2006 SUBARU IMPREZA WRX headlights
[x] Cancel search: headlightsPage 4 of 365
1
CONTINUED
Warranties
Warranties for U.S.A.
All SUBARU vehicles distributed by
Subaru of America, Inc. and sold at retail
by an authorized SUBARU dealer in the
United States come with the following
warranties:
SUBARU Limited Warranty
Emission Control Systems Warranty
Emissions Performance Warranty
All warranty information, including details
of coverage and exclusions, is in the Warranty and Maintenance Booklet .
Please read these warranties carefully.
Warranties for Canada
All SUBARU vehicles distributed by
Subaru Canada, Inc. and sold at retail by
an authorized SUBARU dealer in Canada
come with the following warranties:
SUBARU Limited Warranty
Anti-Corrosion Warranty
Emission Control Warranty
All warranty information, including details
of coverage and exclusions, is in the War-
ranty and Service Booklet. Please read
these warranties carefully.
WRX-STI
All models except WRX-STI
How to use this owner s man-
ual
Using your Owner s manual
Before you operate your vehicle, carefully
read this manual. To protect yourself and
extend the service life of your vehicle, fol-
low the instructions in this manual. Failure
to observe these instructions may result in
serious injury and damage to your vehicle.
This manual is composed of fourteen
chapters. Each chapter begins with a brief
table of contents, so you can usually tell at
a glance if that chapter contains the infor-
mation you want.
Chapter 1: Seat, seatbelt and SRS air-
bags
This chapter informs you how to use the
seat and seatbelt and contains precau-
tions for the SRS airbags.
Chapter 2: Keys and doors
This chapter informs you how to operate
the keys, locks and windows.
Chapter 3: Instruments and controls
This chapter informs you about the opera-
tion of instrument panel indicators and
how to use the instruments and other
switches.
Chapter 4: Climate Control
This chapter informs you how to operate
WRX-STI models are equipped with
High Intensity Discharge (HID) head-
lights that contain mercury. For that
reason, it is necessary to remove
HID headlights before vehicle dis-
posal. Once removed, please reuse,
recycle or dispose of the HID head-
lights as hazardous waste.
This vehicle does not contain mer-
cury devices or parts.
Page 115 of 365

Instruments and controls
Clock .................................................................... 3-22
Light control switch .............................. ............. 3-22
Headlights ........................................ ....................... 3-22
High/low beam change (dimmer) ..................... ..... 3-23
Headlight flasher ................................. ................... 3-23
Daytime running light system ...................... ......... 3-23
Turn signal lever ................................. ................ 3-24
Illumination brightness control ................... ...... 3-25
Headlight beam leveler (U.S.-spec. WRX-STI) .............................. ........ 3-25
Parking light switch .............................. ............. 3-25
Front fog light button (if equipped) .............. .... 3-26
Wiper and washer .................................. ............. 3-26
Windshield wiper and washer switches .............. . 3-27
Rear window wiper and washer switch Wagon ............................................ .................... 3-28
Rear window defogger button ....................... .... 3-29
Windshield wiper deicer (if equipped) ............. . 3-30
Intercooler water spray switch (WRX-STI) ....... 3-3 1
Mirrors ........................................... ...................... 3-32
Inside mirror ..................................... ...................... 3-32
Outside mirrors ................................... .................... 3-33
Tilt steering wheel ............................... ............... 3-35
Horn .............................................. ....................... 3-35
Page 133 of 365
3-20 Instruments and controls
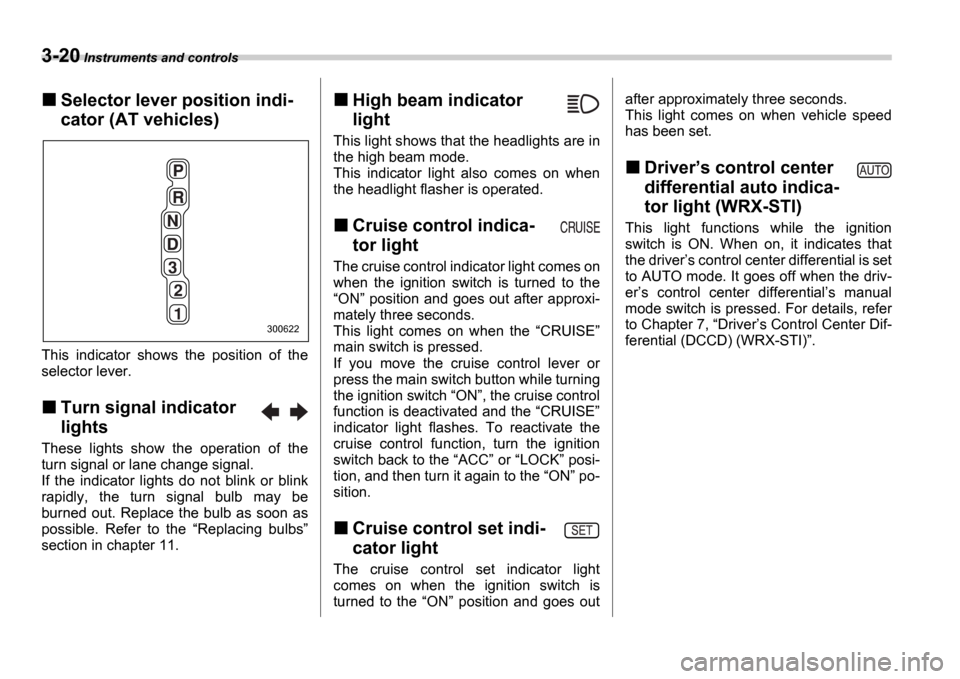
Selector lever position indi-
cator (AT vehicles)
This indicator shows the position of the
selector lever.
Turn signal indicator
lights
These lights show the operation of the
turn signal or lane change signal.
If the indicator lights do not blink or blink
rapidly, the turn signal bulb may be
burned out. Replace the bulb as soon as
possible. Refer to the Replacing bulbs
section in chapter 11.
High beam indicator
light
This light shows that the headlights are in
the high beam mode.
This indicator light also comes on when
the headlight flasher is operated.
Cruise control indica-
tor light
The cruise control indicator light comes on
when the ignition switch is turned to the ON position and goes out after approxi-
mately three seconds.
This light comes on when the CRUISE
main switch is pressed.
If you move the cruise control lever or
press the main switch button while turning
the ignition switch ON , the cruise control
function is deactivated and the CRUISE
indicator light flashes. To reactivate the
cruise control function, turn the ignition
switch back to the ACC or LOCK posi-
tion, and then turn it again to the ON po-
sition.
Cruise control set indi-
cator light
The cruise control set indicator light
comes on when the ignition switch is
turned to the ON position and goes out after approximately three seconds.
This light comes on when vehicle speed
has been set.
Driver
s control center
differential auto indica-
tor light (WRX-STI)
This light functions while the ignition
switch is ON. When on, it indicates that
the driver s control center differential is set
to AUTO mode. It goes off when the driv-
er s control center differential s manual
mode switch is pressed. For details, refer
to Chapter 7, Driver s Control Center Dif-
ferential (DCCD) (WRX-STI) .
300622
Page 135 of 365
3-22 Instruments and controls
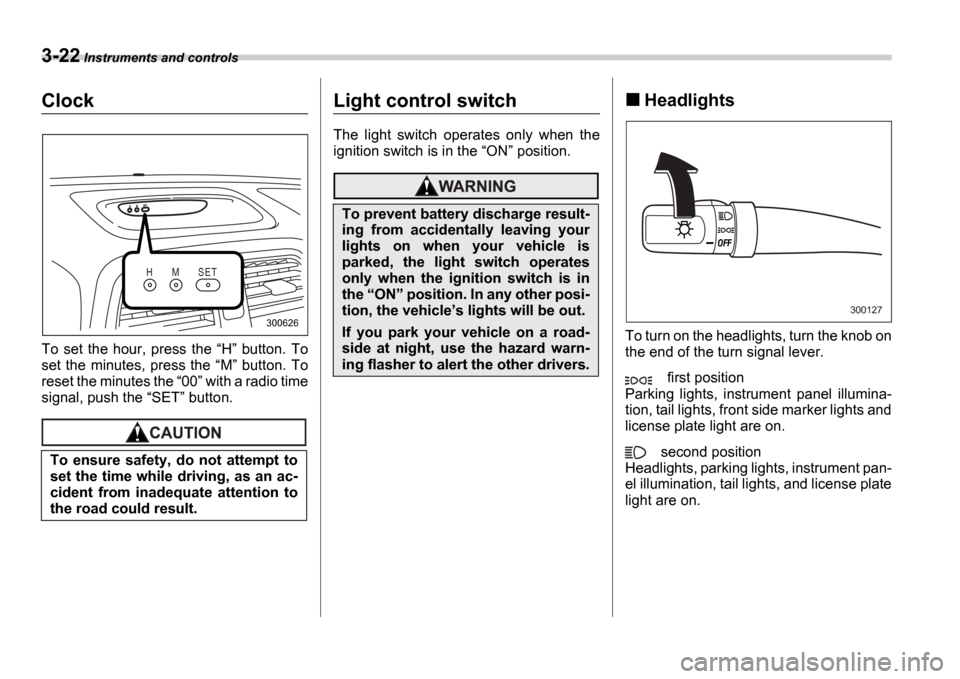
Clock
To set the hour, press the H button. To
set the minutes, press the M button. To
reset the minutes the 00 with a radio time
signal, push the SET button.
Light control switch
The light switch operates only when the
ignition switch is in the ON position.
Headlights
To turn on the headlights, turn the knob on
the end of the turn signal lever.
first position
Parking lights, instrument panel illumina-
tion, tail lights, front side marker lights and
license plate light are on.
second position
Headlights, parking lights, instrument pan-
el illumination, tail lights, and license plate
light are on.
To ensure safety, do not attempt to
set the time while driving, as an ac-
cident from inadequate attention to
the road could result.
H M S E T
300626
To prevent battery discharge result-
ing from accidentally leaving your
lights on when your vehicle is
parked, the light switch operates
only when the ignition switch is in
the
ON position. In any other posi-
tion, the vehicle s lights will be out.
If you park your vehicle on a road-
side at night, use the hazard warn-
ing flasher to alert the other drivers.
300127
Page 136 of 365
Instruments and controls 3-23
CONTINUED
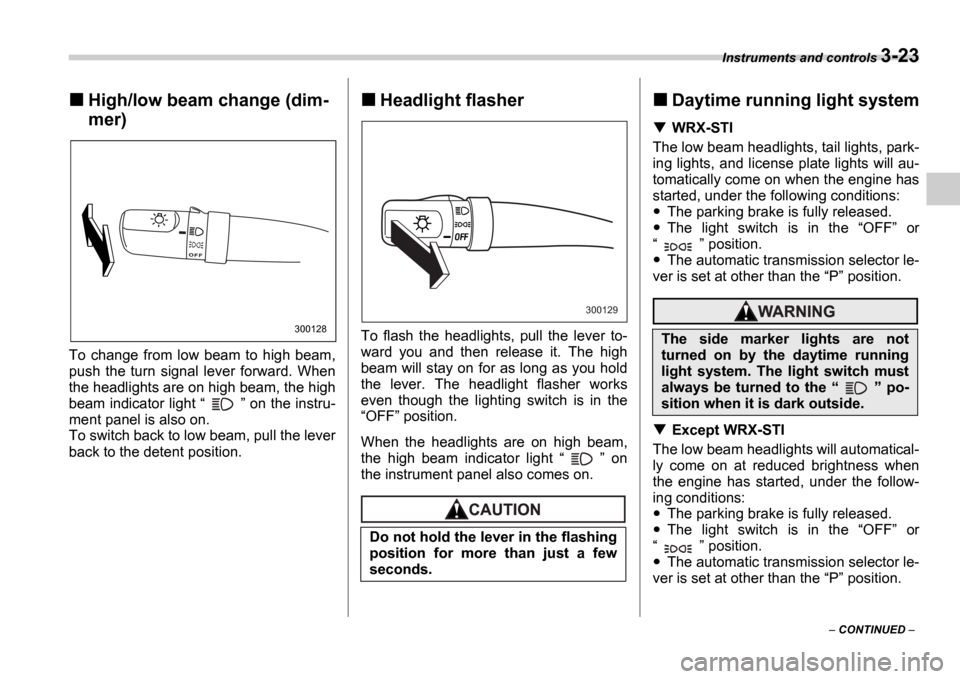
High/low beam change (dim-
mer)
To change from low beam to high beam,
push the turn signal lever forward. When
the headlights are on high beam, the high
beam indicator light on the instru-
ment panel is also on.
To switch back to low beam, pull the lever
back to the detent position.
Headlight flasher
To flash the headlights, pull the lever to-
ward you and then release it. The high
beam will stay on for as long as you hold
the lever. The headlight flasher works
even though the lighting switch is in the OFF position.
When the headlights are on high beam,
the high beam indicator light on
the instrument panel also comes on.
Daytime running light system
WRX-STI
The low beam headlights, tail lights, park-
ing lights, and license plate lights will au-
tomatically come on when the engine has
started, under the following conditions:
The parking brake is fully released.
The light switch is in the OFF or
position.
The automatic transmission selector le-
ver is set at other than the P position.
Except WRX-STI
The low beam headlights will automatical-
ly come on at reduced brightness when
the engine has started, under the follow-
ing conditions:
The parking brake is fully released.
The light switch is in the OFF or
position.
The automatic transmission selector le-
ver is set at other than the P position.
300128
Do not hold the lever in the flashing
position for more than just a few
seconds.
300129
The side marker lights are not
turned on by the daytime running
light system. The light switch must
always be turned to the po-
sition when it is dark outside.
Page 138 of 365
Instruments and controls 3-25
Illumination brightness con-
trol
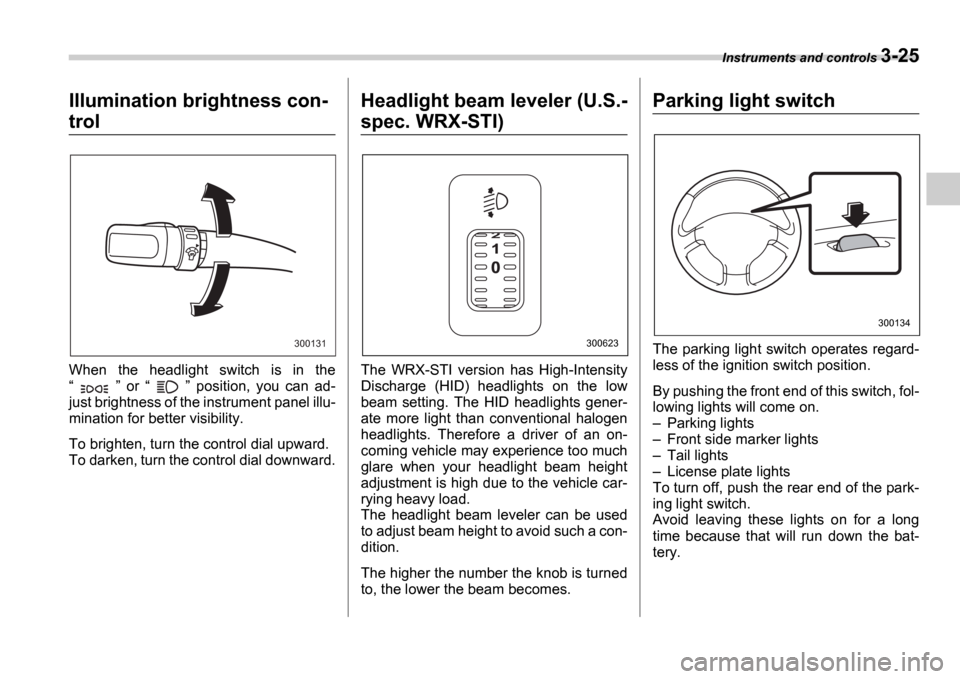
When the headlight switch is in the
or position, you can ad-
just brightness of the instrument panel illu-
mination for better visibility.
To brighten, turn the control dial upward.
To darken, turn the control dial downward.
Headlight beam leveler (U.S.-
spec. WRX-STI)
The WRX-STI version has High-Intensity
Discharge (HID) headlights on the low
beam setting. The HID headlights gener-
ate more light than conventional halogen
headlights. Therefore a driver of an on-
coming vehicle may experience too much
glare when your headlight beam height
adjustment is high due to the vehicle car-
rying heavy load.
The headlight beam leveler can be used
to adjust beam height to avoid such a con-
dition.
The higher the number the knob is turned
to, the lower the beam becomes.
Parking light switch
The parking light switch operates regard-
less of the ignition switch position.
By pushing the front end of this switch, fol-
lowing lights will come on. Parking lights
Front side marker lights
Tail lights
License plate lights
To turn off, push the rear end of the park-
ing light switch.
Avoid leaving these lights on for a long
time because that will run down the bat-
tery.300131300623
300134
Page 139 of 365
3-26 Instruments and controls
Front fog light button (if
equipped)
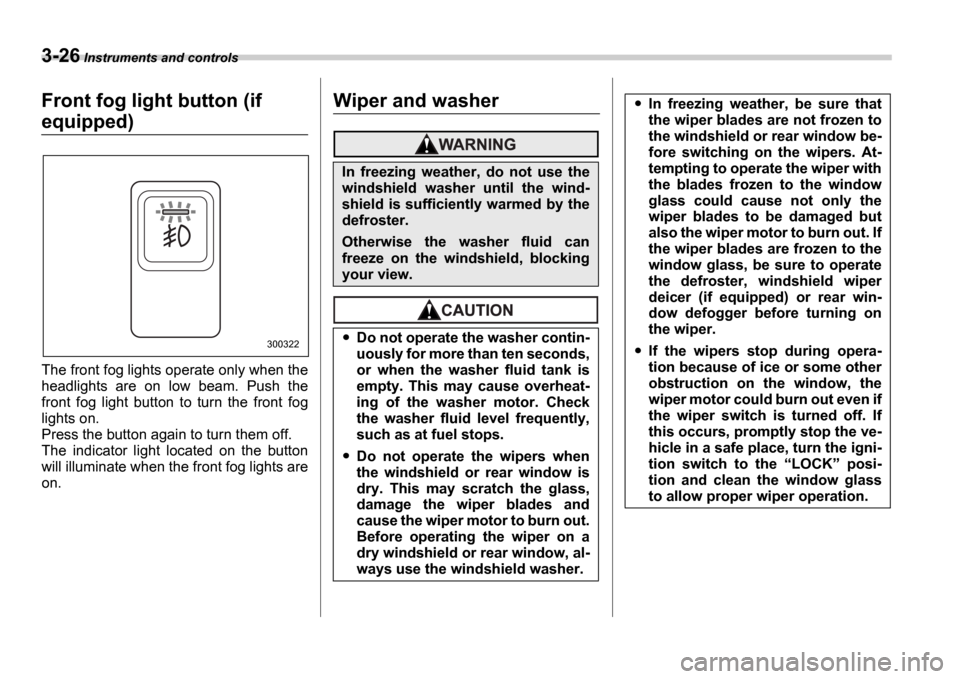
The front fog lights operate only when the
headlights are on low beam. Push the
front fog light button to turn the front fog
lights on.
Press the button again to turn them off.
The indicator light located on the button
will illuminate when the front fog lights are
on.
Wiper and washer
300322
In freezing weather, do not use the
windshield washer until the wind-
shield is sufficiently warmed by the
defroster.
Otherwise the washer fluid can
freeze on the windshield, blocking
your view.
Do not operate the washer contin-
uously for more than ten seconds,
or when the washer fluid tank is
empty. This may cause overheat-
ing of the washer motor. Check
the washer fluid level frequently,
such as at fuel stops.
Do not operate the wipers when
the windshield or rear window is
dry. This may scratch the glass,
damage the wiper blades and
cause the wiper motor to burn out.
Before operating the wiper on a
dry windshield or rear window, al-
ways use the windshield washer.
In freezing weather, be sure that
the wiper blades are not frozen to
the windshield or rear window be-
fore switching on the wipers. At-
tempting to operate the wiper with
the blades frozen to the window
glass could cause not only the
wiper blades to be damaged but
also the wiper motor to burn out. If
the wiper blades are frozen to the
window glass, be sure to operate
the defroster, windshield wiper
deicer (if equipped) or rear win-
dow defogger before turning on
the wiper.
If the wipers stop during opera-
tion because of ice or some other
obstruction on the window, the
wiper motor could burn out even if
the wiper switch is turned off. If
this occurs, promptly stop the ve-
hicle in a safe place, turn the igni-
tion switch to the LOCK posi-
tion and clean the window glass
to allow proper wiper operation.
Page 145 of 365
3-32 Instruments and controls
Mirrors
Always check that the inside and outside
mirrors are properly adjusted before you
start driving.
Inside mirror
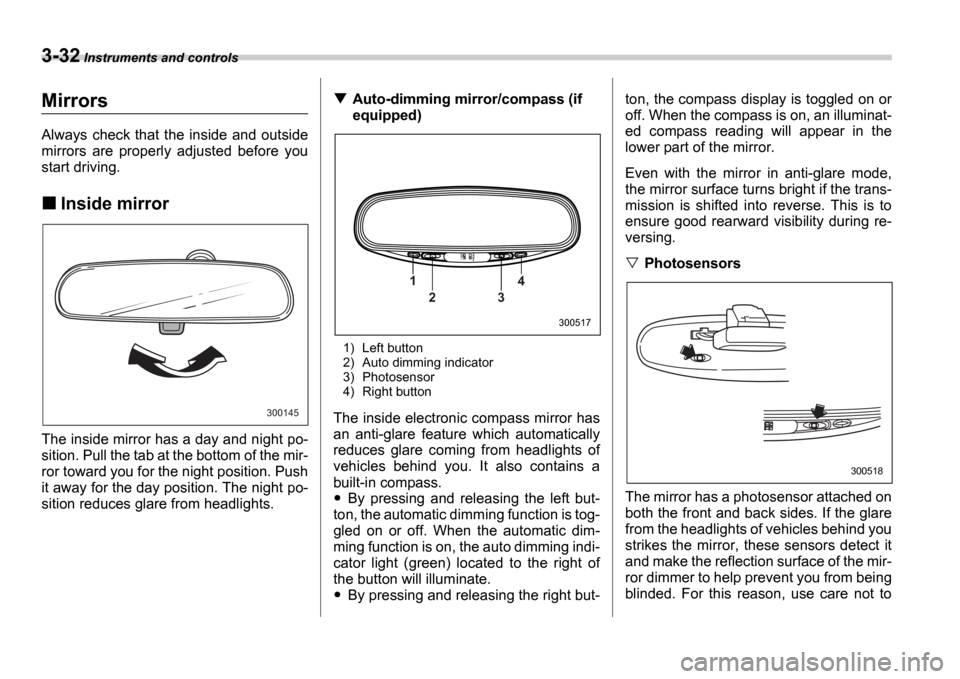
The inside mirror has a day and night po-
sition. Pull the tab at the bottom of the mir-
ror toward you for the night position. Push
it away for the day position. The night po-
sition reduces glare from headlights.
Auto-dimming mirror/compass (if
equipped)
1) Left button
2) Auto dimming indicator
3) Photosensor
4) Right button
The inside electronic compass mirror has
an anti-glare feature which automatically
reduces glare coming from headlights of
vehicles behind you. It also contains a
built-in compass.
By pressing and releasing the left but-
ton, the automatic dimming function is tog-
gled on or off. When the automatic dim-
ming function is on, the auto dimming indi-
cator light (green) located to the right of
the button will illuminate.
By pressing and releasing the right but- ton, the compass display is toggled on or
off. When the compass is on, an illuminat-
ed compass reading will appear in the
lower part of the mirror.
Even with the mirror in anti-glare mode,
the mirror surface turns bright if the trans-
mission is shifted into reverse. This is to
ensure good rearward visibility during re-
versing.
Photosensors
The mirror has a photosensor attached on
both the front and back sides. If the glare
from the headlights of vehicles behind you
strikes the mirror, these sensors detect it
and make the reflection surface of the mir-
ror dimmer to help prevent you from being
blinded. For this reason, use care not to
300145
1 2 3 4
300517
300518