2006 SUBARU IMPREZA WRX door lock
[x] Cancel search: door lockPage 114 of 365

3
Instruments and controls
Ignition switch .................................................... 3-3
LOCK .............................................. ......................... 3-3
ACC ............................................... ........................... 3-4
ON ................................................ ............................ 3-4
START ............................................. ......................... 3-4
Key reminder chime ................................ ............... 3-5
Ignition switch light ............................. ................... 3-5
Key interlock release (AT vehicles only) .......... .... 3-5
Hazard warning flasher ............................ .......... 3-6
Meters and gauges (WRX-STI) ....................... ... 3-6
Combination meter illumination .................... ........ 3-6
Cancelling sequential illumination of the combination meter ................................. .............. 3-6
Speedometer ....................................... .................... 3-6
Odometer/Trip meter ............................... ............... 3-7
Tachometer ........................................ ..................... 3-7
Fuel gauge ........................................ ....................... 3-8
Temperature gauge ................................. ............... 3-8
Outside temperature indicator ..................... ......... 3-9
REV indicator light and buzzer (WRX-STI) ....... 3-9 Setting the alarm-level engine speed .............. ..... 3-10
Deactivating the REV alarm system ................. ..... 3-11
Meters and gauges (Except WRX-STI) ............. 3-1 1
Speedometer ....................................... .................... 3-11
Odometer/Trip meter ............................... ............... 3-11
Tachometer ........................................ ..................... 3-12
Fuel gauge ........................................ ....................... 3-12
Temperature gauge ................................. ............... 3-13
Outside temperature indicator ..................... ......... 3-13Warning and indicator lights ......................
....... 3-14
Seatbelt warning light and chime .................. ........ 3-14
SRS airbag system warning light ................... ....... 3-15
Front passenger s frontal airbag ON and OFF
indicators ........................................ ...................... 3-15
CHECK ENGINE warning light/Malfunction indicator lamp .................................... ................... 3-16
Charge warning light .............................. ................ 3-16
Oil pressure warning light ........................ ............. 3-16
AT OIL TEMPerature warning light (AT vehicles) ..................................... .................... 3-17
Rear differential oil temperature warning light (WRX-STI) ......................................... ..................... 3-17
ABS warning light ................................. .................. 3-17
Brake system warning light ........................ ........... 3-18
Door open warning light ........................... ............. 3-19
All-Wheel Drive warning light (AWD AT vehicles
if equipped) ..................................... ................... 3-19
Intercooler water spray warning light (WRX-STI) ......................................... ..................... 3-19
Selector lever position indicator (AT vehicles) ... . 3-20
Turn signal indicator lights ...................... .............. 3-20
High beam indicator light ......................... .............. 3-20
Cruise control indicator light .................... ............. 3-20
Cruise control set indicator light ................ .......... 3-20
Driver s control center differential auto indicator
light (WRX-STI) ................................... .................. 3-20
Driver s control center differential indicator and
warning lights (WRX-STI) .......................... .......... 3-21
Headlight indicator light (WRX-STI) ............... ....... 3-21
REV indicator light (WRX-STI) ..................... .......... 3-21
Page 118 of 365
Instruments and controls 3-5
The key is near another key that con-
tains an immobilizer transponder.
Key reminder chime
The reminder chime sounds when the
driver s door opens and the key is in the
LOCK or ACC positions. The chime
stops when the key is removed from the
ignition switch.
Ignition switch light
For easy access to the ignition switch in
the dark, the ignition switch light comes on
when driver s door is opened. The light re-
mains on for 10 seconds and goes out af-
ter driver s door is closed or if the key is
turned to the ON position.
Key interlock release (AT ve-
hicles only)
If the key can not be turned to the LOCK
position even when the selector lever is in
the P position:
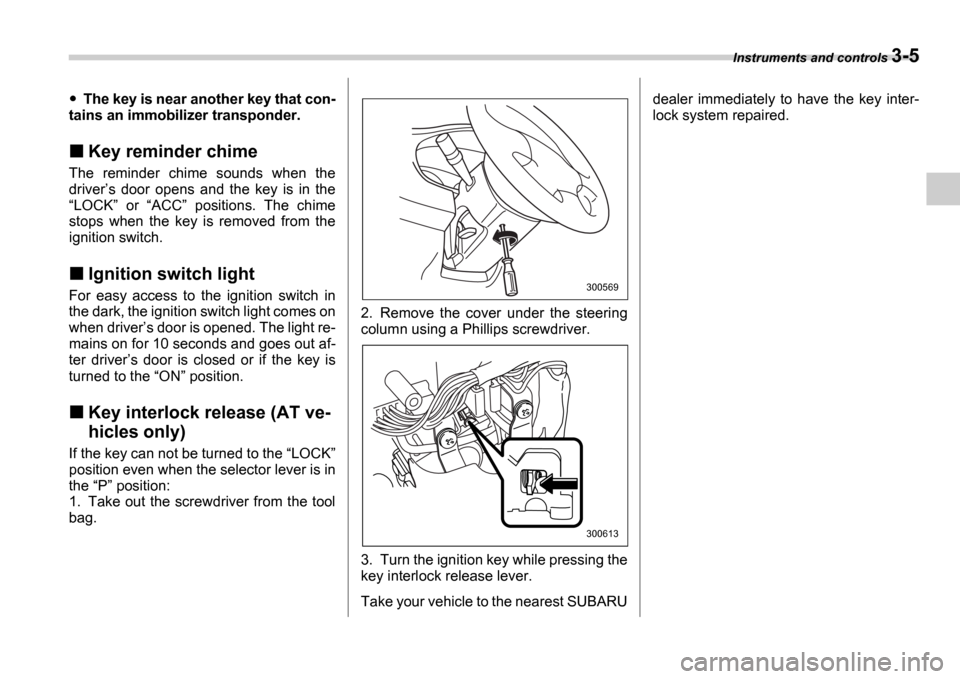
1. Take out the screwdriver from the tool
bag. 2. Remove the cover under the steering
column using a Phillips screwdriver.
3. Turn the ignition key while pressing the
key interlock release lever.
Take your vehicle to the nearest SUBARUdealer immediately to have the key inter-
lock system repaired.
300569
300613
Page 121 of 365
3-8 Instruments and controls
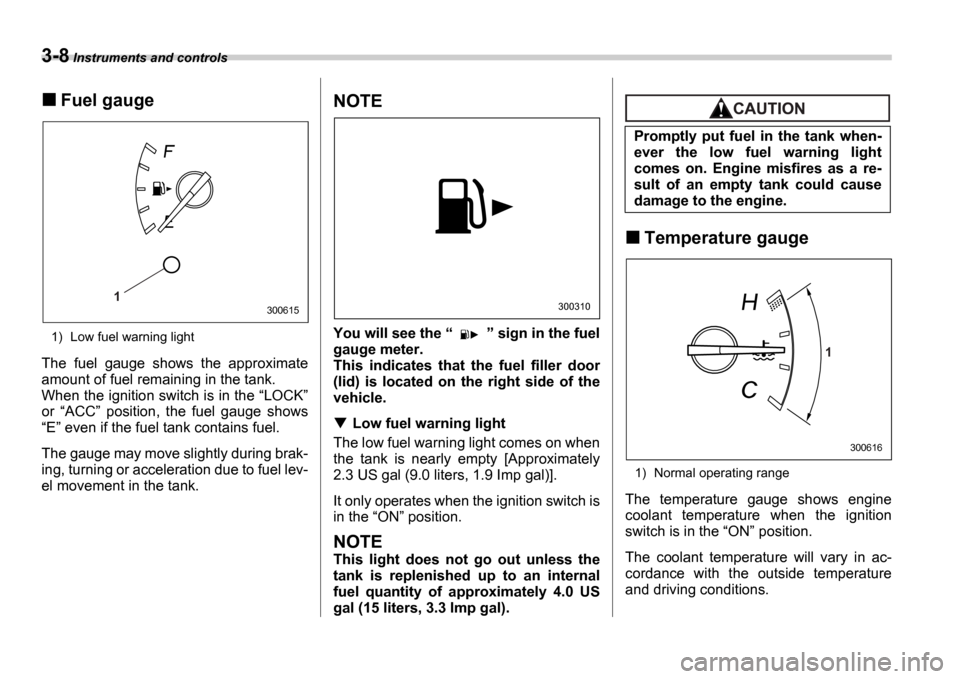
Fuel gauge
1) Low fuel warning light
The fuel gauge shows the approximate
amount of fuel remaining in the tank.
When the ignition switch is in the LOCK
or ACC position, the fuel gauge shows
E even if the fuel tank contains fuel.
The gauge may move slightly during brak-
ing, turning or acceleration due to fuel lev-
el movement in the tank.
NOTE
You will see the sign in the fuel
gauge meter.
This indicates that the fuel filler door
(lid) is located on the right side of the
vehicle.
Low fuel warning light
The low fuel warning light comes on when
the tank is nearly empty [Approximately
2.3 US gal (9.0 liters, 1.9 Imp gal)].
It only operates when the ignition switch is
in the ON position.
NOTE
This light does not go out unless the
tank is replenished up to an internal
fuel quantity of approximately 4.0 US
gal (15 liters, 3.3 Imp gal).
Temperature gauge
1) Normal operating range
The temperature gauge shows engine
coolant temperature when the ignition
switch is in the ON position.
The coolant temperature will vary in ac-
cordance with the outside temperature
and driving conditions.
1300615300310
Promptly put fuel in the tank when-
ever the low fuel warning light
comes on. Engine misfires as a re-
sult of an empty tank could cause
damage to the engine.
1
300616
Page 125 of 365
3-12 Instruments and controls
NOTE
If the connection between the combi-
nation meter and battery is broken for
any reason such as vehicle mainte-
nance or fuse replacement, the data re-
corded on the trip meter will be lost.
Tachometer
The tachometer shows the engine speed
in thousands of revolutions per minute.
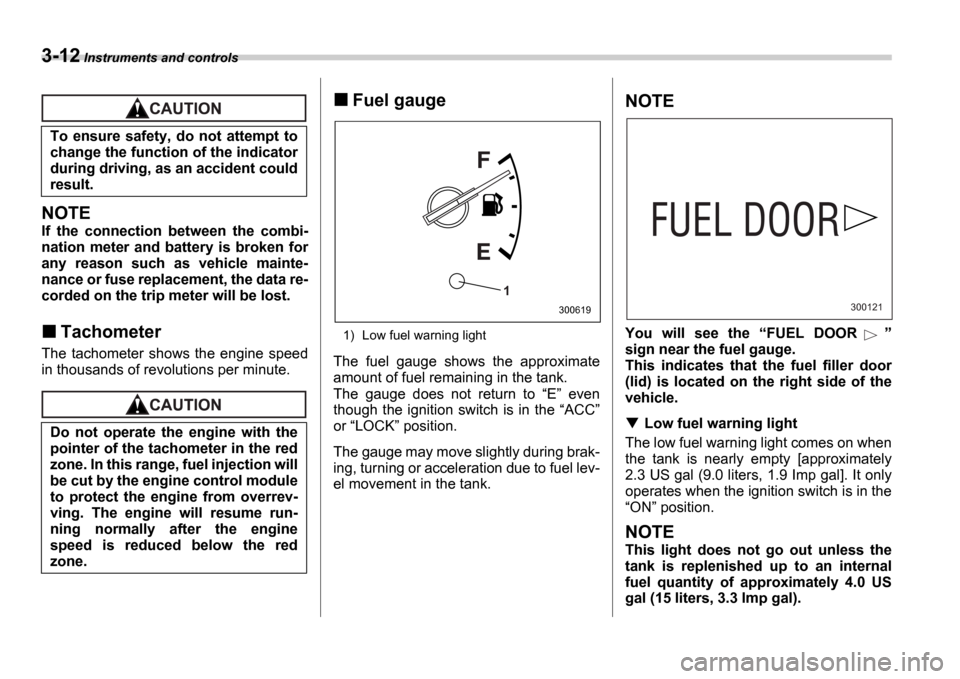
Fuel gauge
1) Low fuel warning light
The fuel gauge shows the approximate
amount of fuel remaining in the tank.
The gauge does not return to E even
though the ignition switch is in the ACC
or LOCK position.
The gauge may move slightly during brak-
ing, turning or acceleration due to fuel lev-
el movement in the tank.
NOTE
You will see the FUEL DOOR
sign near the fuel gauge.
This indicates that the fuel filler door
(lid) is located on the right side of the
vehicle.
Low fuel warning light
The low fuel warning light comes on when
the tank is nearly empty [approximately
2.3 US gal (9.0 liters, 1.9 Imp gal]. It only
operates when the ignition switch is in the ON position.
NOTE
This light does not go out unless the
tank is replenished up to an internal
fuel quantity of approximately 4.0 US
gal (15 liters, 3.3 Imp gal).
To ensure safety, do not attempt to
change the function of the indicator
during driving, as an accident could
result.
Do not operate the engine with the
pointer of the tachometer in the red
zone. In this range, fuel injection will
be cut by the engine control module
to protect the engine from overrev-
ving. The engine will resume run-
ning normally after the engine
speed is reduced below the red
zone.
1
300619300121
Page 132 of 365
Instruments and controls 3-19
CONTINUED
minates if a malfunction occurs in the EBD
system. In that event, it comes on together
with the ABS warning light.
The EBD system may be malfunctioning if
the brake system warning light and ABS
warning light illuminate simultaneously
during driving.
Even if the EBD system fails, the conven-
tional braking system will still function.
However, the rear wheels will be more
prone to locking when the brakes are ap-
plied harder than usual and the vehicle
s
motion may therefore become somewhat
harder to control.
If the brake system warning light and ABS
warning light illuminate simultaneously,
take the following steps:
1. Stop the vehicle in the nearest safe, flat
place.
2. Shut down the engine, then restart it.
3. Release the parking brake. If both
warning lights go out, the EBD system
may be faulty. Drive carefully to the near-
est SUBARU dealer and have the system
inspected.
4. If both warning lights come on again
and stay illuminated after the engine has
been restarted, shut down the engine
again, apply the parking brake, and check
the brake fluid level.
5. If the brake fluid level is not below the MIN mark, the EBD system may be faulty. Drive carefully to the nearest
SUBARU dealer and have the system in-
spected.
6. If the brake fluid level is below the
MIN mark, DO NOT drive the vehicle. In-
stead, have the vehicle towed to the near-
est SUBARU dealer for repair.
Door open warning light
The door open warning light comes on if
any door or the rear gate is not fully
closed.
Always make sure this light is out before
you start to drive.
All-Wheel Drive warn-
ing light (AWD AT vehi-
cles if equipped)
The All-Wheel Drive warning light comes
on when the ignition switch is turned to the ON position and goes out after approxi-
mately two seconds.
This light comes on when All-Wheel Drive
is disengaged and the drive mechanism is
switched to Front Wheel Drive for mainte-
nance or similar purposes (Non-turbo ve-
hicles).
It flashes if the vehicle is driven with tires
of differing diameters fitted on the wheels
or with an excessively low air pressure in any of the tires.
Intercooler water
spray warning light
(WRX-STI)
This light comes on when the water level
in the intercooler water spray tank falls to
the lower limit (approximately 0.4 US qt,
0.4 liter, 0.4 Imp qt).
Continuing to drive with the AWD
warning light flashing can damage
the powertrain. If the AWD warning
light starts to flash, promptly park in
a safe place and check whether the
tires have differing diameters and
whether any of the tires has an ex-
cessively low inflation pressure.
Page 154 of 365
Climate control 4-5
CONTINUED
Heater operation
Defrosting or defogging the wind-
shield
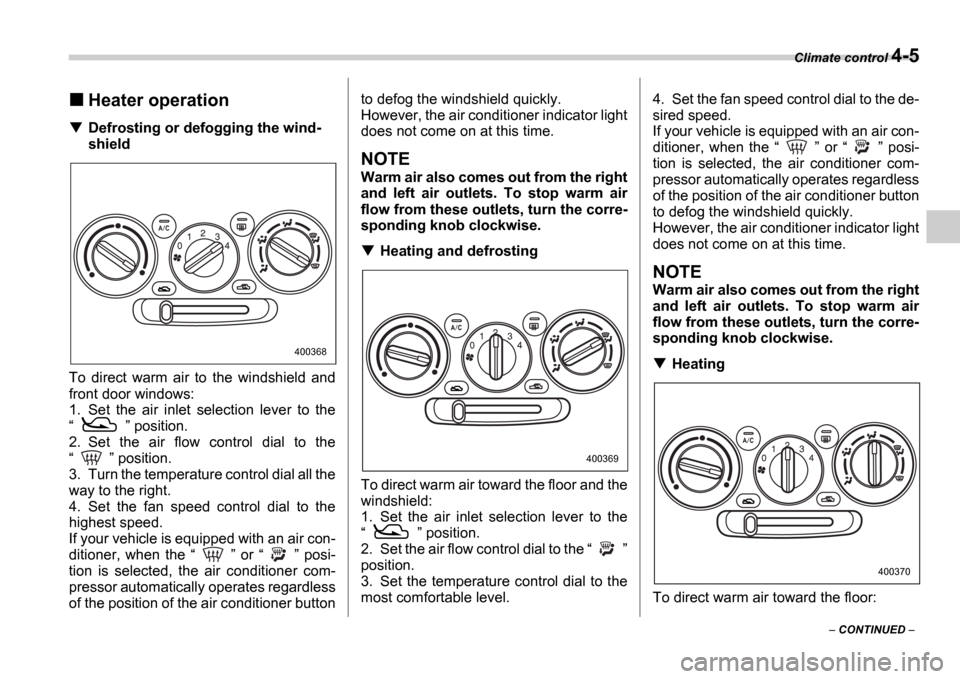
To direct warm air to the windshield and
front door windows:
1. Set the air inlet selection lever to the
position.
2. Set the air flow control dial to the
position.
3. Turn the temperature control dial all the
way to the right.
4. Set the fan speed control dial to the
highest speed.
If your vehicle is equipped with an air con-
ditioner, when the or posi-
tion is selected, the air conditioner com-
pressor automatically operates regardless
of the position of the air conditioner button to defog the windshield quickly.
However, the air conditioner indicator light
does not come on at this time.
NOTE
Warm air also comes out from the right
and left air outlets. To stop warm air
flow from these outlets, turn the corre-
sponding knob clockwise.
Heating and defrosting
To direct warm air toward the floor and the
windshield:
1. Set the air inlet selection lever to the
position.
2. Set the air flow control dial to the
position.
3. Set the temperature control dial to the
most comfortable level. 4. Set the fan speed control dial to the de-
sired speed.
If your vehicle is equipped with an air con-
ditioner, when the
or posi-
tion is selected, the air conditioner com-
pressor automatically operates regardless
of the position of the air conditioner button
to defog the windshield quickly.
However, the air conditioner indicator light
does not come on at this time.
NOTE
Warm air also comes out from the right
and left air outlets. To stop warm air
flow from these outlets, turn the corre-
sponding knob clockwise.
Heating
To direct warm air toward the floor:
400368
400369
400370
Page 183 of 365
5-20 Audio
To insert a disc
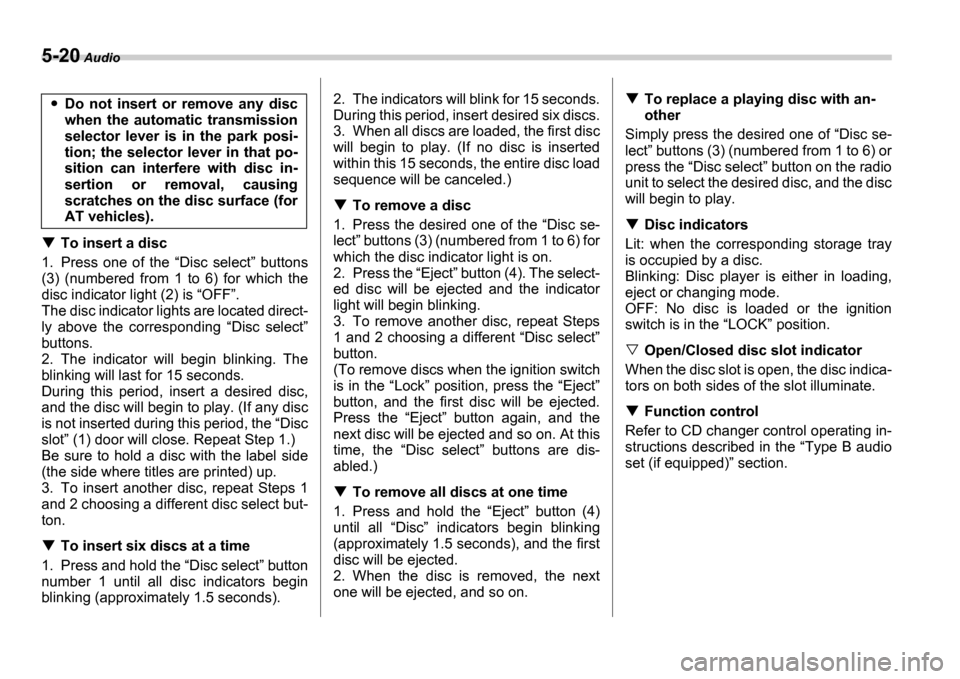
1. Press one of the Disc select buttons
(3) (numbered from 1 to 6) for which the
disc indicator light (2) is OFF .
The disc indicator lights are located direct-
ly above the corresponding Disc select
buttons.
2. The indicator will begin blinking. The
blinking will last for 15 seconds.
During this period, insert a desired disc,
and the disc will begin to play. (If any disc
is not inserted during this period, the Disc
slot (1) door will close. Repeat Step 1.)
Be sure to hold a disc with the label side
(the side where titles are printed) up.
3. To insert another disc, repeat Steps 1
and 2 choosing a different disc select but-
ton.
To insert six discs at a time
1. Press and hold the Disc select button
number 1 until all disc indicators begin
blinking (approximately 1.5 seconds). 2. The indicators will blink for 15 seconds.
During this period, insert desired six discs.
3. When all discs are loaded, the first disc
will begin to play. (If no disc is inserted
within this 15 seconds, the entire disc load
sequence will be canceled.)
To remove a disc
1. Press the desired one of the Disc se-
lect buttons (3) (numbered from 1 to 6) for
which the disc indicator light is on.
2. Press the Eject button (4). The select-
ed disc will be ejected and the indicator
light will begin blinking.
3. To remove another disc, repeat Steps
1 and 2 choosing a different Disc select
button.
(To remove discs when the ignition switch
is in the Lock position, press the Eject
button, and the first disc will be ejected.
Press the Eject button again, and the
next disc will be ejected and so on. At this
time, the Disc select buttons are dis-
abled.)
To remove all discs at one time
1. Press and hold the Eject button (4)
until all Disc indicators begin blinking
(approximately 1.5 seconds), and the first
disc will be ejected.
2. When the disc is removed, the next
one will be ejected, and so on.
To replace a playing disc with an-
other
Simply press the desired one of Disc se-
lect buttons (3) (numbered from 1 to 6) or
press the Disc select button on the radio
unit to select the desired disc, and the disc
will begin to play.
Disc indicators
Lit: when the corresponding storage tray
is occupied by a disc.
Blinking: Disc player is either in loading,
eject or changing mode.
OFF: No disc is loaded or the ignition
switch is in the LOCK position.
Open/Closed disc slot indicator
When the disc slot is open, the disc indica-
tors on both sides of the slot illuminate.
Function control
Refer to CD changer control operating in-
structions described in the Type B audio
set (if equipped) section.
Do not insert or remove any disc
when the automatic transmission
selector lever is in the park posi-
tion; the selector lever in that po-
sition can interfere with disc in-
sertion or removal, causing
scratches on the disc surface (for
AT vehicles).
Page 201 of 365
7-4 Starting and operating
Fuel filler lid and cap
Refueling0
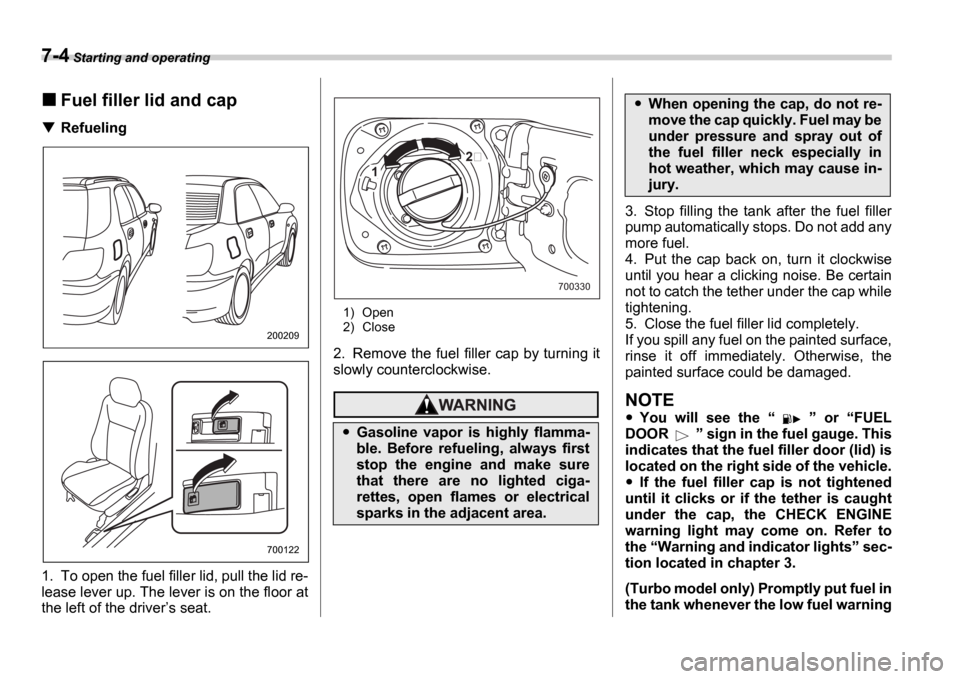
1. To open the fuel filler lid, pull the lid re-
lease lever up. The lever is on the floor at
the left of the driver s seat.
1) Open
2) Close
2. Remove the fuel filler cap by turning it
slowly counterclockwise.
3. Stop filling the tank after the fuel filler
pump automatically stops. Do not add any
more fuel.
4. Put the cap back on, turn it clockwise
until you hear a clicking noise. Be certain
not to catch the tether under the cap while
tightening.
5. Close the fuel filler lid completely.
If you spill any fuel on the painted surface,
rinse it off immediately. Otherwise, the
painted surface could be damaged.
NOTE
You will see the or FUEL
DOOR sign in the fuel gauge. This
indicates that the fuel filler door (lid) is
located on the right side of the vehicle.
If the fuel filler cap is not tightened
until it clicks or if the tether is caught
under the cap, the CHECK ENGINE
warning light may come on. Refer to
the Warning and indicator lights sec-
tion located in chapter 3.
(Turbo model only) Promptly put fuel in
the tank whenever the low fuel warning
200209
700122
Gasoline vapor is highly flamma-
ble. Before refueling, always first
stop the engine and make sure
that there are no lighted ciga-
rettes, open flames or electrical
sparks in the adjacent area.
1
700330
When opening the cap, do not re-
move the cap quickly. Fuel may be
under pressure and spray out of
the fuel filler neck especially in
hot weather, which may cause in-
jury.