2006 SUBARU IMPREZA park assist
[x] Cancel search: park assistPage 204 of 365

Starting and operating 7-7
CONTINUED
Starting the engine
Manual transmission vehicle
1. Apply the parking brake.
2. Turn off unnecessary lights and acces-
sories.
3. Press the clutch pedal to the floor and
shift the shift lever into neutral. Hold the
clutch pedal to the floor while starting the
engine.
The starter motor will only operate when
the clutch pedal is pressed fully to the
floor.
4. Turn the ignition switch to the ON po-
sition and check the operation of the warn-
ing and indicator lights. Refer to the Warning and indicator lights section
(chapter 3).
5. Turn the ignition switch to the START
position without depressing the accelera-
tor pedal. Release the key immediately af-
ter the engine has started. If the engine does not start, try the follow-
ing.
1) Turn the ignition switch to the OFF
position and wait for at least 10 sec-
onds. After checking that the parking
brake is firmly set, turn the ignition
switch to the START position while de-
pressing the accelerator pedal slightly
(approximately a quarter of the full
stroke). Release the accelerator pedal
as soon as the engine starts.
2) If this fails to start the engine, turn the
ignition switch back to the OFF posi-
tion and wait for at least 10 seconds.
Then fully depress the accelerator ped-
al and turn the ignition switch to the START position. If the engine starts,
quickly release the accelerator pedal.
3) If this fails to start the engine, turn the
ignition switch again to the OFF posi-
tion. After waiting for 10 seconds or
longer, turn the ignition switch to the START position without depressing
the accelerator pedal.
4) If the engine still refuses to start, con-
tact your nearest SUBARU dealer for
assistance.
6. Confirm that all warning and indicator
lights have gone off after the engine has
started. The fuel injection system auto-
matically lowers the idle speed as the en-
gine warms up.
NOTE
The engine may be difficult to start
when the battery has been disconnect-
ed and reconnected (for maintenance
or other purposes). This difficulty is
caused by the electronically controlled
throttle s self-diagnosis function. To
overcome it, keep the ignition switch in
the ON position for approximately 10
seconds before starting the engine.
Automatic transmission vehi-
cle
1. Apply the parking brake.
2. Turn off unnecessary lights and acces-
sories.
3. Shift the selector lever to the P or N
position (preferably P position).
The starter motor will only operate when
the select lever is at the P or N position.
4. Turn the ignition switch to the ON po-
sition and check the operation of the warn-
ing and indicator lights. Refer to the Warning and indicator lights section
(chapter 3).
5. Turn the ignition switch to the START
position without depressing the accelera-
tor pedal. Release the key immediately af-
ter the engine has started.
If the engine does not start, try the follow-
Do not operate the starter motor
continuously for more than ten sec-
onds. If the engine fails to start after
operating the starter for five to ten
seconds, wait for ten seconds or
more before trying again.
Page 205 of 365

7-8 Starting and operating
ing.
1) Turn the ignition switch to the OFF
position and wait for at least 10 sec-
onds. After checking that the parking
brake is firmly set, turn the ignition
switch to the START position while de-
pressing the accelerator pedal slightly
(approximately a quarter of the full
stroke). Release the accelerator pedal
as soon as the engine starts.
2) If this fails to start the engine, turn the
ignition switch back to the OFF posi-
tion and wait for at least 10 seconds.
Then fully depress the accelerator ped-
al and turn the ignition switch to the START position. If the engine starts,
quickly release the accelerator pedal.
3) If this fails to start the engine, turn the
ignition switch again to the OFF posi-
tion. After waiting for 10 seconds or
longer, turn the ignition switch to the START position without depressing
the accelerator pedal.
4) If the engine still refuses to start, con-
tact your nearest SUBARU dealer for
assistance.
6. Confirm that all warning and indicator
lights have gone out after the engine has
started. The fuel injection system auto-
matically lowers the idle speed as the en-
gine warms up.
While the engine is warming up, make sure that the selector lever is at the
P or
N position and that the parking brake is
applied.
NOTE
The engine may be difficult to start
when the battery has been disconnect-
ed and reconnected (for maintenance
or other purposes). This difficulty is
caused by the electronically controlled
throttle s self-diagnosis function. To
overcome it, keep the ignition switch in
the ON position for approximately 10
seconds before starting the engine.
Stopping the engine
The ignition switch should be turned off
only when the vehicle is stopped and the
engine is idling.
If you restart the engine while the
vehicle is moving, shift the selector
lever into the N position. Do not
attempt to place the selector lever of
a moving vehicle into the P posi-
tion.
Do not stop the engine when the ve-
hicle is moving. This will cause loss
of power to the power steering and
the brake booster, making steering
and braking more difficult. It could
also result in accidental activation
of the LOCK position on the igni-
tion switch, causing the steering
wheel to lock.
Page 212 of 365

Starting and operating 7-15
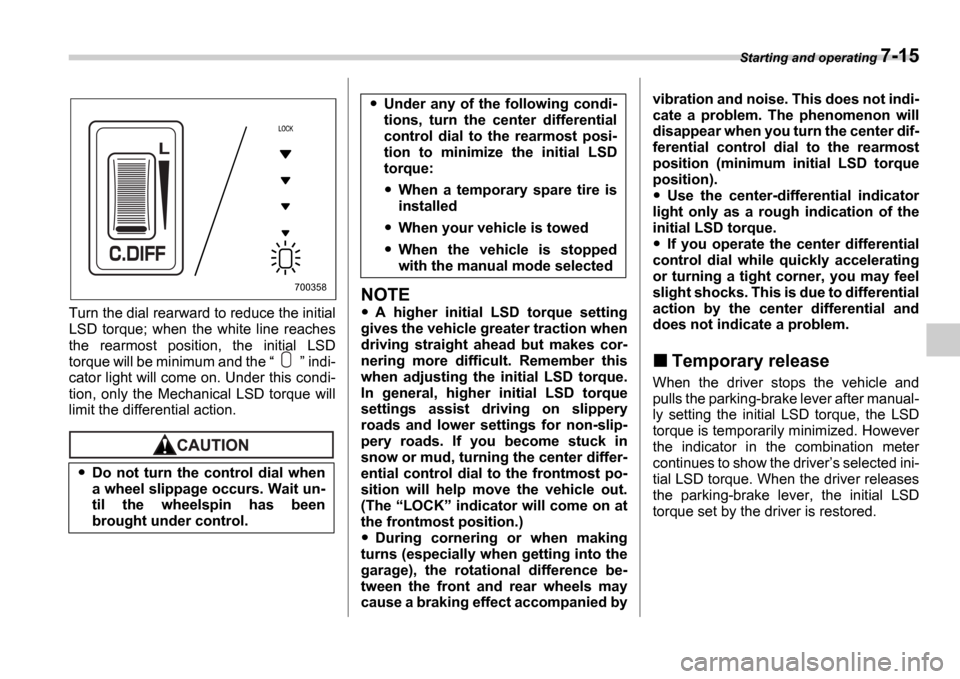
Turn the dial rearward to reduce the initial
LSD torque; when the white line reaches
the rearmost position, the initial LSD
torque will be minimum and the indi-
cator light will come on. Under this condi-
tion, only the Mechanical LSD torque will
limit the differential action.
NOTE
A higher initial LSD torque setting
gives the vehicle greater traction when
driving straight ahead but makes cor-
nering more difficult. Remember this
when adjusting the initial LSD torque.
In general, higher initial LSD torque
settings assist driving on slippery
roads and lower settings for non-slip-
pery roads. If you become stuck in
snow or mud, turning the center differ-
ential control dial to the frontmost po-
sition will help move the vehicle out.
(The LOCK indicator will come on at
the frontmost position.)
During cornering or when making
turns (especially when getting into the
garage), the rotational difference be-
tween the front and rear wheels may
cause a braking effect accompanied by vibration and noise. This does not indi-
cate a problem. The phenomenon will
disappear when you turn the center dif-
ferential control dial to the rearmost
position (minimum initial LSD torque
position).
Use the center-differential indicator
light only as a rough indication of the
initial LSD torque.
If you operate the center differential
control dial while quickly accelerating
or turning a tight corner, you may feel
slight shocks. This is due to differential
action by the center differential and
does not indicate a problem.
Temporary release
When the driver stops the vehicle and
pulls the parking-brake lever after manual-
ly setting the initial LSD torque, the LSD
torque is temporarily minimized. However
the indicator in the combination meter
continues to show the driver s selected ini-
tial LSD torque. When the driver releases
the parking-brake lever, the initial LSD
torque set by the driver is restored.
Do not turn the control dial when
a wheel slippage occurs. Wait un-
til the wheelspin has been
brought under control.
700358
Under any of the following condi-
tions, turn the center differential
control dial to the rearmost posi-
tion to minimize the initial LSD
torque:
When a temporary spare tire is
installed
When your vehicle is towed
When the vehicle is stopped
with the manual mode selected
Page 246 of 365

Driving tips 8-19
CONTINUED
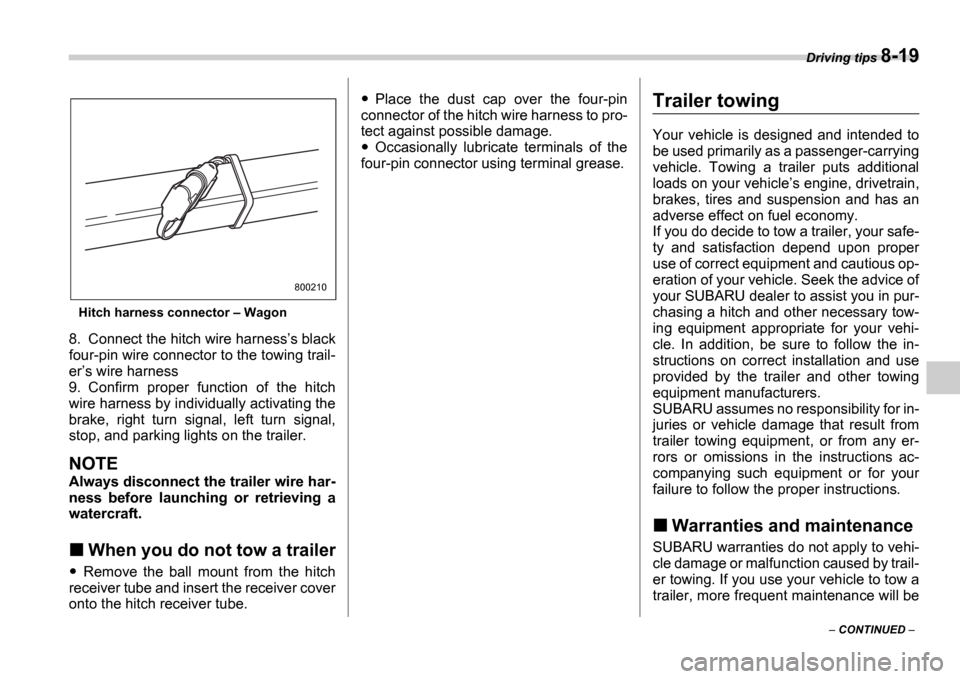
Hitch harness connector Wagon
8. Connect the hitch wire harness s black
four-pin wire connector to the towing trail-
er s wire harness
9. Confirm proper function of the hitch
wire harness by individually activating the
brake, right turn signal, left turn signal,
stop, and parking lights on the trailer.
NOTE
Always disconnect the trailer wire har-
ness before launching or retrieving a
watercraft.
When you do not tow a trailer
Remove the ball mount from the hitch
receiver tube and insert the receiver cover
onto the hitch receiver tube.
Place the dust cap over the four-pin
connector of the hitch wire harness to pro-
tect against possible damage.
Occasionally lubricate terminals of the
four-pin connector using terminal grease.
Trailer towing
Your vehicle is designed and intended to
be used primarily as a passenger-carrying
vehicle. Towing a trailer puts additional
loads on your vehicle s engine, drivetrain,
brakes, tires and suspension and has an
adverse effect on fuel economy.
If you do decide to tow a trailer, your safe-
ty and satisfaction depend upon proper
use of correct equipment and cautious op-
eration of your vehicle. Seek the advice of
your SUBARU dealer to assist you in pur-
chasing a hitch and other necessary tow-
ing equipment appropriate for your vehi-
cle. In addition, be sure to follow the in-
structions on correct installation and use
provided by the trailer and other towing
equipment manufacturers.
SUBARU assumes no responsibility for in-
juries or vehicle damage that result from
trailer towing equipment, or from any er-
rors or omissions in the instructions ac-
companying such equipment or for your
failure to follow the proper instructions.
Warranties and maintenance
SUBARU warranties do not apply to vehi-
cle damage or malfunction caused by trail-
er towing. If you use your vehicle to tow a
trailer, more frequent maintenance will be
800210