2006 SUBARU IMPREZA ignition
[x] Cancel search: ignitionPage 153 of 365
4-4 Climate control
Fan speed control dial
The fan operates only when the ignition
switch is turned to the ON position. The
fan speed control dial is used to select four
fan speeds.
Air flow control dial
This dial has the following five positions:
: Air flows through the instrument pan-
el outlets.
: Air flows through the instrument pan-
el outlets and the foot outlets.
: Air flows through the foot outlets and
some through the windshield defroster
outlets.
: Air flows through the windshield de-
froster outlets and foot outlets.
: Air flows through the windshield de-
froster outlets.
NOTE
You will find the notation USE
WITH on the air flow control
dial plate.
This is intended to remind you to set
the air inlet selection lever in the
position when defogging the
windshield.
Defogging with the air inlet selection
lever set in the position pro-
vides better defogging performance
than in the position.
When the dial is placed in the
or position, the air conditioner
compressor operates automatically re-
gardless of the position of the air con-
ditioner button to defog the windshield
quickly.
However the indicator on the air condi-
tioner button will not come on.
Also, you cannot stop the air condi-
tioner compressor by pressing the air
conditioner button.
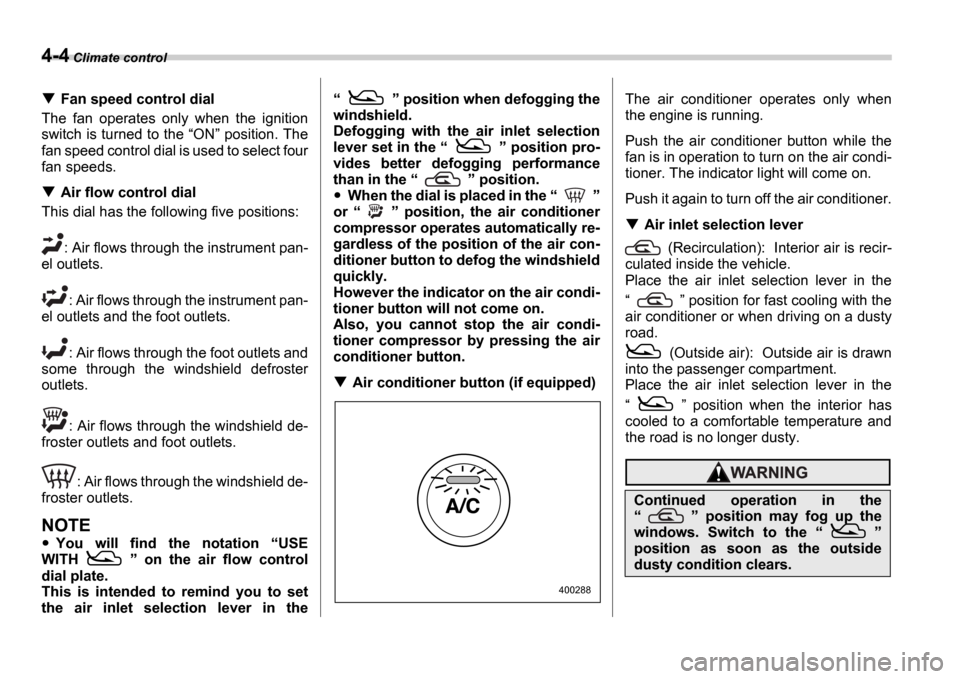
Air conditioner button (if equipped) The air conditioner operates only when
the engine is running.
Push the air conditioner button while the
fan is in operation to turn on the air condi-
tioner. The indicator light will come on.
Push it again to turn off the air conditioner.
Air inlet selection lever
(Recirculation): Interior air is recir-
culated inside the vehicle.
Place the air inlet selection lever in the
position for fast cooling with the
air conditioner or when driving on a dusty
road.
(Outside air): Outside air is drawn
into the passenger compartment.
Place the air inlet selection lever in the
position when the interior has
cooled to a comfortable temperature and
the road is no longer dusty.
400288
Continued operation in the
position may fog up the
windows. Switch to the
position as soon as the outside
dusty condition clears.
Page 157 of 365
4-8 Climate control
turns on the air conditioner compres-
sor automatically and the A/C indica-
tor light on the control panel comes on.
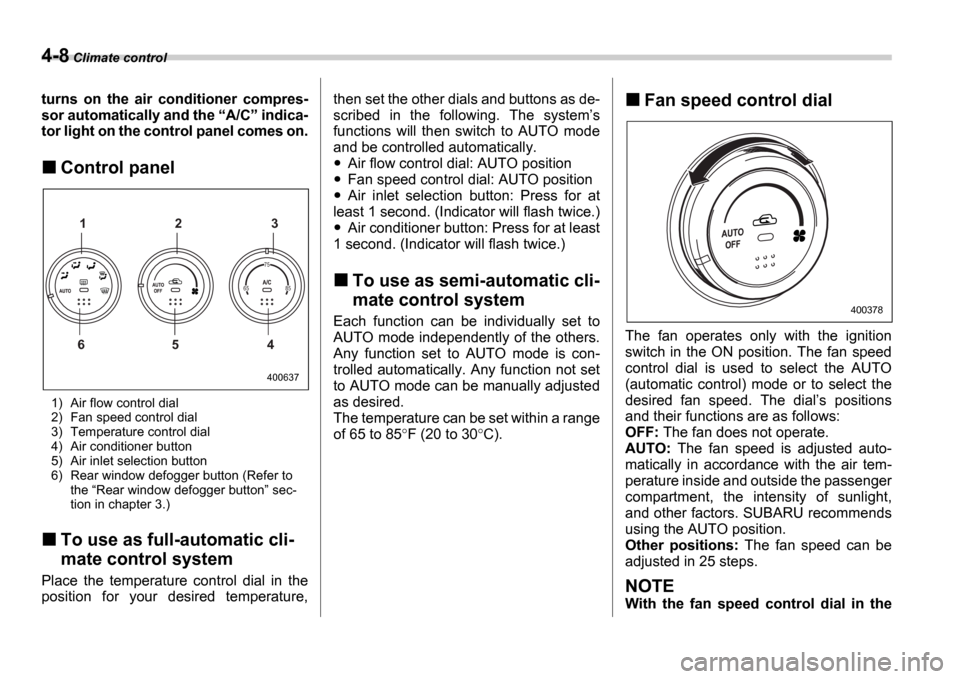
Control panel
1) Air flow control dial
2) Fan speed control dial
3) Temperature control dial
4) Air conditioner button
5) Air inlet selection button
6) Rear window defogger button (Refer to the Rear window defogger button sec-
tion in chapter 3.)
To use as full-automatic cli-
mate control system
Place the temperature control dial in the
position for your desired temperature, then set the other dials and buttons as de-
scribed in the following. The system
s
functions will then switch to AUTO mode
and be controlled automatically.
Air flow control dial: AUTO position
Fan speed control dial: AUTO position
Air inlet selection button: Press for at
least 1 second. (Indicator will flash twice.)
Air conditioner button: Press for at least
1 second. (Indicator will flash twice.)
To use as semi-automatic cli-
mate control system
Each function can be individually set to
AUTO mode independently of the others.
Any function set to AUTO mode is con-
trolled automatically. Any function not set
to AUTO mode can be manually adjusted
as desired.
The temperature can be set within a range
of 65 to 85 F (20 to 30 C).
Fan speed control dial
The fan operates only with the ignition
switch in the ON position. The fan speed
control dial is used to select the AUTO
(automatic control) mode or to select the
desired fan speed. The dial s positions
and their functions are as follows:
OFF: The fan does not operate.
AUTO: The fan speed is adjusted auto-
matically in accordance with the air tem-
perature inside and outside the passenger
compartment, the intensity of sunlight,
and other factors. SUBARU recommends
using the AUTO position.
Other positions: The fan speed can be
adjusted in 25 steps.
NOTE
With the fan speed control dial in the
400637
65 85 75
1 2 3
6 5 4
400378
Page 167 of 365
5-4 Audio
Type A audio set (if equipped)
The radio will operate only when the ignition switch i s in the ACC or ON position.
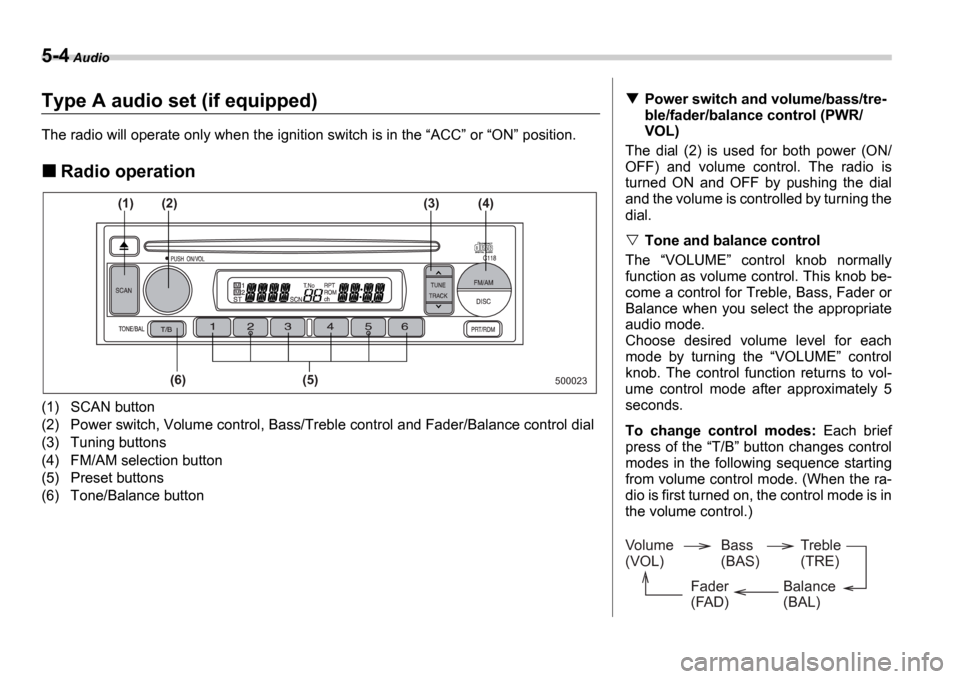
Radio operation
(1) SCAN button
(2) Power switch, Volume control, Bass/Treble control a nd Fader/Balance control dial
(3) Tuning buttons
(4) FM/AM selection button
(5) Preset buttons
(6) Tone/Balance button
500023
(1)
(6) (5)
(2)
(3) (4)
Power switch and volume/bass/tre-
ble/fader/balance control (PWR/
VOL)
The dial (2) is used for both power (ON/
OFF) and volume control. The radio is
turned ON and OFF by pushing the dial
and the volume is controlled by turning the
dial.
Tone and balance control
The VOLUME control knob normally
function as volume control. This knob be-
come a control for Treble, Bass, Fader or
Balance when you select the appropriate
audio mode.
Choose desired volume level for each
mode by turning the VOLUME control
knob. The control function returns to vol-
ume control mode after approximately 5
seconds.
To change control modes: Each brief
press of the T/B button changes control
modes in the following sequence starting
from volume control mode. (When the ra-
dio is first turned on, the control mode is in
the volume control.)
Volume
(VOL) Bass
(BAS)Treble
(TRE)
Balance
(BAL)
Fader
(FAD)
Page 171 of 365

5-8 Audio
(11) to skip to the beginning of the next
track. Each time this side of the button is
pressed, the indicated track number will
increase.
Backward direction
Briefly press the side of the button
(11) to skip to the beginning of the current
track. Each time this side of the button is
pressed, the indicated track number will
decrease.
Fast-forwarding and fast-reversing
Fast-forwarding
Press the side of the button (11)
continuously to fast-forward the disc.
Release the button to stop fast-forward-
ing.
Fast-reversing
Press the side of the button (11)
continuously to fast-reverse the disc.
Release the button to stop fast-reversing.
Repeat playback
Press the RPT/RDM button (10) and re-
lease it in less than 2 seconds while a
song is playing to play the song repeated-
ly. The RPT indicator will come on and
the song will be played continuously. To
cancel the repeat mode, press the button
again. Then the RPT indicator goes out, and normal playback mode is restored.
Random playback
Press the RPT/RDM button (10) and
hold it in for more than 2 seconds while a
disc is being played back to play all songs
on the disc in a random order. The RDM
indicator will come on and all songs on the
disc will be played in a random order.
To cancel the random mode, press the
button again. Then the RDM indicator
goes out, and normal playback mode is
restored.
To eject a disc from the player
When a disc is being played back or when
a disc is in the player, press the Eject
button (7). The disc will be ejected.
The disc may be removed even when the
ignition switch is in the LOCK position.
NOTE
Avoid driving the vehicle with a CD
sticking out, because vibration might
make it fall out.
Page 174 of 365
Audio 5-11
CONTINUED
Type B audio set (if equipped)
The radio will operate only when the ignition switch is in the ACC or ON position.
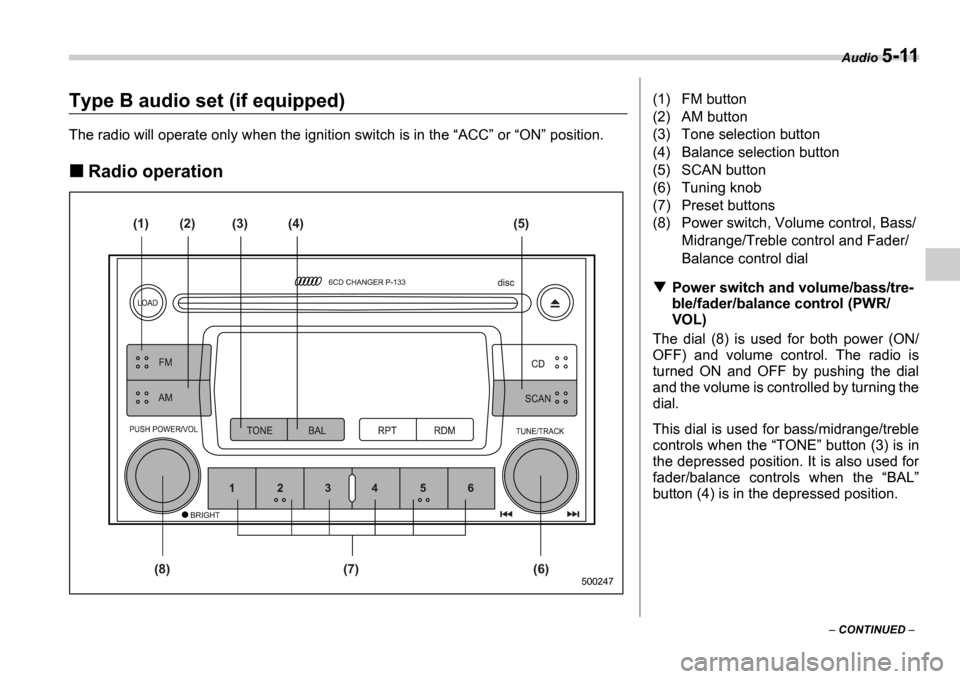
Radio operation
(1)
(8) (7) (6) (2) (3) (4) (5)
500247
(1) FM button
(2) AM button
(3) Tone selection button
(4) Balance selection button
(5) SCAN button
(6) Tuning knob
(7) Preset buttons
(8) Power switch, Volume control, Bass/
Midrange/Treble control and Fader/
Balance control dial
Power switch and volume/bass/tre-
ble/fader/balance control (PWR/
VOL)
The dial (8) is used for both power (ON/
OFF) and volume control. The radio is
turned ON and OFF by pushing the dial
and the volume is controlled by turning the
dial.
This dial is used for bass/midrange/treble
controls when the TONE button (3) is in
the depressed position. It is also used for
fader/balance controls when the BAL
button (4) is in the depressed position.
Page 183 of 365
5-20 Audio
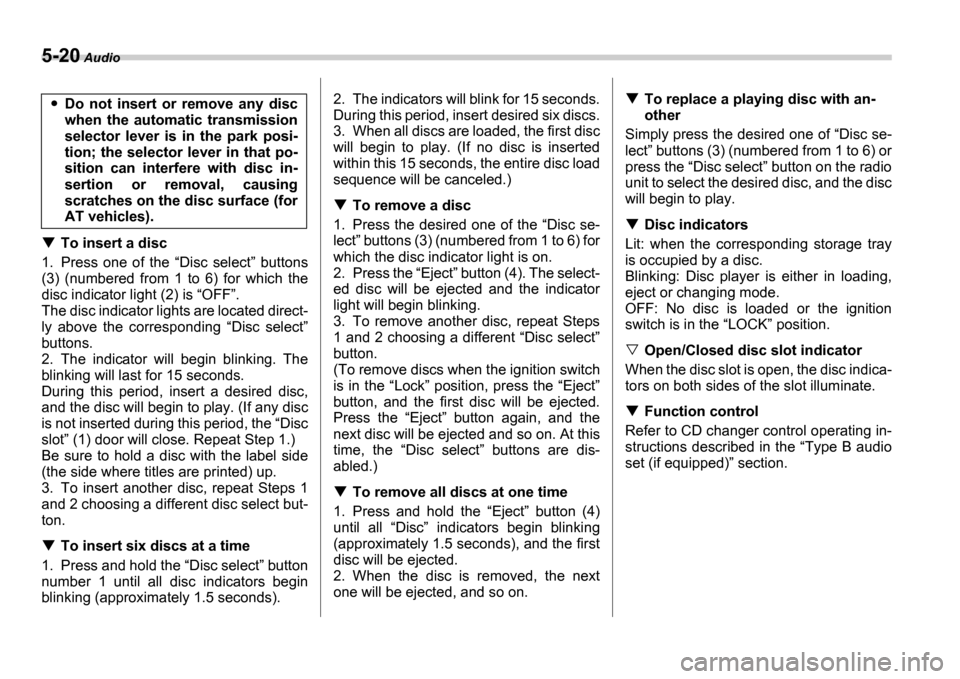
To insert a disc
1. Press one of the Disc select buttons
(3) (numbered from 1 to 6) for which the
disc indicator light (2) is OFF .
The disc indicator lights are located direct-
ly above the corresponding Disc select
buttons.
2. The indicator will begin blinking. The
blinking will last for 15 seconds.
During this period, insert a desired disc,
and the disc will begin to play. (If any disc
is not inserted during this period, the Disc
slot (1) door will close. Repeat Step 1.)
Be sure to hold a disc with the label side
(the side where titles are printed) up.
3. To insert another disc, repeat Steps 1
and 2 choosing a different disc select but-
ton.
To insert six discs at a time
1. Press and hold the Disc select button
number 1 until all disc indicators begin
blinking (approximately 1.5 seconds). 2. The indicators will blink for 15 seconds.
During this period, insert desired six discs.
3. When all discs are loaded, the first disc
will begin to play. (If no disc is inserted
within this 15 seconds, the entire disc load
sequence will be canceled.)
To remove a disc
1. Press the desired one of the Disc se-
lect buttons (3) (numbered from 1 to 6) for
which the disc indicator light is on.
2. Press the Eject button (4). The select-
ed disc will be ejected and the indicator
light will begin blinking.
3. To remove another disc, repeat Steps
1 and 2 choosing a different Disc select
button.
(To remove discs when the ignition switch
is in the Lock position, press the Eject
button, and the first disc will be ejected.
Press the Eject button again, and the
next disc will be ejected and so on. At this
time, the Disc select buttons are dis-
abled.)
To remove all discs at one time
1. Press and hold the Eject button (4)
until all Disc indicators begin blinking
(approximately 1.5 seconds), and the first
disc will be ejected.
2. When the disc is removed, the next
one will be ejected, and so on.
To replace a playing disc with an-
other
Simply press the desired one of Disc se-
lect buttons (3) (numbered from 1 to 6) or
press the Disc select button on the radio
unit to select the desired disc, and the disc
will begin to play.
Disc indicators
Lit: when the corresponding storage tray
is occupied by a disc.
Blinking: Disc player is either in loading,
eject or changing mode.
OFF: No disc is loaded or the ignition
switch is in the LOCK position.
Open/Closed disc slot indicator
When the disc slot is open, the disc indica-
tors on both sides of the slot illuminate.
Function control
Refer to CD changer control operating in-
structions described in the Type B audio
set (if equipped) section.
Do not insert or remove any disc
when the automatic transmission
selector lever is in the park posi-
tion; the selector lever in that po-
sition can interfere with disc in-
sertion or removal, causing
scratches on the disc surface (for
AT vehicles).
Page 187 of 365
6-2 Interior equipment
Interior equipm entInterior light
When leaving your vehicle, make sure the
light goes out to avoid battery discharge.
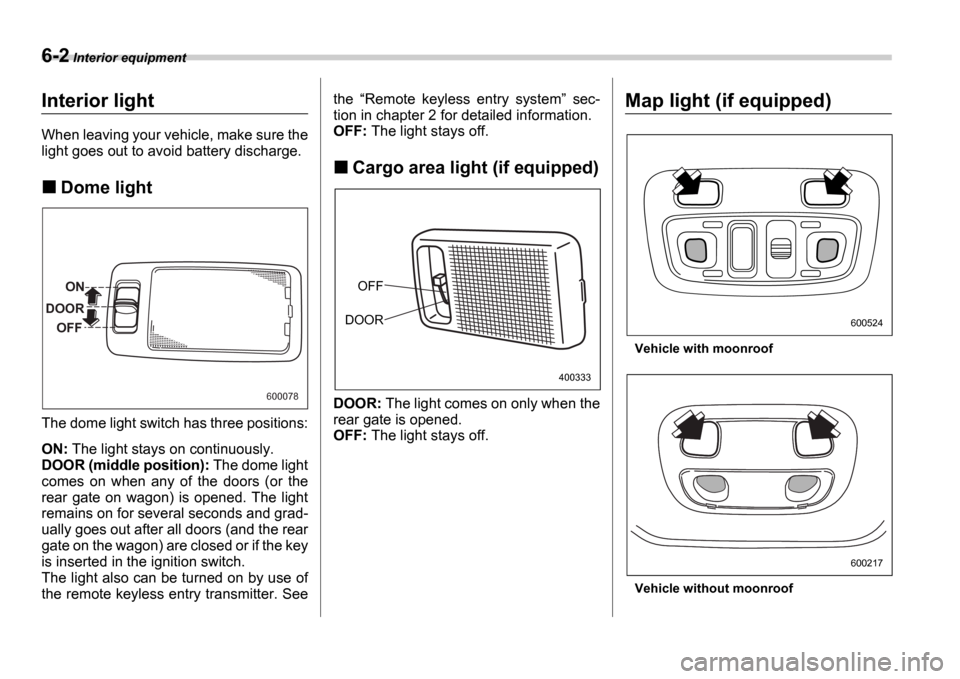
Dome light
The dome light switch has three positions:
ON: The light stays on continuously.
DOOR (middle position): The dome light
comes on when any of the doors (or the
rear gate on wagon) is opened. The light
remains on for several seconds and grad-
ually goes out after all doors (and the rear
gate on the wagon) are closed or if the key
is inserted in the ignition switch.
The light also can be turned on by use of
the remote keyless entry transmitter. See the
Remote keyless entry system sec-
tion in chapter 2 for detailed information.
OFF: The light stays off.
Cargo area light (if equipped)
DOOR: The light comes on only when the
rear gate is opened.
OFF: The light stays off.
Map light (if equipped)
Vehicle with moonroof
Vehicle without moonroof
ON
DOOR OFF
600078
OFF
DOOR
400333
600524
600217
Page 190 of 365
Interior equipment 6-5
CONTINUED
Cup holder
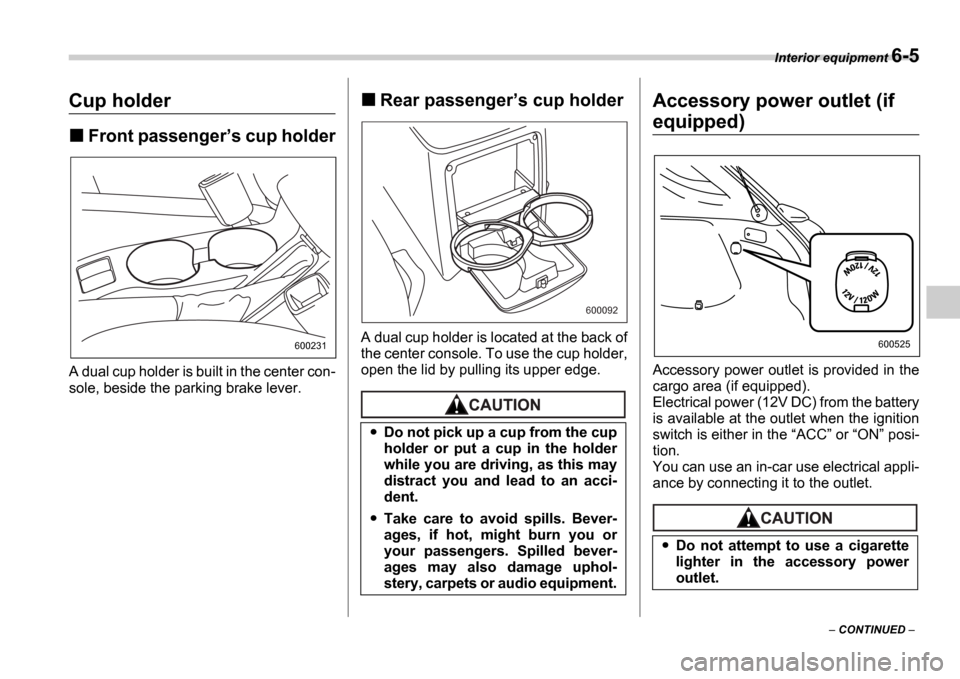
Front passenger s cup holder
A dual cup holder is built in the center con-
sole, beside the parking brake lever.
Rear passenger s cup holder
A dual cup holder is located at the back of
the center console. To use the cup holder,
open the lid by pulling its upper edge.
Accessory power outlet (if
equipped)
Accessory power outlet is provided in the
cargo area (if equipped).
Electrical power (12V DC) from the battery
is available at the outlet when the ignition
switch is either in the ACC or ON posi-
tion.
You can use an in-car use electrical appli-
ance by connecting it to the outlet.
600231
Do not pick up a cup from the cup
holder or put a cup in the holder
while you are driving, as this may
distract you and lead to an acci-
dent.
Take care to avoid spills. Bever-
ages, if hot, might burn you or
your passengers. Spilled bever-
ages may also damage uphol-
stery, carpets or audio equipment.
600092
Do not attempt to use a cigarette
lighter in the accessory power
outlet.
600525