2006 SUBARU IMPREZA warning
[x] Cancel search: warningPage 201 of 365
7-4 Starting and operating
Fuel filler lid and cap
Refueling0
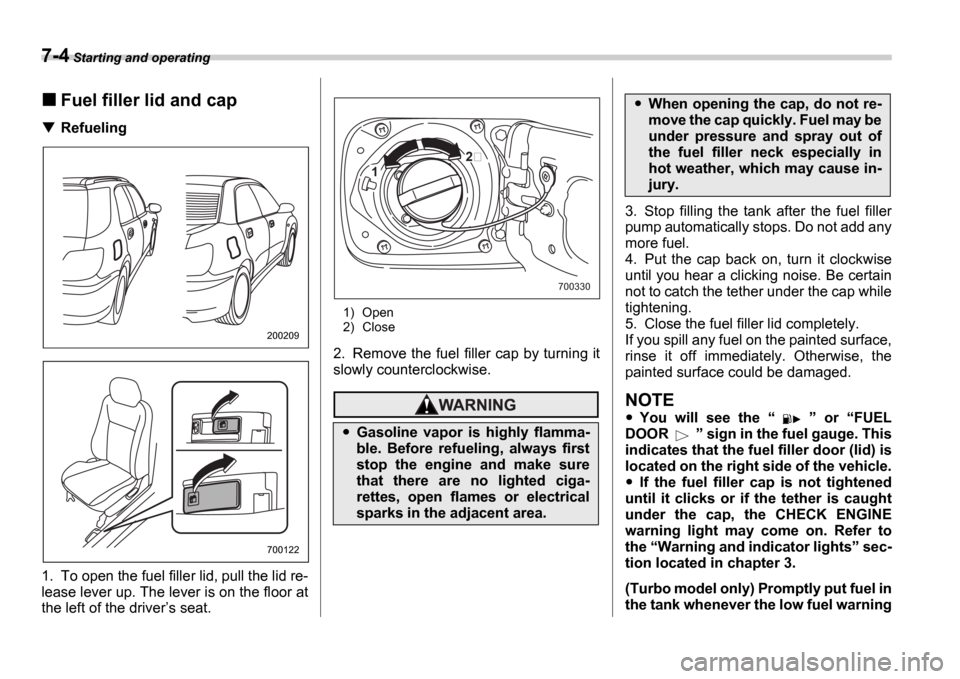
1. To open the fuel filler lid, pull the lid re-
lease lever up. The lever is on the floor at
the left of the driver s seat.
1) Open
2) Close
2. Remove the fuel filler cap by turning it
slowly counterclockwise.
3. Stop filling the tank after the fuel filler
pump automatically stops. Do not add any
more fuel.
4. Put the cap back on, turn it clockwise
until you hear a clicking noise. Be certain
not to catch the tether under the cap while
tightening.
5. Close the fuel filler lid completely.
If you spill any fuel on the painted surface,
rinse it off immediately. Otherwise, the
painted surface could be damaged.
NOTE
You will see the or FUEL
DOOR sign in the fuel gauge. This
indicates that the fuel filler door (lid) is
located on the right side of the vehicle.
If the fuel filler cap is not tightened
until it clicks or if the tether is caught
under the cap, the CHECK ENGINE
warning light may come on. Refer to
the Warning and indicator lights sec-
tion located in chapter 3.
(Turbo model only) Promptly put fuel in
the tank whenever the low fuel warning
200209
700122
Gasoline vapor is highly flamma-
ble. Before refueling, always first
stop the engine and make sure
that there are no lighted ciga-
rettes, open flames or electrical
sparks in the adjacent area.
1
700330
When opening the cap, do not re-
move the cap quickly. Fuel may be
under pressure and spray out of
the fuel filler neck especially in
hot weather, which may cause in-
jury.
Page 203 of 365
7-6 Starting and operating
The EPA has issued regulations for in-
specting the On-Board Diagnostic (OBD)
system as part of the state emissions in-
spection. The OBD system is designed to
detect engine and transmission problems
that might cause vehicle emissions to ex-
ceed allowable limits. These inspections
apply to all 1996 model year and newer
passenger cars and light trucks. Over 30
states plus the District of Columbia have
implemented the OBD system inspection.
The inspection of the OBD system con-
sists of a visual operational check of the CHECK ENGINE warning light/malfunc-
tion indicator lamp (MIL) and an examina-
tion of the OBD system with an electronic
scan tool while the engine is running.
A vehicle passes the OBD system in-
spection if proper the CHECK ENGINE
warning light/MIL illumination is observed,
there is no stored diagnostic trouble
codes, and the OBD system readiness
monitors are complete.
A vehicle fails the OBD inspection if the
CHECK ENGINE warning light/MIL is
not properly operating or there is one or
more diagnostic trouble codes stored in
vehicle s computer with the CHECK EN-
GINE warning light/MIL illuminated.
A state emission inspection may reject
(not pass or fail) a vehicle if the number of
OBD system readiness monitors Not
Ready is greater than one. Under this
condition, the vehicle operator should be
instructed to drive his/her vehicle for a few
days to set the monitors and return for an
emission re-inspection.
Owners of rejected or failing vehicles
should contact their Subaru Dealer for
service.
Preparing to drive
You should perform the following checks
and adjustments every day before you
start driving.
1. Check that all windows, mirrors, and
lights are clean and unobstructed.
2. Check the appearance and condition of
the tires. Also check tires for proper infla-
tion.
3. Look under the vehicle for any sign of
leaks.
4. Check that the hood, trunk (Sedan)
and rear gate (Wagon) are fully closed.
5. Check the adjustment of the seat.
6. Check the adjustment of the inside and
outside mirrors.
7. Fasten your seatbelt. Check that your
passengers have fastened their seatbelts.
8. Check the operation of the warning and
indicator lights when the ignition switch is
turned to the ON position.
9. Check the gauges, indicator and warn-
ing lights after starting the engine.
NOTE
Engine oil, engine coolant, brake fluid,
washer fluid and other fluid levels
should be checked daily, weekly or at
fuel stops.
Resultant vehicle damage due to im-
proper testing is not covered under
the SUBARU Limited Warranty and
is the responsibility of the state in-
spection program or its contractors
or licensees.
Page 204 of 365
Starting and operating 7-7
CONTINUED
Starting the engine
Manual transmission vehicle
1. Apply the parking brake.
2. Turn off unnecessary lights and acces-
sories.
3. Press the clutch pedal to the floor and
shift the shift lever into neutral. Hold the
clutch pedal to the floor while starting the
engine.
The starter motor will only operate when
the clutch pedal is pressed fully to the
floor.
4. Turn the ignition switch to the ON po-
sition and check the operation of the warn-
ing and indicator lights. Refer to the Warning and indicator lights section
(chapter 3).
5. Turn the ignition switch to the START
position without depressing the accelera-
tor pedal. Release the key immediately af-
ter the engine has started. If the engine does not start, try the follow-
ing.
1) Turn the ignition switch to the OFF
position and wait for at least 10 sec-
onds. After checking that the parking
brake is firmly set, turn the ignition
switch to the START position while de-
pressing the accelerator pedal slightly
(approximately a quarter of the full
stroke). Release the accelerator pedal
as soon as the engine starts.
2) If this fails to start the engine, turn the
ignition switch back to the OFF posi-
tion and wait for at least 10 seconds.
Then fully depress the accelerator ped-
al and turn the ignition switch to the START position. If the engine starts,
quickly release the accelerator pedal.
3) If this fails to start the engine, turn the
ignition switch again to the OFF posi-
tion. After waiting for 10 seconds or
longer, turn the ignition switch to the START position without depressing
the accelerator pedal.
4) If the engine still refuses to start, con-
tact your nearest SUBARU dealer for
assistance.
6. Confirm that all warning and indicator
lights have gone off after the engine has
started. The fuel injection system auto-
matically lowers the idle speed as the en-
gine warms up.
NOTE
The engine may be difficult to start
when the battery has been disconnect-
ed and reconnected (for maintenance
or other purposes). This difficulty is
caused by the electronically controlled
throttle s self-diagnosis function. To
overcome it, keep the ignition switch in
the ON position for approximately 10
seconds before starting the engine.
Automatic transmission vehi-
cle
1. Apply the parking brake.
2. Turn off unnecessary lights and acces-
sories.
3. Shift the selector lever to the P or N
position (preferably P position).
The starter motor will only operate when
the select lever is at the P or N position.
4. Turn the ignition switch to the ON po-
sition and check the operation of the warn-
ing and indicator lights. Refer to the Warning and indicator lights section
(chapter 3).
5. Turn the ignition switch to the START
position without depressing the accelera-
tor pedal. Release the key immediately af-
ter the engine has started.
If the engine does not start, try the follow-
Do not operate the starter motor
continuously for more than ten sec-
onds. If the engine fails to start after
operating the starter for five to ten
seconds, wait for ten seconds or
more before trying again.
Page 205 of 365
7-8 Starting and operating
ing.
1) Turn the ignition switch to the OFF
position and wait for at least 10 sec-
onds. After checking that the parking
brake is firmly set, turn the ignition
switch to the START position while de-
pressing the accelerator pedal slightly
(approximately a quarter of the full
stroke). Release the accelerator pedal
as soon as the engine starts.
2) If this fails to start the engine, turn the
ignition switch back to the OFF posi-
tion and wait for at least 10 seconds.
Then fully depress the accelerator ped-
al and turn the ignition switch to the START position. If the engine starts,
quickly release the accelerator pedal.
3) If this fails to start the engine, turn the
ignition switch again to the OFF posi-
tion. After waiting for 10 seconds or
longer, turn the ignition switch to the START position without depressing
the accelerator pedal.
4) If the engine still refuses to start, con-
tact your nearest SUBARU dealer for
assistance.
6. Confirm that all warning and indicator
lights have gone out after the engine has
started. The fuel injection system auto-
matically lowers the idle speed as the en-
gine warms up.
While the engine is warming up, make sure that the selector lever is at the
P or
N position and that the parking brake is
applied.
NOTE
The engine may be difficult to start
when the battery has been disconnect-
ed and reconnected (for maintenance
or other purposes). This difficulty is
caused by the electronically controlled
throttle s self-diagnosis function. To
overcome it, keep the ignition switch in
the ON position for approximately 10
seconds before starting the engine.
Stopping the engine
The ignition switch should be turned off
only when the vehicle is stopped and the
engine is idling.
If you restart the engine while the
vehicle is moving, shift the selector
lever into the N position. Do not
attempt to place the selector lever of
a moving vehicle into the P posi-
tion.
Do not stop the engine when the ve-
hicle is moving. This will cause loss
of power to the power steering and
the brake booster, making steering
and braking more difficult. It could
also result in accidental activation
of the LOCK position on the igni-
tion switch, causing the steering
wheel to lock.
Page 219 of 365
7-22 Starting and operating
Disc brake pad wear warning
indicators
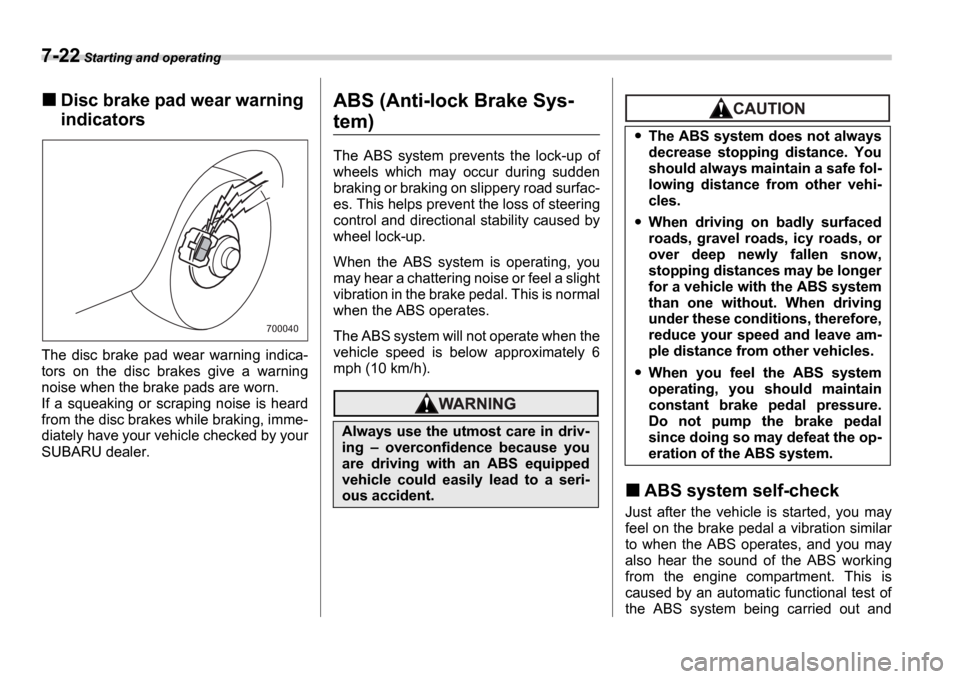
The disc brake pad wear warning indica-
tors on the disc brakes give a warning
noise when the brake pads are worn.
If a squeaking or scraping noise is heard
from the disc brakes while braking, imme-
diately have your vehicle checked by your
SUBARU dealer.
ABS (Anti-lock Brake Sys-
tem)
The ABS system prevents the lock-up of
wheels which may occur during sudden
braking or braking on slippery road surfac-
es. This helps prevent the loss of steering
control and directional stability caused by
wheel lock-up.
When the ABS system is operating, you
may hear a chattering noise or feel a slight
vibration in the brake pedal. This is normal
when the ABS operates.
The ABS system will not operate when the
vehicle speed is below approximately 6
mph (10 km/h).
ABS system self-check
Just after the vehicle is started, you may
feel on the brake pedal a vibration similar
to when the ABS operates, and you may
also hear the sound of the ABS working
from the engine compartment. This is
caused by an automatic functional test of
the ABS system being carried out and
700040
Always use the utmost care in driv-
ing overconfidence because you
are driving with an ABS equipped
vehicle could easily lead to a seri-
ous accident.
The ABS system does not always
decrease stopping distance. You
should always maintain a safe fol-
lowing distance from other vehi-
cles.
When driving on badly surfaced
roads, gravel roads, icy roads, or
over deep newly fallen snow,
stopping distances may be longer
for a vehicle with the ABS system
than one without. When driving
under these conditions, therefore,
reduce your speed and leave am-
ple distance from other vehicles.
When you feel the ABS system
operating, you should maintain
constant brake pedal pressure.
Do not pump the brake pedal
since doing so may defeat the op-
eration of the ABS system.
Page 220 of 365
Starting and operating 7-23
does not indicate any abnormal condition.
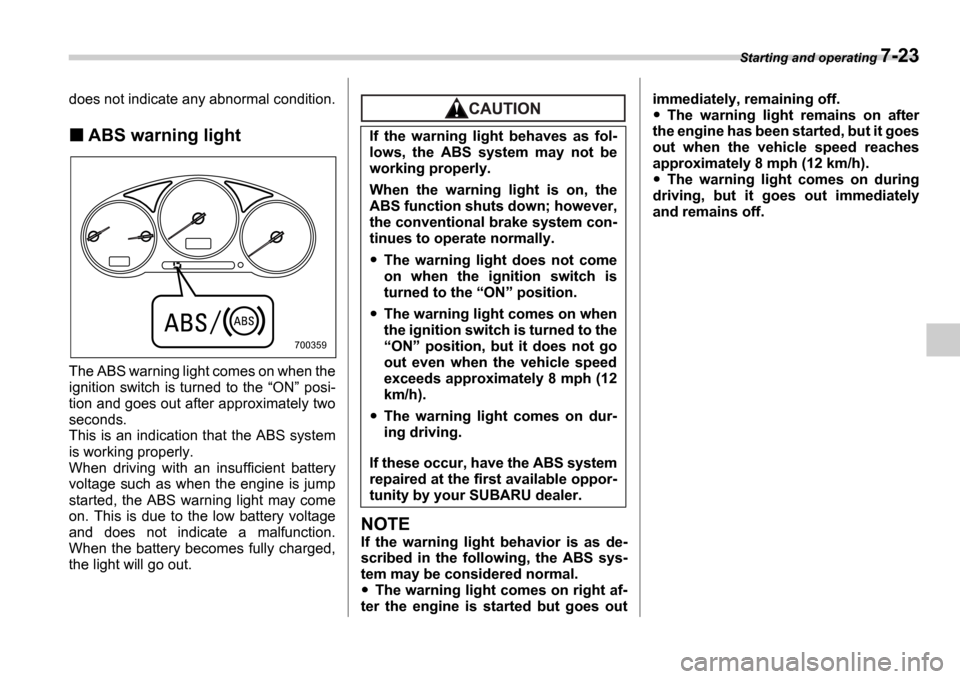
ABS warning light
The ABS warning light comes on when the
ignition switch is turned to the ON posi-
tion and goes out after approximately two
seconds.
This is an indication that the ABS system
is working properly.
When driving with an insufficient battery
voltage such as when the engine is jump
started, the ABS warning light may come
on. This is due to the low battery voltage
and does not indicate a malfunction.
When the battery becomes fully charged,
the light will go out.
NOTE
If the warning light behavior is as de-
scribed in the following, the ABS sys-
tem may be considered normal.
The warning light comes on right af-
ter the engine is started but goes out immediately, remaining off.
The warning light remains on after
the engine has been started, but it goes
out when the vehicle speed reaches
approximately 8 mph (12 km/h).
The warning light comes on during
driving, but it goes out immediately
and remains off.
700359
If the warning light behaves as fol-
lows, the ABS system may not be
working properly.
When the warning light is on, the
ABS function shuts down; however,
the conventional brake system con-
tinues to operate normally.
The warning light does not come
on when the ignition switch is
turned to the ON position.
The warning light comes on when
the ignition switch is turned to the ON position, but it does not go
out even when the vehicle speed
exceeds approximately 8 mph (12
km/h).
The warning light comes on dur-
ing driving.
If these occur, have the ABS system
repaired at the first available oppor-
tunity by your SUBARU dealer.
Page 221 of 365
7-24 Starting and operating
Electronic Brake Force Dis-
tribution (EBD) system
The EBD system maximizes the effective-
ness of the brakes by allowing the rear
brakes to supply a greater proportion of
the braking force. It functions by adjusting
the distribution of braking force to the rear
wheels in accordance with the vehicle s
loading condition and speed.
The EBD system is an integral part of the
ABS system and uses some of the ABS
system s components to perform its func-
tion of optimizing the distribution of brak-
ing force. If any of the ABS components
used by the EBD function fails, the EBD
system also stops working.
When the EBD system is operating, you
may hear a chattering noise or feel a slight
vibration in the brake pedal. This is normal
and does not indicate a malfunction.
Steps to take if EBD system
fails
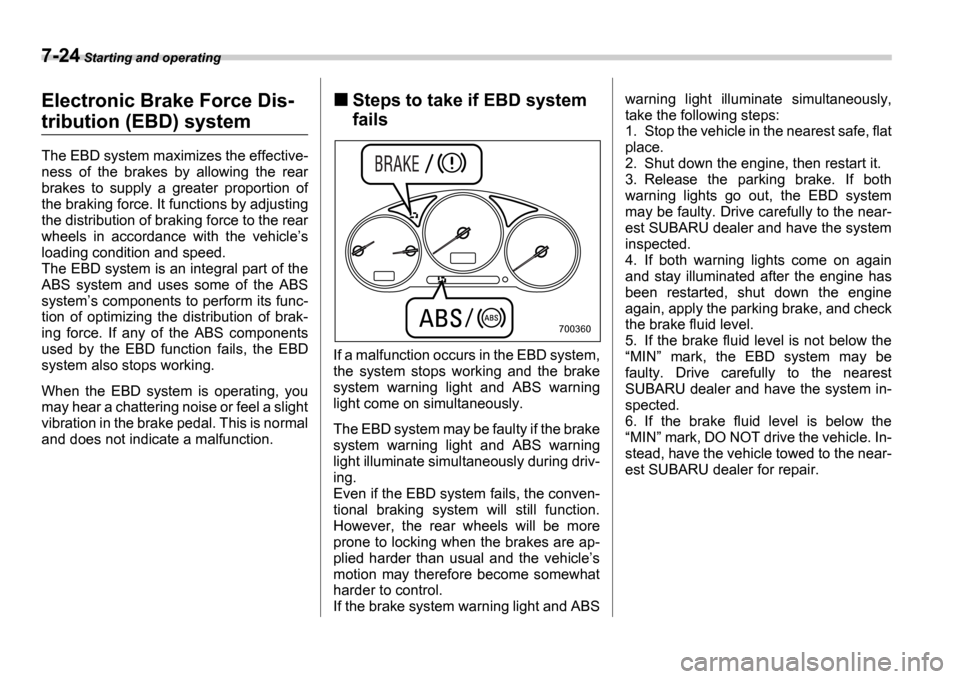
If a malfunction occurs in the EBD system,
the system stops working and the brake
system warning light and ABS warning
light come on simultaneously.
The EBD system may be faulty if the brake
system warning light and ABS warning
light illuminate simultaneously during driv-
ing.
Even if the EBD system fails, the conven-
tional braking system will still function.
However, the rear wheels will be more
prone to locking when the brakes are ap-
plied harder than usual and the vehicle s
motion may therefore become somewhat
harder to control.
If the brake system warning light and ABS warning light illuminate simultaneously,
take the following steps:
1. Stop the vehicle in the nearest safe, flat
place.
2. Shut down the engine, then restart it.
3. Release the parking brake. If both
warning lights go out, the EBD system
may be faulty. Drive carefully to the near-
est SUBARU dealer and have the system
inspected.
4. If both warning lights come on again
and stay illuminated after the engine has
been restarted, shut down the engine
again, apply the parking brake, and check
the brake fluid level.
5. If the brake fluid level is not below the
MIN mark, the EBD system may be
faulty. Drive carefully to the nearest
SUBARU dealer and have the system in-
spected.
6. If the brake fluid level is below the MIN mark, DO NOT drive the vehicle. In-
stead, have the vehicle towed to the near-
est SUBARU dealer for repair.
700360
Page 222 of 365
Starting and operating 7-25
CONTINUED
Parking your vehicle
Parking brake
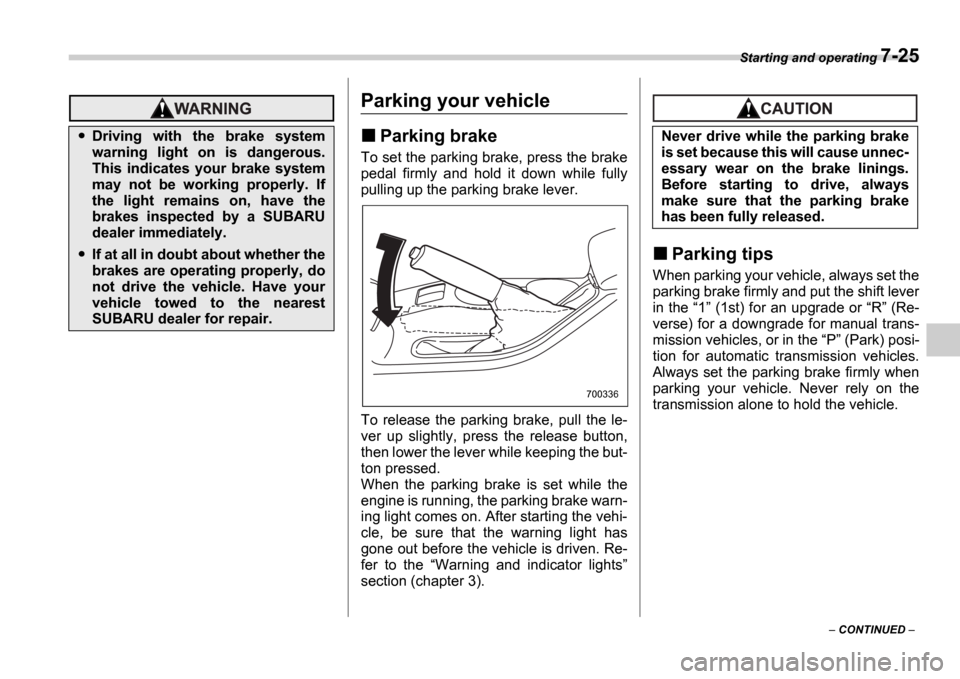
To set the parking brake, press the brake
pedal firmly and hold it down while fully
pulling up the parking brake lever.
To release the parking brake, pull the le-
ver up slightly, press the release button,
then lower the lever while keeping the but-
ton pressed.
When the parking brake is set while the
engine is running, the parking brake warn-
ing light comes on. After starting the vehi-
cle, be sure that the warning light has
gone out before the vehicle is driven. Re-
fer to the Warning and indicator lights
section (chapter 3).
Parking tips
When parking your vehicle, always set the
parking brake firmly and put the shift lever
in the 1 (1st) for an upgrade or R (Re-
verse) for a downgrade for manual trans-
mission vehicles, or in the P (Park) posi-
tion for automatic transmission vehicles.
Always set the parking brake firmly when
parking your vehicle. Never rely on the
transmission alone to hold the vehicle.
Driving with the brake system
warning light on is dangerous.
This indicates your brake system
may not be working properly. If
the light remains on, have the
brakes inspected by a SUBARU
dealer immediately.
If at all in doubt about whether the
brakes are operating properly, do
not drive the vehicle. Have your
vehicle towed to the nearest
SUBARU dealer for repair.
700336
Never drive while the parking brake
is set because this will cause unnec-
essary wear on the brake linings.
Before starting to drive, always
make sure that the parking brake
has been fully released.