2006 SUBARU IMPREZA stop start
[x] Cancel search: stop startPage 235 of 365
8-8 Driving tips
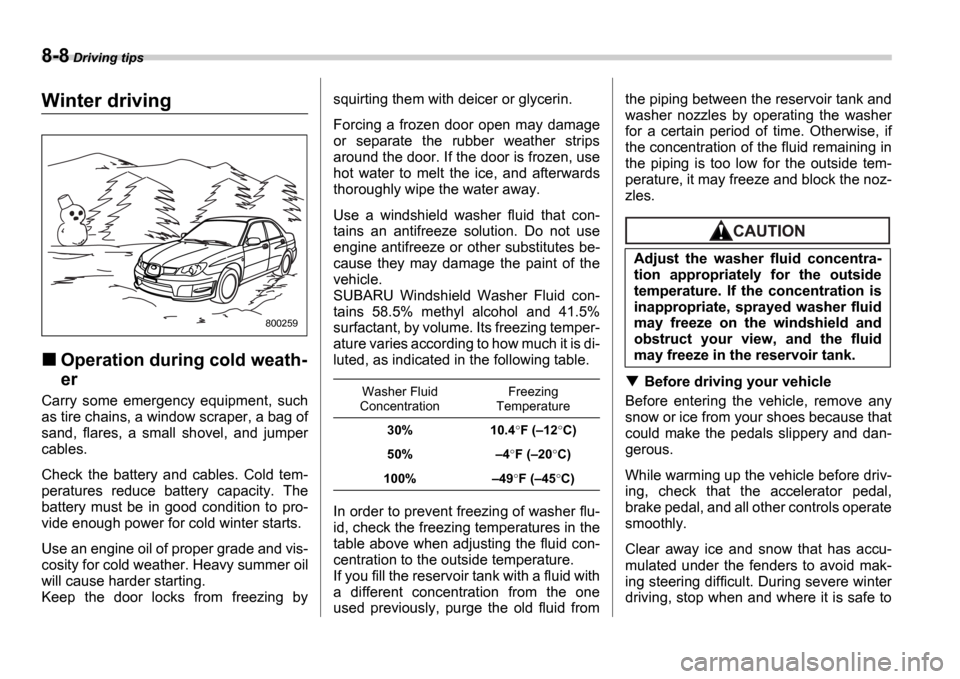
Winter driving
Operation during cold weath-
er
Carry some emergency equipment, such
as tire chains, a window scraper, a bag of
sand, flares, a small shovel, and jumper
cables.
Check the battery and cables. Cold tem-
peratures reduce battery capacity. The
battery must be in good condition to pro-
vide enough power for cold winter starts.
Use an engine oil of proper grade and vis-
cosity for cold weather. Heavy summer oil
will cause harder starting.
Keep the door locks from freezing by squirting them with deicer or glycerin.
Forcing a frozen door open may damage
or separate the rubber weather strips
around the door. If the door is frozen, use
hot water to melt the ice, and afterwards
thoroughly wipe the water away.
Use a windshield washer fluid that con-
tains an antifreeze solution. Do not use
engine antifreeze or other substitutes be-
cause they may damage the paint of the
vehicle.
SUBARU Windshield Washer Fluid con-
tains 58.5% methyl alcohol and 41.5%
surfactant, by volume. Its freezing temper-
ature varies according to how much it is di-
luted, as indicated in the following table.
In order to prevent freezing of washer flu-
id, check the freezing temperatures in the
table above when adjusting the fluid con-
centration to the outside temperature.
If you fill the reservoir tank with a fluid with
a different concentration from the one
used previously, purge the old fluid fromthe piping between the reservoir tank and
washer nozzles by operating the washer
for a certain period of time. Otherwise, if
the concentration of the fluid remaining in
the piping is too low for the outside tem-
perature, it may freeze and block the noz-
zles.
Before driving your vehicle
Before entering the vehicle, remove any
snow or ice from your shoes because that
could make the pedals slippery and dan-
gerous.
While warming up the vehicle before driv-
ing, check that the accelerator pedal,
brake pedal, and all other controls operate
smoothly.
Clear away ice and snow that has accu-
mulated under the fenders to avoid mak-
ing steering difficult. During severe winter
driving, stop when and where it is safe to
800259
Washer Fluid
Concentration Freezing
Temperature
30% 10.4 F ( 12 C)
50% 4F ( 20 C)
100% 49 F ( 45 C)
Adjust the washer fluid concentra-
tion appropriately for the outside
temperature. If the concentration is
inappropriate, sprayed washer fluid
may freeze on the windshield and
obstruct your view, and the fluid
may freeze in the reservoir tank.
Page 237 of 365
8-10 Driving tips
Wiper operation when snowing
Before driving in cold weather, make sure
the wiper blades are not frozen to the
windshield or rear window. If the wiper
blades are frozen to the windshield or rear
window, use the defroster with the airflow
control dial in the position and the
temperature control dial set for maximum
warmth until the wiper blades are com-
pletely thawed out. If your vehicle is
equipped with a wiper deicer, it is helpful
to thaw the windshield wiper blades. To
thaw out the rear wiper blade, use the rear
window defogger.
When driving in snow, if frozen snow
starts to stick on the surface of the wind-
shield despite wiper operation, use the de-
froster with the airflow control dial in
and the temperature control dial
set for maximum warmth. After the wind-
shield gets warmed enough to melt the
frozen snow on it, wash it away using the windshield washer.
Snow stuck on the wiper arm prevents the
wiper from working effectively. If snow is
stuck on the wiper arm, pull off the road to
a safe place, then remove it. If you stop
the vehicle at road side, use the hazard
warning flasher to alert other drivers.
We recommend use of non-freezing type
wiper blades (winter blades) during the
seasons you could have snow and sub-
zero temperatures. Blades of this type
give superior wiping performance in
snowy conditions. Be sure to use blades
that are suitable for your vehicle.
NOTE
When the season requiring non-freez-
ing type wiper blades is over, replace
them with standard wiper blades.
Corrosion protection
Refer to the
Corrosion protection section
(chapter 10).
Snow tires
All models except WRX-STIAvoid prolonged continuous driving
in snowstorms. Snow will enter the
engine s intake system and may
hinder the air flow, which could re-
sult in engine shutdown or even
breakdown.
During high-speed driving, non-
freezing type wiper blades may not
perform as well as standard wiper
blades. If this happens, reduce the
vehicle speed.
When replacing original tires with
winter (snow) tires, make sure you
use only the same size, construc-
tion and load range as the original
tires listed on the tire placard. Us-
ing other sizes and construction
may affect speedometer/odome-
ter calibration and clearance be-
tween the body and tires. It also
may be dangerous and lead to
loss of vehicle control.
You must install four winter tires
that are of the same size, con-
struction, brand, and load range.
Mixing other sizes or construc-
tions may result in severe me-
chanical damage to the drive train
of your vehicle and may affect
ride, handling, braking and speed-
ometer/odometer calibration. It
also may be dangerous and lead
to loss of vehicle control.
Page 239 of 365
8-12 Driving tips
pension.
When driving with tire chains, drive at
speeds below 19 mph (30 km/h).
When a temporary spare tire is on a front
wheel, replace the temporary spare tire
with the rear tire on the same side of the
vehicle, and then fit chains on the front
tires.
Always use the utmost care when driving
with tire chains overconfidence be-
cause you are driving with tire chains
could easily lead to a serious accident.
Rocking the vehicle
If you must rock the vehicle to free it from
snow, sand, or mud, depress the acceler-
ator pedal slightly and move the selector
lever back and forth between D and R
repeatedly. Do not race the engine. For
the best possible traction, avoid spinning
the wheels when trying to free the vehicle. When the road surface is extremely slip-
pery, you can obtain better traction by
starting the vehicle with the transmission
in 2nd than 1st (both for MT and AT).
Refer to the
Automatic transmission sec-
tion in chapter 7 for information on holding
the transmission in 2nd position.
Loading your vehicle
Tire chains cannot be used on tires
listed in the following because of
lack of clearance between the tires
and vehicle body.
225/45R17 tires for WRX-STI
215/45R17 tires for WRX
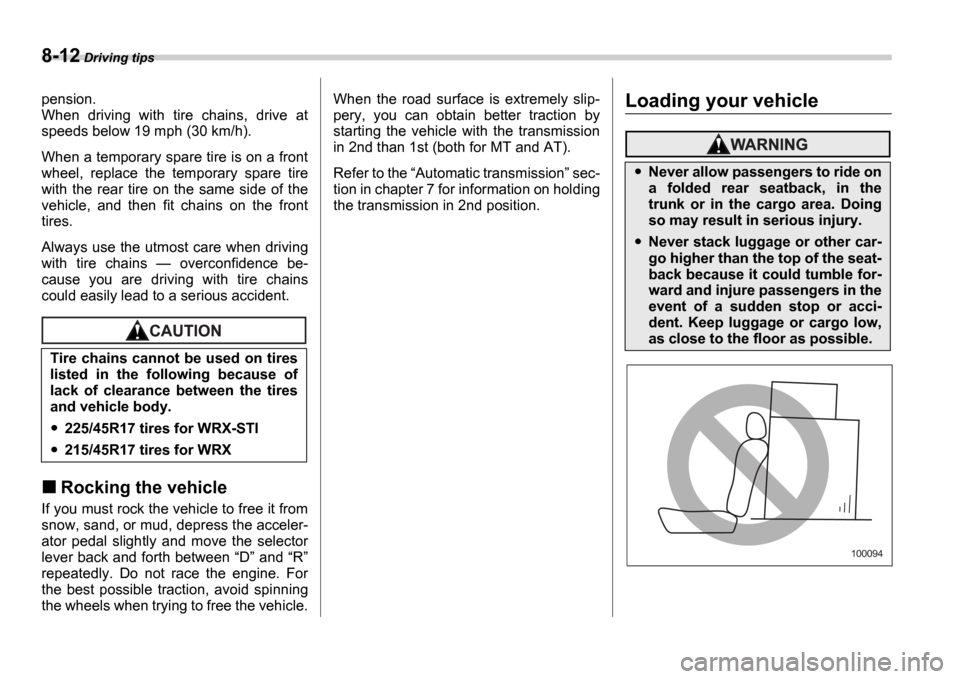
Never allow passengers to ride on
a folded rear seatback, in the
trunk or in the cargo area. Doing
so may result in serious injury.
Never stack luggage or other car-
go higher than the top of the seat-
back because it could tumble for-
ward and injure passengers in the
event of a sudden stop or acci-
dent. Keep luggage or cargo low,
as close to the floor as possible.
100094
Page 242 of 365
Driving tips 8-15
CONTINUED
your vehicle
section in this chapter for in-
formation on loading cargo into or onto
your vehicle. The maximum load limit of
the cargo, crossbars and carrying attach-
ment must not exceed 100 lbs (45 kg).
Place the heaviest load at the bottom,
nearest the roof, and evenly distribute the
cargo. Always properly secure all cargo.
Installing carrying attachments on
the crossbars
When installing any carrying attachment
such as a bike carrier, ski carrier, kayak carrier, cargo basket, etc. on the cross-
bars, follow the manufacturer
s instruc-
tions and make sure that the attachment is
securely fixed to the crossbars. Use only
attachments designed specifically for the
crossbars. A set of the crossbars is de-
signed to carry loads (cargo and attach-
ment) of not more than 100 lbs (45 kg).
Before operating the vehicle, make sure
that the cargo is properly secured on the
attachment.
NOTE
Remember that the vehicle s center of
gravity is altered with the weight of the
load on the roof, thus affecting the
driving characteristics.
Drive carefully. Avoid rapid starts, hard
cornering and abrupt stops. Crosswind
effects will be increased.
Removal and installation of the
crossbars
The crossbars can be removed when you
do not use the roof to carry cargo.
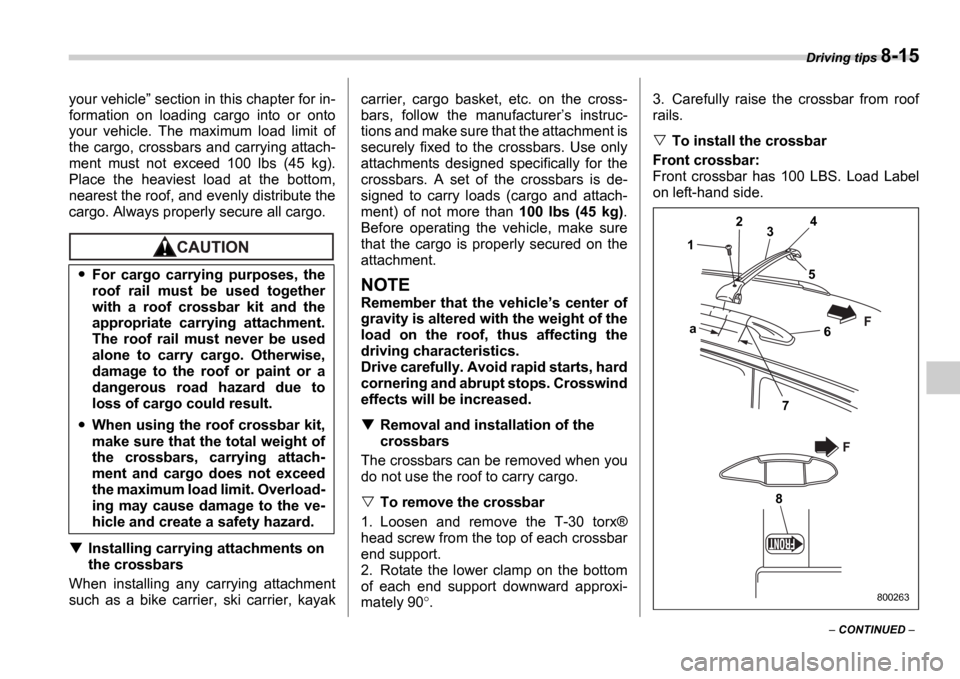
To remove the crossbar
1. Loosen and remove the T-30 torx Æ
head screw from the top of each crossbar
end support.
2. Rotate the lower clamp on the bottom
of each end support downward approxi-
mately 90 . 3. Carefully raise the crossbar from roof
rails.
To install the crossbar
Front crossbar:
Front crossbar has 100 LBS. Load Label
on left-hand side.
For cargo carrying purposes, the
roof rail must be used together
with a roof crossbar kit and the
appropriate carrying attachment.
The roof rail must never be used
alone to carry cargo. Otherwise,
damage to the roof or paint or a
dangerous road hazard due to
loss of cargo could result.
When using the roof crossbar kit,
make sure that the total weight of
the crossbars, carrying attach-
ment and cargo does not exceed
the maximum load limit. Overload-
ing may cause damage to the ve-
hicle and create a safety hazard.
1 2
3 4
5
6
7
a
8
F
F
800263
Page 252 of 365
Driving tips 8-25
CONTINUED
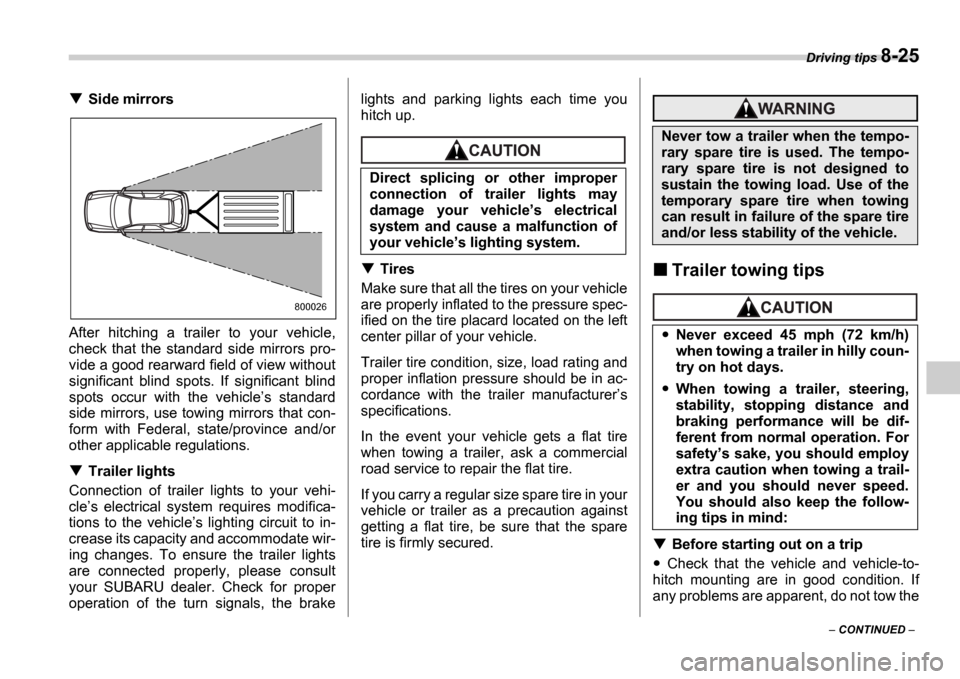
Side mirrors
After hitching a trailer to your vehicle,
check that the standard side mirrors pro-
vide a good rearward field of view without
significant blind spots. If significant blind
spots occur with the vehicle s standard
side mirrors, use towing mirrors that con-
form with Federal, state/province and/or
other applicable regulations.
Trailer lights
Connection of trailer lights to your vehi-
cle s electrical system requires modifica-
tions to the vehicle s lighting circuit to in-
crease its capacity and accommodate wir-
ing changes. To ensure the trailer lights
are connected properly, please consult
your SUBARU dealer. Check for proper
operation of the turn signals, the brake lights and parking lights each time you
hitch up.
Tires
Make sure that all the tires on your vehicle
are properly inflated to the pressure spec-
ified on the tire placard located on the left
center pillar of your vehicle.
Trailer tire condition, size, load rating and
proper inflation pressure should be in ac-
cordance with the trailer manufacturer s
specifications.
In the event your vehicle gets a flat tire
when towing a trailer, ask a commercial
road service to repair the flat tire.
If you carry a regular size spare tire in your
vehicle or trailer as a precaution against
getting a flat tire, be sure that the spare
tire is firmly secured.Trailer towing tips
Before starting out on a trip
Check that the vehicle and vehicle-to-
hitch mounting are in good condition. If
any problems are apparent, do not tow the
800026
Direct splicing or other improper
connection of trailer lights may
damage your vehicle s electrical
system and cause a malfunction of
your vehicle s lighting system.
Never tow a trailer when the tempo-
rary spare tire is used. The tempo-
rary spare tire is not designed to
sustain the towing load. Use of the
temporary spare tire when towing
can result in failure of the spare tire
and/or less stability of the vehicle.
Never exceed 45 mph (72 km/h)
when towing a trailer in hilly coun-
try on hot days.
When towing a trailer, steering,
stability, stopping distance and
braking performance will be dif-
ferent from normal operation. For
safety s sake, you should employ
extra caution when towing a trail-
er and you should never speed.
You should also keep the follow-
ing tips in mind:
Page 253 of 365
8-26 Driving tips
trailer.
Check that the vehicle sits horizontally
with the trailer attached. If the vehicle is
tipped sharply up at the front and down at
the rear, check the total trailer weight,
GVW, GAWs and tongue load again, then
confirm that the load and its distribution
are acceptable.
Check that the tire pressures are cor-
rect.
Check that the vehicle and trailer are
connected properly. Confirm that the trailer tongue is connected prop-
erly to the hitch ball. the trailer lights connector is connect-
ed properly and trailer s brake lights illu-
minate when the vehicle s brake pedal
is pressed, and that the trailer s turn sig-
nal lights flash when the vehicle s turn
signal lever is operated. the safety chains are connected prop-
erly. all cargo in the trailer is secured safe-
ty in position. the side mirrors provide a good rear-
ward field of view without a significant
blind spot.
Sufficient time should be taken to learn
the feel of the vehicle/trailer combination
before starting out on a trip. In an area free
of traffic, practice turning, stopping and
backing up.
Driving with a trailer
You should allow for considerably more
stopping distance when towing a trailer.
Avoid sudden braking because it may re-
sult in skidding or jackknifing and loss of
control.
Avoid abrupt starts and sudden acceler-
ations. If your vehicle has a manual trans-
mission, always start out in first gear and
release the clutch at moderate engine rev-
olution.
Avoid uneven steering, sharp turns and
rapid lane changes.
Slow down before turning. Make a long-
er than normal turning radius because the
trailer wheels will be closer than the vehi-
cle wheels to the inside of the turn. In a
tight turn, the trailer could hit your vehicle.
Crosswinds will adversely affect the
handling of your vehicle and trailer, caus-
ing sway. Crosswinds can be due to
weather conditions or the passing of large
tracks or buses. If swaying occurs, firmly
grip the steering wheel and slow down im-
mediately but gradually.
When passing other vehicles, consider-
able distance is required because of the
added weight and length caused by at-
taching the trailer to your vehicle.
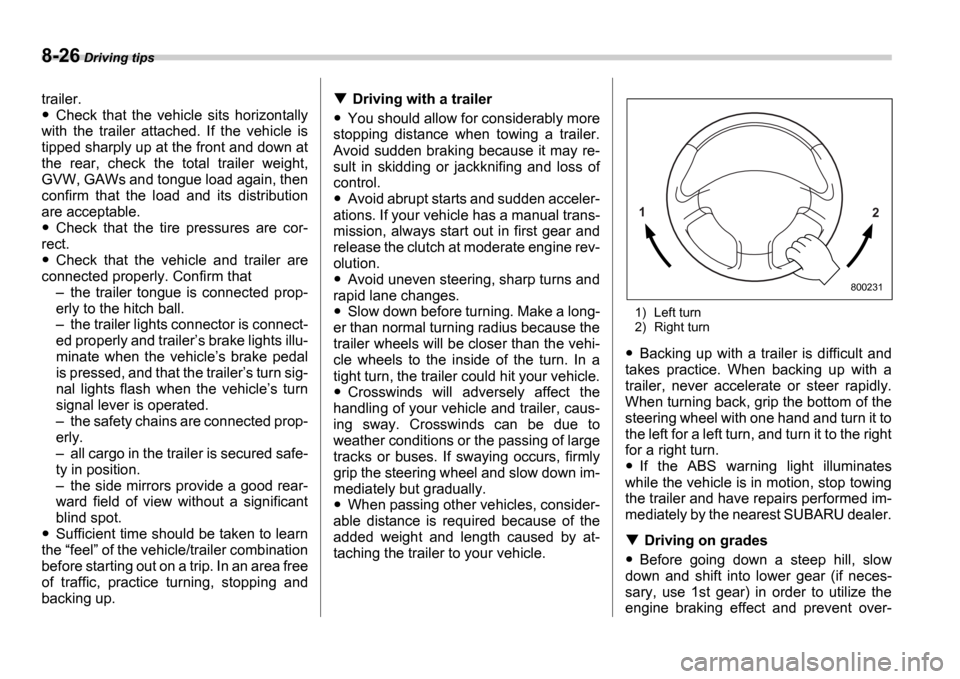
1) Left turn
2) Right turn
Backing up with a trailer is difficult and
takes practice. When backing up with a
trailer, never accelerate or steer rapidly.
When turning back, grip the bottom of the
steering wheel with one hand and turn it to
the left for a left turn, and turn it to the right
for a right turn.
If the ABS warning light illuminates
while the vehicle is in motion, stop towing
the trailer and have repairs performed im-
mediately by the nearest SUBARU dealer.
Driving on grades
Before going down a steep hill, slow
down and shift into lower gear (if neces-
sary, use 1st gear) in order to utilize the
engine braking effect and prevent over-
1 2
800231
Page 289 of 365
11-10 Maintenance and service
11.Reinstall under cover.
12.Pour engine oil through the filler neck.
Oil capacity (guideline):
4.2 US qt (4.0 liters, 3.5 Imp qt)
The oil quantity indicated above is only
guideline.
The necessary quantity of oil depends on
the quantity of oil that has been drained.
The quantity of drained oil differs slightly
depending on the temperature of the oil
and the time the oil is left flowing out. After refilling the engine with oil, therefore, you
must the dipstick to confirm that the level
is correct.
13.Start the engine and make sure that no
oil leaks appear around the filter
s rubber
seal and drain plug.
14.Run the engine until it reaches the nor-
mal operating temperature. Then stop the
engine and wait a few minutes to allow the
oil drain back. Check the oil level again
and if necessary, add more engine oil.
Recommended grade and
viscosity
Oil grade:
ILSAC GF-4, which can be identified
with the ILSAC certification mark
(Starburst mark)
or API classification SM with the
words ENERGY CONSERVING
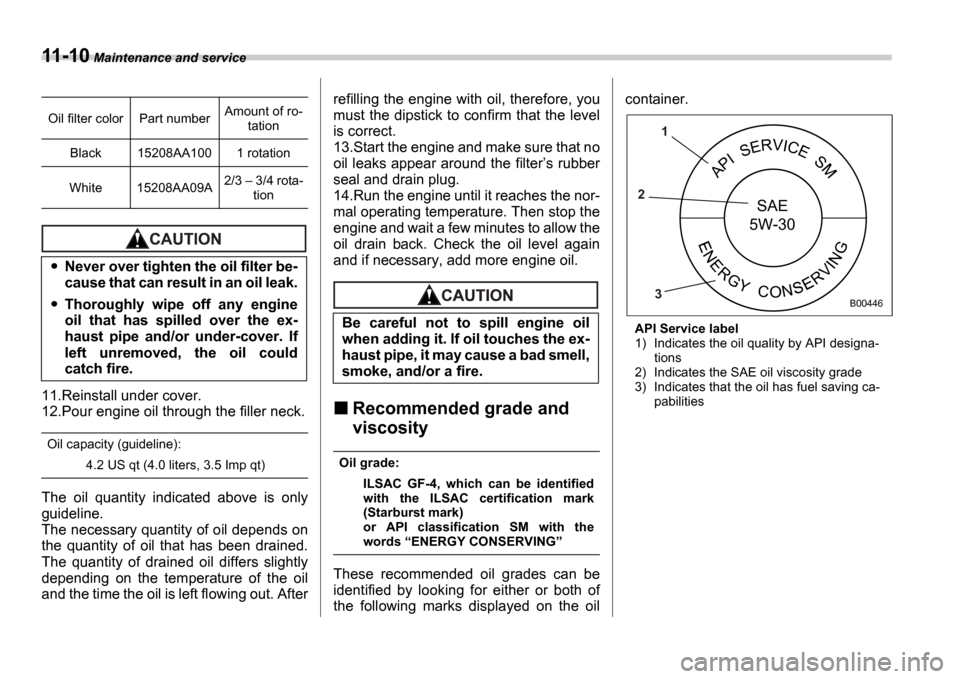
These recommended oil grades can be
identified by looking for either or both of
the following marks displayed on the oil container.
API Service label
1) Indicates the oil quality by API designa-
tions
2) Indicates the SAE oil viscosity grade
3) Indicates that the oil has fuel saving ca- pabilities
Oil filter color Part number
Amount of ro-
tation
Black 15208AA100 1 rotation
White 15208AA09A 2/3
3/4 rota-
tion
Never over tighten the oil filter be-
cause that can result in an oil leak.
Thoroughly wipe off any engine
oil that has spilled over the ex-
haust pipe and/or under-cover. If
left unremoved, the oil could
catch fire.
Be careful not to spill engine oil
when adding it. If oil touches the ex-
haust pipe, it may cause a bad smell,
smoke, and/or a fire.
APISERVICES
NERGYCONRVING
SAE
5W-30
1
2
3
B00446
Page 294 of 365
Maintenance and service 11-15
CONTINUED
en firmly. At this time, make sure that the
rubber gasket in the radiator cap is cor-
rectly in place.
8. Start and run the engine for more than
five minutes at 2,000 to 3,000 rpm.
9. Stop the engine and wait until the cool-
ant cools down (122 to 140
F [50 to
60 C]). If there is any loss of coolant, add
coolant to the radiator s filler neck and to
the reserve tank s FULL level.
10.Put the radiator cap and reservoir cap
back on and tighten firmly.
Air cleaner element
The air cleaner element functions as a fil-
ter screen. When the element is perforat-
ed or removed, engine wear will be exces-
sive and engine life shortened.
The air cleaner element is a viscous type.
It is unnecessary to clean or wash the ele-
ment.
Replacing the air cleaner ele-
ment
Replace the air cleaner element according
to the maintenance schedule in the War-
ranty and Maintenance Booklet . Under
extremely dusty conditions, replace it
more frequently. It is recommended that
you always use genuine SUBARU parts.
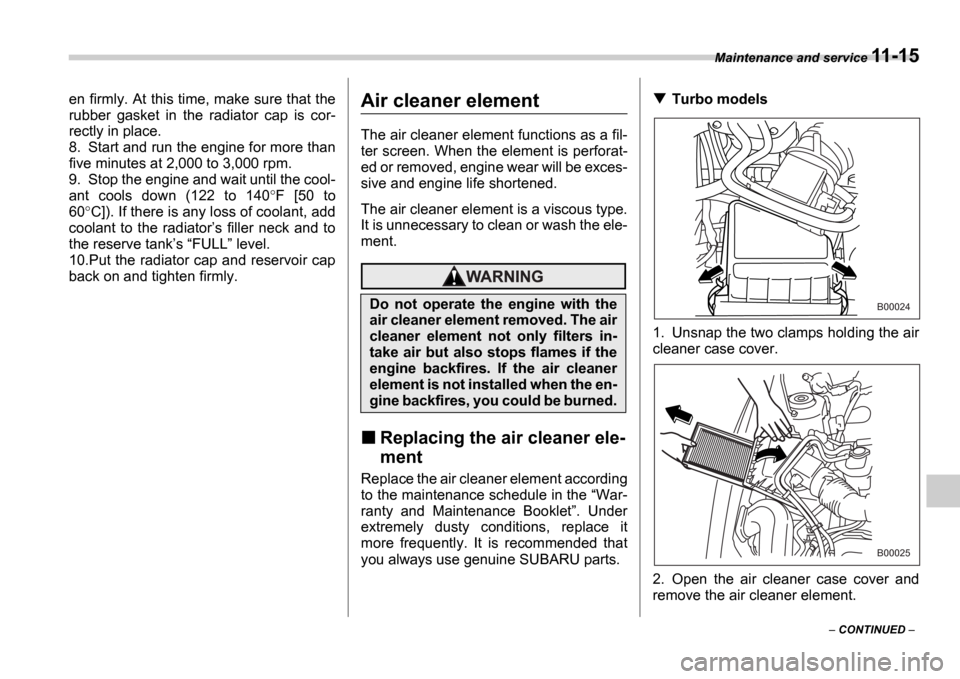
Turbo models
1. Unsnap the two clamps holding the air
cleaner case cover.
2. Open the air cleaner case cover and
remove the air cleaner element.
Do not operate the engine with the
air cleaner element removed. The air
cleaner element not only filters in-
take air but also stops flames if the
engine backfires. If the air cleaner
element is not installed when the en-
gine backfires, you could be burned.B00024
B00025