Page 292 of 365

Maintenance and service 11-13
CONTINUED
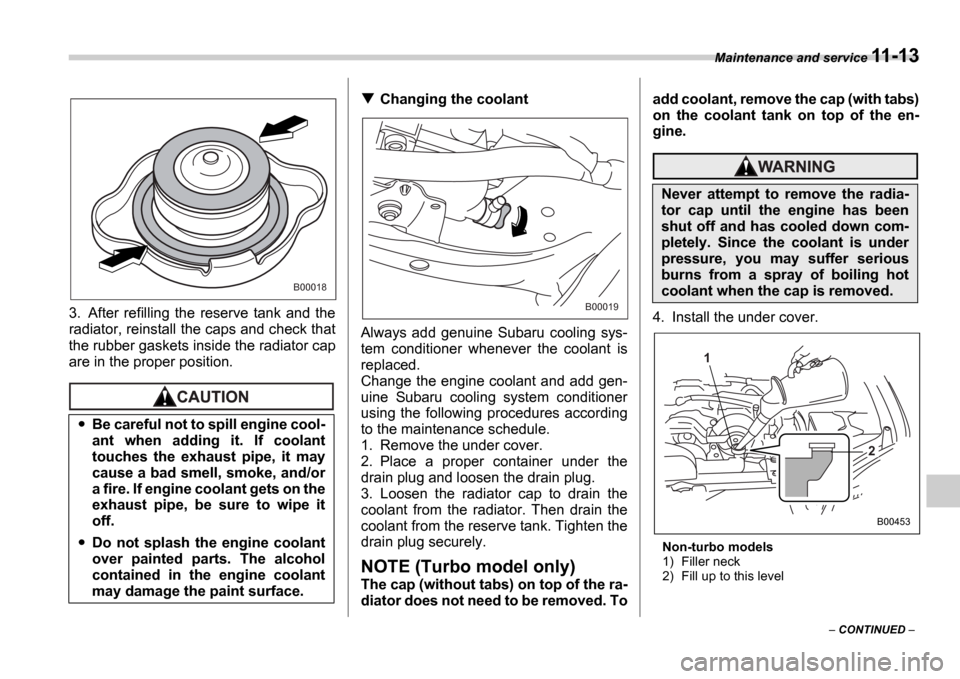
3. After refilling the reserve tank and the
radiator, reinstall the caps and check that
the rubber gaskets inside the radiator cap
are in the proper position.
Changing the coolant
Always add genuine Subaru cooling sys-
tem conditioner whenever the coolant is
replaced.
Change the engine coolant and add gen-
uine Subaru cooling system conditioner
using the following procedures according
to the maintenance schedule.
1. Remove the under cover.
2. Place a proper container under the
drain plug and loosen the drain plug.
3. Loosen the radiator cap to drain the
coolant from the radiator. Then drain the
coolant from the reserve tank. Tighten the
drain plug securely.
NOTE (Turbo model only)
The cap (without tabs) on top of the ra-
diator does not need to be removed. To add coolant, remove the cap (with tabs)
on the coolant tank on top of the en-
gine.
4. Install the under cover.
Non-turbo models
1) Filler neck
2) Fill up to this level
Be careful not to spill engine cool-
ant when adding it. If coolant
touches the exhaust pipe, it may
cause a bad smell, smoke, and/or
a fire. If engine coolant gets on the
exhaust pipe, be sure to wipe it
off.
Do not splash the engine coolant
over painted parts. The alcohol
contained in the engine coolant
may damage the paint surface.
B00018
B00019
Never attempt to remove the radia-
tor cap until the engine has been
shut off and has cooled down com-
pletely. Since the coolant is under
pressure, you may suffer serious
burns from a spray of boiling hot
coolant when the cap is removed.
1
2
B00453
Page 297 of 365
11-18 Maintenance and service
Drive belts
1) Power steering pump pulley
2) Air conditioner compressor pulley
3) Crank pulley
The alternator, power steering pump, and
air conditioner compressor depend on
drive belts. Satisfactory performance re-
quires that belt tension be correct.
To check belt tension, place a straight-
edge (ruler) across two adjacent pulleys
and apply a force of 22 lbs (98 N, 10 kg)
midway between the pulleys by using a
spring scale. Belt deflection should be the
amount specified. If a belt is loose,
cracked, or worn, contact your SUBARU
dealer.
in (mm)Manual transmission oil
Checking the oil level
5-speed transmission (Non-turbo model)
1) Yellow handle
A
B
2
3
1
B00365
Deflection
New belt Used belt
A 0.28
0.35
(7.0 9.0) 0.35
0.43
(9.0 11.0)
B 0.30
0.33
(7.5 8.5) 0.35
0.40
(9.0 10.0)
1
B00465
Page 298 of 365
Maintenance and service 11-19
5-speed transmission (Turbo model)
6-speed transmission
1. Park the vehicle on a level surface and
stop the engine. 2. Pull out the dipstick, wipe it clean, and
insert it again.
1) Upper level
2) Lower level
3. Pull out the dipstick again and check
the oil level on it. If it is below the lower
level, add oil through the dipstick hole to
bring the level up to the upper level.
Recommended grade and
viscosity
Each oil manufacturer has its own base
oils and additives. Never use different
brands together.
Oil grade:
API classification GL-5
SAE viscosity No. and applicable tem-
perature
B00469
B00470
Be careful not to spill manual trans-
mission oil when adding it. If oil
touches the exhaust pipe, it may
cause a bad smell, smoke, and/or a
fire. If oil gets on the exhaust pipe,
be sure to wipe it off.
L F
F
L1
2 1
2
B00368
-30 -20 -10 0 10 20 30 40-20 0 60 20
80W
75W/90 80 100
40
85W 90
B00032
Page 300 of 365

Maintenance and service 11-21
CONTINUED
Recommended fluid
Use one of the following types of automat-
ic transmission fluid.
Genuine Subaru Automatic Transmis-
sion Fluid Type-HP
IDEMITSU ATF HP
Castrol Transmax J
Pennzoil ATF-J*
* Available only in the USA (except
Alaska and Hawaii)
NOTE
Using any non-specified type of auto-
matic transmission fluid could result in
damage inside the transmission. When
replacing the automatic transmission
fluid, be sure to use a fluid of the types
specified above.
Front differential gear oil (AT
vehicles)
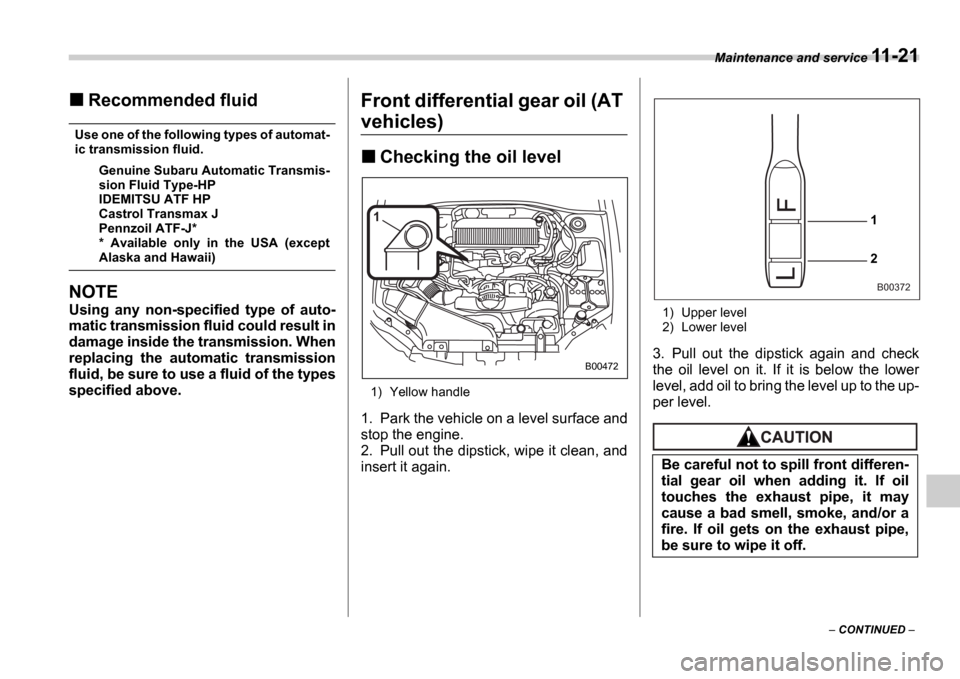
Checking the oil level
1) Yellow handle
1. Park the vehicle on a level surface and
stop the engine.
2. Pull out the dipstick, wipe it clean, and
insert it again.
1) Upper level
2) Lower level
3. Pull out the dipstick again and check
the oil level on it. If it is below the lower
level, add oil to bring the level up to the up-
per level.
1
B00472
Be careful not to spill front differen-
tial gear oil when adding it. If oil
touches the exhaust pipe, it may
cause a bad smell, smoke, and/or a
fire. If oil gets on the exhaust pipe,
be sure to wipe it off.
1 2
B00372
Page 301 of 365
11-22 Maintenance and service
Recommended grade and
viscosity
Each oil manufacturer has its own base
oils and additives. Never use different
brands together.
Oil grade:
API classification GL-5
SAE viscosity No. and applicable tem-
perature
Rear differential gear oil
Checking the gear oil level
Your vehicle may be equipped with a rear
differential protector. The differential pro-
tector provides protection to the rear dif-
ferential assembly during off-road use.
Removal of the rear differential protector
is not required when checking the oil level.
1) Filler plug
2) Drain plug 1) Filler hole
2) Drain hole
3) Oil level
Remove the plug from the filler hole and
check the oil level. The oil level should be
kept even with the bottom of the filler hole.
If the oil level is below the bottom edge of
the hole, add oil through the filler hole to
raise the level.
-30 -20 -10 0 10 20 30 40
-20 0 60 20
80W
75W/90 80 100
40
85W 90
B00032
2 1B00373
3
1
2
B00434
Page 302 of 365
Maintenance and service 11-23
Recommended grade and
viscosity
Each oil manufacturer has its own base
oils and additives. Never use different
brands together.
Oil grade:
API classification GL-5 SAE viscosity No. and applicable tem-
perature
Except STI version
SAE viscosity No. and applicable tem-
perature
STI version
Be careful not to spill rear differ-
ential gear oil when adding it. If
rear differential gear oil touches
the exhaust pipe, it may cause a
bad smell, smoke, and/or a fire. If
rear differential gear oil gets on
the exhaust pipe, be sure to wipe
it off.
If the vehicle requires frequent re-
filling, there may be an oil leak. If
you suspect a problem, have the
vehicle checked at your SUBARU
dealer.
-30 -20 -10 0 10 20 30 40
-20 0 60 20
80W
75W/90 80 100
40
85W 90
B00032
-30 -20 -10 0 10 20 30 40
-20 0 60 20 80 10040
90
B00159
Page 303 of 365

11-24 Maintenance and service
Power steering fluid
Checking the fluid level
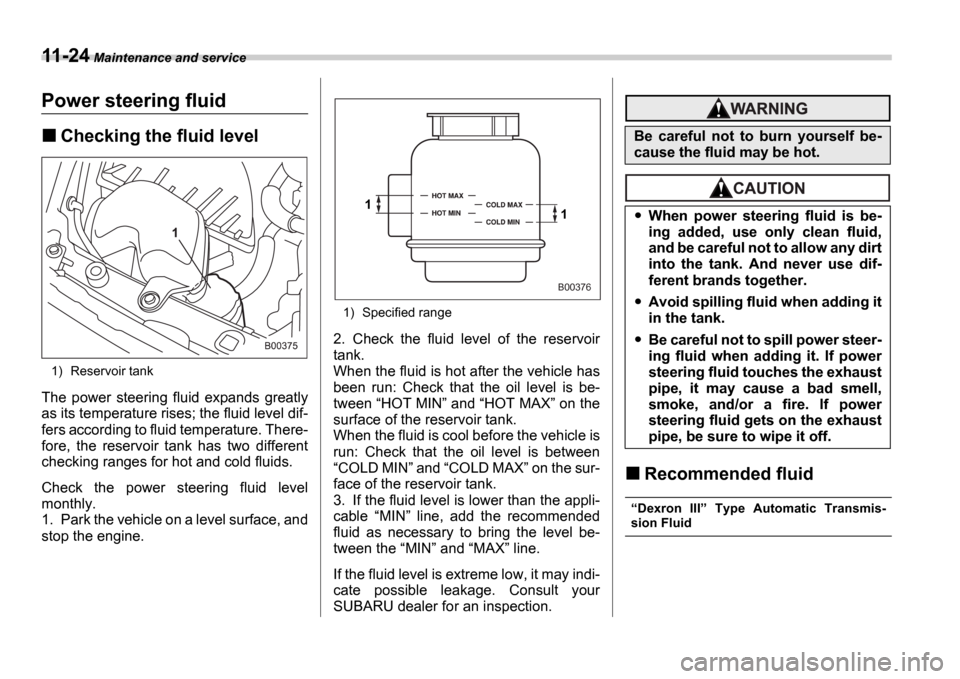
1) Reservoir tank
The power steering fluid expands greatly
as its temperature rises; the fluid level dif-
fers according to fluid temperature. There-
fore, the reservoir tank has two different
checking ranges for hot and cold fluids.
Check the power steering fluid level
monthly.
1. Park the vehicle on a level surface, and
stop the engine.
1) Specified range
2. Check the fluid level of the reservoir
tank.
When the fluid is hot after the vehicle has
been run: Check that the oil level is be-
tween HOT MIN and HOT MAX on the
surface of the reservoir tank.
When the fluid is cool before the vehicle is
run: Check that the oil level is between COLD MIN and COLD MAX on the sur-
face of the reservoir tank.
3. If the fluid level is lower than the appli-
cable MIN line, add the recommended
fluid as necessary to bring the level be-
tween the MIN and MAX line.
If the fluid level is extreme low, it may indi-
cate possible leakage. Consult your
SUBARU dealer for an inspection.
Recommended fluid
Dexron III Type Automatic Transmis-
sion Fluid
1
1
B00376
Be careful not to burn yourself be-
cause the fluid may be hot.
When power steering fluid is be-
ing added, use only clean fluid,
and be careful not to allow any dirt
into the tank. And never use dif-
ferent brands together.
Avoid spilling fluid when adding it
in the tank.
Be careful not to spill power steer-
ing fluid when adding it. If power
steering fluid touches the exhaust
pipe, it may cause a bad smell,
smoke, and/or a fire. If power
steering fluid gets on the exhaust
pipe, be sure to wipe it off.
Page 314 of 365

Maintenance and service 11-35
Aluminum wheels
Aluminum wheels can be scratched and
damaged easily. Handle them carefully to
maintain their appearance, performance,
and safety.
When any of the wheels is removed and
replaced for tire rotation or to change a
flat, always check the tightness of the
wheel nuts after driving approximately 600
miles (1,000 km). If any nut is loose, tight-
en it to the specified torque.
Never apply oil to the threaded parts,
wheel nuts, or tapered surface of the
wheel.
Never let the wheel rub against sharp
protrusions or curbs.
Be sure to fit tire chains on uniformly
and completely around the tire, otherwise
the chains may scratch the wheel.
When wheel nuts, balance weights, or
the center cap is replaced, be sure to re-
place them with genuine SUBARU parts
designed for aluminum wheels.
Intercooler water spray
(WRX-STI)
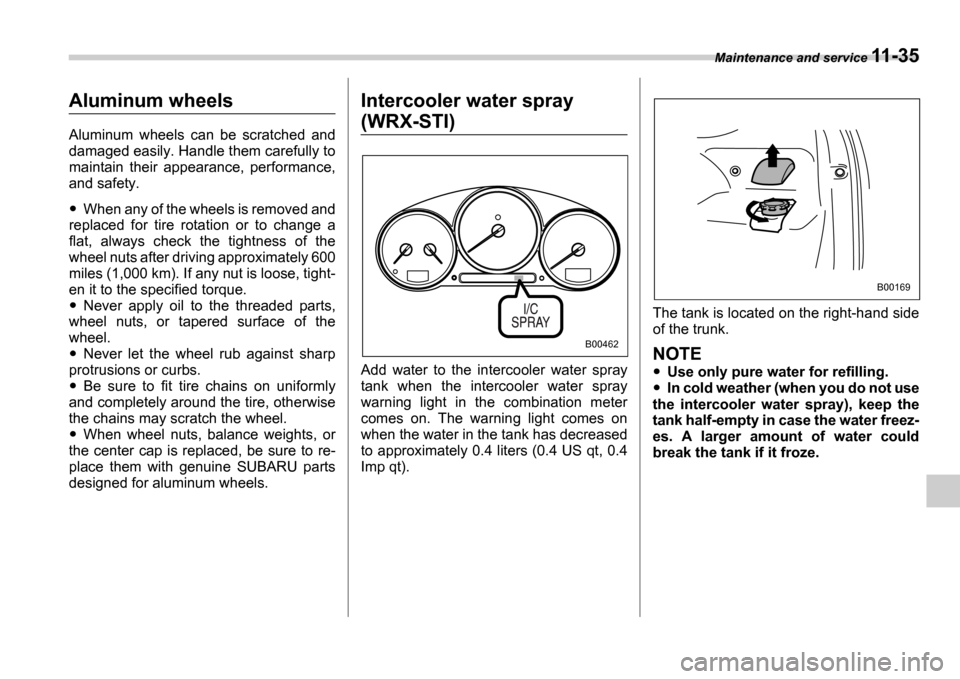
Add water to the intercooler water spray
tank when the intercooler water spray
warning light in the combination meter
comes on. The warning light comes on
when the water in the tank has decreased
to approximately 0.4 liters (0.4 US qt, 0.4
Imp qt). The tank is located on the right-hand side
of the trunk.
NOTE
Use only pure water for refilling.
In cold weather (when you do not use
the intercooler water spray), keep the
tank half-empty in case the water freez-
es. A larger amount of water could
break the tank if it froze.
B00462
B00169