2006 PONTIAC GRAND PRIX trunk
[x] Cancel search: trunkPage 15 of 472
Rear Seats
Split Folding Rear Seat
If your vehicle has this feature, both sides of the rear
seatback can be folded down. This gives direct access
to the trunk. Make sure the front seats are not
reclined. If they are, the rear seatback(s) may not fold
down all the way.
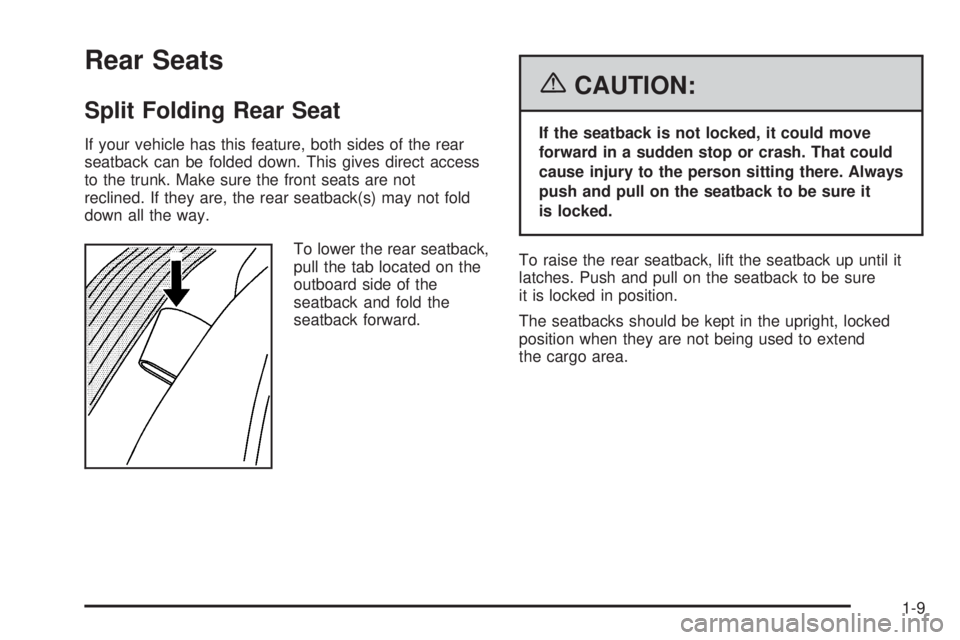
To lower the rear seatback,
pull the tab located on the
outboard side of the
seatback and fold the
seatback forward.
{CAUTION:
If the seatback is not locked, it could move
forward in a sudden stop or crash. That could
cause injury to the person sitting there. Always
push and pull on the seatback to be sure it
is locked.
To raise the rear seatback, lift the seatback up until it
latches. Push and pull on the seatback to be sure
it is locked in position.
The seatbacks should be kept in the upright, locked
position when they are not being used to extend
the cargo area.
1-9
Page 75 of 472

Keys...............................................................2-2
Remote Keyless Entry System.........................2-3
Remote Keyless Entry System Operation...........2-4
Doors and Locks............................................2-10
Door Locks..................................................2-10
Power Door Locks........................................2-11
Delayed Locking...........................................2-11
Programmable Automatic Door Locks..............2-12
Rear Door Security Locks..............................2-12
Lockout Protection........................................2-13
Trunk..........................................................2-13
Windows........................................................2-15
Power Windows............................................2-16
Sun Visors...................................................2-17
Theft-Deterrent Systems..................................2-17
Content Theft-Deterrent.................................2-17
PASS-Key
®III ..............................................2-19
PASS-Key®III Operation...............................2-20
Starting and Operating Your Vehicle................2-21
New Vehicle Break-In....................................2-21
Ignition Positions..........................................2-22
Retained Accessory Power (RAP)...................2-22
Starting the Engine.......................................2-23
Engine Coolant Heater..................................2-24Displacement on Demand™ (DoD™)
(5.3L Engine)............................................2-25
Automatic Transaxle Operation.......................2-25
Parking Brake..............................................2-30
Shifting Into Park (P).....................................2-31
Shifting Out of Park (P).................................2-32
Parking Over Things That Burn.......................2-33
Engine Exhaust............................................2-33
Running the Engine While Parked...................2-34
Mirrors...........................................................2-35
Manual Rearview Mirror with OnStar
®..............2-35
Automatic Dimming Rearview Mirror with
Compass and Temperature Display..............2-35
Outside Power Mirrors...................................2-37
Outside Convex Mirror...................................2-38
OnStar
®System.............................................2-38
Storage Areas................................................2-40
Glove Box...................................................2-40
Cupholder(s)................................................2-41
Overhead Console........................................2-42
Front Seat Storage Net.................................2-42
Center Console Storage Area.........................2-42
Assist Handles.............................................2-42
Convenience Net..........................................2-43
Sunroof.........................................................2-43
Section 2 Features and Controls
2-1
Page 78 of 472
This device complies with RSS-210 of Industry Canada.
Operation is subject to the following two conditions:
1. This device may not cause interference.
2. This device must accept any interference received,
including interference that may cause undesired
operation of the device.
Changes or modi�cations to this system by other than
an authorized service facility could void authorization to
use this equipment.
At times you may notice a decrease in range. This is
normal for any remote keyless entry system. If the
transmitter does not work or if you have to stand closer
to your vehicle for the transmitter to work, try this:
Check the distance. You may be too far from your
vehicle. You may need to stand closer during
rainy or snowy weather.
Check the location. Other vehicles or objects may
be blocking the signal. Take a few steps to the
left or right, hold the transmitter higher, and
try again.
Check to determine if battery replacement is
necessary. See “Battery Replacement” under
Remote Keyless Entry System Operation on
page 2-4.
If you are still having trouble, see your dealer or a
quali�ed technician for service.
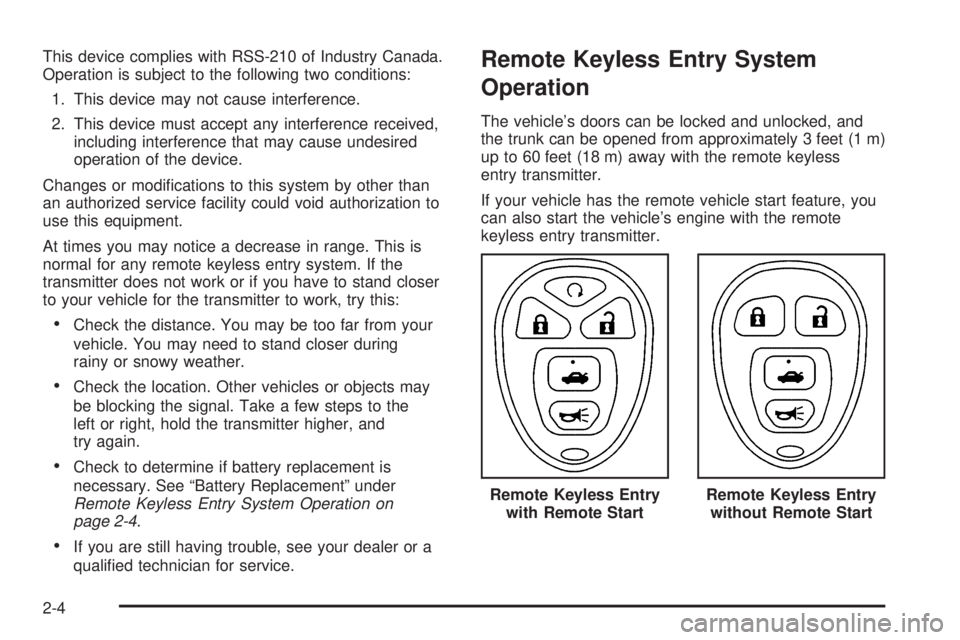
Remote Keyless Entry System
Operation
The vehicle’s doors can be locked and unlocked, and
the trunk can be opened from approximately 3 feet (1 m)
up to 60 feet (18 m) away with the remote keyless
entry transmitter.
If your vehicle has the remote vehicle start feature, you
can also start the vehicle’s engine with the remote
keyless entry transmitter.
Remote Keyless Entry
with Remote Start
Remote Keyless Entry
without Remote Start
2-4
Page 79 of 472

The following functions may be available with your
vehicle’s remote keyless entry system:
/(Remote Vehicle Start):If your vehicle has this
feature, the engine may be started from outside
the vehicle using the remote keyless entry transmitter.
See “Remote Vehicle Start” later in this section for more
detailed information.
Q(Lock):Press the lock button to lock all the doors.
If enabled through the Driver Information Center
(DIC), the parking lamps may �ash once and the horn
may chirp once to indicate locking has occurred.
See “REMOTE LOCKS FEEDBACK” underDIC Controls
and Displays (Base Level DIC) on page 3-52orDIC
Controls and Displays (Uplevel DIC with Trip Computer)
on page 3-60for programming information. Pressing
the lock button will arm the content theft-deterrent
system. SeeContent Theft-Deterrent on page 2-17for
more information.
"(Unlock):Press the unlock button one time to unlock
the driver’s door. Press the unlock button again within
�ve seconds to unlock the other doors. The interior
lamps will come on and stay on for 20 seconds or until
the ignition is turned on. If enabled through the DIC,
the parking lamps may �ash once and the horn
may chirp once to indicate unlocking has occurred. See
“REMOTE LOCKS FEEDBACK” underDIC Controls
and Displays (Base Level DIC) on page 3-52or
DIC Controls and Displays (Uplevel DIC with Trip
Computer) on page 3-60. Pressing the unlock button on
the remote keyless entry transmitter will disarm the
content theft-deterrent system. SeeContent
Theft-Deterrent on page 2-17for more details.
V(Trunk Release):Press this button to release the
trunk lid. The transaxle must be in PARK (P) for this
feature to operate.
L(Panic Alarm):Press this button to activate the
alarm. The ignition must be in OFF for the remote alarm
to work. When the remote alarm button is pressed
the headlamps will �ash and the horn will sound
repeatedly for two minutes. The alarm will turn off when
the ignition is moved to RUN or the remote alarm
button is pressed again.
2-5
Page 87 of 472
When you want to open a rear door when the security
lock is on, do the following:
1. Unlock the door using the remote keyless entry
transmitter, if equipped, the power door lock
switch, or by lifting the rear door manual lock.
2. Open the door from the outside.
To cancel the rear door security lock, do the following:
1. Unlock the door and open it from the outside.
2. Insert the key into the security lock slot and turn it
so the slot is in the vertical position.
Lockout Protection
The lockout protection feature makes it more difficult to
lock the key in the vehicle. If the driver’s door is
open while the key is in the ignition, the door cannot be
locked with the power door lock switch.
This feature cannot guarantee that you will never be
locked out of the vehicle. If the key is not left in
the ignition, or, if the manual door lock pin is used, the
key could still be locked inside the vehicle. Always
remember to take the key with you.
Trunk
{CAUTION:
It can be dangerous to drive with the trunk lid
open because carbon monoxide (CO) gas can
come into your vehicle. You cannot see or
smell CO. It can cause unconsciousness and
even death. If you must drive with the trunk lid
open or if electrical wiring or other cable
connections must pass through the seal
between the body and the trunk lid:
Make sure all other windows are shut.
Turn the fan on your heating or cooling
system to its highest speed and select the
control setting that will force outside air
into your vehicle. See Climate Control
System.
If you have air outlets on or under the
instrument panel, open them all the way.
SeeEngine Exhaust on page 2-33.
To unlock and open the trunk from the outside, press the
trunk button on the remote keyless entry transmitter. See
Remote Keyless Entry System Operation on page 2-4.
2-13
Page 88 of 472
To open the trunk from the inside, use the power door
lock switch located on the driver’s or front passenger’s
door. See “Remote Trunk Release” following.
The vehicle must be in PARK (P) in order for the trunk
to open.
If the vehicle has lost power, you can open the trunk by
lowering the rear seat and pulling the emergency
trunk release handle located in the trunk. SeeSplit
Folding Rear Seat on page 1-9and “Emergency Trunk
Release Handle” following.
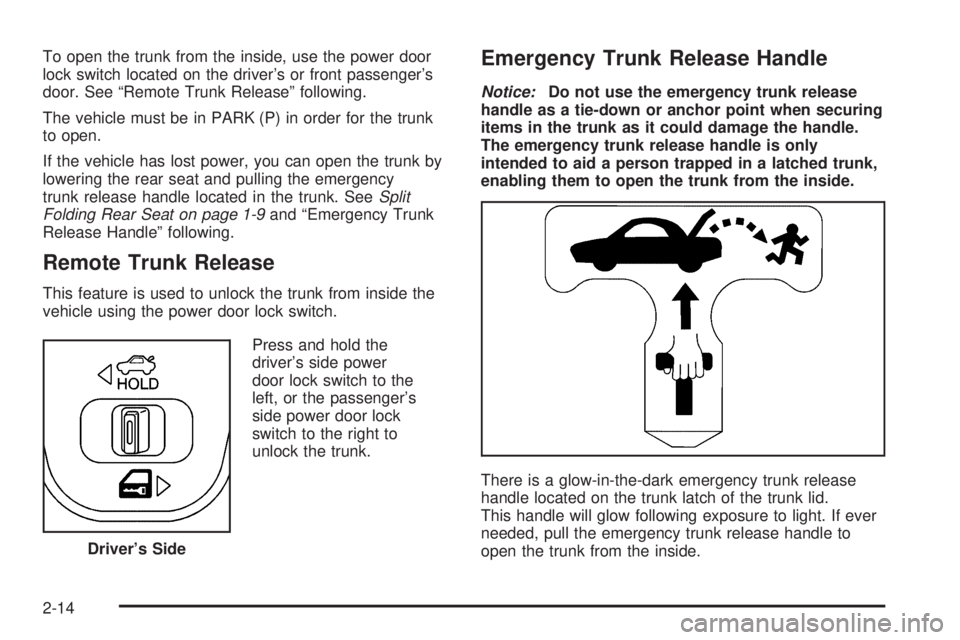
Remote Trunk Release
This feature is used to unlock the trunk from inside the
vehicle using the power door lock switch.
Press and hold the
driver’s side power
door lock switch to the
left, or the passenger’s
side power door lock
switch to the right to
unlock the trunk.
Emergency Trunk Release Handle
Notice:Do not use the emergency trunk release
handle as a tie-down or anchor point when securing
items in the trunk as it could damage the handle.
The emergency trunk release handle is only
intended to aid a person trapped in a latched trunk,
enabling them to open the trunk from the inside.
There is a glow-in-the-dark emergency trunk release
handle located on the trunk latch of the trunk lid.
This handle will glow following exposure to light. If ever
needed, pull the emergency trunk release handle to
open the trunk from the inside. Driver’s Side
2-14
Page 91 of 472

Sun Visors
To help block out glare, pull the sun visors down. Pull
on the inside edges of the sun visors to swing them from
the front windshield to the side window.
Visor Vanity Mirror
Raise the cover on the top of the sun visor to expose
the vanity mirror. If the vehicle has lighted vanity mirrors,
the lamps come on when the cover is opened.
Theft-Deterrent Systems
Vehicle theft is big business, especially in some cities.
Although your vehicle has a number of theft-deterrent
features, we know that nothing we put on it can make it
impossible to steal.
Content Theft-Deterrent
The vehicle has a content theft-deterrent alarm system.
A red light located on top
of the instrument panel,
toward the center of
the vehicle and near
the windshield, will �ash
slowly when the system
is armed.
The theft-deterrent alarm system needs to be activated
through the Driver’s Information Center (DIC). See “Theft
Deterrent” under the Personal Programming Mode
Screens inDIC Controls and Displays (Base Level DIC)
on page 3-52orDIC Controls and Displays (Uplevel DIC
with Trip Computer) on page 3-60. While armed, the
doors will not unlock with the power door lock switch. The
remote alarm will sound if someone tampers with the
trunk or enters the vehicle without using the remote
keyless entry transmitter or key to unlock the doors. The
horn will sound and the headlamps will �ash for up to
two minutes. The system will also cut off the fuel supply,
preventing the vehicle from being driven.
2-17
Page 117 of 472
Convenience Net
The vehicle may have a convenience net located on the
back wall of the trunk.
Put small loads, like grocery bags, behind the net. It can
help keep them from falling over.
The net is not for larger, heavier loads. Store those in
the trunk as far forward as possible.
Unhook the net so that it will lie �at when not in use.
Sunroof
If the vehicle has a sunroof, it includes a sliding glass
panel and a sunshade.
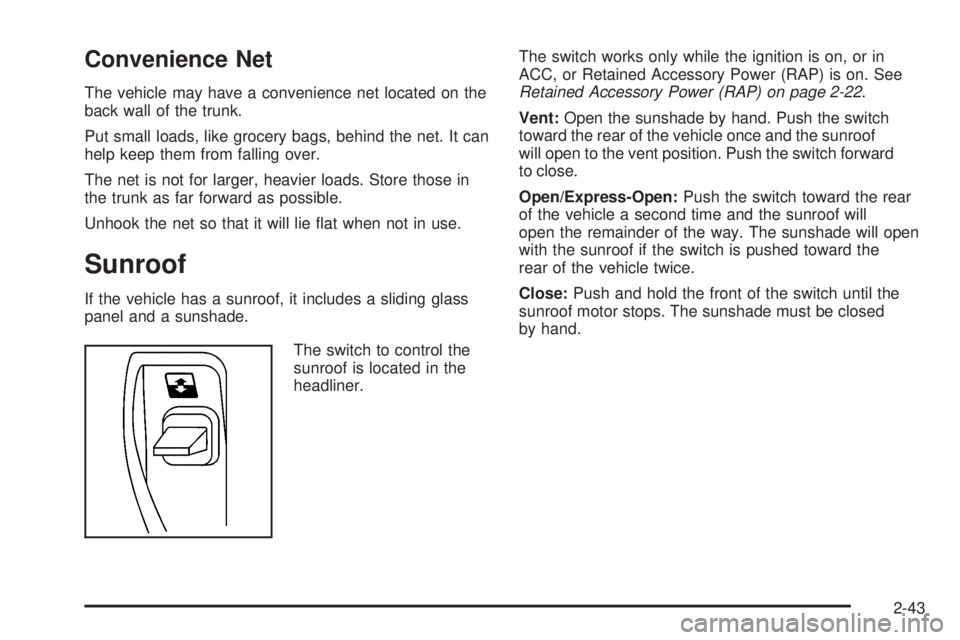
The switch to control the
sunroof is located in the
headliner.The switch works only while the ignition is on, or in
ACC, or Retained Accessory Power (RAP) is on. See
Retained Accessory Power (RAP) on page 2-22.
Vent:Open the sunshade by hand. Push the switch
toward the rear of the vehicle once and the sunroof
will open to the vent position. Push the switch forward
to close.
Open/Express-Open:Push the switch toward the rear
of the vehicle a second time and the sunroof will
open the remainder of the way. The sunshade will open
with the sunroof if the switch is pushed toward the
rear of the vehicle twice.
Close:Push and hold the front of the switch until the
sunroof motor stops. The sunshade must be closed
by hand.
2-43