2006 PONTIAC GRAND PRIX dic controls
[x] Cancel search: dic controlsPage 149 of 472

9(Off):Turning the fan knob off will turn the
controller completely off. Only the rear window defogger
and heated seats will function when the fan knob is off.
Air Flow:This control has several settings to control
the direction of air�ow.
To change the current mode, select one of the following:
AUTO:This mode is automatically set depending on
the temperature in the vehicle and solar sensor
information.
H(Vent):This mode directs air to the instrument
panel outlets.
%(Bi-Level):This mode directs air�ow to the
instrument panel outlets and to the �oor outlets. A small
amount of air is also directed to the windshield and
the side window outlets.
6(Floor):This mode directs most of the air to the
�oor outlets with some air directed to the side window
outlets, and a little air directed to the windshield.
#(Air Conditioning):Press this button to turn
the air conditioning compressor on or off. The indicator
light on the button will come on when the air
conditioning is on.The indicator light on the air condition button will light
every time the vehicle is started. The air conditioner may
be turned off by pressing the air conditioner button.
?(Recirculation):Press this button to turn the
recirculation mode on or off. This mode keeps outside air
from coming in the vehicle. It can be used to prevent
outside air and odors from entering your vehicle or to help
cool the air inside your vehicle more quickly.
Recirculation is not available in defrost or �oor/defog
mode. Pressing the recirculation button will turn on the
indicator light.
Using recirculation for long periods of time may cause the
air inside your vehicle to become too dry. To prevent this
from happening, after the air in your vehicle has cooled,
turn the recirculation mode off.
z(Heated Seats):Press this button to turn the
heated seats on and off. The button on the left controls
the driver’s seat and the button on the right controls
the passenger’s seat. SeeHeated Seats on page 1-3for
additional information.
3-31
Page 155 of 472

The vehicle is equipped with this cluster or one very
similar to it. It has indicator warning lights that are
explained on the following pages. Be sure to read
about them.
Speedometer and Odometer
The speedometer shows the vehicle’s speed in both
miles per hour (mph) and kilometers per hour (km/h).
The odometer, located on the Driver Information Center
(DIC) display, shows how far the vehicle has been
driven, in either miles or kilometers. SeeDIC Controls
and Displays (Base Level DIC) on page 3-52orDIC
Controls and Displays (Uplevel DIC with Trip Computer)
on page 3-60for more information.
If the vehicle has the Head-Up Display (HUD) the speed
will also be displayed on the HUD screen.
If a vehicle has to have a new odometer installed, a
new one can be set to the mileage total of the old
odometer, if that can be done. If it cannot, than it will be
set at zero and a label must be put on the driver’s
door to show the old mileage reading when the new
odometer was installed.
Trip Odometer
The trip odometer, located in the Driver Information
Center (DIC), tells how far the vehicle has driven since it
was last reset. The miles (kilometers) for two different
trips can be viewed. SeeDIC Controls and Displays
(Base Level DIC) on page 3-52orDIC Controls and
Displays (Uplevel DIC with Trip Computer) on page 3-60
for more information on setting the trip odometer.
Tachometer
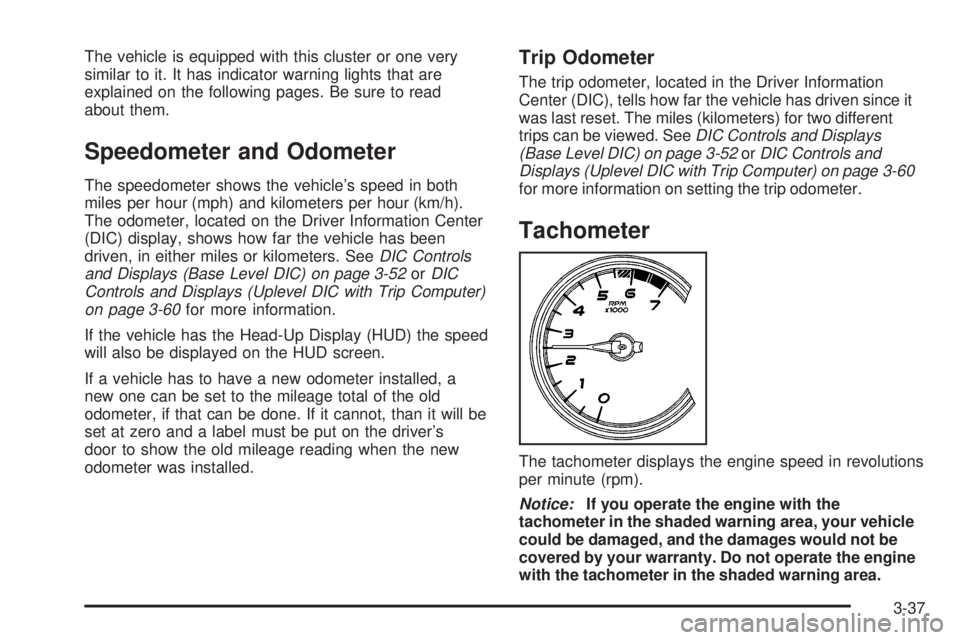
The tachometer displays the engine speed in revolutions
per minute (rpm).
Notice:If you operate the engine with the
tachometer in the shaded warning area, your vehicle
could be damaged, and the damages would not be
covered by your warranty. Do not operate the engine
with the tachometer in the shaded warning area.
3-37
Page 165 of 472

Malfunction Indicator Lamp
Check Engine Light
Your vehicle is equipped
with a computer which
monitors operation of the
fuel, ignition, and emission
control systems.
This system is called OBD II (On-Board
Diagnostics-Second Generation) and is intended to
assure that emissions are at acceptable levels for the
life of the vehicle, helping to produce a cleaner
environment. The check engine light comes on to
indicate that there is a problem and service is required.
Malfunctions often will be indicated by the system
before any problem is apparent. This may prevent more
serious damage to your vehicle. This system is also
designed to assist your service technician in correctly
diagnosing any malfunction.
Notice:If you keep driving your vehicle with this
light on, after awhile, your emission controls
may not work as well, your fuel economy may not
be as good, and your engine may not run as
smoothly. This could lead to costly repairs that may
not be covered by your warranty.Notice:Modi�cations made to the engine,
transaxle, exhaust, intake, or fuel system of your
vehicle or the replacement of the original tires with
other than those of the same Tire Performance
Criteria (TPC) can affect your vehicle’s emission
controls and may cause this light to come on.
Modi�cations to these systems could lead to costly
repairs not covered by your warranty. This may
also result in a failure to pass a required Emission
Inspection/Maintenance test. SeeAccessories
and Modifications on page 5-3.
This light should come on, as a check to show you it is
working, when the ignition is on and the engine is
not running. If the light does not come on, have it
repaired. This light will also come on during a
malfunction in one of two ways:
Light Flashing— A mis�re condition has been
detected. A mis�re increases vehicle emissions
and may damage the emission control system on
your vehicle. Diagnosis and service may be
required.
Light On Steady— An emission control system
malfunction has been detected on your vehicle.
Diagnosis and service may be required.
3-47
Page 170 of 472

Driver Information Center (DIC)
The Driver Information Center (DIC) gives important
safety and maintenance facts. When the vehicle’s
ignition is turned on, all of the DIC lights illuminate for a
few seconds and an introductory message will appear.
After this, the DIC will begin working.
DIC Controls and Displays
(Base Level DIC)
The Driver Information Center (DIC) control buttons and
the message display screen are located above the radio.
The DIC gives important safety and maintenance facts
concerning the vehicle. The status of many of the
vehicle’s systems along with driver personal
programming mode menus and warning messages about
the vehicle’s systems may display on the DIC screen.
The vehicle’s transaxle position will also appear.
The buttons on the base level are trip odometer,
set/reset, and options.
Trip Odometer
3(Trip Odometer):Press this button to access the
odometer and trip distance modes.
The �rst menu on the DIC screen will be the odometer
reading, or cumulative mileage of the vehicle. The
odometer cannot be reset.
Press the trip odometer button to advance to the
next menu.
Trip Distances:This menu shows the distances that
the vehicle has driven between speci�c points. The trip
odometer will record the number of miles up to
9,999.9 miles or 9 999.9 km travelled for up to two trips.
When 9,999.9 miles or 9 999.9 km is reached for either
trip, the odometer for that trip will go back to zero.
Press the trip odometer button again to access TRIP A.
Press the trip odometer button again to access TRIP B.
To reset the trip odometer(s) back to zero miles or
kilometers, access the trip to reset and press the set/
reset button.
The trip odometer has a feature called the retro-active
reset. This can be used to set the trip odometer to the
number of miles or kilometers driven since the ignition
was last turned on. This can be used if the trip odometer
was not reset at the beginning of the trip.
3-52
Page 178 of 472

DIC Controls and Displays (Uplevel
DIC with Trip Computer)
The Driver Information Center (DIC) control buttons and
the message display screen are located above the
radio. The DIC gives important safety and maintenance
facts concerning the vehicle. The status of many of
the vehicle’s systems along with driver personalization
menus and warning messages about the vehicle’s
systems may display on the DIC screen.
The outside temperature automatically appears on the
bottom right corner of the DIC display screen. If the
outside temperature is below 38°F (3°C), the temperature
reading will toggle between displaying the outside
temperature and the word ICE for two minutes. If there is
a problem with the system that controls the temperature
display, the letters OC (Open Circuit) or SC (Short
Circuit) will appear on the display. If this occurs, have the
vehicle serviced by
your GM dealer.
The vehicle’s transaxle position and the direction the
vehicle is traveling will also appear on the DIC screen.The compass is self-calibrating, which eliminates the
need to manually set the compass. However, under
certain circumstances, such as during a long distance
cross-country trip, it will be necessary to compensate for
compass variance and reset the zone through the
DIC. See “Setting the Compass” later in this section for
more information.
The buttons on the DIC trip computer are gages, trip
odometer, set/reset, options, and fuel.
Gages
2(Gages):Press this button to access the OIL LIFE
REMAINING, TRANSMISSION FLUID TEMPERATURE,
BATTERY, ENGINE HOURS, ENGINE BOOST, and
MAXIMUM Gs modes.
3-60
Page 190 of 472

DIC Warnings and Messages
These messages will appear if there is a problem in
one of the vehicle’s systems. They will override
any other mode or screen the Driver Information
Center (DIC) may be in.
Some messages can be cleared from the DIC screen.
In order to do this the message must be acknowledged.
To acknowledge or clear the message from the
screen, press the set/reset button on the DIC. SeeDIC
Controls and Displays (Base Level DIC) on page 3-52
orDIC Controls and Displays (Uplevel DIC with
Trip Computer) on page 3-60for DIC button
descriptions.
Other warning messages are not allowed to be cleared
until the problem indicated by the warning message
is taken care of. When the problem indicated by
the message is resolved, it can be acknowledged and
the screen can be reset.
Be sure to take any message that appears on the DIC
screen seriously and remember that clearing the
messages that are able to be acknowledged, will only
make the message disappear, not the problem.
A/C OFF FOR ENGINE PROTECTION
This warning message comes on when the engine
coolant becomes hotter than the normal operating
temperature. To avoid added strain on a hot engine, the
air conditioning compressor is automatically turned
off. When the coolant temperature returns to normal, the
air conditioning compressor will turn back on. The
vehicle can then continue to be driven.
This message comes on while the ignition is in RUN. A
chime will sound for two seconds when this message
is displayed. Press the set/reset button to acknowledge
this warning message and to clear it from the screen.
This message will continue to display for three seconds
if it has not been acknowledged when the engine is
turned off. It will also re-display for three seconds if the
message has been acknowledged, but the condition
still exists when the engine is turned off.
If the condition still exists, the message will re-appear
when the engine is turned on.
3-72
Page 192 of 472

The CHANGE OIL SOON message is reset by
acknowledging the message. The ENGINE OIL
MONITOR SYSTEM screen under the options menu on
the DIC must also be reset. See “Engine Oil Monitor
System” in options underDIC Controls and Displays
(Base Level DIC) on page 3-52orDIC Controls
and Displays (Uplevel DIC with Trip Computer) on
page 3-60for more information.
This message will display while the ignition is in RUN.
Press the set/reset button to acknowledge this message
and to clear it from the screen.
This message will continue to display for three seconds
if it has not been acknowledged when the engine is
turned off. It will also re-display for three seconds if the
message has been acknowledged, but the condition
still exists when the engine is turned off.
If the condition still exists, the message will re-appear
when the engine is turned on.CHARGING SYSTEM FAILURE
This symbol comes on
with the CHARGING
SYSTEM FAILURE
warning message.
This warning message indicates that there is a problem
with the generator and battery charging systems.
Have the electrical system checked by your GM dealer
as soon as possible.
This message will display while the ignition is in RUN. A
chime will sound for two seconds when this message
is displayed. Press the set/reset button to acknowledge
this message and to clear it from the screen.
This message will continue to display if it has not been
acknowledged when the engine is turned off. It will
also re-display for three seconds if the message has
been acknowledged, but the condition still exists
when the engine is turned off.
If the condition still exists, the message will re-appear
when the engine is turned on.
3-74
Page 193 of 472

CHECK GAS CAP
This warning message comes on when the gas cap is
not on, or is not fully tightened. Check the gas cap
to ensure it is on and properly tightened. The diagnostic
system can determine if the fuel cap has been left off
or improperly installed. A loose or missing fuel cap
will allow fuel to evaporate into the atmosphere. A few
driving trips with the cap properly installed should
turn this message off. SeeFilling the Tank on page 5-7
for more information.
This message will display while the ignition is in RUN. A
chime will sound for two seconds when this message
is displayed and then the message continues to display.
Press the set/reset button to acknowledge this
message and to clear it from the screen.
This message will continue to display for three seconds
if it has not been acknowledged when the engine is
turned off. It will also re-display for three seconds if the
message has been acknowledged, but the condition
still exists when the engine is turned off.
If the condition still exists, the message will re-appear
when the engine is turned on.
CHECK TIRE PRESSURE
This symbol comes
on with the CHECK
TIRE PRESSURE
warning message.
If the vehicle has ABS brakes, this warning message
will appear when the air pressure in one of the tires
is too low or too high. Check the vehicle’s tire pressure
as soon as possible, and �ll or de�ate the affected
tire to the appropriate level. The correct tire in�ation
pressure should be set to those shown on the
tire-loading information label on the vehicle. See
Loading Your Vehicle on page 4-33for more information.
The CHECK TIRE PRESSURE screen is reset when
it is acknowledged. However, the TIRE INFLATION
MONITOR SYSTEM screen, located under the option
menu in the DIC, must also be reset. See “Tire In�ation
Monitor System” in the options section underDIC
Controls and Displays (Base Level DIC) on page 3-52
orDIC Controls and Displays (Uplevel DIC with Trip
Computer) on page 3-60for more information.
3-75