2006 NISSAN FRONTIER lights
[x] Cancel search: lightsPage 268 of 336
HEADLIGHTS
The headlight is a semi-sealed beam type which
uses a replaceable headlight (halogen) bulb. A
bulb can be replaced from inside the engine
compartment without removing the headlight as-
sembly.
CAUTION
cHigh pressure halogen gas is sealed
inside the halogen bulb. The bulb may
break if the glass envelope is scratched
or the bulb is dropped.
cWhen handling the bulb, do not touch
the glass envelope.
cDO NOT TOUCH THE BULB
cUse the same number and wattage as
originally installed:
Wattage 65/55Bulb No. HB5/9007*
*: Always check with the Parts Depart-
ment at a NISSAN dealer for the latest
parts information.
cDo not leave the bulb out of the head-
light reflector for a long period of time
as dust, moisture and smoke may enter
the headlight body and affect the per-
formance of the headlight.cAiming is not necessary after replacing
the bulb. When aiming adjustment is
necessary, contact a NISSAN dealer.
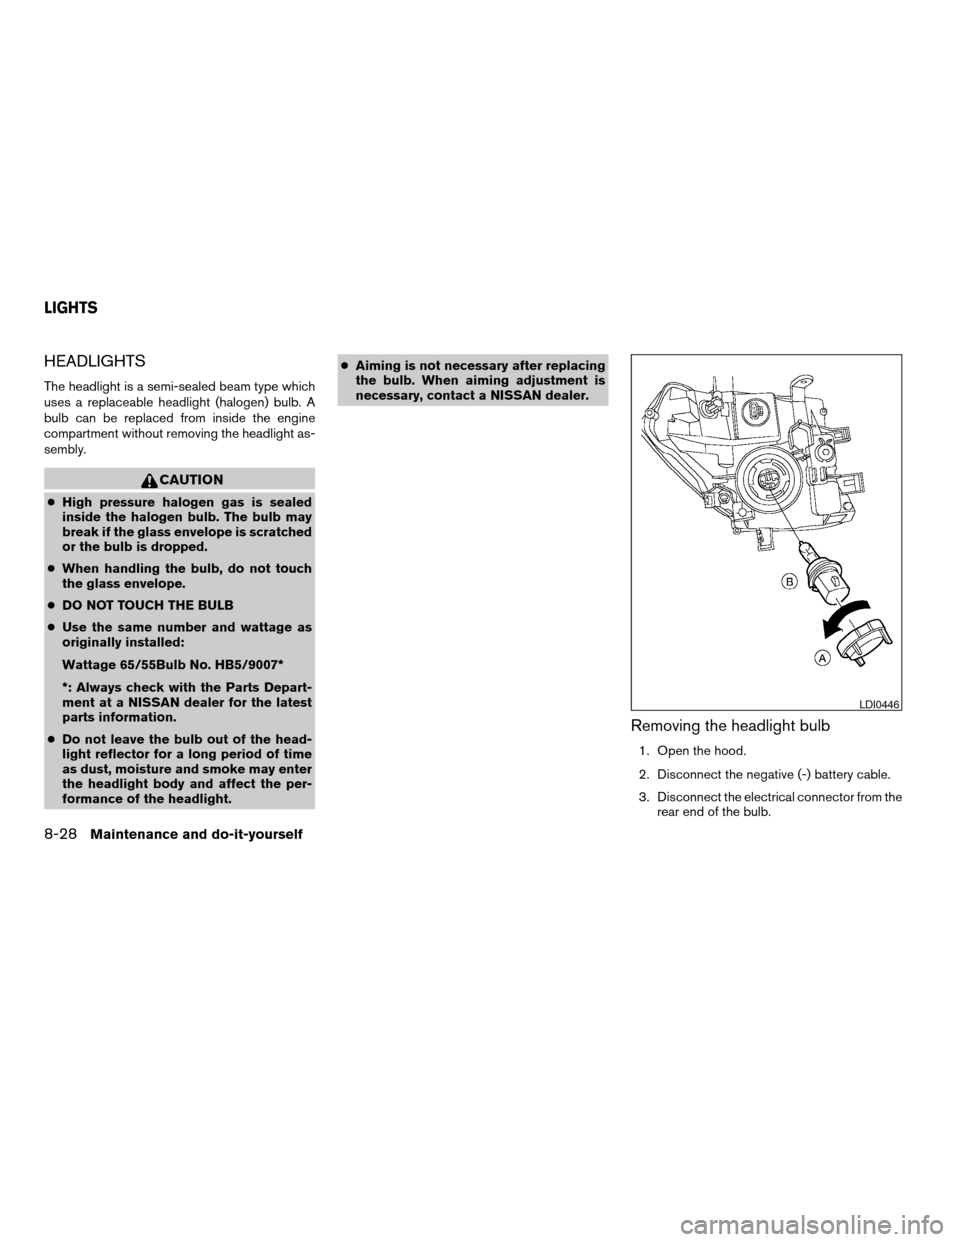
Removing the headlight bulb
1. Open the hood.
2. Disconnect the negative (-) battery cable.
3. Disconnect the electrical connector from the
rear end of the bulb.
LDI0446
LIGHTS
8-28Maintenance and do-it-yourself
ZREVIEW COPYÐ2006 Truck/Frontier(d22)
Owners ManualÐUSA_English(nna)
10/17/05Ðdebbie
X
Page 269 of 336

4. Turn the bulb retaining ring counterclock-
wise until it is free form the headlight reflec-
tor and then remove it
sA.
5. Carefully remove the headlight bulb. Do not
shake or rotate the bulb when removing it
sB.
Replacing the headlight bulb
1. Insert the bulb.
DO NOT TOUCH THE BULB.
2. Install and tighten the bulb retainer.
cBe sure the lip of the bulb socket con-
tacts the headlight body.
3. Push the electrical connector into the bulb
plastic base until it snaps and stops.
4. Connect the negative (-) battery cable.
5. Close the hood.
EXTERIOR AND INTERIOR LIGHTS
Item Wattage (W) Bulb No.*1
Headlight 65/55 9007 (HB5)
Turn signal light/Parking light 28/8 3457K
Side marker 3.8 194
Rear combination light
Turn signal 27 3156AK
Stop/Tail 27/8 3157K
Back-up 18 921
License plate light 5 2J6
Fog light*
2(if so equipped) 55 H11
Map lights/ personal lights 8 AL38
Room light 8 AL41
High-mounted stop light/cargo lights*
2——
*1Always check with the Parts Department at a NISSAN dealer for the latest parts information.
*2The bulb is not serviceable in-vehicle. See a NISSAN dealer for assistance.
Maintenance and do-it-yourself8-29
ZREVIEW COPYÐ2006 Truck/Frontier(d22)
Owners ManualÐUSA_English(nna)
10/17/05Ðdebbie
X
Page 270 of 336
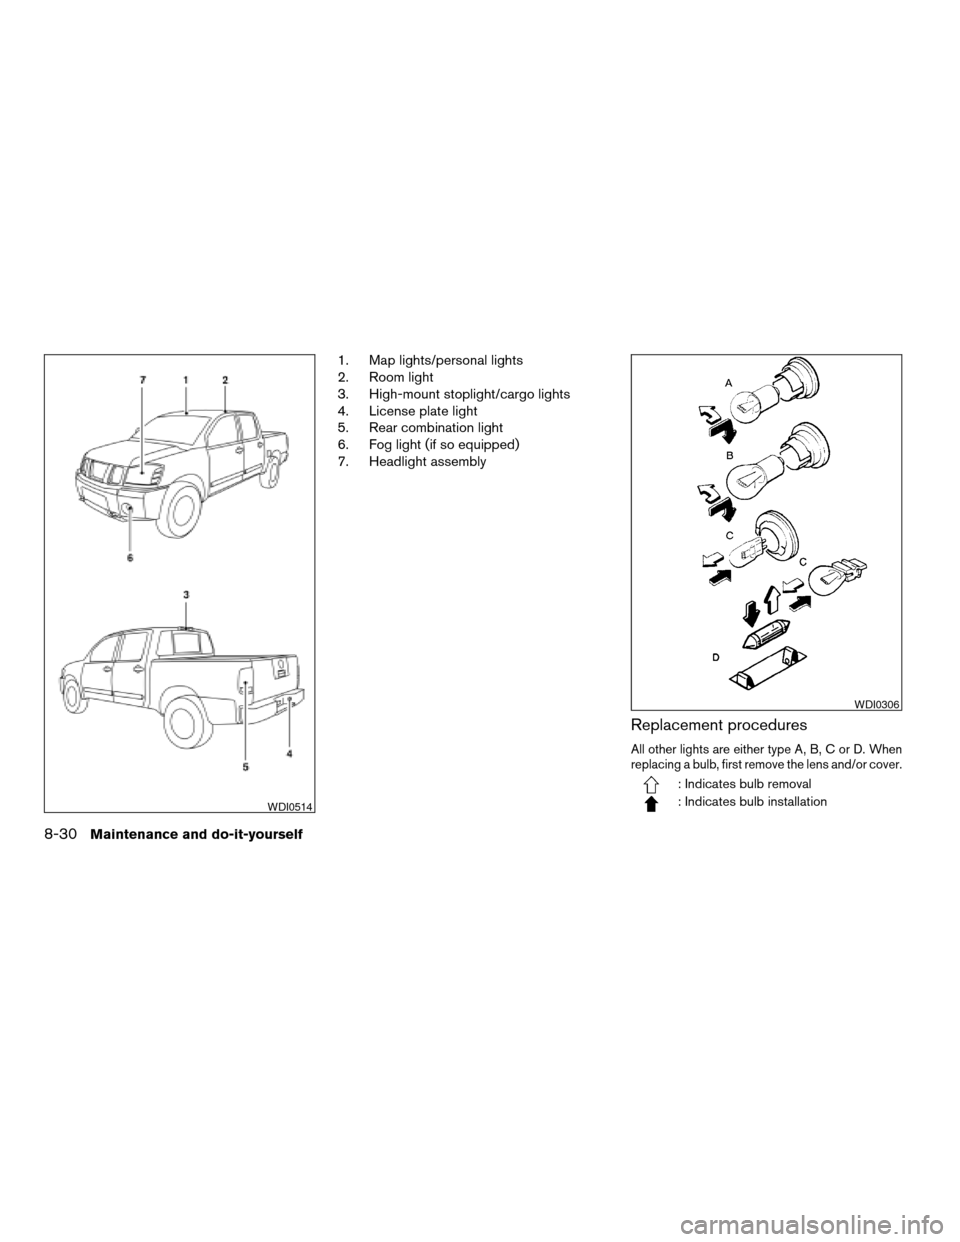
1. Map lights/personal lights
2. Room light
3. High-mount stoplight/cargo lights
4. License plate light
5. Rear combination light
6. Fog light (if so equipped)
7. Headlight assembly
Replacement procedures
All other lights are either type A, B, C or D. When
replacing a bulb, first remove the lens and/or cover.
: Indicates bulb removal
: Indicates bulb installationWDI0514
WDI0306
8-30Maintenance and do-it-yourself
ZREVIEW COPYÐ2006 Truck/Frontier(d22)
Owners ManualÐUSA_English(nna)
10/26/05Ðtbrooks
X
Page 271 of 336

Use a cloths1to protect the housing.
Map lights/personal lights
LDI0459
Room light
WDI0206
Rear combination light
WDI0300
Maintenance and do-it-yourself8-31
ZREVIEW COPYÐ2006 Truck/Frontier(d22)
Owners ManualÐUSA_English(nna)
10/17/05Ðdebbie
X
Page 317 of 336
Trailer lights
CAUTION
When splicing into the vehicle electrical
system, a commercially available power-
type module/converter must be used to
provide power for all trailer lighting. This
unit uses the vehicle battery as a direct
power source for all trailer lights while
using the vehicle tail light, stoplight and
turn signal circuits as a signal source. The
module/converter must draw no more
that 15 milliamps from the stop and tail
lamp circuits. Using a module/converter
that exceeds these power requirements
may damage the vehicle’s electrical sys-
tem. See a reputable trailer dealer to ob-
tain the proper equipment and to have it
installed.
Trailer lights should comply with federal and/or
local regulations. For assistance in hooking up
trailer lights, contact a NISSAN dealer or repu-
table trailer dealer. Vehicles equipped with the
optional trailer tow package are equipped with a
7-pin trailer harness connector. If your trailer is
equipped with a flat 4-pin connector, an adapter
will be needed to connect the trailer lights to the
vehicle. Adapters are available at NISSAN deal-
ers as well as auto parts stores and hitch retail-
ers.
Trailer brakes
If your trailer is equipped with a braking system,
make sure it conforms to federal and/or local
regulations and that it is properly installed.
WARNING
Never connect a trailer brake system di-
rectly to the vehicle brake system.
Pre-towing tips
cBe certain your vehicle maintains a level
position when a loaded and/or unloaded
trailer is hitched. Do not drive the vehicle if it
has an abnormal nose-up or nose-down
condition; check for improper tongue load,
overload, worn suspension or other possible
causes of either condition.
cAlways secure items in the trailer to prevent
load shift while driving.
cKeep the cargo load as low as possible in
the trailer to keep the trailer center of gravity
low.
cLoad the trailer so approximately 60% of the
trailer load is in the front half and 40% is in
the back half. Also make sure the load is
balanced side to side.cCheck your hitch, trailer tire pressure, ve-
hicle tire pressure, trailer light operation, and
trailer wheel lug nuts every time you attach a
trailer to the vehicle.
cBe certain your rearview mirrors conform to
all federal, state or local regulations. If not,
install any mirrors required for towing before
driving the vehicle.
cDetermine the overall height of the vehicle
and trailer so the required clearance is
known.
Trailer towing tips
In order to gain skill and an understanding of the
vehicle’s behavior, you should practice turning,
stopping and backing up in an area which is free
from traffic. Steering stability and braking perfor-
mance will be somewhat different than under
normal driving conditions.
cAlways secure items in the trailer to prevent
load shift while driving.
cLock the trailer hitch coupler with a pin or
lock to prevent the coupler from inadvert-
ently becoming unlatched.
cAvoid abrupt starts, acceleration or stops.
cAvoid sharp turns or lane changes.
Technical and consumer information9-33
ZREVIEW COPYÐ2006 Truck/Frontier(d22)
Owners ManualÐUSA_English(nna)
10/17/05Ðdebbie
X
Page 319 of 336
cCrosswinds and rough roads will adversely
affect vehicle/trailer handling, possibly caus-
ing vehicle sway. When being passed by
larger vehicles, be prepared for possible
changes in crosswinds that could affect ve-
hicle handling.
Do the following if the trailer begins to sway:
1.
Take your foot off the accelerator pedal to
allow the vehicle to coast and steer as
straight ahead as the road conditions allow.
This combination will help stabilize the vehicle
- Do not correct trailer sway by steering or
applying the brakes.
2. When the trailer sway stops, gently apply the
brakes and pull to the side of the road in a
safe area.
3. Try to rearrange the trailer load so it is bal-
anced as described earlier in this section.
cBe careful when passing other vehicles.
Passing while towing a trailer requires con-
siderably more distance than normal pass-
ing. Remember, the length of the trailer must
also pass the other vehicle before you can
safely change lanes.
cDown shift the transmission to a lower gear
for engine braking when driving down steep
or long hills. This will help slow the vehicle
without applying the brakes.cTo maintain engine braking efficiency and
electrical charging performance, do not use
overdrive.
cAvoid holding the brake pedal down too long
or too frequently. This could cause the
brakes to overheat, resulting in reduced
braking efficiency.
cIncrease your following distance to allow for
greater stopping distances while towing a
trailer. Anticipate stops and brake gradually
cDo not use cruise control while towing a
trailer.
cSome states or provinces have specific regu-
lations and speed limits for vehicles that are
towing trailers. Obey the local speed limits.
cCheck your hitch, trailer wiring harness con-
nections, and trailer wheel lug nuts after 50
miles (80 km) of travel and at every break.
cWhen stopped in traffic for long periods of
time in hot weather, put the vehicle in the P
(Park) position.
cWhen launching a boat, don’t allow the wa-
ter level to go over the exhaust tail pipe or
rear bumper.
cMake sure you disconnect the trailer lights
before backing the trailer into the water or
the trailer lights may burn out.When towing a trailer, final drive gear oil
should be replaced and transmission
oil/fluid should be changed more fre-
quently. For additional information, see the
“Maintenance and do-it-yourself” section
earlier in this manual.
FLAT TOWING
Towing your vehicle with all four wheels on the
ground is sometimes called flat towing. This
method is sometimes used when towing a vehicle
behind a recreational vehicle, such as a motor
home.
CAUTION
cFailure to follow these guidelines can
result in severe transmission damage.
cWhenever flat towing your vehicle, al-
ways tow forward, never backward.
cDO NOT tow any automatic transmis-
sion vehicle with all four wheels on the
ground (flat towing) . Doing so WILL
DAMAGE internal transmission parts
due to lack of transmission lubrication.
cFor emergency towing procedures refer
to “Towing recommended by NISSAN”
in the “In case of emergency” section of
this manual.
Technical and consumer information9-35
ZREVIEW COPYÐ2006 Truck/Frontier(d22)
Owners ManualÐUSA_English(nna)
10/17/05Ðdebbie
X
Page 327 of 336
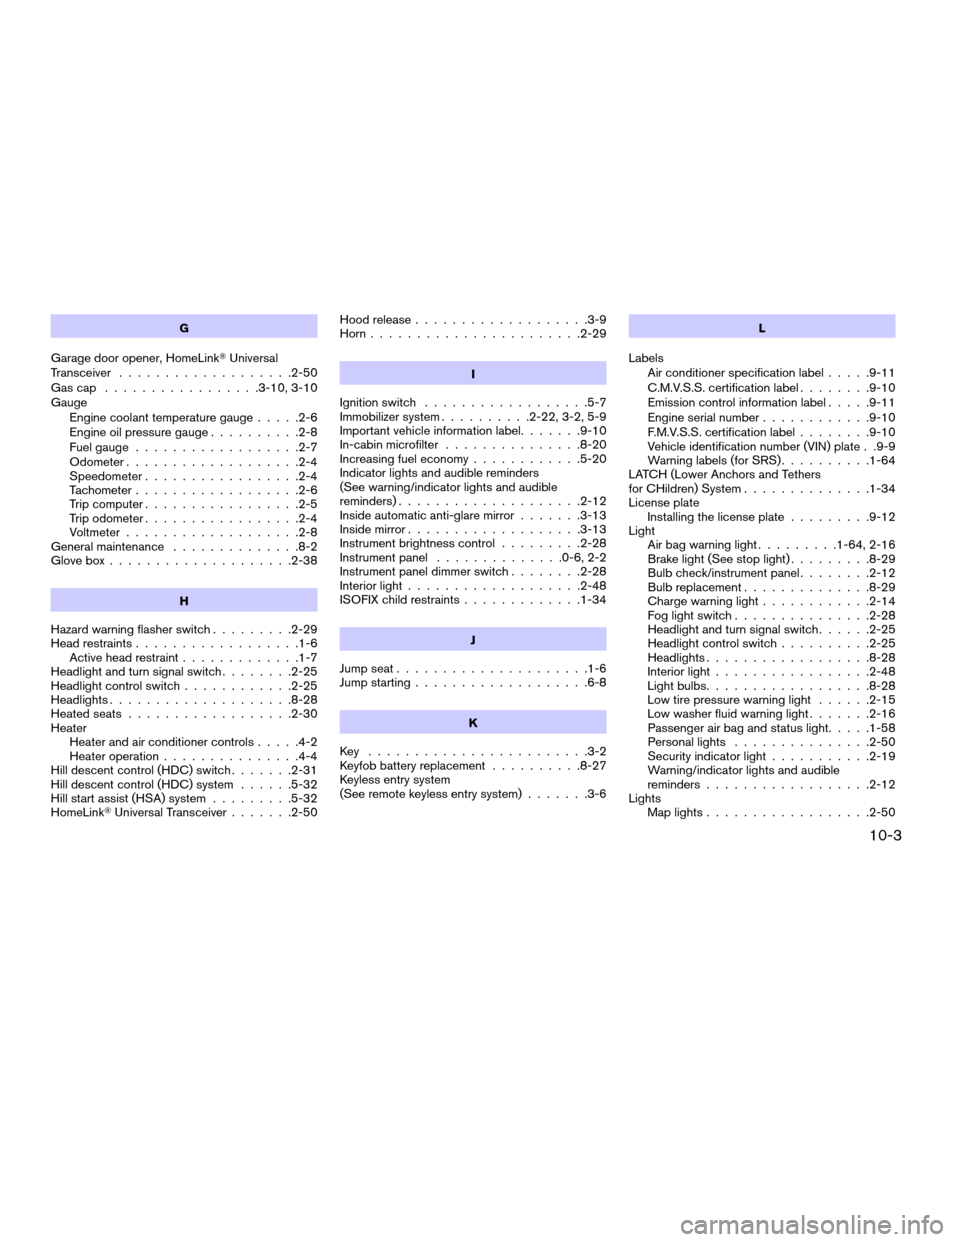
G
Garage door opener, HomeLinkTUniversal
Transceiver...................2-50
Gascap .................3-10, 3-10
Gauge
Engine coolant temperature gauge.....2-6
Engine oil pressure gauge..........2-8
Fuel gauge..................2-7
Odometer...................2-4
Speedometer.................2-4
Tachometer..................2-6
Trip computer.................2-5
Trip odometer.................2-4
Voltmeter...................2-8
General maintenance..............8-2
Glove box....................2-38
H
Hazard warning flasher switch.........2-29
Head restraints..................1-6
Active head restraint.............1-7
Headlight and turn signal switch........2-25
Headlight control switch............2-25
Headlights....................8-28
Heated seats..................2-30
Heater
Heater and air conditioner controls.....4-2
Heater operation...............4-4
Hill descent control (HDC) switch.......2-31
Hill descent control (HDC) system......5-32
Hill start assist (HSA) system.........5-32
HomeLinkTUniversal Transceiver.......2-50Hood release...................3-9
Horn.......................2-29
I
Ignition switch..................5-7
Immobilizer system..........2-22, 3-2, 5-9
Important vehicle information label.......9-10
In-cabin microfilter...............8-20
Increasing fuel economy............5-20
Indicator lights and audible reminders
(See warning/indicator lights and audible
reminders)....................2-12
Inside automatic anti-glare mirror.......3-13
Inside mirror...................3-13
Instrument brightness control.........2-28
Instrument panel..............0-6, 2-2
Instrument panel dimmer switch........2-28
Interior light...................2-48
ISOFIX child restraints.............1-34
J
Jump seat.....................1-6
Jump starting...................6-8
K
Key ........................3-2
Keyfob battery replacement..........8-27
Keyless entry system
(See remote keyless entry system).......3-6L
Labels
Air conditioner specification label.....9-11
C.M.V.S.S. certification label........9-10
Emission control information label.....9-11
Engine serial number............9-10
F.M.V.S.S. certification label........9-10
Vehicle identification number (VIN) plate . .9-9
Warning labels (for SRS)..........1-64
LATCH (Lower Anchors and Tethers
for CHildren) System..............1-34
License plate
Installing the license plate.........9-12
Light
Air bag warning light.........1-64, 2-16
Brake light (See stop light).........8-29
Bulb check/instrument panel........2-12
Bulb replacement..............8-29
Charge warning light............2-14
Fog light switch...............2-28
Headlight and turn signal switch......2-25
Headlight control switch..........2-25
Headlights..................8-28
Interior light.................2-48
Light bulbs..................8-28
Low tire pressure warning light......2-15
Low washer fluid warning light.......2-16
Passenger air bag and status light.....1-58
Personal lights...............2-50
Security indicator light...........2-19
Warning/indicator lights and audible
reminders..................2-12
Lights
Map lights..................2-50
10-3
ZREVIEW COPYÐ2006 Truck/Frontier(d22)
Owners ManualÐUSA_English(nna)
10/17/05Ðdebbie
X
Page 328 of 336
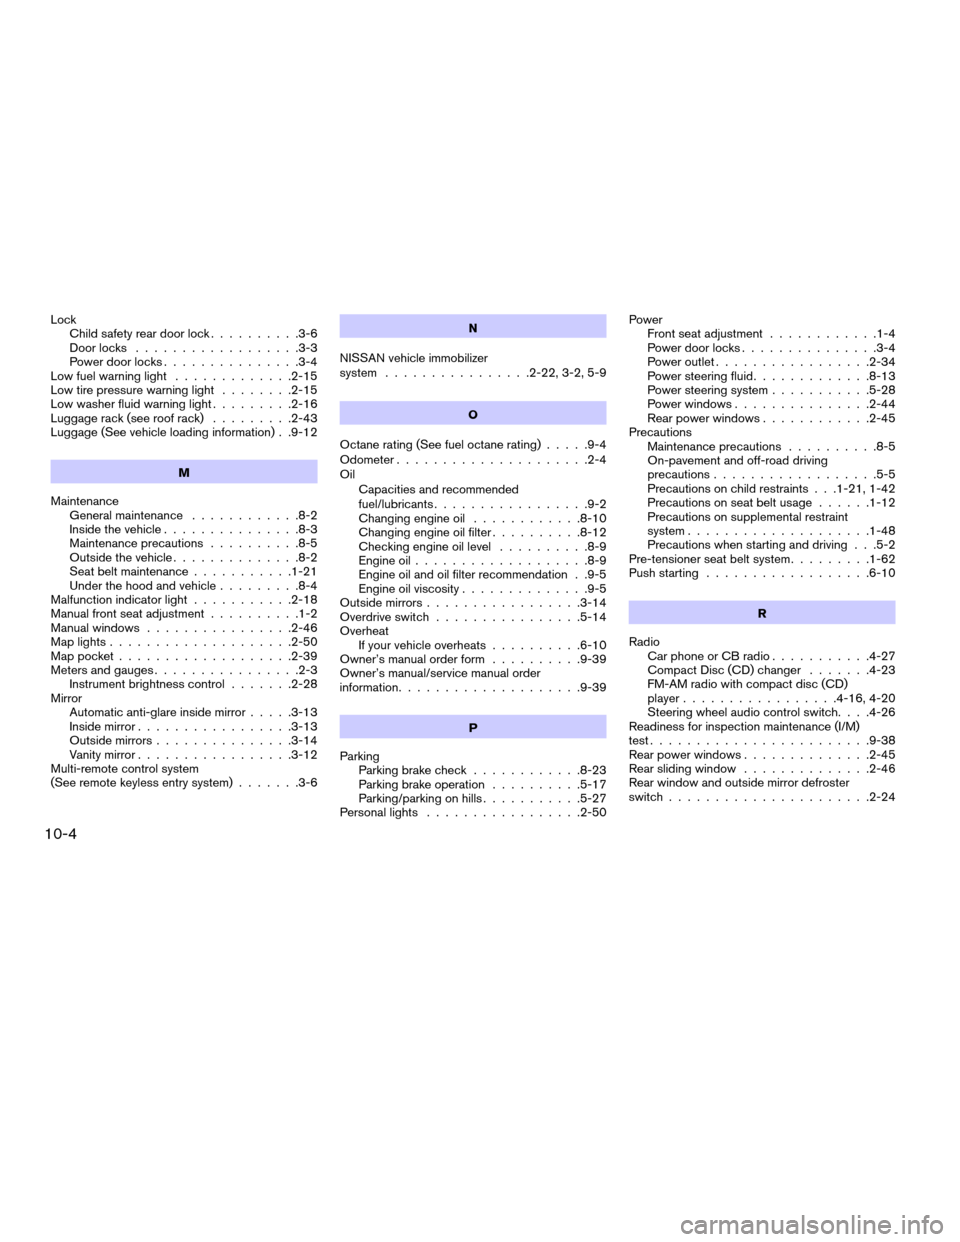
Lock
Child safety rear door lock..........3-6
Door locks..................3-3
Power door locks...............3-4
Low fuel warning light.............2-15
Low tire pressure warning light........2-15
Low washer fluid warning light.........2-16
Luggage rack (see roof rack).........2-43
Luggage (See vehicle loading information) . .9-12
M
Maintenance
General maintenance............8-2
Inside the vehicle...............8-3
Maintenance precautions..........8-5
Outside the vehicle..............8-2
Seat belt maintenance...........1-21
Under the hood and vehicle.........8-4
Malfunction indicator light...........2-18
Manual front seat adjustment..........1-2
Manual windows................2-46
Map lights....................2-50
Map pocket...................2-39
Meters and gauges................2-3
Instrument brightness control.......2-28
Mirror
Automatic anti-glare inside mirror.....3-13
Inside mirror.................3-13
Outside mirrors...............3-14
Vanity mirror.................3-12
Multi-remote control system
(See remote keyless entry system).......3-6N
NISSAN vehicle immobilizer
system................2-22, 3-2, 5-9
O
Octane rating (See fuel octane rating).....9-4
Odometer.....................2-4
Oil
Capacities and recommended
fuel/lubricants.................9-2
Changing engine oil............8-10
Changing engine oil filter..........8-12
Checking engine oil level..........8-9
Engine oil...................8-9
Engine oil and oil filter recommendation . .9-5
Engine oil viscosity..............9-5
Outside mirrors.................3-14
Overdrive switch................5-14
Overheat
If your vehicle overheats..........6-10
Owner’s manual order form..........9-39
Owner’s manual/service manual order
information....................9-39
P
Parking
Parking brake check............8-23
Parking brake operation..........5-17
Parking/parking on hills...........5-27
Personal lights.................2-50Power
Front seat adjustment............1-4
Power door locks...............3-4
Power outlet.................2-34
Power steering fluid.............8-13
Power steering system...........5-28
Power windows...............2-44
Rear power windows............2-45
Precautions
Maintenance precautions..........8-5
On-pavement and off-road driving
precautions..................5-5
Precautions on child restraints . . .1-21, 1-42
Precautions on seat belt usage......1-12
Precautions on supplemental restraint
system....................1-48
Precautions when starting and driving . . .5-2
Pre-tensioner seat belt system.........1-62
Push starting..................6-10
R
Radio
Car phone or CB radio...........4-27
Compact Disc (CD) changer.......4-23
FM-AM radio with compact disc (CD)
player.................4-16, 4-20
Steering wheel audio control switch. . . .4-26
Readiness for inspection maintenance (I/M)
test........................9-38
Rear power windows..............2-45
Rear sliding window..............2-46
Rear window and outside mirror defroster
switch......................2-24
10-4
ZREVIEW COPYÐ2006 Truck/Frontier(d22)
Owners ManualÐUSA_English(nna)
10/17/05Ðdebbie
X