2006 NISSAN FRONTIER radio
[x] Cancel search: radioPage 134 of 336

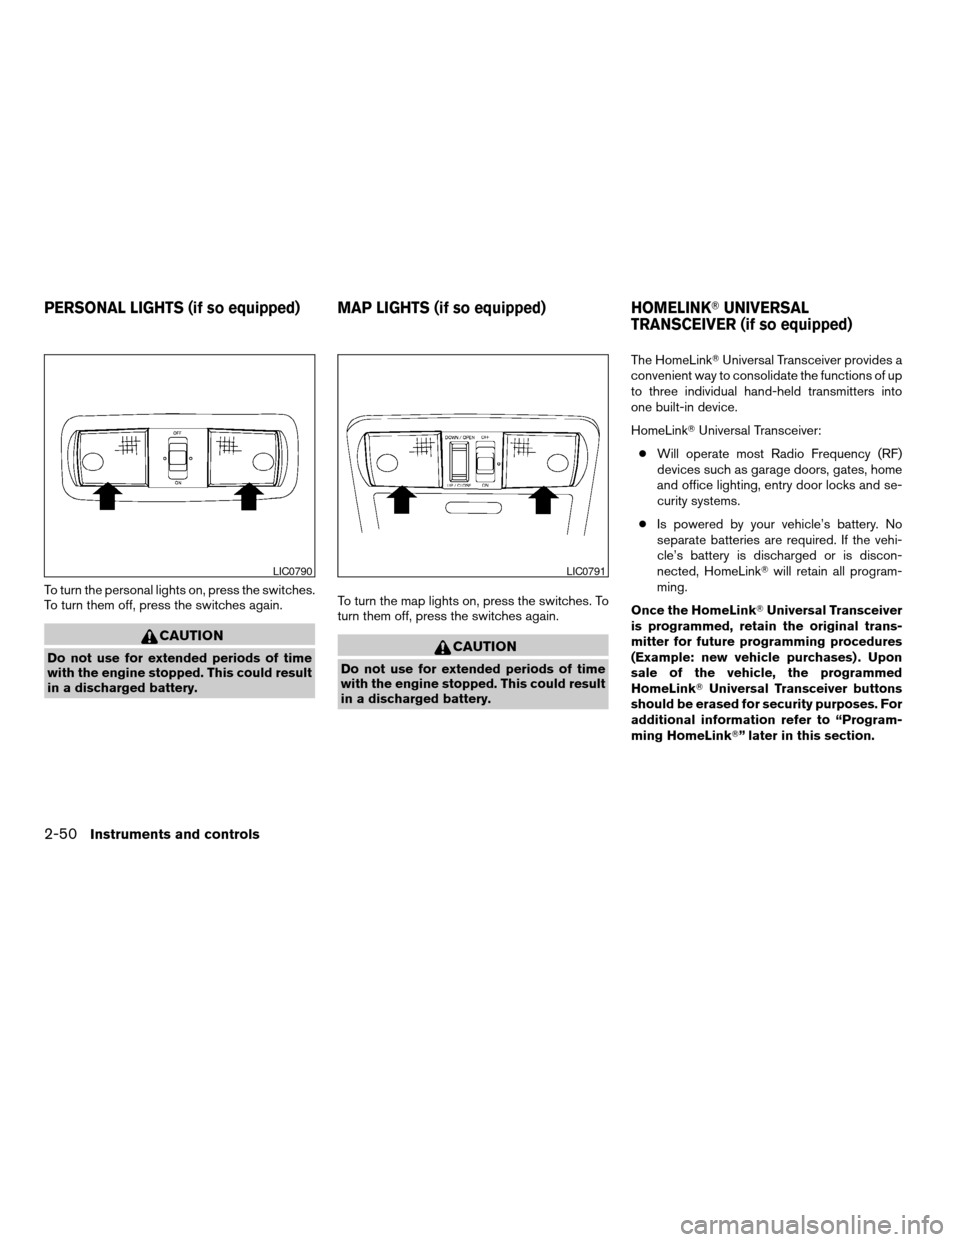
To turn the personal lights on, press the switches.
To turn them off, press the switches again.
CAUTION
Do not use for extended periods of time
with the engine stopped. This could result
in a discharged battery.To turn the map lights on, press the switches. To
turn them off, press the switches again.CAUTION
Do not use for extended periods of time
with the engine stopped. This could result
in a discharged battery.The HomeLinkTUniversal Transceiver provides a
convenient way to consolidate the functions of up
to three individual hand-held transmitters into
one built-in device.
HomeLinkTUniversal Transceiver:
cWill operate most Radio Frequency (RF)
devices such as garage doors, gates, home
and office lighting, entry door locks and se-
curity systems.
cIs powered by your vehicle’s battery. No
separate batteries are required. If the vehi-
cle’s battery is discharged or is discon-
nected, HomeLinkTwill retain all program-
ming.
Once the HomeLinkTUniversal Transceiver
is programmed, retain the original trans-
mitter for future programming procedures
(Example: new vehicle purchases) . Upon
sale of the vehicle, the programmed
HomeLinkTUniversal Transceiver buttons
should be erased for security purposes. For
additional information refer to “Program-
ming HomeLinkT” later in this section.
LIC0790LIC0791
PERSONAL LIGHTS (if so equipped) MAP LIGHTS (if so equipped) HOMELINKTUNIVERSAL
TRANSCEIVER (if so equipped)
2-50Instruments and controls
ZREVIEW COPYÐ2006 Truck/Frontier(d22)
Owners ManualÐUSA_English(nna)
10/17/05Ðdebbie
X
Page 157 of 336

4 Heater, air conditioner and audio
systems
Ventilators........................................4-2
Heater and air conditioner (manual)..................4-2
Controls.......................................4-3
Heater operation...............................4-4
Air conditioner operation (if so equipped).........4-5
Air flow charts..................................4-6
Servicing air conditioner............................4-9
Audio system....................................4-10
Radio........................................4-10
FM radio reception............................4-10
AM radio reception............................4-10Satellite radio reception (if so equipped).........4-10
Audio operation precautions....................4-11
FM-AM radio with compact disc (CD) player
(if so equipped)...............................4-16
FM-AM-SAT radio with compact disc (CD)
changer......................................4-20
CD care and cleaning..........................4-25
Steering wheel switch for audio control
(if so equipped)...............................4-26
Antenna......................................4-26
Car phone or CB radio............................4-27
ZREVIEW COPYÐ2006 Truck/Frontier(d22)
Owners ManualÐUSA_English(nna)
10/17/05Ðdebbie
X
Page 166 of 336

RADIO
Turn the ignition key to the ACC or ON position
and press the PWR (power)/VOL (volume) knob
to turn the radio on. If you listen to the radio with
the engine not running, the key should be turned
to the ACC position.
Radio reception is affected by station signal
strength, distance from radio transmitter, build-
ings, bridges, mountains and other external influ-
ences. Intermittent changes in reception quality
normally are caused by these external influences.
Using a cellular phone in or near the ve-
hicle may influence radio reception quality.
Radio reception
Your NISSAN radio system is equipped with
state-of-the-art electronic circuits to enhance ra-
dio reception. These circuits are designed to
extend reception range, and to enhance the qual-
ity of that reception.
However there are some general characteristics
of both FM and AM radio signals that can affect
radio reception quality in a moving vehicle, even
when the finest equipment is used. These char-
acteristics are completely normal in a given re-
ception area, and do not indicate any malfunction
in your NISSAN radio system.Reception conditions will constantly change be-
cause of vehicle movement. Buildings, terrain,
signal distance and interference from other ve-
hicles can work against ideal reception. De-
scribed below are some of the factors that can
affect your radio reception.
FM RADIO RECEPTION
Range: FM range is normally limited to 25 – 30
miles (40 – 48 km) , with monaural (single chan-
nel) FM having slightly more range than stereo
FM. External influences may sometimes interfere
with FM station reception even if the FM station is
within 25 miles (40 km) . The strength of the FM
signal is directly related to the distance between
the transmitter and receiver. FM signals follow a
line-of-sight path, exhibiting many of the same
characteristics as light. For example they will
reflect off objects.
Fade and drift: As your vehicle moves away from
a station transmitter, the signals will tend to fade
and/or drift.
Static and flutter: During signal interference from
buildings, large hills or due to antenna position
(usually in conjunction with increased distance
from the station transmitter) static or flutter can
be heard. This can be reduced by adjusting the
treble control to reduce treble response.Multipath reception: Because of the reflective
characteristics of FM signals, direct and reflected
signals reach the receiver at the same time. The
signals may cancel each other, resulting in mo-
mentary flutter or loss of sound.
AM RADIO RECEPTION
AM signals, because of their low frequency, can
bend around objects and skip along the ground.
In addition, the signals can be bounced off the
ionosphere and bent back to earth. Because of
these characteristics, AM signals are also sub-
ject to interference as they travel from transmitter
to receiver.
Fading: Occurs while the vehicle is passing
through freeway underpasses or in areas with
many tall buildings. It can also occur for several
seconds during ionospheric turbulence even in
areas where no obstacles exist.
Static: Caused by thunderstorms, electrical
power lines, electric signs and even traffic lights.
SATELLITE RADIO RECEPTION (if so
equipped)
When the satellite radio is first installed or the
battery has been replaced, the satellite radio may
not work properly. This is not a malfunction. Wait
more than 10 minutes with satellite radio ON and
AUDIO SYSTEM
4-10Heater, air conditioner and audio systems
ZREVIEW COPYÐ2006 Truck/Frontier(d22)
Owners ManualÐUSA_English(nna)
10/17/05Ðdebbie
X
Page 167 of 336

the vehicle outside of any metal or large building
for satellite radio to receive all of the necessary
data.
No satellite radio reception is available and “NO
SAT” is displayed when the SAT band option is
selected unless optional satellite receiver and
antenna are installed and an XMTor SIRIUS™
satellite radio service subscription is active. Sat-
ellite radio can only be installed in vehicles that
were factory pre-wired for satellite radio. Satellite
radio is not available in Alaska, Hawaii and Guam.
Satellite radio performance may be affected if
cargo carried on the roof blocks the satellite radio
signal.
If possible, do not put cargo over the satellite
antenna.
AUDIO OPERATION PRECAUTIONS
Compact disc (CD) player
cOnly use high quality 4.7 inches (12 cm)
round discs that have the “COMPACTdisc DIGITAL AUDIO” logo on the disc
or packaging.
cDuring cold weather or rainy days, the
player may malfunction due to the hu-
midity. If this occurs, remove the CD
and dehumidify or ventilate the player
completely.
cThe player may skip while driving on
rough roads.
cThe CD player sometimes cannot func-
tion when the compartment tempera-
ture is extremely high or low.
Decrease/increase the temperature
before use.
cDo not expose the CD to direct sun-
light.
cCDs that are in poor condition or are
dirty, scratched or covered with finger-
prints may not work properly.
cThe following CDs may not work prop-
erly:
cCopy control compact discs (CCCD)
cRecordable compact discs (CD-R)
cRewritable compact discs (CD-RW)
LHA0099
Heater, air conditioner and audio systems4-11
ZREVIEW COPYÐ2006 Truck/Frontier(d22)
Owners ManualÐUSA_English(nna)
10/17/05Ðdebbie
X
Page 172 of 336

1. PRESET ABC button
2. Display
3. CD button
4. CD eject button
5. CD insert slot
6. MENU button7. AUDIO button
8. Station select buttons
9. SEEK/TRACK button
10. PWR/VOL control knob
11. BAND select button
FM-AM RADIO WITH COMPACT
DISC (CD) PLAYER (if so equipped)
PWR/VOL control knob
Turn the ignition key to the ACC or ON position,
then push the PWR/VOL control knob. If you
listen to the radio with the engine not running,
turn the key to the ACC position. The mode (radio
or CD) that was playing immediately before the
system was turned off resumes playing.
When no CD is loaded, the radio comes on.
Pushing the PWR/VOL control knob again turns
the system off.
Turn the PWR/VOL control knob to the right to
increase volume or to the left to decrease volume.
WHA0586
4-16Heater, air conditioner and audio systems
ZREVIEW COPYÐ2006 Truck/Frontier(d22)
Owners ManualÐUSA_English(nna)
10/17/05Ðdebbie
X
Page 173 of 336

Adjusting tone quality and speaker balance
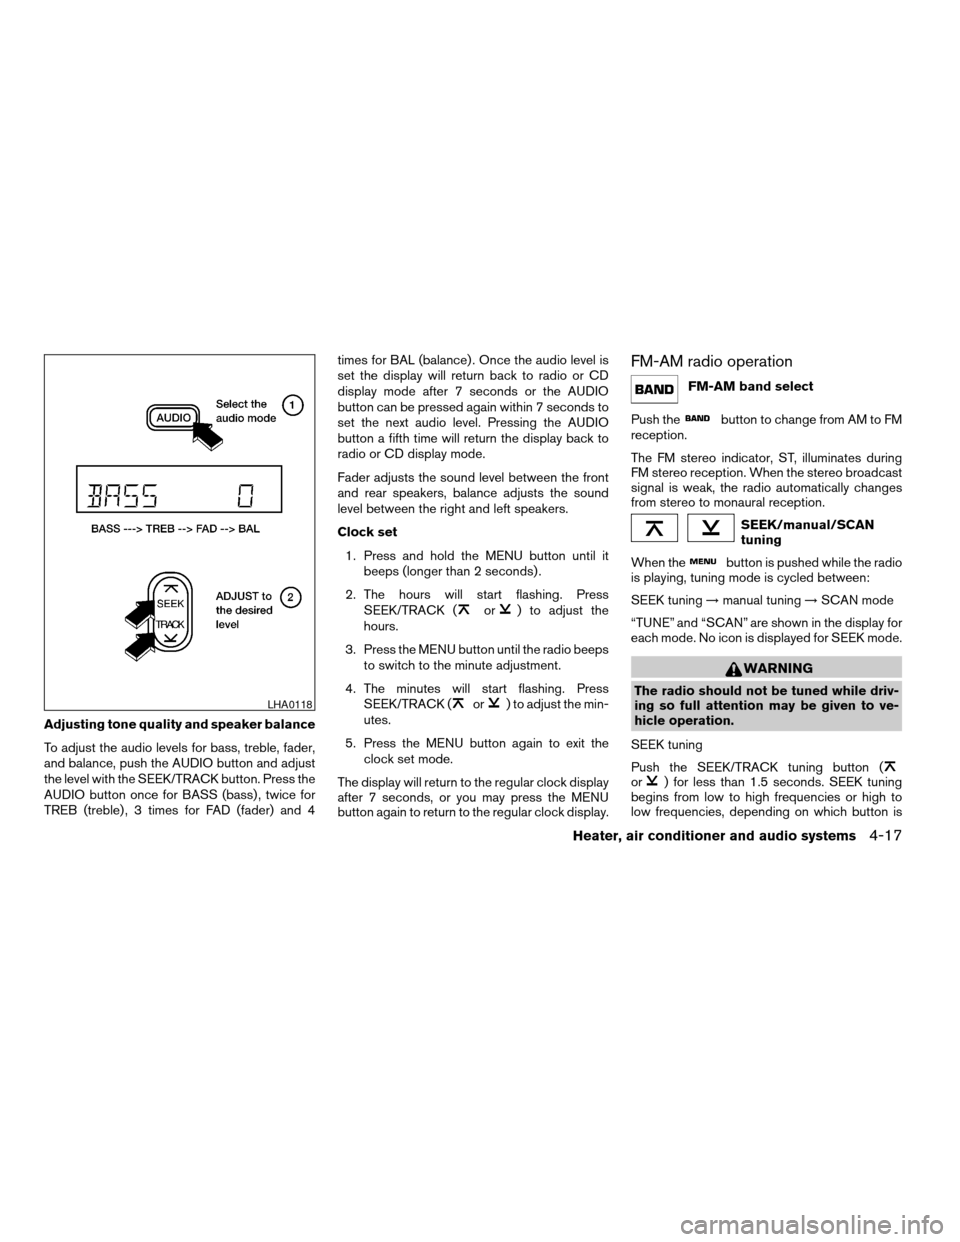
To adjust the audio levels for bass, treble, fader,
and balance, push the AUDIO button and adjust
the level with the SEEK/TRACK button. Press the
AUDIO button once for BASS (bass) , twice for
TREB (treble) , 3 times for FAD (fader) and 4times for BAL (balance) . Once the audio level is
set the display will return back to radio or CD
display mode after 7 seconds or the AUDIO
button can be pressed again within 7 seconds to
set the next audio level. Pressing the AUDIO
button a fifth time will return the display back to
radio or CD display mode.
Fader adjusts the sound level between the front
and rear speakers, balance adjusts the sound
level between the right and left speakers.
Clock set
1. Press and hold the MENU button until it
beeps (longer than 2 seconds) .
2. The hours will start flashing. Press
SEEK/TRACK (
or) to adjust the
hours.
3. Press the MENU button until the radio beeps
to switch to the minute adjustment.
4. The minutes will start flashing. Press
SEEK/TRACK (
or) to adjust the min-
utes.
5. Press the MENU button again to exit the
clock set mode.
The display will return to the regular clock display
after 7 seconds, or you may press the MENU
button again to return to the regular clock display.
FM-AM radio operation
FM-AM band select
Push the
button to change from AM to FM
reception.
The FM stereo indicator, ST, illuminates during
FM stereo reception. When the stereo broadcast
signal is weak, the radio automatically changes
from stereo to monaural reception.
SEEK/manual/SCAN
tuning
When the
button is pushed while the radio
is playing, tuning mode is cycled between:
SEEK tuning!manual tuning!SCAN mode
“TUNE” and “SCAN” are shown in the display for
each mode. No icon is displayed for SEEK mode.
WARNING
The radio should not be tuned while driv-
ing so full attention may be given to ve-
hicle operation.
SEEK tuning
Push the SEEK/TRACK tuning button (
or) for less than 1.5 seconds. SEEK tuning
begins from low to high frequencies or high to
low frequencies, depending on which button is
LHA0118
Heater, air conditioner and audio systems4-17
ZREVIEW COPYÐ2006 Truck/Frontier(d22)
Owners ManualÐUSA_English(nna)
10/17/05Ðdebbie
X
Page 174 of 336

pressed, and stops at the next broadcasting sta-
tion. If using thebutton, once the highest
broadcasting station is reached, the radio contin-
ues in the SEEK mode at the lowest broadcasting
station. If using the
button, once the lowest
broadcasting station is reached, the radio contin-
ues in the SEEK mode at the highest broadcast-
ing station.
Manual tuning
Use the
andbuttons for manual
tuning. To move quickly through the channels,
hold either of the tuning buttons down.
SCAN tuning
Push and hold the SEEK/TRACK tuning button
(
or) for more than 1.5 seconds.
SCAN illuminates in the display window, and the
radio station blinks. SCAN tuning begins from
low to high frequencies or high to low frequen-
cies, depending on which button is pressed.
SCAN tuning stops at each broadcasting station
for 5 seconds. When scanning, SCAN is solid
and the radio station blinks. When temporarily
stopped on a station, SCAN blinks and the sta-
tion display is solid. Pushing the button again
during this 5 second period stops SCAN tuning
and the radio remains tuned to that station.Station memory operations
Each preset mode (A, B or C) has 6 presets,
capable of storing any combination of AM and FM
stations.Press the PRESET ABC button to change be-
tween the presets:
A!B!C
The radio displays icon A, B or C to indicate
which set of presets is active.
To store a radio station in a preset:
1. Select the desired preset by pressing PRE-
SET ABC.
2. Tune to the desired station.
3. Press the desired station select button for
more than 3 seconds. For example, in the
illustrations, ch2 is to be memorized. The
radio mutes when the select button is
pushed.
4. When the indicator illuminates in the display
and the sound resumes, memorizing is com-
plete.
5. Other station select buttons can be set in
the same manner.
If the battery cable is disconnected, or if the radio
fuse opens, the radio memory is canceled. In that
case, reset the desired stations.
LHA0119
4-18Heater, air conditioner and audio systems
ZREVIEW COPYÐ2006 Truck/Frontier(d22)
Owners ManualÐUSA_English(nna)
10/17/05Ðdebbie
X
Page 175 of 336

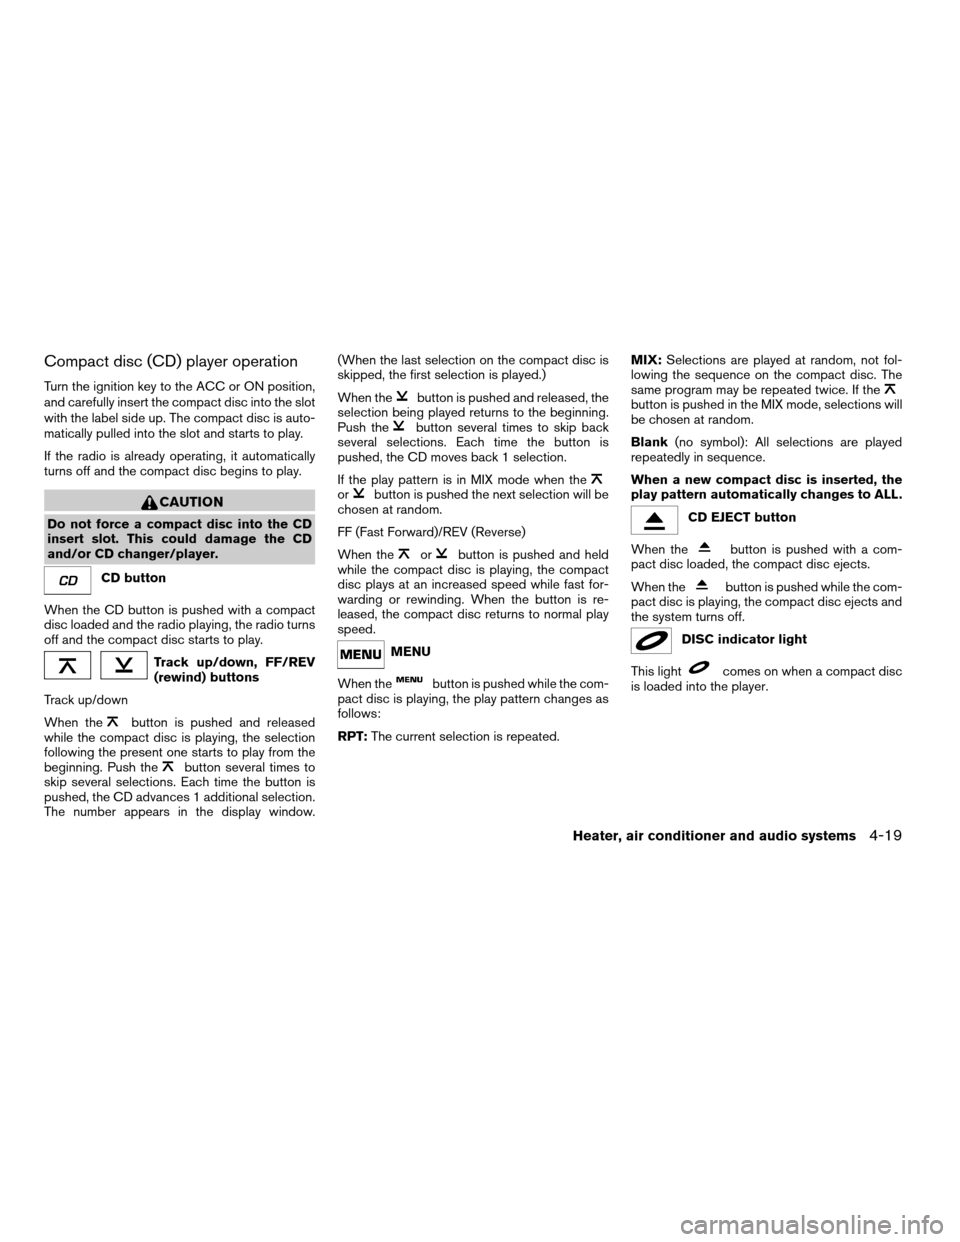
Compact disc (CD) player operation
Turn the ignition key to the ACC or ON position,
and carefully insert the compact disc into the slot
with the label side up. The compact disc is auto-
matically pulled into the slot and starts to play.
If the radio is already operating, it automatically
turns off and the compact disc begins to play.
CAUTION
Do not force a compact disc into the CD
insert slot. This could damage the CD
and/or CD changer/player.
CD button
When the CD button is pushed with a compact
disc loaded and the radio playing, the radio turns
off and the compact disc starts to play.
Track up/down, FF/REV
(rewind) buttons
Track up/down
When the
button is pushed and released
while the compact disc is playing, the selection
following the present one starts to play from the
beginning. Push the
button several times to
skip several selections. Each time the button is
pushed, the CD advances 1 additional selection.
The number appears in the display window.(When the last selection on the compact disc is
skipped, the first selection is played.)
When the
button is pushed and released, the
selection being played returns to the beginning.
Push the
button several times to skip back
several selections. Each time the button is
pushed, the CD moves back 1 selection.
If the play pattern is in MIX mode when the
orbutton is pushed the next selection will be
chosen at random.
FF (Fast Forward)/REV (Reverse)
When the
orbutton is pushed and held
while the compact disc is playing, the compact
disc plays at an increased speed while fast for-
warding or rewinding. When the button is re-
leased, the compact disc returns to normal play
speed.
MENU
When the
button is pushed while the com-
pact disc is playing, the play pattern changes as
follows:
RPT:The current selection is repeated.MIX:Selections are played at random, not fol-
lowing the sequence on the compact disc. The
same program may be repeated twice. If the
button is pushed in the MIX mode, selections will
be chosen at random.
Blank(no symbol): All selections are played
repeatedly in sequence.
When a new compact disc is inserted, the
play pattern automatically changes to ALL.
CD EJECT button
When the
button is pushed with a com-
pact disc loaded, the compact disc ejects.
When the
button is pushed while the com-
pact disc is playing, the compact disc ejects and
the system turns off.
DISC indicator light
This light
comes on when a compact disc
is loaded into the player.
Heater, air conditioner and audio systems4-19
ZREVIEW COPYÐ2006 Truck/Frontier(d22)
Owners ManualÐUSA_English(nna)
10/17/05Ðdebbie
X