Page 141 of 297
to set the other maintenance information.
1. Reset the driving distance to the new main-
tenance schedule.
2. Set the interval (mileage) of the maintenance
schedule. To determine the recommended
maintenance interval, refer to your “NISSAN
Service and Maintenance Guide”.
3. To display the MAINTENANCE INFORMA-
TION automatically when the set trip distance
is reached, highlight the “Interval Re-
minder” key with the joystick and push the
“ENTER” button.
4. To return the display to the “Maintenance”
screen, push the “BACK” button.“Maintenance” display cannot be operated
when the vehicle is moving. Stop the vehicle in a
safe place to see the information.
SAA1291
4-4
Display screen, heater, air conditioner and audio systems
�
06.1.17/Z33-D/V5.0
�
Page 142 of 297
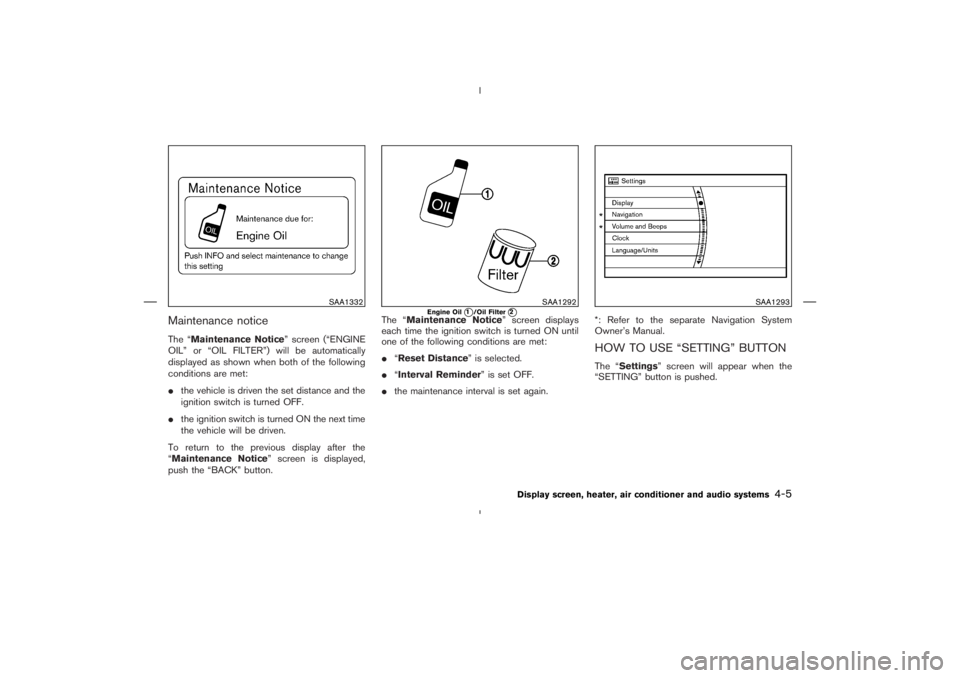
Maintenance noticeThe “Maintenance Notice” screen (“ENGINE
OIL” or “OIL FILTER”) will be automatically
displayed as shown when both of the following
conditions are met:
�the vehicle is driven the set distance and the
ignition switch is turned OFF.
�the ignition switch is turned ON the next time
the vehicle will be driven.
To return to the previous display after the
“Maintenance Notice” screen is displayed,
push the “BACK” button.The “Maintenance Notice” screen displays
each time the ignition switch is turned ON until
one of the following conditions are met:
�“Reset Distance” is selected.
�“Interval Reminder” is set OFF.
�the maintenance interval is set again.*: Refer to the separate Navigation System
Owner’s Manual.
HOW TO USE “SETTING” BUTTONThe “Settings” screen will appear when the
“SETTING” button is pushed.
SAA1332
SAA1292
Engine Oil
�1
/Oil Filter
�2
SAA1293
Display screen, heater, air conditioner and audio systems
4-5
�
06.1.17/Z33-D/V5.0
�
Page 143 of 297

Display settingsThe following menu will appear when pushing
the “SETTING” button, selecting “Display” key
and pushing the “ENTER” button.
Display:
To turn off the screen, select the “Display” key
and push the “ENTER” button to turn off the
“ON” indicator. When any mode button is
pushed with the screen off, the screen turns on
for further operation. The screen will turn off
automatically 5 seconds after the operation is
finished on the map display.
To turn on the screen, select the “Display” keyand turn on the “ON” indicator.
Brightness/Contrast/Background Color:
To adjust the brightness and contrast of the
screen, select the “Brightness”or“Contrast”
key and push the “ENTER” button. Then you can
adjust the brightness to darker or brighter and
the contrast to lower or higher using the joystick.
For information on the “Background Color”
key, refer to the separate Navigation System
Owner’s Manual.
Clock settingsThe following display will appear when pushing
the “SETTING” button, selecting the “Clock”
key and pushing the “ENTER” button.
On-screen Clock:
When this item is turned to ON, a clock is always
displayed in the upper right corner of the screen.
This clock will indicate the time almost exactly
because it is always adjusted by the GPS
system.
SAA1294
SAA1091
4-6
Display screen, heater, air conditioner and audio systems
�
06.1.17/Z33-D/V5.0
�
Page 144 of 297
Clock Format:
Choose either the 12-hour clock display or the
24-hour clock display.
Offset Adjust:
Adjust the time by increasing or decreasing per
minute.
Daylight Saving Time:
Turn this item to ON for daylight saving time
application.
Time Zone:
Choose the time zone from the following
�Pacific
�Mountain
�Central
�Eastern
�Atlantic
�Newfoundland
Language/Units settingsThe Language/Units settings screen will appear
when selecting the “Language/Units” key and
pushing the “ENTER” button.Select the “Select Language”or“Select
Units” key and push the “ENTER” button.
Language: “English” or “Français”
Unit: “US” — Mile, °F, MPG
“Metric” — km, °C, L/100 km
Select the “ON” key of the desired language or
units and push the “ENTER” button.
SAA1295
SAA1296
Display of Select Language
Display screen, heater, air conditioner and audio systems
4-7
�
06.1.17/Z33-D/V5.0
�
Page 145 of 297
HOW TO USE THE “
”
BUTTON
To change the display brightness, push the
“
” (DAY/NIGHT) button. Pushing the but-
ton again will change the display to DAY or
NIGHT display. Then, adjust the brightness mov-
ing the joystick right or left.
If no operation is done within 10 seconds, or if
the “BACK” button is pushed, the display will
return to the previous display.
CENTER VENTILATORSAdjust the air flow direction of ventilators.
Moving the lever up or down will open
�A
or
close
�B
the vents.
To change the air flow direction, turn the dial
�C.
SIDE VENTILATORSAdjust the air flow direction of ventilators by
�A
opening,
�Bclosing or
�Crotating as illustrated.
SAA0600
SAA0601
VENTILATORS
4-8
Display screen, heater, air conditioner and audio systems
�
06.1.17/Z33-D/V5.0
�
Page 146 of 297
.
“18-25-32” is used for °C (Canada).
3. Fan speed control dial
4. Rear window d")
1. Air flow control dial
2. Temperature control dial*
* The display of degrees:
“60-75-90” is used for °F (US).
“18-25-32” is used for °C (Canada).
3. Fan speed control dial
4. Rear window defroster button
(See the “2. Instruments and controls” sec-
tion.)
5. Air intake button
(Air recirculation and Fresh air)
6. A/C (air conditioner) button
WARNING
�The air conditioner cooling function
operates only when the engine is
running.
�On hot, sunny days, temperatures in
a closed vehicle could quickly be-
come high enough to cause severe or
possibly fatal injuries to people or
animals. Do not leave children or
adults who would normally requirethe assistance of others in your ve-
hicle. Unattended pets should also
not be left alone.
�Do not use the recirculation mode for
long periods as it may cause the
interior air to become stale and the
windows to fog up.
�Positioning of the heater or air con-
ditioner controls should not be done
while driving, so full attention may be
given to vehicle operation.
Start the engine and operate the controls to
activate the air conditioner.
NOTE:
In your vehicle, the air conditioner system is
designed to automatically activate the cooling
function when operating the air flow control dial,
the fan speed control dial or the air intake button.
(The indicator light on the A/C button will illumi-
nate.) Push the A/C button off when the cooling
function is not necessary.
SAA1297
HEATER AND AIR CONDITIONER
(Automatic)
Display screen, heater, air conditioner and audio systems
4-9
�
06.1.17/Z33-D/V5.0
�
Page 147 of 297
This mode may be normally used all year round
as the system automatically works to keep a
constant temperature. Air flow distribution and")
AUTOMATIC OPERATION
Cooling and/or dehumidified heating
(AUTO)This mode may be normally used all year round
as the system automatically works to keep a
constant temperature. Air flow distribution and
fan speed are also controlled automatically.
1. Turn the fan speed control dial and air flow
control dial to the AUTO position. The air
conditioner will automatically turn on. (The
A/C button indicator light illuminates.)
2. Turn the temperature control dial to set the
desired temperature.
�Adjust the temperature to about 75°F (24°C)
for normal operation.
�The temperature of the passenger compart-
ment will be maintained automatically. Air
flow distribution and fan speed are also con-
trolled automatically.Heating (AUTO; A/C off)The air conditioner does not activate. When you
need to heat only, use this mode.
1. Turn the fan speed control dial and air flow
control dial to the AUTO position. (The air
conditioner will turn on.)2. Push the A/C button to turn off the air
conditioner. (The A/C button indicator light
will turn off.)
3. Turn the temperature control dial to set the
desired temperature.
�The temperature of the passenger compart-
ment will be maintained automatically. Air
flow distribution and fan speed are also con-
trolled automatically.
�Do not set the temperature lower than the
outside air temperature. Otherwise the sys-
tem may not work properly.
�Not recommended if windows fog up.
Dehumidified defrosting or defogging1. Turn the fan speed control dial to the desired
position.
2. Turn the air flow control dial to the DEF
position.
3. Turn the temperature control dial to set the
desired temperature.
�To quickly remove ice from the outside of the
windows, turn the fan speed control dial to
the maximum position.
�As soon as possible after the windshield is
clean, turn the air flow control dial to the
AUTO position to return to the auto mode.�When the air flow control dial is turned to the
or
position, the air conditioner
will automatically be turned on at outside
temperatures above 23°F (−5°C) to defog
the windshield, and the air recirculation mode
will automatically be turned off.
Outside air is drawn into the passenger
compartment to improve the defogging per-
formance.
MANUAL OPERATION
Fan speed controlTurn the fan speed control dial
to manually
control the fan speed.
Turn the dial to the AUTO position to return to
automatic control of the fan speed.
Air recirculation/Fresh airEach time the air intake button is pushed, the
indicator light on the button will alternate
(Air recirculation) and
(Fresh air).
When the
indicator light is on, the interior
air is recirculated. (When the air recirculation
mode is selected with the A/C indicator off while
the fan speed control dial is in the AUTO
position, the air conditioner will turn on.)
When theindicator light is on, the outside
air is drawn into the passenger compartment.
4-10
Display screen, heater, air conditioner and audio systems
�
06.1.17/Z33-D/V5.0
�
Page 148 of 297
 will flash twice, and then
the intake air will be controlled automatically.
During this AUTO mode, the")
�When the air intake button is pushed for
longer than 1.5 seconds, both indicator lights
(
and
) will flash twice, and then
the intake air will be controlled automatically.
During this AUTO mode, the indicator light of
the currently selected mode illuminates.
�When the air flow control dial is in the
or
position, the air recirculation
mode does not activate.
Air flow controlTurning the air flow control dial selects the air
outlet to:
: Air flows from center and side ventila-
tors.: Air flows from center and side ventila-
tors and foot outlets.: Air flows mainly from foot outlets.: Air flows from defroster and foot out-
lets.: Air flows mainly from defroster outlets.
To turn the system offTurn the fan speed control dial to the OFF
position.
OPERATING TIPSWhen the engine coolant temperature and out-
side air temperature are low, the air flow from the
foot outlets may not operate for a maximum of
150 seconds. However, this is not a malfunction.
After the coolant temperature warms up, the air
flow from the foot outlets will operate normally.
Sensor
�A
on the instrument panel helps main-
tain a constant temperature; do not put anything
on or around this sensor.
SAA0603
Display screen, heater, air conditioner and audio systems
4-11
�
06.1.17/Z33-D/V5.0
�
 of the maintenance
schedule. To determine the recommended
maint")

 button. Pushing the but-
ton again will change the display to DAY or
NIGHT display. Then, adjust the bright")