Page 60 of 409

59 Getting started
Parking and locking
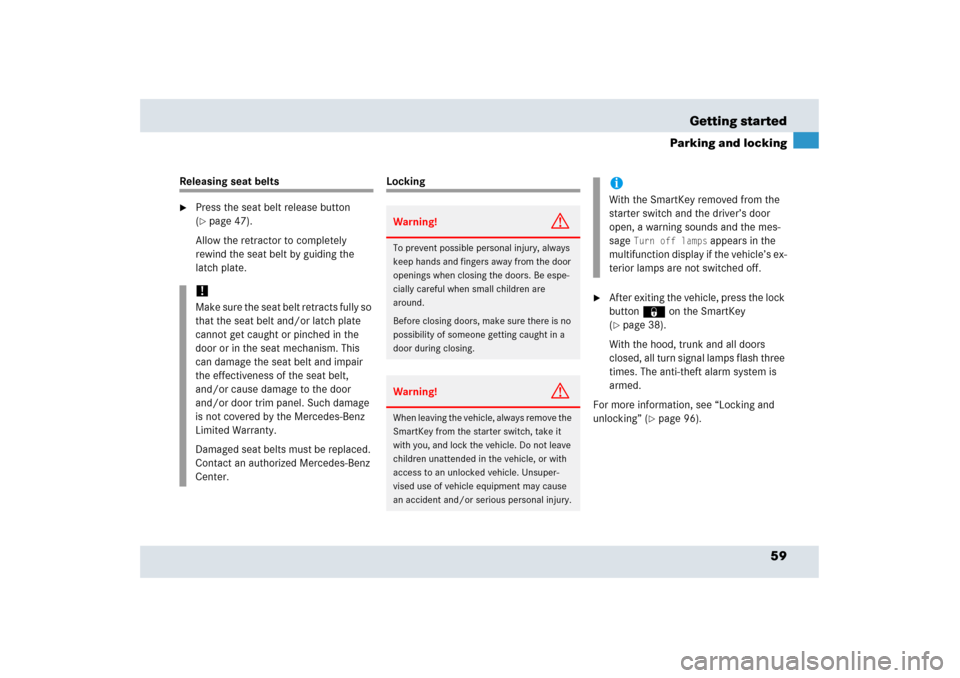
Releasing seat belts�
Press the seat belt release button
(�page 47).
Allow the retractor to completely
rewind the seat belt by guiding the
latch plate.
Locking
�
After exiting the vehicle, press the lock
button‹ on the SmartKey
(�page 38).
With the hood, trunk and all doors
closed, all turn signal lamps flash three
times. The anti-theft alarm system is
armed.
For more information, see “Locking and
unlocking” (
�page 96).
!Make sure the seat belt retracts fully so
that the seat belt and/or latch plate
cannot get caught or pinched in the
door or in the seat mechanism. This
can damage the seat belt and impair
the effectiveness of the seat belt,
and/or cause damage to the door
and/or door trim panel. Such damage
is not covered by the Mercedes-Benz
Limited Warranty.
Damaged seat belts must be replaced.
Contact an authorized Mercedes-Benz
Center.
Warning!
G
To prevent possible personal injury, always
keep hands and fingers away from the door
openings when closing the doors. Be espe-
cially careful when small children are
around.
Before closing doors, make sure there is no
possibility of someone getting caught in a
door during closing.Warning!
G
When leaving the vehicle, always remove the
SmartKey from the starter switch, take it
with you, and lock the vehicle. Do not leave
children unattended in the vehicle, or with
access to an unlocked vehicle. Unsuper-
vised use of vehicle equipment may cause
an accident and/or serious personal injury.
iWith the SmartKey removed from the
starter switch and the driver’s door
open, a warning sounds and the mes-
sage
Turn off lamps
appears in the
multifunction display if the vehicle’s ex-
terior lamps are not switched off.
Page 92 of 409
91 Safety and Security
Anti-theft systems
Arming the alarm system�
Lock the vehicle with the SmartKey.
The turn signal lamps flash three times
to indicate that the alarm system is
activated. The indicator lamp in the
central locking switch (
�page 104) be-
gins to flash after arming the alarm
system.Disarming the alarm system
�
Unlock your vehicle with the SmartKey.
The turn signal lamps flash once to
indicate that the alarm system is
disarmed.Canceling the alarm
To cancel the alarm:
�
Press buttonŒ or‹ on the
SmartKey.
or
�
Insert the SmartKey in the starter
switch.
iIf the turn signal lamps do not flash
three times, one of the following
elements may not be properly closed:�
a door
�
the trunk
�
the hood
Close the respective element and lock
the vehicle again.
iThe alarm system will rearm automati-
cally after approximately 40 seconds if
neither a door nor the trunk lid was
opened.
Page 99 of 409

98 Controls in detailLocking and unlockingFactory setting
Global unlocking�
Press buttonŒ.
All turn signal lamps flash once. The
anti-theft alarm system is disarmed.
The vehicle will lock again automatically
and reactivate the anti-theft alarm system
within approximately 40 seconds of un-
locking if:
�
neither door nor trunk is opened
�
the SmartKey is not inserted in the
starter switch
�
the central locking switch is not
activated
Global locking
�
Press button‹.
With the hood, trunk and all doors
closed, all turn signal lamps flash three
times. The anti-theft alarm system is
armed.Selective setting
If you frequently travel alone, you may wish
to reprogram the SmartKey so that
pressingŒ only unlocks the driver’s
door and the fuel filler flap.
�
Press and hold buttonsŒ and‹
simultaneously for about 5 seconds un-
til battery check lamp5 flashes twice.
The SmartKey will then function as
follows:
Unlocking driver’s door and fuel filler
flap
�
Press buttonΠonce.
All turn signal lamps flash once. The
anti-theft alarm system is disarmed.Global unlocking
�
Press buttonΠtwice.
All turn signal lamps flash once. The
anti-theft alarm system is disarmed.
Global locking
�
Press button‹.
With the hood, trunk and all doors
closed, all turn signal lamps flash three
times. The anti-theft alarm system is
armed.
Page 103 of 409

102 Controls in detailLocking and unlocking�
Lower trunk lid by firmly pulling on
handle1.
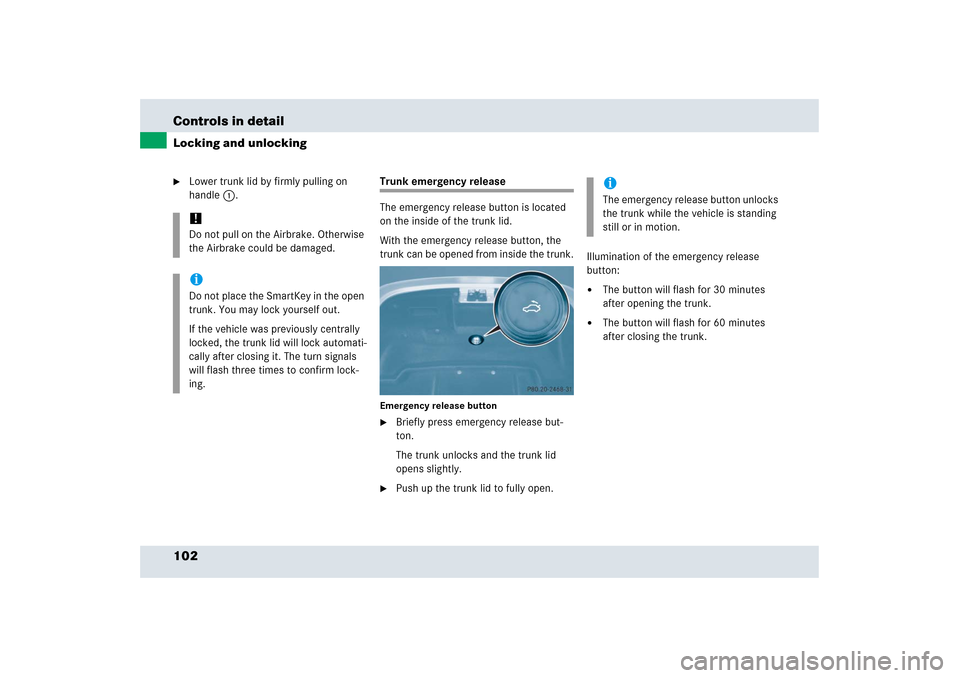
Trunk emergency release
The emergency release button is located
on the inside of the trunk lid.
With the emergency release button, the
trunk can be opened from inside the trunk.Emergency release button�
Briefly press emergency release but-
ton.
The trunk unlocks and the trunk lid
opens slightly.
�
Push up the trunk lid to fully open.Illumination of the emergency release
button:
�
The button will flash for 30 minutes
after opening the trunk.
�
The button will flash for 60 minutes
after closing the trunk.
!Do not pull on the Airbrake. Otherwise
the Airbrake could be damaged.iDo not place the SmartKey in the open
trunk. You may lock yourself out.
If the vehicle was previously centrally
locked, the trunk lid will lock automati-
cally after closing it. The turn signals
will flash three times to confirm lock-
ing.
iThe emergency release button unlocks
the trunk while the vehicle is standing
still or in motion.
Page 106 of 409

105 Controls in detail
Lighting
�Lighting
For information on how to switch on the
headlamps and use the turn signals, see
“Switching on headlamps” (
�page 52)
and (
�page 53).
Exterior lamp switch
The exterior lamp switch is located on the
dashboard to the left of the steering wheel.
MOff
UAutomatic headlamp mode
CParking lamps (also tail lamps,
license plate lamps, side marker
lamps, instrument panel lamps)
BLow beam headlamps (or high
beam headlamps when the
combination switch is pushed
forward) and parking lampsˆStanding lamps, right (turn left one
stop)
‚Standing lamps, left (turn left two
stops)
iIf you drive in countries where vehicles
drive on the other side of the road than
the country where the vehicle is regis-
tered, you must have the headlamps
modified for symmetrical low beams.
Relevant information can be obtained
at your authorized Mercedes-Benz
Center.
iIf you remove the SmartKey from the
starter switch and open the driver’s
door while the parking lamps or low
beam headlamps are switched on, then �
a warning sounds
�
$ appears in the left multifunc-
tion display
�
the message
Turn off lamps
appears in right multifunction dis-
play
Page 111 of 409
110 Controls in detailLightingHazard warning flasher
The hazard warning flasher can be
switched on at all times, even with the
SmartKey removed from the starter
switch.
The hazard warning flasher switches on
automatically when an airbag deploys.
The hazard warning flasher switch is
located on the upper part of the center
console.
1Hazard warning flasher switchSwitching on hazard warning flasher
�
Press hazard warning flasher
switch1.
All turn signals are flashing.Switching off hazard warning flasher
�
Press hazard warning flasher switch1
again.
iWith the hazard warning flasher
activated and the combination switch
set for either left or right turn, only the
respective turn signals will operate
when the ignition is switched on.
iIf the hazard warning flasher has been
activated automatically, press hazard
warning flasher switch1 once to
switch it off.
Page 209 of 409

208 Controls in detailUseful featuresTele Aid
Shortly after the completion of your Tele
Aid acquaintance call, you will receive a
user ID and password. By visiting
www.mbusa.com and selecting “Tele Aid”
(USA only), you will have access to account
information, remote door unlock, and
more.The Tele Aid system
(Tele
matic A
larm I
dentification on
D
emand)
The Tele Aid system consists of three
types of response:�
automatic and manual emergency
�
Roadside Assistance
�
information
The Tele Aid system is operational provid-
ing that the vehicle’s battery is charged,
properly connected, not damaged and cel-
lular and GPS coverage is available.
The speaker volume of a Tele Aid call can
be adjusted when using the volume control
on the audio system or on the multifunc-
tion steering wheel. To raise, turn the rota-
ry volume control on the audio system
clockwise or press buttonæ on the
multifunction steering wheel. To lower,
turn the rotary volume control on the audio
system control counterclockwise or pressbuttonç on the multifunction steering
wheel.
�
To activate, press the SOS button, the
Roadside Assistance button• or
the Information button¡, depend-
ing on the type of response required.
!The initial activation of the Tele Aid sys-
tem may only be performed by com-
pleting the subscriber agreement and
placing an acquaintance call using the
¡button. Failure to complete either
of these steps will result in a system
that is not activated.
If you have any questions regarding ac-
tivation, please call the Response
Center at 1-800-756-9018 (in the USA)
or 1-888-881-6611 (in Canada).
iThe SOS button is located above the in-
side rear view mirror.
The Roadside Assistance button•
and the Information button¡ are
located in the center storage compart-
ment (
�page 201).
!The Tele Aid system utilizes the cellular
network for communication and the
GPS (G
lobal P
ositioning S
ystem) satel-
lites for vehicle location. If either of
these signals are unavailable, the Tele
Aid system may not function and if this
occurs, assistance must be summoned
by other means.
Page 219 of 409

218 Controls in detailUseful featuresStep 5:�
After the indicator lamp1 changes
from a slow to a rapidly flashing light,
release the hand-held remote control
button and the signal transmitter but-
ton.
Step 6:
�
Press and hold the just-trained signal
transmitter button (2, 3 or4) and
observe the indicator lamp1.If the indicator lamp1 stays on
constantly, programming is complete
and your device should activate when
the respective signal transmitter
button (2, 3 or4) is pressed and re-
leased.
Step 7:
�
To program the remaining two signal
transmitter buttons, repeat the steps
above starting with step 3.Rolling code programming
To train a garage door opener (or other
rolling code devices) with the rolling code
feature, follow these instructions after
completing the “Programming” portion
(steps 1 through 6) of this text. (A second
person may make the following training
procedures quicker and easier.)
Step 8:
�
Locate “training” button on the garage
door opener motor head unit.
Exact location and color of the button
may vary by garage door opener brand.
Depending on manufacturer, the
“training” button may also be referred
to as “learn”or “smart” button. If there
is difficulty locating the transmitting
button, refer to the garage door opener
operator’s manual.
iThe indicator lamp1 flashes immedi-
ately the first time the signal transmit-
ter button is programmed. If this button
has already been programmed, the in-
dicator lamp will only start flashing af-
ter 20 seconds.
iIf the indicator lamp1 flashes rapidly
for about 2 seconds and then turns to a
constant light, continue with
programming steps 8 through 12 as
your garage door opener may be
equipped with the “rolling code”
feature.
��