Page 308 of 480

307 Operation
Tires and wheels
For more information on tire load rating
(�page 302).
For information on calculating total and
cargo load capacities (
�page 287).
Maximum tire inflation pressure
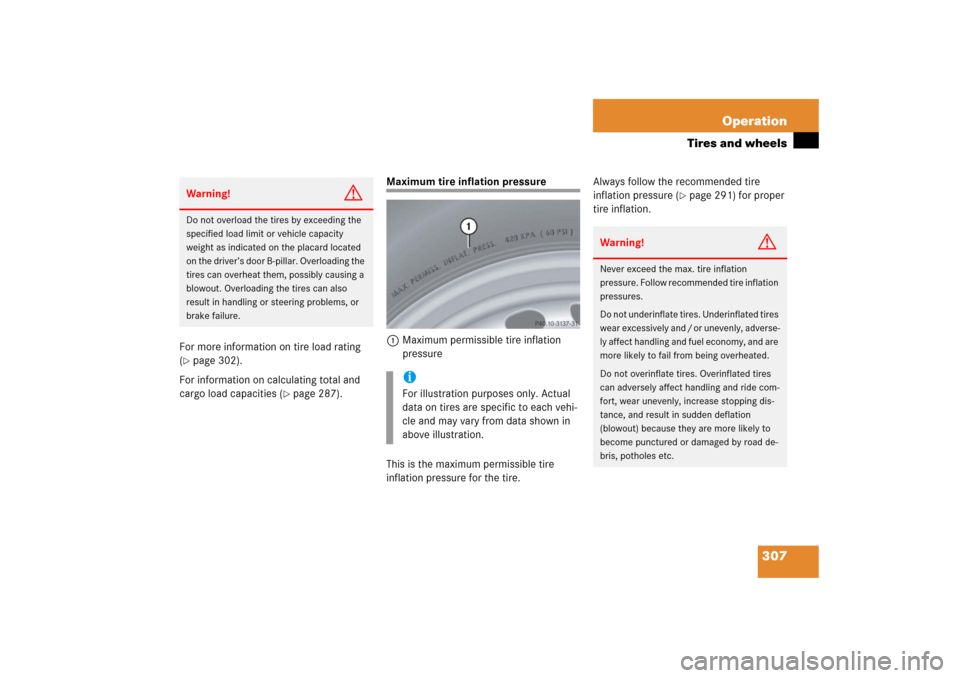
1Maximum permissible tire inflation
pressure
This is the maximum permissible tire
inflation pressure for the tire.Always follow the recommended tire
inflation pressure (
�page 291) for proper
tire inflation.
Warning!
G
Do not overload the tires by exceeding the
specified load limit or vehicle capacity
weight as indicated on the placard located
on the driver’s door B-pillar. Overloading the
tires can overheat them, possibly causing a
blowout. Overloading the tires can also
result in handling or steering problems, or
brake failure.
iFor illustration purposes only. Actual
data on tires are specific to each vehi-
cle and may vary from data shown in
above illustration.
Warning!
G
Never exceed the max. tire inflation
pressure. Follow recommended tire inflation
pressures.
Do not underinflate tires. Underinflated tires
wear excessively and / or unevenly, adverse-
ly affect handling and fuel economy, and are
more likely to fail from being overheated.
Do not overinflate tires. Overinflated tires
can adversely affect handling and ride com-
fort, wear unevenly, increase stopping dis-
tance, and result in sudden deflation
(blowout) because they are more likely to
become punctured or damaged by road de-
bris, potholes etc.
Page 314 of 480

313 Operation
Tires and wheels
Uniform Tire Quality Grading Standards
A tire information system that provides
consumers with ratings for a tire’s traction,
temperature and treadwear. Ratings are
determined by tire manufacturers using
government testing procedures. The
ratings are molded into the sidewall of the
tire.
Vehicle capacity weight
Rated cargo and luggage load plus
68 kilograms (150 lbs) times the vehicle's
designated seating capacity.
Vehicle maximum load on the tire
Load on an individual tire that is
determined by distributing to each axle its
share of the maximum loaded vehicle
weight and dividing it by two.
Rotating tires
Tire rotation can be performed on vehicles
with tires of the same dimension all
around. If your vehicle is equipped with
tires of the same dimension all around,
tires can be rotated, observing a a
front-to-rear rotation pattern that will
maintain the intended rotation (spinning)
direction of the tire (
�page 284).
In some cases, such as when your vehicle
is equipped with mixed-size tires (different
tire dimension front vs. rear), tire rotation
is not possible.If applicable to your vehicle’s tire configu-
ration, tires can be rotated according to
the tire manufacturer's recommended in-
tervals in the tire manufacturer’s warranty
pamphlet located in your vehicle literature
portfolio. If none is available, tires should
be rotated every 3 000 to 6 000 miles
(5 000 to 10 000 km), or sooner if neces-
sary, according to the degree of tire wear.
The same rotation (spinning) direction
must be maintained (
�page 284).
Rotate tires before the characteristic tire
wear pattern becomes visible (shoulder
wear on front tires and tread center wear
on rear tires).
Thoroughly clean the mounting face of
wheels and brake disks, i.e. the inner side
of the wheels/tires, during each rotation.
Check for and ensure proper tire inflation
pressure.
Warning!
G
Rotate front and rear wheels only if the tires
are of the same dimension.
If your vehicle is equipped with mixed-size
tires (different tire dimensions front vs.
rear), tire rotation is not possible.
Page 315 of 480
314 OperationTires and wheelsFor information on wheel change, see the
“Practical hints” section (
�page 383) and
(
�page 399).Warning!
G
Have the tightening torque checked after
changing a wheel. Wheels could become
loose if not tightened with a torque of
96 lb-ft (130 Nm).
Only use genuine Mercedes-Benz wheel
bolts specified for your vehicle’s rims.
Page 316 of 480

315 Operation
Winter driving
�Winter driving
Before the onset of winter, have your vehi-
cle winterized at an authorized
Mercedes-Benz Center. This service in-
cludes:�
Check of anticorrosion and antifreeze
concentration.
�
Addition of cleaning concentrate to the
water of the windshield and headlamp
cleaning system. Add MB Concentrate
“S” to a pre-mixed windshield washer
solvent / antifreeze which is formulated
for temperatures below freezing point
(�page 451).
�
Battery test. Battery capacity drops
with decreasing ambient temperature.
A well charged battery helps to ensure
that the engine can be started and the
electro-hydraulic brake system will be
fully operational even at low ambient
temperatures.
�
Tire change.
Winter tires
Always use winter tires at temperatures
below 45°F (7°C) and whenever wintry
road conditions prevail. Not all M+S rated
tires provide special winter performance.
Make sure the tires you use show M+S and
the mountain/snowflake sym-
bol.marking on the tire sidewall.
These tires meet specific snow traction
performance requirements of the Rubber
Manufacturers Association (RMA) and the
Rubber Association of Canada (RAC) and
have been designed specifically for use in
snow conditions. Use of winter tires is the
only way to achieve the maximum effec-
tiveness of the ABS and ESP
® in winter op-
eration.
For safe handling, make sure all winter
tires mounted are of the same make and
have the same tread design.
!When scraping ice or snow from the
rear window, be careful not to damage
the sealing strip or apertures along the
side of the window.
Page 318 of 480

317 Operation
Winter driving
Snow chains
Snow chains should only be driven on
snow-covered roads at speeds not to ex-
ceed 30 mph (50 km/h). Remove chains
as soon as possible when driving on roads
without snow. Please observe the following guidelines
when using snow chains:
�
Use of snow chains is not permissible
with all wheel/tire combinations.
�
Snow chains should only be used on
the rear wheels. Follow the manufac-
turer's mounting instructions.
�
Only use snow chains that are ap-
proved by Mercedes-Benz. Your autho-
rized Mercedes-Benz Center will be
glad to advise you on this subject.
�
Use of snow chains may be prohibited
depending on location. Always check
local and state laws before installing
snow chains.
!When driving with snow chains, always
select setting 1 of the level control sys-
tem (
�page 220). Other settings may
result in damage to your vehicle.
iWhen driving with snow chains, you
may wish to deactivate the ESP
®
(
�page 86) before setting the vehicle
in motion. This will improve the vehi-
cle’s traction.
!Some tire sizes do not leave adequate
clearance for snow chains. To help
avoid serious damage to your vehicle or
tires, use of snow chains is not permis-
sible with the spare wheel and with tire
size:�
285/35 R18 97W
�
285/35 R18 97Y
�
285/35 ZR18 97Y
�
285/35 R18 97Y MOExtended
�
285/35 R18 97V M+S .
MOExtended
�
285/30 ZR19 98Y XL (Extra Load)
Page 320 of 480

319 Operation
Maintenance
1Reset button�
Press reset button1 on the instru-
ment cluster.
The maintenance service indicator
message is cleared and the standard
display appears in the multifunction
display (
�page 140).Maintenance service term exceeded
If you have exceeded the suggested main-
tenance service term, you will see the fol-
lowing message in the right multifunction
display:
Service A exceeded by XXXX miles (km)
Service A exceeded by XXX daysIn addition, a signal sounds when the mes-
sage appears.
Any authorized Mercedes-Benz Center will
reset the maintenance service indicator
following a completed maintenance ser-
vice.Calling up the maintenance service
indicator display�
Switch on the ignition (
�page 36).
The standard display of the control sys-
tem appears (
�page 135).
�
Press button è or ÿ on the mul-
tifunction steering wheel repeatedly
until the standard display appears in
the multifunction display (
�page 140).
�
Press button k or j on the
multifunction steering wheel until the
maintenance service indicator mes-
sage with the maintenance service
symbol 9 or
½
appears in the
left multifunction display and the main-
tenance service deadline appears in
the right multifunction display.
��
Page 325 of 480

324 OperationVehicle careHand-wash
Do not use hot water or wash your vehicle
in direct sunlight. �
Only use a mild car wash detergent,
such as Mercedes-Benz approved Car
Shampoo.
�
Thoroughly spray the vehicle with a dif-
fused jet of water.
Direct only a very weak spray towards
the ventilation intake.
�
Use plenty of water and rinse the
sponge and chamois frequently.
�
Rinse with clean water and thoroughly
dry with a chamois.
Do not allow cleaning agents to dry on
the finish.Automatic car wash
You can have your car washed in an auto-
matic car wash from the start. Automatic
car washes without brushes are prefera-
ble.
If the vehicle is very dirty, prewash it be-
fore running it through the automatic car
wash.
!Due to the width of the vehicle, fold in
exterior rear view mirrors prior to run-
ning the vehicle through an automatic
car wash to prevent damage to the
mirrors.
Make sure that the windshield wiper
switch is set to0 (
�page 54). Other-
wise, the rain sensor could activate and
cause the wipers to move unintention-
ally. This may lead to vehicle damage.
iAfter running the vehicle through an au-
tomatic car wash, wipe any wax off of
the windshield (
�page 327). This will
prevent smears and reduce wiping
noise which can be caused by residual
wax on the windshield.
When leaving the car wash, make sure
that the mirrors are folded out. Other-
wise they may vibrate.
Page 326 of 480

325 Operation
Vehicle care
Ornamental moldings
For regular cleaning and care of ornamen-
tal moldings, use a use damp cloth.Headlamps, tail lamps, side markers,
turn signal lenses
�
Use a mild car wash detergent, such as
Mercedes-Benz approved Car Sham-
poo, with plenty of water.Cleaning the Distronic* system sensor
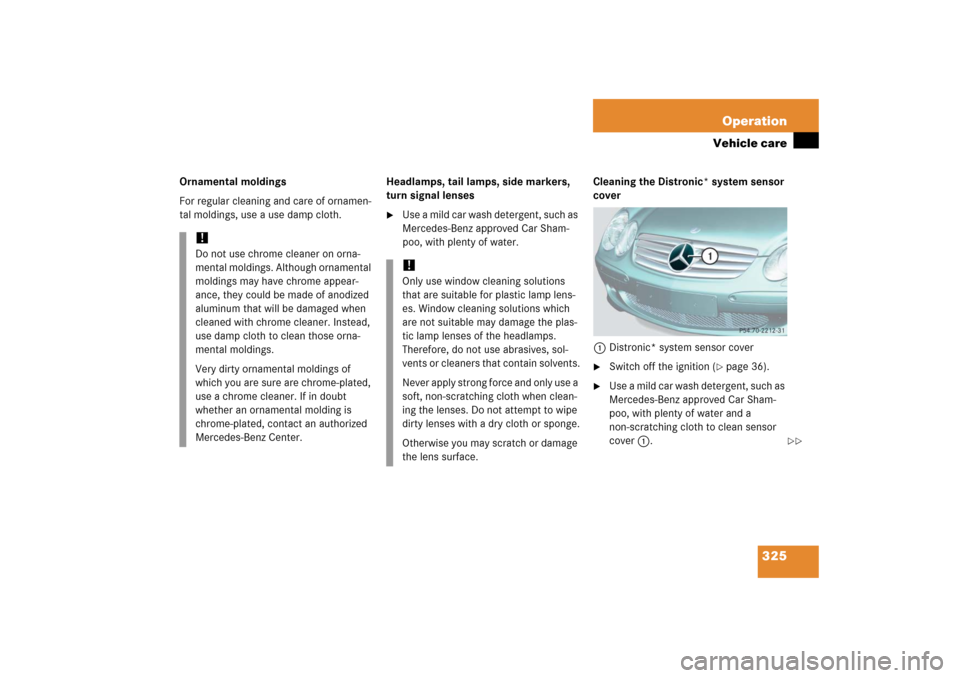
cover
1Distronic* system sensor cover
�
Switch off the ignition (
�page 36).
�
Use a mild car wash detergent, such as
Mercedes-Benz approved Car Sham-
poo, with plenty of water and a
non-scratching cloth to clean sensor
cover1.
!Do not use chrome cleaner on orna-
mental moldings. Although ornamental
moldings may have chrome appear-
ance, they could be made of anodized
aluminum that will be damaged when
cleaned with chrome cleaner. Instead,
use damp cloth to clean those orna-
mental moldings.
Very dirty ornamental moldings of
which you are sure are chrome-plated,
use a chrome cleaner. If in doubt
whether an ornamental molding is
chrome-plated, contact an authorized
Mercedes-Benz Center.
!Only use window cleaning solutions
that are suitable for plastic lamp lens-
es. Window cleaning solutions which
are not suitable may damage the plas-
tic lamp lenses of the headlamps.
Therefore, do not use abrasives, sol-
vents or cleaners that contain solvents.
Never apply strong force and only use a
soft, non-scratching cloth when clean-
ing the lenses. Do not attempt to wipe
dirty lenses with a dry cloth or sponge.
Otherwise you may scratch or damage
the lens surface.
��