Page 155 of 480
154 Controls in detailControl systemSetting night security illumination
(Exterior lamps delayed switch-off)
Use this function to set whether you would
like the exterior lamps to illuminate during
darkness after exiting the vehicle and clos-
ing the doors.
With the delayed switch-off feature activat-
ed and the exterior lamp switch in position
U before the engine is turned off, the
following lamps will switch on when the en-
gine is turned off and remain lit for approx-
imately 15 seconds: �
Parking lamps
�
Tail lamps
�
License plate lamps
�
Side marker lamps
�
Front fog lampsIf after turning off the engine you do not
open a door or do not close an opened
door, the lamps will switch off automatical-
ly after 60 seconds.
�
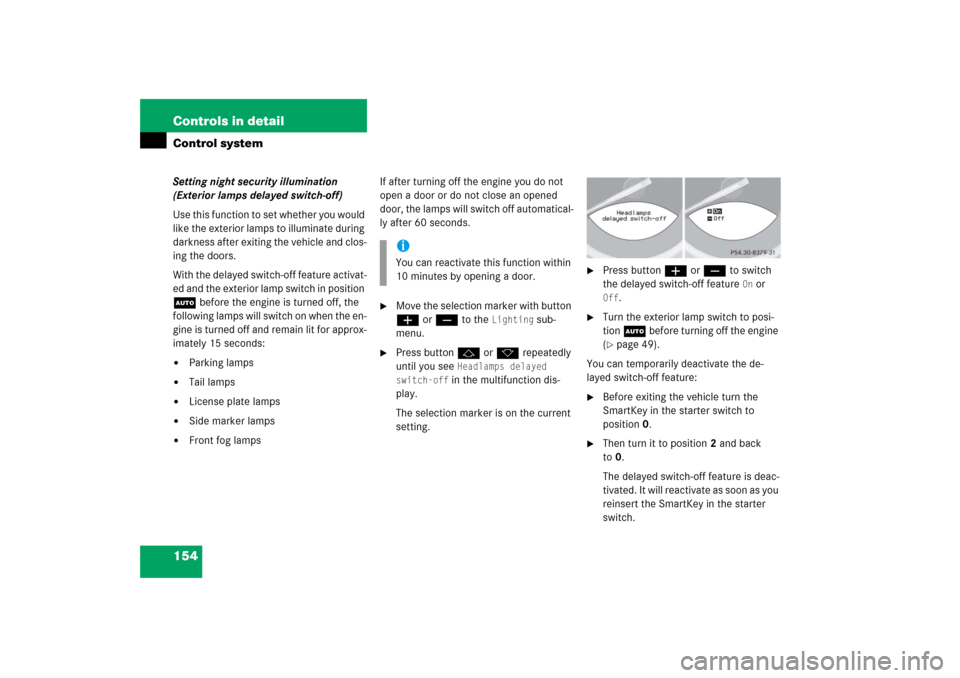
Move the selection marker with button
æ or ç to the
Lighting
sub-
menu.
�
Press button j or k repeatedly
until you see
Headlamps delayed
switch-off in the multifunction dis-
play.
The selection marker is on the current
setting.
�
Press button æ or ç to switch
the delayed switch-off feature
On or
Off
.
�
Turn the exterior lamp switch to posi-
tion U before turning off the engine
(�page 49).
You can temporarily deactivate the de-
layed switch-off feature:
�
Before exiting the vehicle turn the
SmartKey in the starter switch to
position0.
�
Then turn it to position2 and back
to0.
The delayed switch-off feature is deac-
tivated. It will reactivate as soon as you
reinsert the SmartKey in the starter
switch.
iYou can reactivate this function within
10 minutes by opening a door.
Page 156 of 480
155 Controls in detail
Control system
Interior lighting delayed switch-off
Use this function to set whether you would
like the interior lighting to remain lit during
darkness for approximately 10 seconds
after you have removed the SmartKey from
the starter switch. �
Move the selection marker with button
æ or ç to the
Lighting
sub-
menu.
�
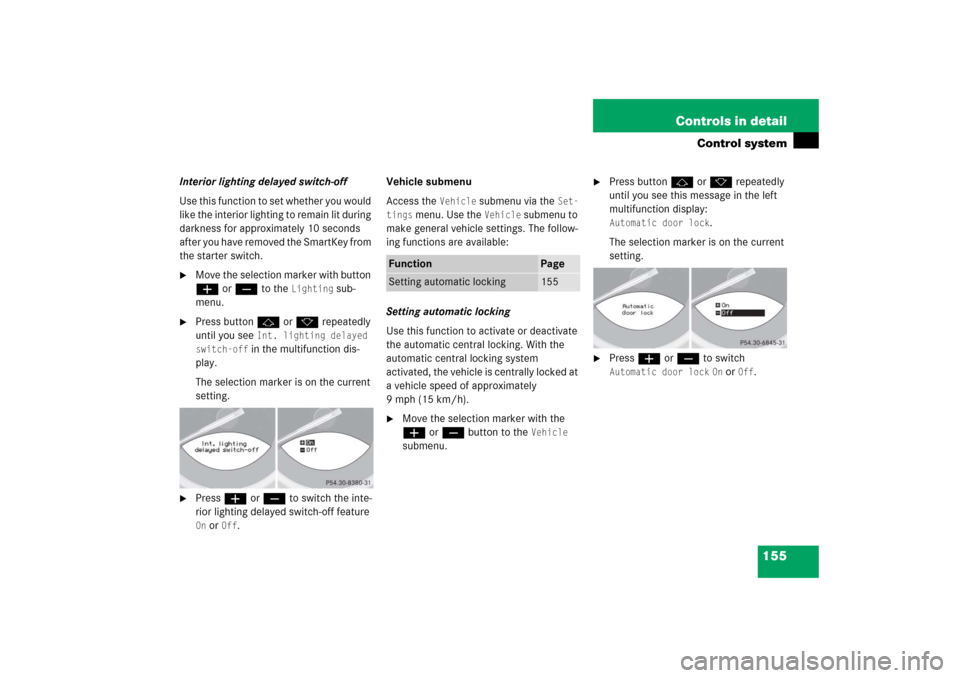
Press button j or k repeatedly
until you see
Int. lighting delayed
switch-off in the multifunction dis-
play.
The selection marker is on the current
setting.
�
Press æ or ç to switch the inte-
rior lighting delayed switch-off feature On or
Off
.Vehicle submenu
Access the
Vehicle
submenu via the
Set-
tings
menu. Use the
Vehicle
submenu to
make general vehicle settings. The follow-
ing functions are available:
Setting automatic locking
Use this function to activate or deactivate
the automatic central locking. With the
automatic central locking system
activated, the vehicle is centrally locked at
a vehicle speed of approximately
9mph(15km/h).
�
Move the selection marker with the
æ or ç button to the
Vehicle
submenu.
�
Press button j or k repeatedly
until you see this message in the left
multifunction display: Automatic door lock
.
The selection marker is on the current
setting.
�
Press æ or ç to switch Automatic door lock
On or
Off
.
Function
Page
Setting automatic locking
155
Page 157 of 480

156 Controls in detailControl systemConvenience submenu
Access the
Convenience
submenu via the
Settings
menu. Use the
Convenience
sub-
menu to change the settings for a number
of convenience features. The following
functions are available:
Activating easy-entry/exit feature
Use this function to activate and deacti-
vate the easy-entry/exit feature
(
�page 43).
�
Move the selection marker with the
æ orç button to the
Conve-
nience
submenu.
�
Press button j or k repeatedly
until you see
Activate Easy-entry
feature
in the multifunction display.
The selection marker is on the current
setting.
�
Press æ or ç to switch the
easy-entry/exit feature
On or
Off
.
Function
Page
Activating easy-entry/exit
feature
156
Warning!
G
You must make sure no one can become
trapped or injured by the moving steering
wheel when the easy-entry/exit feature is
activated.
To stop steering wheel adjustment, do one
of the following:�
Move steering column stalk
(�page 42).
�
Press the memory button (
�page 121).
Do not leave children unattended in the ve-
hicle, or with access to an unlocked vehicle.
Children could open the driver’s door and
unintentionally activate the easy-entry/exit
feature, which could result in an accident
and/or serious personal injury.
Page 158 of 480

157 Controls in detail
Control system
Trip computer menu
Use the trip computer menu to call up sta-
tistical data on your vehicle. The following
information is available:Fuel consumption statistics after start
�
Press button ÿ or è repeatedly
until you see the first function of the
trip computer menu.
�
Press button j or k repeatedly
until you see this message in the left
multifunction display:
From start.
1Distance driven since start
2Average speed since start
3Time elapsed since start
4Average fuel consumption since start
Function
Page
Fuel consumption statistics after
start
157
Fuel consumption statistics
since last reset
158
Calling up range
(distancetoempty)
158
iThe last function called up will reap-
pear the next time you enter the trip
computer menu.
iAll statistics stored since the last en-
gine start will be reset approximately
4 hours after the SmartKey in the start-
er switch is turned to position0 or re-
moved from the starter switch.
Resetting will not occur if you turn the
SmartKey back to position1 or2 with-
in this time period.
Page 159 of 480
158 Controls in detailControl systemFuel consumption since last reset�
Press button ÿ or è repeatedly
until you see the first function of the
trip computer menu.
�
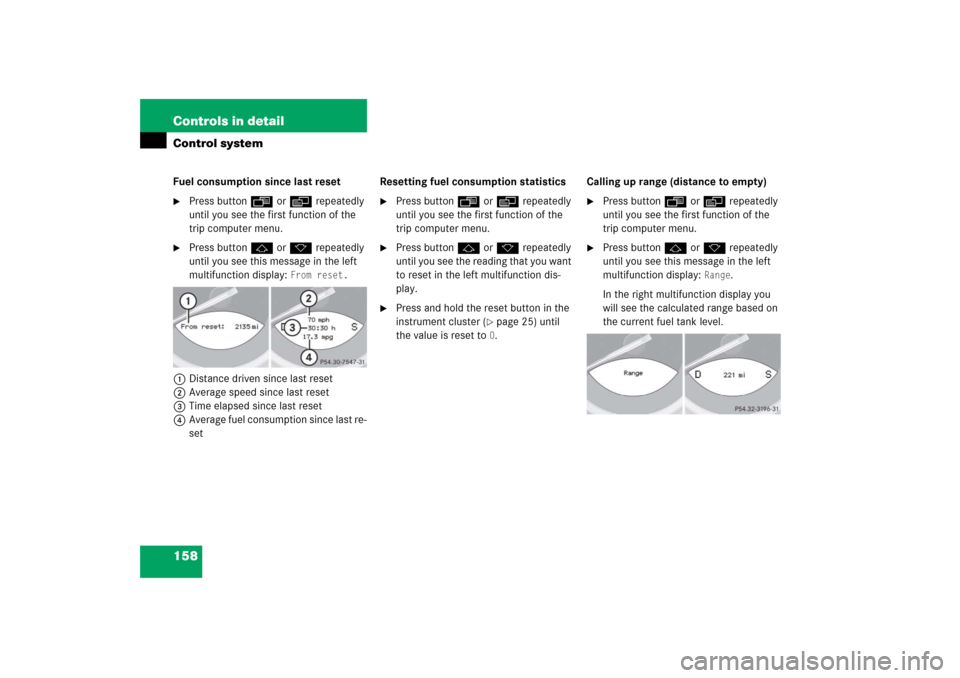
Press button j or k repeatedly
until you see this message in the left
multifunction display:
From reset.
1Distance driven since last reset
2Average speed since last reset
3Time elapsed since last reset
4Average fuel consumption since last re-
setResetting fuel consumption statistics
�
Press button ÿ or è repeatedly
until you see the first function of the
trip computer menu.
�
Press button j or k repeatedly
until you see the reading that you want
to reset in the left multifunction dis-
play.
�
Press and hold the reset button in the
instrument cluster (
�page 25) until
the value is reset to 0.Calling up range (distance to empty)
�
Press button ÿ or è repeatedly
until you see the first function of the
trip computer menu.
�
Press button j or k repeatedly
until you see this message in the left
multifunction display:
Range
.
In the right multifunction display you
will see the calculated range based on
the current fuel tank level.
Page 163 of 480

162 Controls in detailAutomatic transmissionFor more information on driving with an
automatic transmission, see “Automatic
transmission” (
�page 49).
Your vehicle’s transmission adapts its gear
shifting process to your individual driving
style by continually adjusting the shift
points up or down. These shift point adjust-
ments are performed based on current
operating and driving conditions.
If the operating conditions change, the
automatic transmission reacts by
adjusting its shift program.
Gearshift pattern for automatic
transmission
The automatic transmission selects indi-
vidual gears automatically, depending on:�
the gear selector lever
positionD(
�page 164) with
gear ranges (�page 167)
�
the selected program mode:
(C/S) (
�page 168)
or
(MANUAL/C/S) (SL 55 AMG and
SL 65 AMG only) (
�page 173)
�
the position of the accelerator pedal
(�page 166)
�
the vehicle speed
iDuring the brief warm-up, transmission
upshifting is delayed. This allows the
catalytic converter to heat up more
quickly to operating temperature.
Page 166 of 480
165 Controls in detail
Automatic transmission
!
Coasting the vehicle, or driving for any
other reason with gear selector lever
inN can result in transmission damage
that is not covered by the
Mercedes-Benz Limited Warranty.
Warning!
G
Getting out of your vehicle with the gear
selector lever not fully engaged in positionP
is dangerous. Also, positionP alone is not
intended to or capable of preventing your
vehicle from moving, possibly hitting people
or objects.
Always set the parking brake in addition to
shifting to positionP (
�page 59).
When parked on an incline, turn the front
wheels towards the road curb.
Do not park this vehicle in areas where
combustible materials such as grass, hay or
leaves can come into contact with the hot
exhaust system, as these materials could be
ignited and cause a vehicle fire.
Warning!
G
When leaving the vehicle, always remove the
SmartKey or SmartKey with KEYLESS-GO*
from the starter switch, take it with you, and
lock the vehicle. Do not leave children unat-
tended in the vehicle, or with access to an
unlocked vehicle. Children could move the
gear selector lever from positionP, which
could result in an accident and/or serious
personal injury.
Page 168 of 480
167 Controls in detail
Automatic transmission
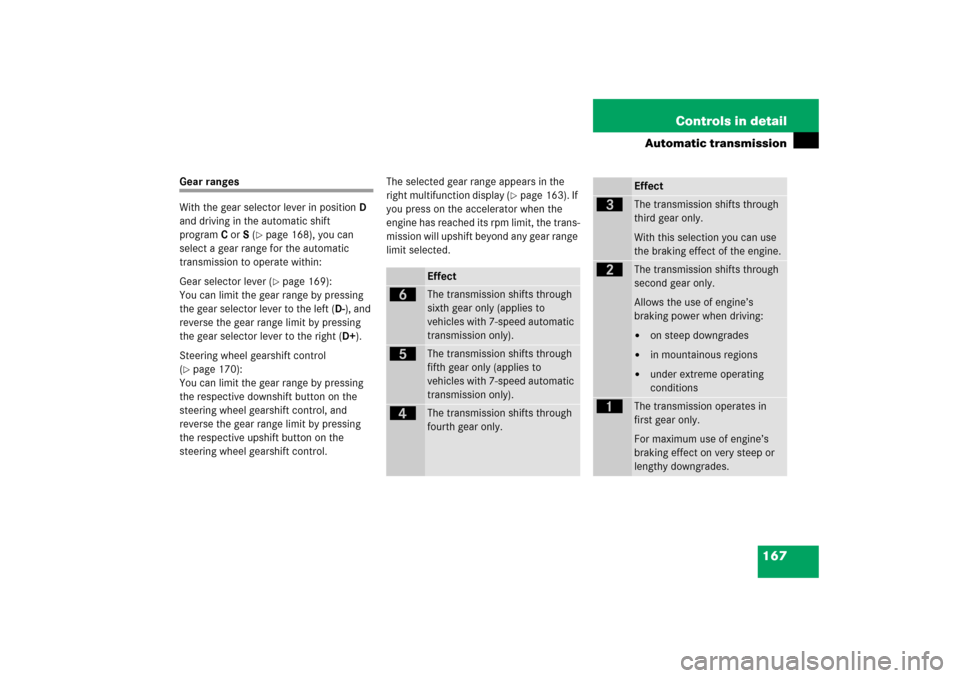
Gear ranges
With the gear selector lever in positionD
and driving in the automatic shift
programC orS (
�page 168), you can
select a gear range for the automatic
transmission to operate within:
Gear selector lever (�page 169):
You can limit the gear range by pressing
the gear selector lever to the left (D-), and
reverse the gear range limit by pressing
the gear selector lever to the right (D+).
Steering wheel gearshift control
(
�page 170):
You can limit the gear range by pressing
the respective downshift button on the
steering wheel gearshift control, and
reverse the gear range limit by pressing
the respective upshift button on the
steering wheel gearshift control.The selected gear range appears in the
right multifunction display (
�page 163). If
you press on the accelerator when the
engine has reached its rpm limit, the trans-
mission will upshift beyond any gear range
limit selected.
Effect
ï
The transmission shifts through
sixth gear only (applies to
vehicles with 7-speed automatic
transmission only).
î
The transmission shifts through
fifth gear only (applies to
vehicles with 7-speed automatic
transmission only).
é
The transmission shifts through
fourth gear only.
Effect
è
The transmission shifts through
third gear only.
With this selection you can use
the braking effect of the engine.
ç
The transmission shifts through
second gear only.
Allows the use of engine’s
braking power when driving:�
on steep downgrades
�
in mountainous regions
�
under extreme operating
conditions
æ
The transmission operates in
first gear only.
For maximum use of engine’s
braking effect on very steep or
lengthy downgrades.