Page 282 of 561
281 Controls in detail
Loading
Please pay attention to and comply with
the following instructions when loading the
vehicle and transporting cargo:�
Always place items being carried
against front or rear seat backrests,
and fasten them as securely as possi-
ble.
�
The heaviest portion of the cargo
should always be kept as low as possi-
ble against front or rear seat backrests.
Cargo tie-down rings
Your vehicle is equipped with eight cargo
tie-down rings.
Carefully secure cargo by applying even
load on all rings with rope of sufficient
strength to hold down the cargo.Cargo compartment
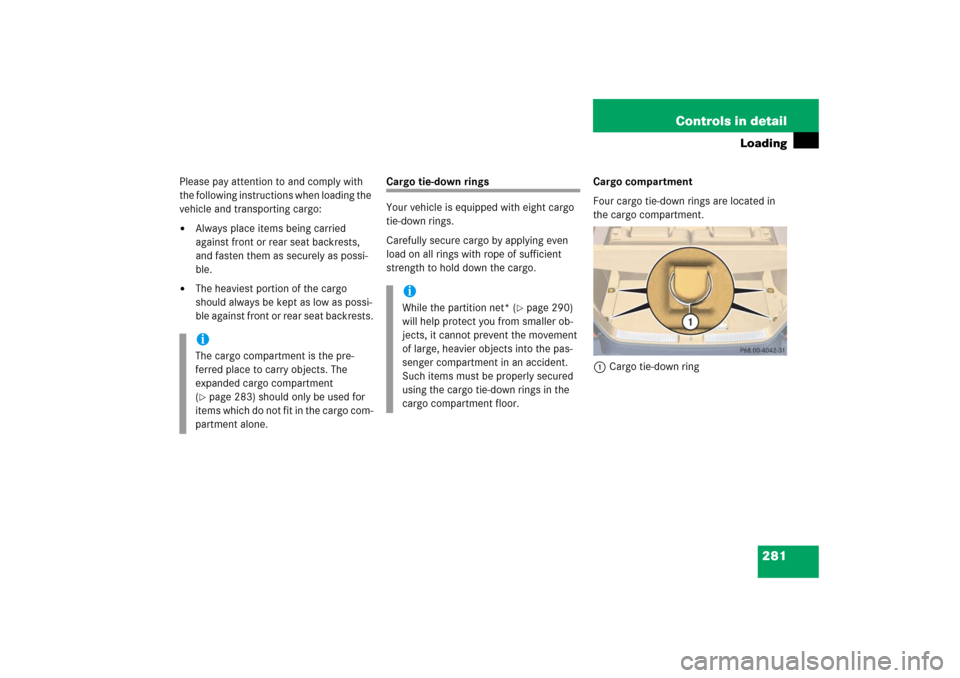
Four cargo tie-down rings are located in
the cargo compartment.
1Cargo tie-down ring
iThe cargo compartment is the pre-
ferred place to carry objects. The
expanded cargo compartment
(�page 283) should only be used for
items which do not fit in the cargo com-
partment alone.
iWhile the partition net* (
�page 290)
will help protect you from smaller ob-
jects, it cannot prevent the movement
of large, heavier objects into the pas-
senger compartment in an accident.
Such items must be properly secured
using the cargo tie-down rings in the
cargo compartment floor.
Page 283 of 561
282 Controls in detailLoadingSecond seat-row
Two cargo tie-down rings are located in the
footwell behind the driver’s and passenger
seat.
1Cargo tie-down ringThird seat-row
Two cargo tie-down rings are located in the
footwell behind the second-row seats.
1Cargo tie-down ring
Hooks
Two hooks are located on the rear com-
partment trim panels, one on each side.
1Hook
Use the hooks to secure light weight items
only. The maximum permissible weight per
hook is 9 lbs (4 kg).
Page 284 of 561
283 Controls in detail
Loading
Expanding cargo compartment
You can separately fold each seat of the
rear passenger compartment to expand
the cargo compartment.Expanding cargo compartment in part
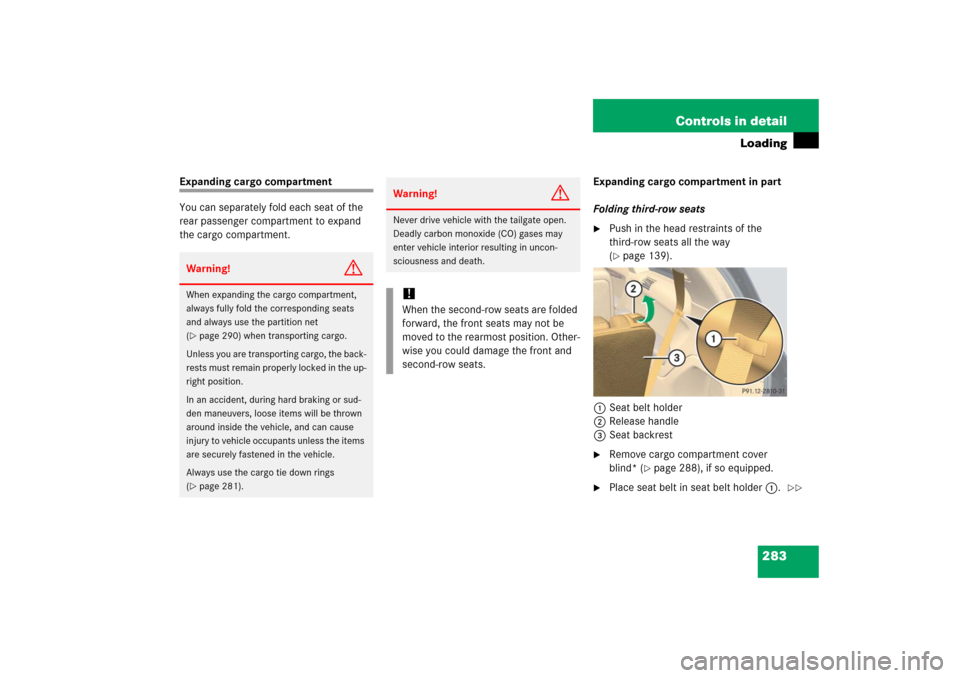
Folding third-row seats
�
Push in the head restraints of the
third-row seats all the way
(�page 139).
1Seat belt holder
2Release handle
3Seat backrest
�
Remove cargo compartment cover
blind* (
�page 288), if so equipped.
�
Place seat belt in seat belt holder 1.
Warning!
G
When expanding the cargo compartment,
always fully fold the corresponding seats
and always use the partition net
(�page 290) when transporting cargo.
Unless you are transporting cargo, the back-
rests must remain properly locked in the up-
right position.
In an accident, during hard braking or sud-
den maneuvers, loose items will be thrown
around inside the vehicle, and can cause
injury to vehicle occupants unless the items
are securely fastened in the vehicle.
Always use the cargo tie down rings
(�page 281).
Warning!
G
Never drive vehicle with the tailgate open.
Deadly carbon monoxide (CO) gases may
enter vehicle interior resulting in uncon-
sciousness and death.!When the second-row seats are folded
forward, the front seats may not be
moved to the rearmost position. Other-
wise you could damage the front and
second-row seats.
��
Page 291 of 561
290 Controls in detailLoading�
With the cargo compartment cover
installed behind third-row seats, insert
extension guide rail 5 into
mounting6.
�
Push extension into mounting6 as far
as it will go.
Partition net*Use of the partition net is a particularly im-
portant safety factor when the vehicle is
loaded higher than the top of the seat
backrests with smaller objects.
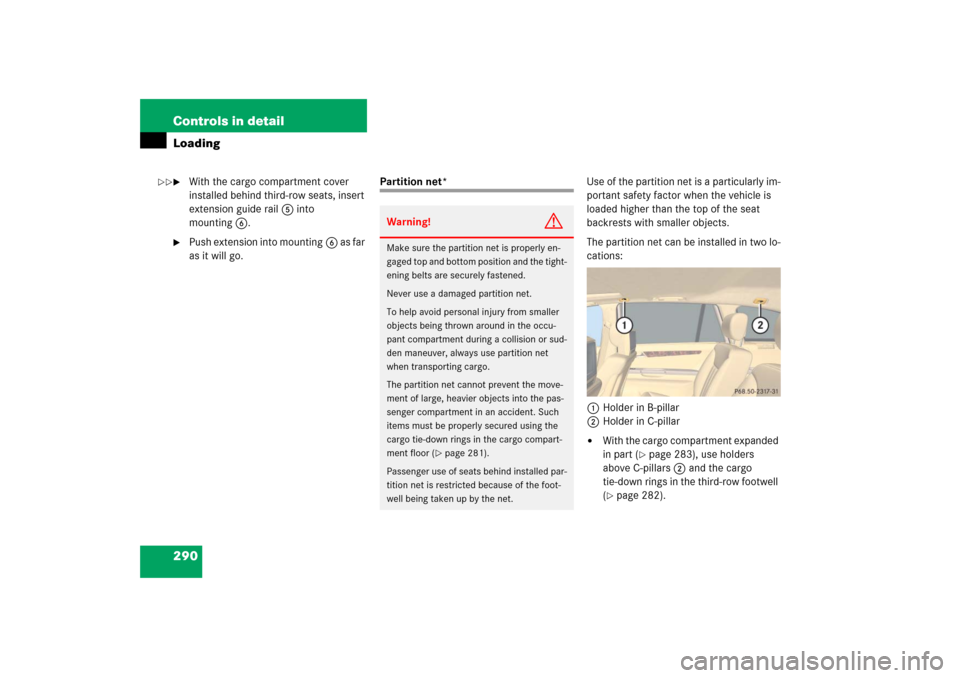
The partition net can be installed in two lo-
cations:
1Holder in B-pillar
2Holder in C-pillar
�
With the cargo compartment expanded
in part (
�page 283), use holders
above C-pillars 2 and the cargo
tie-down rings in the third-row footwell
(
�page 282).
Warning!
G
Make sure the partition net is properly en-
gaged top and bottom position and the tight-
ening belts are securely fastened.
Never use a damaged partition net.
To help avoid personal injury from smaller
objects being thrown around in the occu-
pant compartment during a collision or sud-
den maneuver, always use partition net
when transporting cargo.
The partition net cannot prevent the move-
ment of large, heavier objects into the pas-
senger compartment in an accident. Such
items must be properly secured using the
cargo tie-down rings in the cargo compart-
ment floor (
�page 281).
Passenger use of seats behind installed par-
tition net is restricted because of the foot-
well being taken up by the net.
��
Page 295 of 561
294 Controls in detailUseful featuresStorage compartments Glove box/CD-changer*
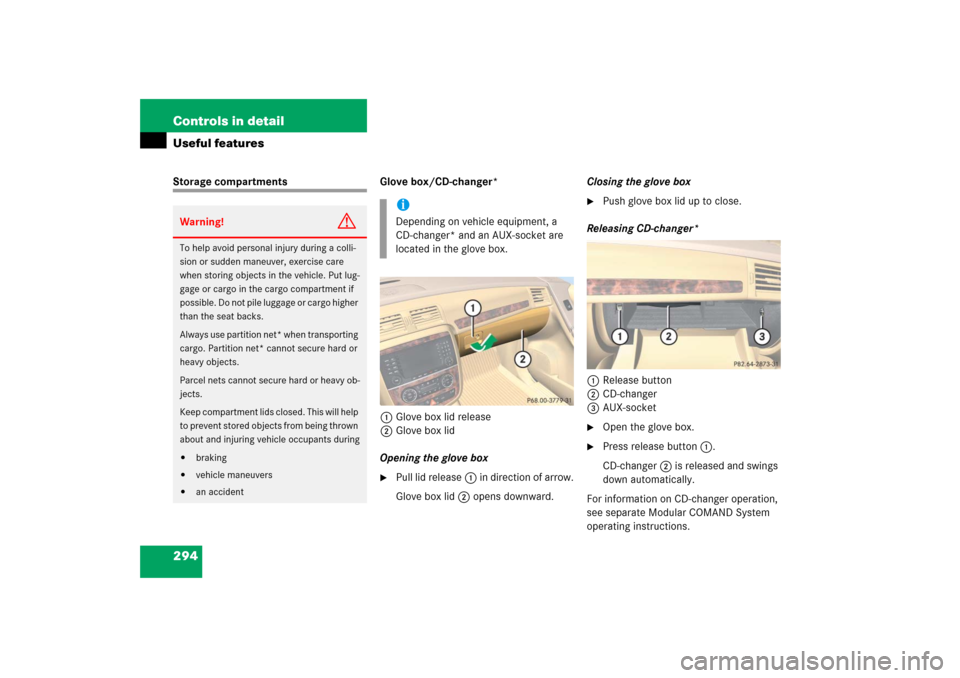
1Glove box lid release
2Glove box lid
Opening the glove box
�
Pull lid release1 in direction of arrow.
Glove box lid2 opens downward.Closing the glove box
�
Push glove box lid up to close.
Releasing CD-changer*
1Release button
2CD-changer
3AUX-socket
�
Open the glove box.
�
Press release button 1.
CD-changer 2 is released and swings
down automatically.
For information on CD-changer operation,
see separate Modular COMAND System
operating instructions.
Warning!
G
To help avoid personal injury during a colli-
sion or sudden maneuver, exercise care
when storing objects in the vehicle. Put lug-
gage or cargo in the cargo compartment if
possible. Do not pile luggage or cargo higher
than the seat backs.
Always use partition net* when transporting
cargo. Partition net* cannot secure hard or
heavy objects.
Parcel nets cannot secure hard or heavy ob-
jects.
Keep compartment lids closed. This will help
to prevent stored objects from being thrown
about and injuring vehicle occupants during�
braking
�
vehicle maneuvers
�
an accident
iDepending on vehicle equipment, a
CD-changer* and an AUX-socket are
located in the glove box.
Page 304 of 561
303 Controls in detail
Useful features
Ashtray in the front center console
Opening the ashtray
1Cover
2Chrome label�
Tab lightly on chrome label 2 of
cover1.
Cover 1 swings open.Removing ashtray insert
1Cover plate
2Ashtray insert
�
Grip ashtray insert 2 on the sides and
pull it out upwards.
Reinstalling ashtray insert
�
Insert ashtray insert 2 and push down
until the ball catch engages.
�
Close ashtray cover plate 1.
Warning!
G
Remove ashtray only with vehicle standing
still. Set the parking brake to secure vehicle
from movement. Set automatic transmis-
sion toP. With the automatic transmission
set toP, turn off the engine.
Page 329 of 561
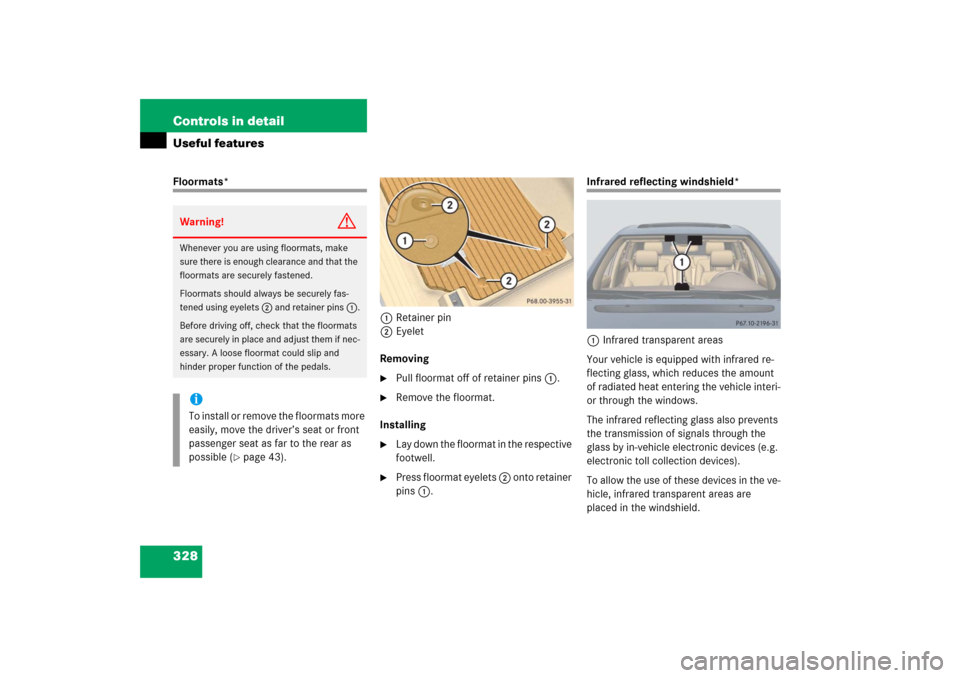
328 Controls in detailUseful featuresFloormats*
1Retainer pin
2Eyelet
Removing
�
Pull floormat off of retainer pins 1.
�
Remove the floormat.
Installing
�
Lay down the floormat in the respective
footwell.
�
Press floormat eyelets 2 onto retainer
pins 1.
Infrared reflecting windshield*
1Infrared transparent areas
Your vehicle is equipped with infrared re-
flecting glass, which reduces the amount
of radiated heat entering the vehicle interi-
or through the windows.
The infrared reflecting glass also prevents
the transmission of signals through the
glass by in-vehicle electronic devices (e.g.
electronic toll collection devices).
To allow the use of these devices in the ve-
hicle, infrared transparent areas are
placed in the windshield.
Warning!
G
Whenever you are using floormats, make
sure there is enough clearance and that the
floormats are securely fastened.
Floormats should always be securely fas-
tened using eyelets 2 and retainer pins 1.
Before driving off, check that the floormats
are securely in place and adjust them if nec-
essary. A loose floormat could slip and
hinder proper function of the pedals.iTo install or remove the floormats more
easily, move the driver’s seat or front
passenger seat as far to the rear as
possible (
�page 43).
Page 339 of 561
338 OperationDriving instructionsStanding water
To prevent water from entering the pas-
senger compartment or the engine com-
partment if you must drive through
standing water, keep in mind that�
the maximum depth of the water may
not exceed 10 in (25 cm)
�
you must drive slowly
Passenger compartment
iVehicles with AIRMATIC*: If you have
selected the raised level (
�page 272)
before driving through standing water,
the maximum water depth is
12 in (30 cm).
!Do not drive through flooded areas or
water of unknown depth. Before driving
through water, determine its depth.
Never accelerate before driving into
water. The bow wave could force water
into the engine and auxiliary equip-
ment, thus damaging them.
If you must drive through standing wa-
ter, drive slowly to prevent water from
entering the passenger compartment
or the engine compartment. Water in
these areas could cause damage to
electrical components or wiring of the
engine or transmission, or could result
in water being ingested by the engine
through the air intake, causing severe
internal engine damage. Any such dam-
age is not covered by the
Mercedes-Benz Limited Warranty.
Warning!
G
Always fasten items being carried as secure-
ly as possible.
In an accident, during hard braking or sud-
den maneuvers, loose items will be thrown
around inside the vehicle, and cause injury
to vehicle occupants unless the items are
securely fastened in the vehicle.
The rear cargo compartment is the preferred
place to carry objects. Always use the parti-
tion net when transporting cargo. Partition
net cannot secure hard or heavy objects. Al-
ways fasten items being carried as securely
as possible using the cargo tie-down rings in
the cargo floor area and fastening materials.