Page 274 of 561
273 Controls in detail
Driving systems
Highway level�
Close all doors and the tailgate.
�
Start the engine (
�page 53).
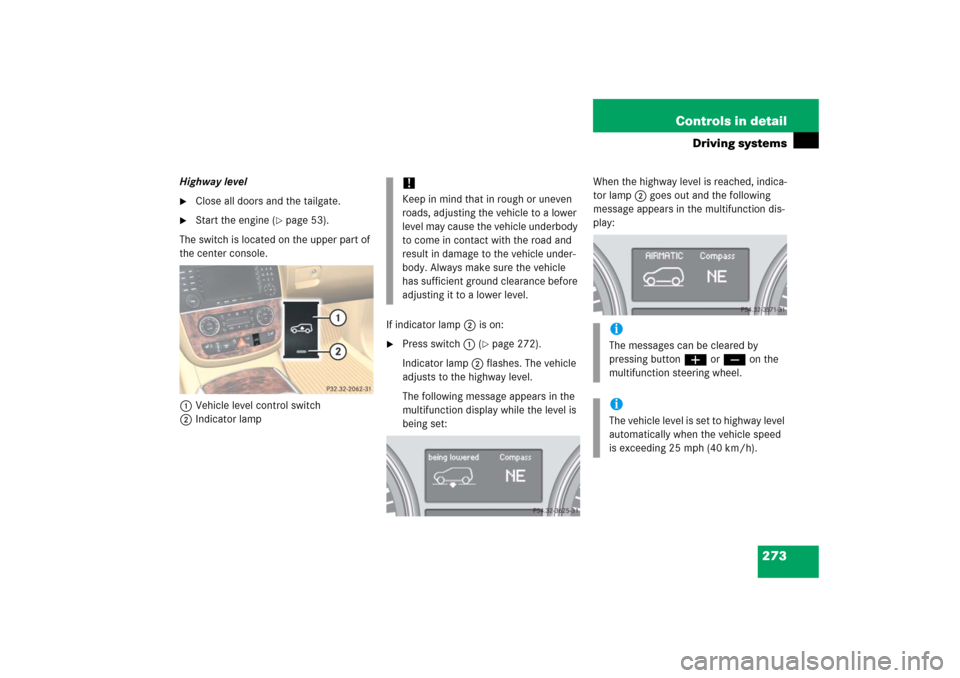
The switch is located on the upper part of
the center console.
1Vehicle level control switch
2Indicator lampIf indicator lamp2 is on:
�
Press switch1 (
�page 272).
Indicator lamp2 flashes. The vehicle
adjusts to the highway level.
The following message appears in the
multifunction display while the level is
being set:When the highway level is reached, indica-
tor lamp2 goes out and the following
message appears in the multifunction dis-
play:
!Keep in mind that in rough or uneven
roads, adjusting the vehicle to a lower
level may cause the vehicle underbody
to come in contact with the road and
result in damage to the vehicle under-
body. Always make sure the vehicle
has sufficient ground clearance before
adjusting it to a lower level.
iThe messages can be cleared by
pressing buttonæ orç on the
multifunction steering wheel.iThe vehicle level is set to highway level
automatically when the vehicle speed
is exceeding 25 mph (40 km/h).
Page 304 of 561
303 Controls in detail
Useful features
Ashtray in the front center console
Opening the ashtray
1Cover
2Chrome label�
Tab lightly on chrome label 2 of
cover1.
Cover 1 swings open.Removing ashtray insert
1Cover plate
2Ashtray insert
�
Grip ashtray insert 2 on the sides and
pull it out upwards.
Reinstalling ashtray insert
�
Insert ashtray insert 2 and push down
until the ball catch engages.
�
Close ashtray cover plate 1.
Warning!
G
Remove ashtray only with vehicle standing
still. Set the parking brake to secure vehicle
from movement. Set automatic transmis-
sion toP. With the automatic transmission
set toP, turn off the engine.
Page 307 of 561
306 Controls in detailUseful featuresPower outletsPower outlets are located
�
in the additional storage compartment
in front center console (
�page 306)
�
in the front passenger footwell
(�page 307)
�
in the second-row footwell
(�page 307)
�
on the right-hand side of the cargo
compartment (
�page 307)Power outlet in front center console
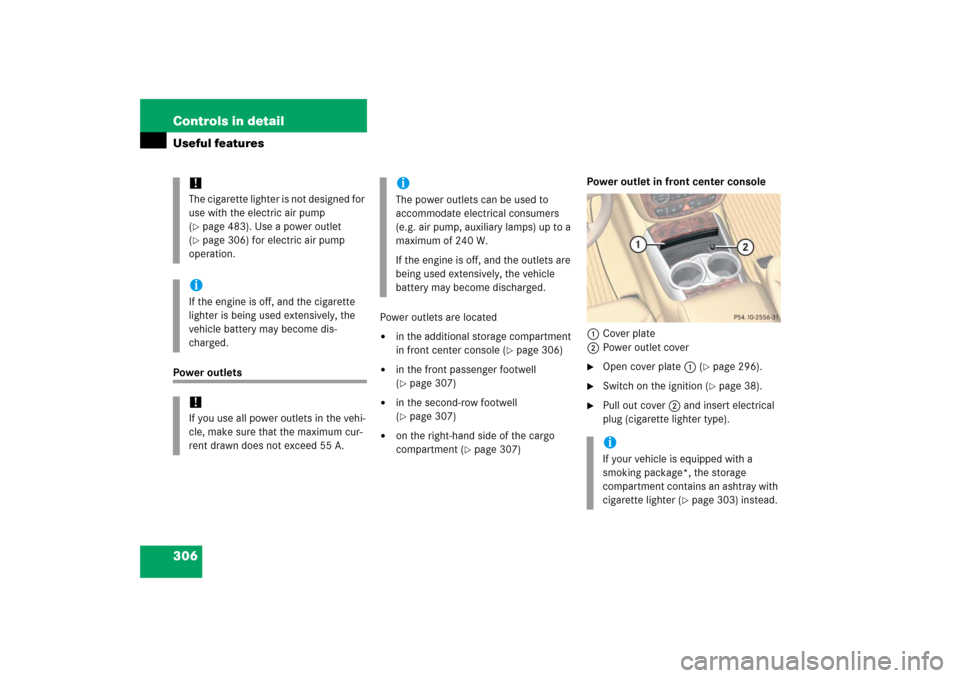
1Cover plate
2Power outlet cover
�
Open cover plate1 (
�page 296).
�
Switch on the ignition (
�page 38).
�
Pull out cover 2 and insert electrical
plug (cigarette lighter type).
!The cigarette lighter is not designed for
use with the electric air pump
(�page 483). Use a power outlet
(�page 306) for electric air pump
operation.
iIf the engine is off, and the cigarette
lighter is being used extensively, the
vehicle battery may become dis-
charged.!If you use all power outlets in the vehi-
cle, make sure that the maximum cur-
rent drawn does not exceed 55 A.
iThe power outlets can be used to
accommodate electrical consumers
(e.g. air pump, auxiliary lamps) up to a
maximum of 240 W.
If the engine is off, and the outlets are
being used extensively, the vehicle
battery may become discharged.
iIf your vehicle is equipped with a
smoking package*, the storage
compartment contains an ashtray with
cigarette lighter (
�page 303) instead.
Page 311 of 561
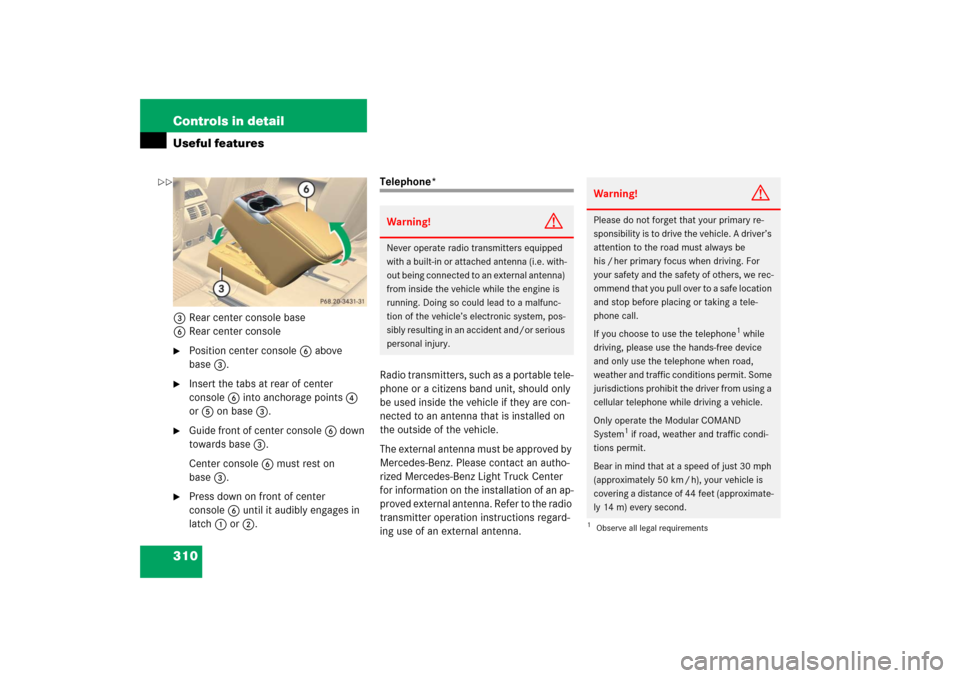
310 Controls in detailUseful features3Rear center console base
6Rear center console�
Position center console 6 above
base3.
�
Insert the tabs at rear of center
console6into anchorage points4
or 5 on base 3.
�
Guide front of center console6 down
towards base 3.
Center console 6 must rest on
base3.
�
Press down on front of center
console6 until it audibly engages in
latch1or2.
Telephone*
Radio transmitters, such as a portable tele-
phone or a citizens band unit, should only
be used inside the vehicle if they are con-
nected to an antenna that is installed on
the outside of the vehicle.
The external antenna must be approved by
Mercedes-Benz. Please contact an autho-
rized Mercedes-Benz Light Truck Center
for information on the installation of an ap-
proved external antenna. Refer to the radio
transmitter operation instructions regard-
ing use of an external antenna.Warning!
G
Never operate radio transmitters equipped
with a built-in or attached antenna (i.e. with-
out being connected to an external antenna)
from inside the vehicle while the engine is
running. Doing so could lead to a malfunc-
tion of the vehicle’s electronic system, pos-
sibly resulting in an accident and/or serious
personal injury.
Warning!
G
Please do not forget that your primary re-
sponsibility is to drive the vehicle. A driver’s
attention to the road must always be
his / her primary focus when driving. For
your safety and the safety of others, we rec-
ommend that you pull over to a safe location
and stop before placing or taking a tele-
phone call.
If you choose to use the telephone
1 while
driving, please use the hands-free device
and only use the telephone when road,
weather and traffic conditions permit. Some
jurisdictions prohibit the driver from using a
cellular telephone while driving a vehicle.
Only operate the Modular COMAND
System
1 if road, weather and traffic condi-
tions permit.
Bear in mind that at a speed of just 30 mph
(approximately 50 km / h), your vehicle is
covering a distance of 44 feet (approximate-
ly 14 m) every second.
1Observe all legal requirements
��
Page 322 of 561
321 Controls in detail
Useful features
Programming the integrated remote
control
Step 1:�
Switch on the ignition (
�page 38).Step 2:
�
If you have previously programmed an
signal transmitter button and wish to
retain its programming, proceed to
step 3.
If you are programming the integrated
remote control for the first time, press
and hold the two outer signal transmit-
ter buttons2 and4 and release
them only when the indicator lamp1
begins to flash after approximately
20 seconds (do not hold the button for
longer than 30 seconds). This proce-
dure erases any previous settings for
all three channels and initializes the
memory.
If you later wish to program a second
and/or third hand-held transmitter to
the remaining two signal transmitter
buttons, do not repeat this step and be-
gin directly with step 3.
Warning!
G
Before programming the integrated remote
control to a garage door opener or gate
operator, make sure people and objects are
out of the way of the device to prevent po-
tential harm or damage. When programming
a garage door opener, the door moves up or
down. When programming a gate operator,
the gate opens or closes.
Do not use the integrated remote control
with any garage door opener that lacks
safety stop and reverse features as required
by U.S. federal safety standards (this
includes any garage door opener model
manufactured before April 1, 1982).
A garage door that cannot detect an object
– signaling the door to stop and reverse –
does not meet current U.S. federal safety
standards.
When programming a garage door opener, it
is advised to park outside the garage.
Do not run the engine while programming
the integrated remote control. Inhalation of
exhaust gas is hazardous to your health. All
exhaust gas contains carbon monoxide, and
inhaling it can cause unconsciousness and
possible death.
��
Page 330 of 561
329 Operation
The first 1000 miles (1500 km)
Driving instructions
At the gas station
Engine compartment
Tires and wheels
Winter driving
Maintenance
Vehicle care
Page 331 of 561

330 OperationIn the “Operation” section you will find
detailed information on operating, main-
taining and caring for your vehicle.The first 1000 miles (1500 km)
The more cautiously you treat your vehicle
during the break-in period, the more satis-
fied you will be with its performance later
on.�
Drive your vehicle during the first
1000 miles (1500 km) at varying but
moderate vehicle and engine speeds.
�
During this period, avoid heavy loads
(full throttle driving) and excessive
engine speeds (no more than
2/3 of
maximum rpm in each gear).
�
Shift gears in a timely manner.
�
Avoid accelerating by kick-down.
�
Do not attempt to slow the vehicle
down by shifting to a lower gear using
the gear selector lever.
�
Select gear ranges3, 2 or1
(�page 202) only when driving at
moderate speeds (for hill driving).
�
SelectCas the preferred shift program
(�page 204) for the first 1 000 miles
(1500 km).After 1 000 miles (1 500 km) you may
gradually increase vehicle and engine
speeds to the permissible maximum.
All of the above instructions, as may apply
to your vehicle type, also apply when the
first 1 000 miles (1 500 km) after the en-
gine, the transfer case, the front differen-
tial or the rear differential has been
replaced.
iAlways obey applicable speed limits.
Page 332 of 561
331 Operation
Driving instructions
�Driving instructions
Drive sensibly – save fuel
Fuel consumption, to a great extent,
depends on driving habits and operating
conditions.
To save fuel you should:�
Keep tires at the recommended infla-
tion pressures.
�
Remove unnecessary loads.
�
Remove roof rack when not in use.
�
Allow engine to warm up under low
load use.
�
Avoid frequent acceleration and decel-
eration.
�
Have all maintenance work performed
at the intervals specified in the Mainte-
nance Booklet and as required by the
Maintenance System (U.S. vehicles) or
FSS PLUS (Canada vehicles). Contact
an authorized Mercedes-Benz Light
Truck Center.Fuel consumption is also increased by
driving in cold weather, in stop-and-go
traffic, on short trips and in hilly area.
Drinking and driving
PedalsPower assistance
Warning!
G
Drinking and driving and/or taking drugs
and driving are a very dangerous combina-
tion. Even a small amount of alcohol or
drugs can affect your reflexes, perceptions
and judgment.
The possibility of a serious or even fatal
accident are greatly increased when you
drink or take drugs and drive.
Do not drink or take drugs and drive or allow
anyone to drive who has been drinking or
taking drugs.
Warning!
G
Keep driver’s foot area clear at all times. Ob-
jects stored in this area may impair pedal
movement.Warning!
G
With the engine not running, there is no
power assistance for the brake and steering
systems. In this case, it is important to keep
in mind that a considerably higher degree of
effort is necessary to brake and steer the ve-
hicle.