Page 253 of 521

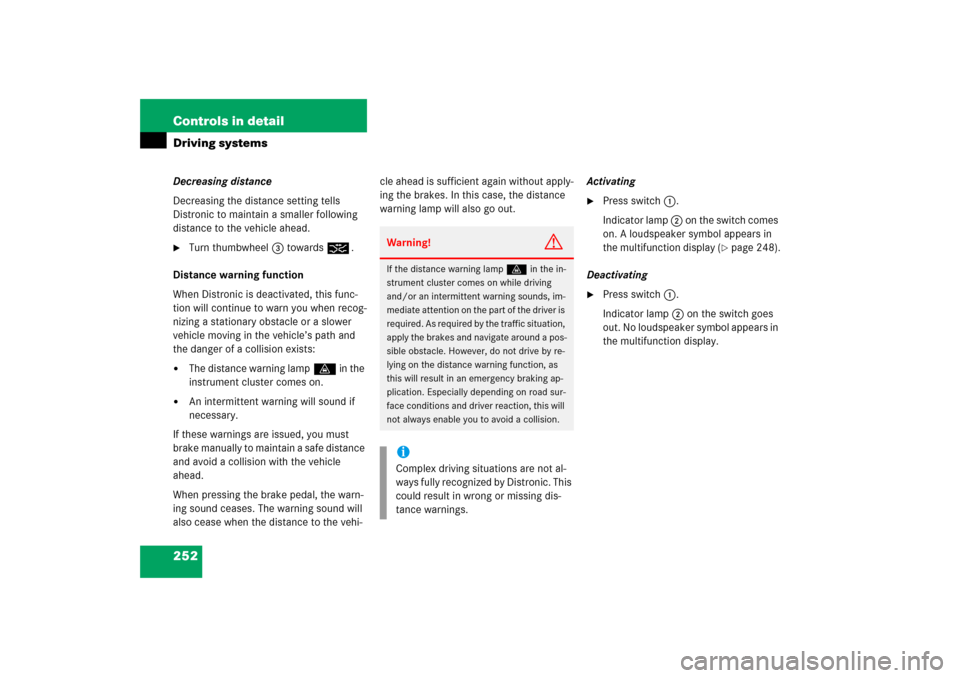
252 Controls in detailDriving systemsDecreasing distance
Decreasing the distance setting tells
Distronic to maintain a smaller following
distance to the vehicle ahead.�
Turn thumbwheel3 towards®.
Distance warning function
When Distronic is deactivated, this func-
tion will continue to warn you when recog-
nizing a stationary obstacle or a slower
vehicle moving in the vehicle’s path and
the danger of a collision exists:
�
The distance warning lampl in the
instrument cluster comes on.
�
An intermittent warning will sound if
necessary.
If these warnings are issued, you must
brake manually to maintain a safe distance
and avoid a collision with the vehicle
ahead.
When pressing the brake pedal, the warn-
ing sound ceases. The warning sound will
also cease when the distance to the vehi-cle ahead is sufficient again without apply-
ing the brakes. In this case, the distance
warning lamp will also go out.Activating
�
Press switch1.
Indicator lamp 2 on the switch comes
on. A loudspeaker symbol appears in
the multifunction display (
�page 248).
Deactivating
�
Press switch1.
Indicator lamp 2 on the switch goes
out. No loudspeaker symbol appears in
the multifunction display.
Warning!
G
If the distance warning lampl in the in-
strument cluster comes on while driving
and/or an intermittent warning sounds, im-
mediate attention on the part of the driver is
required. As required by the traffic situation,
apply the brakes and navigate around a pos-
sible obstacle. However, do not drive by re-
lying on the distance warning function, as
this will result in an emergency braking ap-
plication. Especially depending on road sur-
face conditions and driver reaction, this will
not always enable you to avoid a collision.iComplex driving situations are not al-
ways fully recognized by Distronic. This
could result in wrong or missing dis-
tance warnings.
Page 258 of 521
257 Controls in detail
Driving systems
Select the “Raised” level only when re-
quired by current driving conditions. Oth-
erwise�
handling may be impaired
�
fuel consumption may increaseiThese height adjustments are so small
that you may not notice any change.Warning!
G
To help avoid personal injury, keep hands
and feet away from wheel housing area, and
stay away from under the vehicle when low-
ering the vehicle chassis.
Page 280 of 521

279 Controls in detail
Useful features
Power outlet
The power outlet is located in the rear pas-
senger compartment.�
Switch on the ignition (
�page 36).
�
Flip up cover and insert electrical plug
(cigarette lighter type).
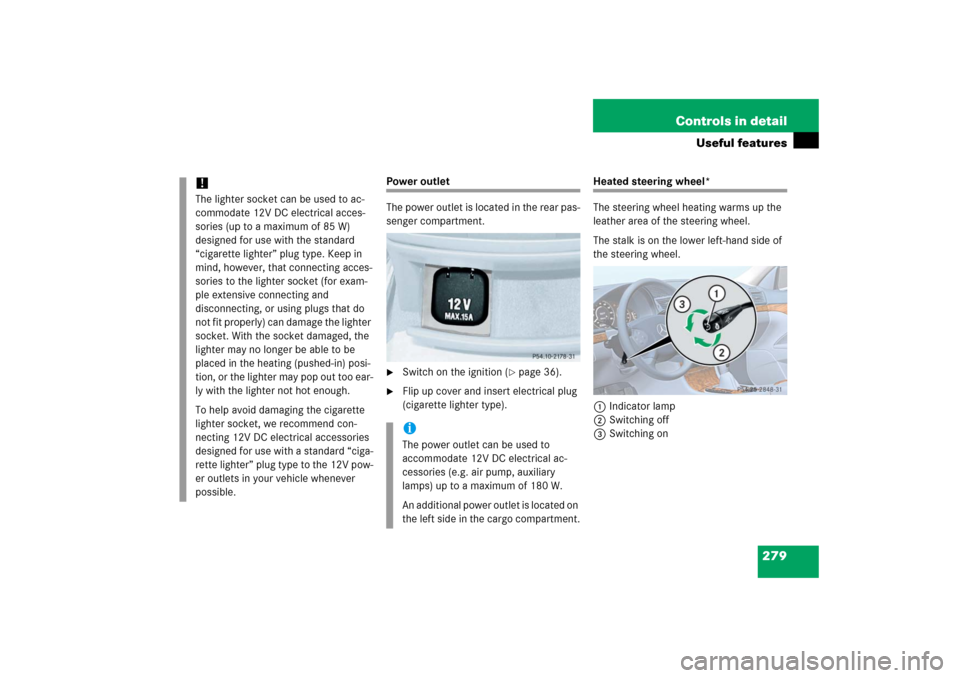
Heated steering wheel*
The steering wheel heating warms up the
leather area of the steering wheel.
The stalk is on the lower left-hand side of
the steering wheel.
1Indicator lamp
2Switching off
3Switching on
!The lighter socket can be used to ac-
commodate 12V DC electrical acces-
sories (up to a maximum of 85 W)
designed for use with the standard
“cigarette lighter” plug type. Keep in
mind, however, that connecting acces-
sories to the lighter socket (for exam-
ple extensive connecting and
disconnecting, or using plugs that do
not fit properly) can damage the lighter
socket. With the socket damaged, the
lighter may no longer be able to be
placed in the heating (pushed-in) posi-
tion, or the lighter may pop out too ear-
ly with the lighter not hot enough.
To help avoid damaging the cigarette
lighter socket, we recommend con-
necting 12V DC electrical accessories
designed for use with a standard “ciga-
rette lighter” plug type to the 12V pow-
er outlets in your vehicle whenever
possible.
iThe power outlet can be used to
accommodate 12V DC electrical ac-
cessories (e.g. air pump, auxiliary
lamps) up to a maximum of 180 W.
An additional power outlet is located on
the left side in the cargo compartment.
Page 281 of 521

280 Controls in detailUseful featuresSwitching on�
Switch on the ignition (
�page 36).
�
Turn switch at the tip of stalk in direc-
tion of arrow3.
The steering wheel is heated. Indicator
lamp1 comes on.Switching off
�
Turn switch at the tip of stalk in direc-
tion of arrow2.
The heated steering wheel is switched
off. Indicator lamp1 goes out.
For information on steering wheel, see
“Multifunction steering wheel”
(
�page 156).
Floormats
1Retainer pin
2Eyelet
iThe steering wheel heating is tempo-
rarily suspended while indicator
lamp1 remains on when�
the temperature of the vehicle inte-
rior is above 86°F (30°C)
�
the temperature of the steering
wheel is above 95°F (35°C)
When these conditions do not apply
anymore, steering wheel heating con-
tinues.
iIndicator lamp1 flashes or goes out�
in case of power surge or undervolt-
age
�
in case of a steering wheel heating
malfunction
iThe steering wheel heating switches off
automatically when you remove the
SmartKey from the starter switch or, on
vehicles with KEYLESS-GO*, when you
switch off the ignition (
�page 61) and
open the driver’s door.
iTo install or remove the floormat more
easily, move the driver’s seat or front
passenger seat as far to the rear as
possible (
�page 41).
Page 283 of 521

282 Controls in detailUseful featuresYou can take and place telephone calls us-
ing buttonss andt on the steering
wheel. To carry out other telephone func-
tions, use the control system
(�page 181).
See separate operating manual for instruc-
tions on how to use the telephone.
Tele Aid
Shortly after the completion of your ac-
quaintance call, you will receive a user ID
and password. By visiting
www.mbusa.com and selecting “Tele Aid”
(USA only), you will have access to account
information, remote door unlock and
more.The Tele Aid system
(Tele
matic A
larm I
dentification on D
e-
mand)
The Tele Aid system consists of three
types of response:
�
automatic and manual emergency
�
Roadside Assistance and
�
information
The Tele Aid system is operational provid-
ing that the vehicle’s battery is charged,
properly connected, not damaged and cel-
lular and GPS coverage is available.
The speaker volume of a Tele Aid call can
be adjusted when using the volume control
on the multifunction steering wheel. To
raise, press buttonæ and to lower,
press buttonçor use the volume knob
on your COMAND headunit.
Bear in mind that at a speed of just 30 mph
(approximately 50 km/h), your vehicle is
covering a distance of 44 feet (approximate-
ly 14 m) every second.
!The initial activation of the Tele Aid sys-
tem may only be performed by com-
pleting the subscriber agreement and
placing an acquaintance call using
button¡. Failure to complete either
of these steps will result in a system
that is not activated.
If you have any questions regarding ac-
tivation, please call the Response Cen-
ter at 1-800-756-9018 (in the USA) or
1-888-923-8367 (in Canada).
��
Page 288 of 521

287 Controls in detail
Useful features
Information button¡
The Information button¡ is located be-
low the center armrest cover.�
Press and hold button (for longer than
2 seconds).
A call to the Customer Assistance Cen-
ter will be initiated. The button will
flash while the call is in progress. The
message
Connecting call
will appear
in the multifunction display and the
audio system is muted.
When the connection is established, the
message
Call connected
appears in the
multifunction display. The Tele Aid system
will transmit data generating the vehicle
identification number, model, color and lo-
cation (subject to availability of cellular
and GPS signals).A voice connection between the Customer
Assistance Center representative and the
occupants of the vehicle will be estab-
lished. Information regarding the operation
of your vehicle, the nearest authorized
Mercedes-Benz Center or Mercedes-Benz
USA products and services is available to
you.
For more details concerning the Tele Aid
system, please visit www.mbusa.com and
use your ID and password (sent to you sep-
arately) to learn more (USA only). Roadside Assistance calls can be ter-
minated using button t on the mul-
tifunction steering wheel or the
respective button for ending a tele-
phone call on the COMAND headunit.
iThe indicator lamp on the Information
button¡ remains illuminated in red
for approximately 10 seconds during
the system self-check after switching
on the ignition (together with the SOS
button and the Roadside Assistance
button•).
See system self-check (
�page 283)
when the indicator lamp does not come
on in red or stays on longer than ap-
proximately 10 seconds.
If the indicator lamp on the Information
button¡ is flashing continuously
and there was no voice connection to
the Response Center established, then
the Tele Aid system could not initiate
an Information call (e.g. the relevant
cellular phone network is not avail-
able). The message
Call failed
ap-
pears in the multifunction display.
Information calls can be terminated us-
ing button t on the multifunction
steering wheel or the respective button
for ending a telephone call on the
COMAND headunit.
Page 289 of 521

288 Controls in detailUseful features
Call priority
If other service calls such as a
Roadside Assistance call or Information
call are active, an Emergency call is still
possible. In this case, the Emergency call
will take priority and override all other ac-
tive calls.
!If the indicator lamps do not start flash-
ing after pressing one of the buttons or
remain illuminated (in red) at any time,
the Tele Aid system has detected a
malfunction or the service is not cur-
rently active, and may not initiate a call.
Visit an authorized Mercedes-Benz
Center and have the system checked
or contact the Response Center at
1-800-756-9018 (in the USA) or
1-888-923-8367 (in Canada) as soon
as possible.
iThe indicator lamp in the respective
button flashes until the call is conclud-
ed. Calls can only be terminated by a
Response Center or Customer Assis-
tance Center representative except
Roadside Assistance and Information
calls, which can also be terminated by
pressing buttont on the multifunc-
tion steering wheel or the respective
button for ending a telephone call on
the COMAND headunit.
!If the indicator lamp continues to flash
or the system does not reset, contact
the Response Center at
1-800-756-9018 (in the USA) or
1-888-923-8367 (in Canada), or
Mercedes-Benz Customer Assistance
at 1-800-FOR-MERCedes
(1-800-367-6372) in the USA or Cus-
tomer Service at 1-800-387-0100 in
Canada.
Page 300 of 521
299 Operation
The first 1 000 miles (1 500 km)
Driving instructions
At the gas station
Engine compartment
Tires and wheels
Winter driving
Maintenance
Vehicle care