Page 273 of 521

272 Controls in detailUseful featuresStorage compartments Glove box
1Glove box lid release
2Compartment for mobile
phone/glasses
Opening the glove box
�
Push glove box lid release1.
The glove box lid opens downward.
Closing the glove box
�
Push glove box lid up to close.Storage compartment in the center
console (no CD changer* installed)
1Opening/closing button
�
Press button1 to open.
The control panel swings out upward
and the storage compartment extends
out.
�
Press button1 to close.
Warning!
G
To help avoid personal injury during a colli-
sion or sudden maneuver, exercise care
when storing objects in the vehicle. Put lug-
gage or cargo in the cargo compartment if
possible. Do not pile luggage or cargo higher
than the seat backs.
Luggage nets cannot secure hard or heavy
objects.
Keep compartment lids closed. This will help
to prevent stored objects from being thrown
around and injuring vehicle occupants dur-
ing an accident.
iClose the compartment for glasses2
first before closing the glove box.
iNever place any medications in the
storage compartment. If there is a pow-
er failure, the storage compartment
cannot be opened.
Page 278 of 521
277 Controls in detail
Useful features
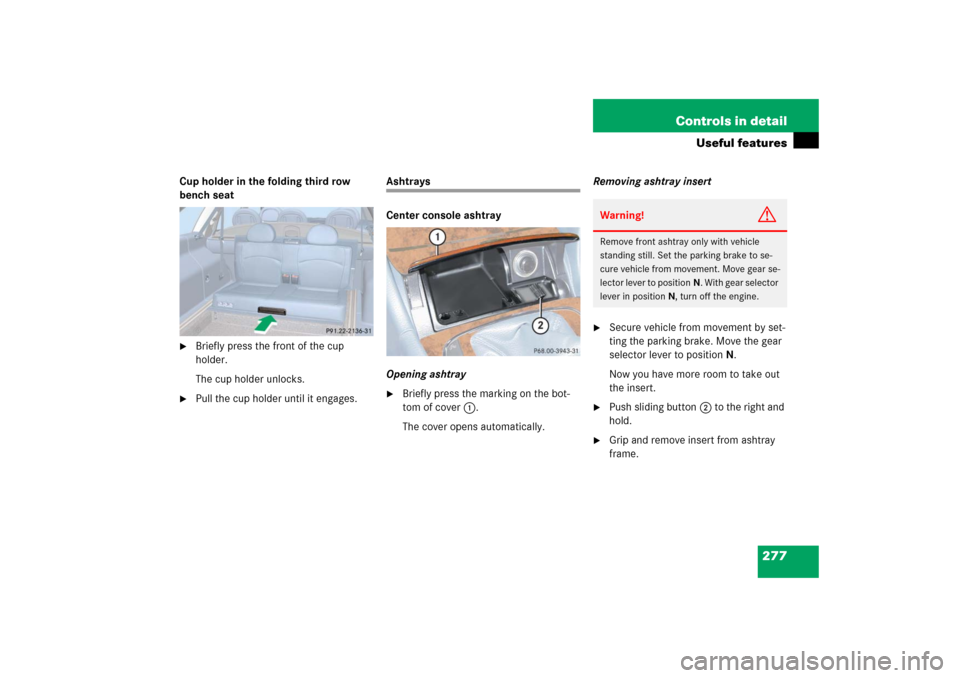
Cup holder in the folding third row
bench seat�
Briefly press the front of the cup
holder.
The cup holder unlocks.
�
Pull the cup holder until it engages.
Ashtrays
Center console ashtray
Opening ashtray�
Briefly press the marking on the bot-
tom of cover1.
The cover opens automatically.Removing ashtray insert
�
Secure vehicle from movement by set-
ting the parking brake. Move the gear
selector lever to positionN.
Now you have more room to take out
the insert.
�
Push sliding button2 to the right and
hold.
�
Grip and remove insert from ashtray
frame.Warning!
G
Remove front ashtray only with vehicle
standing still. Set the parking brake to se-
cure vehicle from movement. Move gear se-
lector lever to positionN. With gear selector
lever in positionN, turn off the engine.
Page 282 of 521

281 Controls in detail
Useful features
Removing�
Pull floormat off of retainer pins1.
�
Remove the floormat.
Installing
�
Lay down the floormat.
�
Press the floormat eyelets2 onto re-
tainer pins1.
Telephone*
Radio transmitters, such as a portable tele-
phone or a citizens band unit, should only
be used inside the vehicle if they are con-
nected to an antenna that is installed on
the outside of the vehicle.
The external antenna must be approved by
Mercedes-Benz. Please contact an autho-
rized Mercedes-Benz Center for informa-
tion on the installation of an approved
external antenna. Refer to the radio trans-
mitter operation instructions regarding use
of an external antenna.
Warning!
G
Whenever you are using floormats, make
sure there is enough clearance and that the
floormats are securely fastened.
Floormats should always be securely fas-
tened using eyelets2 and retainer pins1.
Before driving off, check that the floormats
are securely in place and adjust them if nec-
essary. A loose floormat could slip and
hinder proper functioning of the pedals.
Warning!
G
Never operate radio transmitters equipped
with a built-in or attached antenna (i.e. with-
out being connected to an external antenna)
from inside the vehicle while the engine is
running. Doing so could lead to a malfunc-
tion of the vehicle’s electronic system, pos-
sibly resulting in an accident and/or serious
personal injury.
Warning!
G
Please do not forget that your primary re-
sponsibility is to drive the vehicle. A driver’s
attention to the road must always be
his /her primary focus when driving. For
your safety and the safety of others, we rec-
ommend that you pull over to a safe location
and stop before placing or taking a tele-
phone call.
If you choose to use the telephone
1 while
driving, please use the hands-free device
and only use the telephone when road,
weather and traffic conditions permit. Some
jurisdictions prohibit the driver from using a
cellular telephone while driving a vehicle.
Only operate the COMAND (Cockpit Man-
agement and Data System) if road, weather
and traffic conditions permit.
1Observe all legal requirements.
��
Page 310 of 521

309 Operation
Driving instructions
Passenger compartmentDriving abroad
Abroad, there is an extensive
Mercedes-Benz service network at your
disposal. If you plan to drive into areas
which are not listed in the index of your
Mercedes-Benz Center directory, you
should request pertinent information from
your authorized Mercedes-Benz Center.Control and operation of radio trans-
mitter
COMAND, radio and telephone*Telephones and two-way radios
Radio transmitters, such as a portable tele-
phone or a citizens band unit should only
be used inside the vehicle if they are con-
nected to an antenna that is installed on
the outside of the vehicle.
Refer to the radio transmitter operation in-
structions regarding use of an external an-
tenna.
Warning!
G
Always fasten items being carried as secure-
ly as possible.
In an accident, during hard braking or sud-
den maneuvers, loose items will be thrown
around inside the vehicle, and cause injury
to vehicle occupants unless the items are
securely fastened in the vehicle.
The cargo compartment is the preferred
place to carry objects.
Warning!
G
Please do not forget that your primary re-
sponsibility is to drive the vehicle safely.
Only operate the COMAND (Cockpit Man-
agement and Data System), radio or tele-
phone
1 if road, weather and traffic
conditions permit.
Bear in mind that at a speed of just 30 mph
(approximately 50 km/h), your vehicle is
covering a distance of 44 feet (approximate-
ly 14 m) every second.
1Observe all legal requirements.
Warning!
G
Never operate radio transmitters equipped
with a built-in or attached antenna (i.e. with-
out being connected to an external antenna)
from inside the vehicle while the engine is
running. Doing so could lead to a malfunc-
tion of the vehicle’s electronic system, pos-
sibly resulting in an accident and/or
personal injury.
Page 391 of 521

390 Practical hintsWhat to do if …Display messages
Possible cause/consequence
Possible solution
Front passenger
airbag
activated
See Operator’s Manual
Front passenger front air bag is
activated while driving even
though a child, small individual, or
object below the system’s weight
threshold is on the front passen-
ger seat, or the front passenger
seat is empty. Objects on the seat
or forces acting on the seat may
make the system sense supple-
mental weight.
Stop the vehicle in a safe location as soon as possible and check the
front passenger seat for the following:�
Switch off the ignition (
�page 36).
�
Open the front passenger door.
�
Remove child and child restraint from front passenger seat and
properly secure the child in rear seat employing the child restraint
if necessary.
�
Remove any other items from on and around the front passenger
seat and make sure the storage pocket on the back of the front pas-
senger seat is empty.
�
Make sure that no objects which apply forces to the seat are
present (e.g. objects such as books, briefcases etc. lodged behind
or around the seat, head restraints pushing against roof etc.). The
system may recognize such forces as supplemental weight and
sense that an occupant on the front passenger seat is of a greater
weight than actually present.
�
Keep the seat unoccupied, close the front passenger door and turn
on the ignition (
�page 36).
(Continued on next page)
Page 423 of 521

422 Practical hintsWhere will I find ...?Operational position�
Turn crank handle clockwise.
Before storing the vehicle jack in its
compartment:
�
It should be fully collapsed.
�
The handle must be folded in (storage
position).Spare wheel
If your vehicle is equipped with a spare
wheel (Minispare or collapsible tire), it is
located in the cargo compartment under-
neath the third row seat cushions and foot-
well (
�page 420) or underneath the cargo
compartment floor (
�page 419). To ac-
cess the spare wheel, fold seat cushions
and footwell up (
�page 420).
1Vehicle tool kit
Wheel bolt wrench and Jack
2Spare wheel
3Luggage bowlRemoving the spare wheel
�
Turn luggage bowl3 counterclock-
wise.
�
Remove spare wheel2.
Storing the spare wheel
�
Place spare wheel2 in wheel well.
�
Turn luggage bowl3 clockwise to its
stop to secure the spare wheel.Warning!
G
The dimensions of the spare wheel
(Minispare or collapsible tire) are different
from those of the road wheels. As a result,
the vehicle handling characteristics change
when driving with a spare wheel mounted.
The Minispare wheel and collapsible tire
should only be used temporarily, and re-
placed with a regular road wheel as quickly
as possible.
Page 424 of 521
423 Practical hints
Where will I find ...?
In the case of a flat tire, you may tempo-
rarily use the spare wheel when observing
the following restrictions:�
Do not exceed a vehicle speed of
50 mph (80 km/h).
�
Drive to the nearest tire repair facility
to have the flat tire repaired or re-
placed as appropriate.
�
Do not operate vehicle with more than
one spare wheel mounted.
For more information see the “Technical
data” section (
�page 478).Setting up the collapsible wheel chock
The collapsible wheel chock serves to
additionally secure the vehicle, e.g. while
changing the wheel.
1Tilt the plates upward
2Fold the lower plate outward
3Insert the plate
�
Tilt both plates upward1.
�
Fold the lower plate outward2.
�
Guide the tabs of the lower plate all the
way into the openings of the base
plate3.
Page 440 of 521
439 Practical hints
Replacing wiper blades
1Wiper blade
2Tab
3Attachment
4Removing�
Turn the wiper blade1 at a right angle
to wiper arm.
�
Press tab2 down and push wiper
blade1 downward in direction of
arrow4.
�
Remove wiper blade1.
Installing rear wiper blade
1Wiper blade
2Tab
3Attachment
4Installing�
Slide the wiper blade1 into
attachment3 in direction of
arrow4.
�
Let tab2 latch into attachment3
until it locks in place.
�
Check if the wiper blade is securely fas-
tened.
�
Fold the wiper arm backward to rest on
the rear windshield.
Make sure you hold on to the wiper arm
when folding it back.