Page 101 of 521

100 Safety and SecurityDriving safety systemsWarning!
G
If you see the ESP
® warning lampv
flashing in the speedometer, proceed as fol-
lows:
�
While driving off, apply as little throttle
as possible
�
While driving, ease up on the accelera-
tor
�
Adapt your speed and driving style to
the prevailing road conditions
Failure to observe these guidelines could
cause the vehicle to skid.
The ESP
® cannot prevent accidents result-
ing from excessive speed.
!Do not tow with one axle raised.
Otherwise the transfer case can be
damaged, which is not covered by the
Mercedes-Benz Limited Warranty.
!Performance testing must only be con-
ducted on a two-axle dynamometer.
Otherwise the transfer case can be
damaged, which is not covered by the
Mercedes-Benz Limited Warranty.!Because of the ESP’s
® automatic oper-
ation, the engine and the ignition must
be shut off (SmartKey in starter switch
position0 or1 or KEYLESS-GO
start/stop button* in position0 or1)
when the parking brake is being tested
on a brake test dynamometer.
Active braking action through ESP
®
may otherwise seriously damage the
front or rear axle brake system.
Operational tests with the engine
running can only be conducted on a
two-axle dynamometer.
Page 102 of 521
101 Safety and Security
Anti-theft systems
�Anti-theft systems
Immobilizer
The immobilizer prevents unauthorized
persons from starting your vehicle.
Activating
With the SmartKey�
Remove the SmartKey from the starter
switch.
With KEYLESS-GO*
�
Turn off the engine by means of the
start/stop button on the gear selector
lever.
�
Open the driver’s door.Deactivating
With the SmartKey
�
Switch on the ignition.
With KEYLESS-GO*
�
Start the engine by means of the
start/stop button on the gear selector
lever.
Anti-theft alarm system
Once the alarm system has been armed, a
visual and audible alarm is triggered when
someone opens:�
a door
�
the tailgate
�
the hood
The alarm will stay on, even if the activat-
ing element (a door, for example) is imme-
diately closed.
The alarm system will also be triggered
when
�
someone attempts to raise the vehicle
�
the vehicle is opened using the
mechanical key
�
someone opens a door from the inside
iIn case the engine cannot be started
(yet the vehicle’s battery is charged),
the system is not operational. Contact
an authorized Mercedes-Benz Center
or call 1-800-FOR-MERCedes (in the
USA), or 1-800-387-0100 (in Canada).
Page 105 of 521
104 Safety and SecurityAnti-theft systemsDisarming tow-away alarm
To prevent triggering the tow-away alarm
feature, switch off the tow-away alarm be-
fore towing the vehicle, or when parking on
a surface subject to movement, such as a
ferry or auto train.
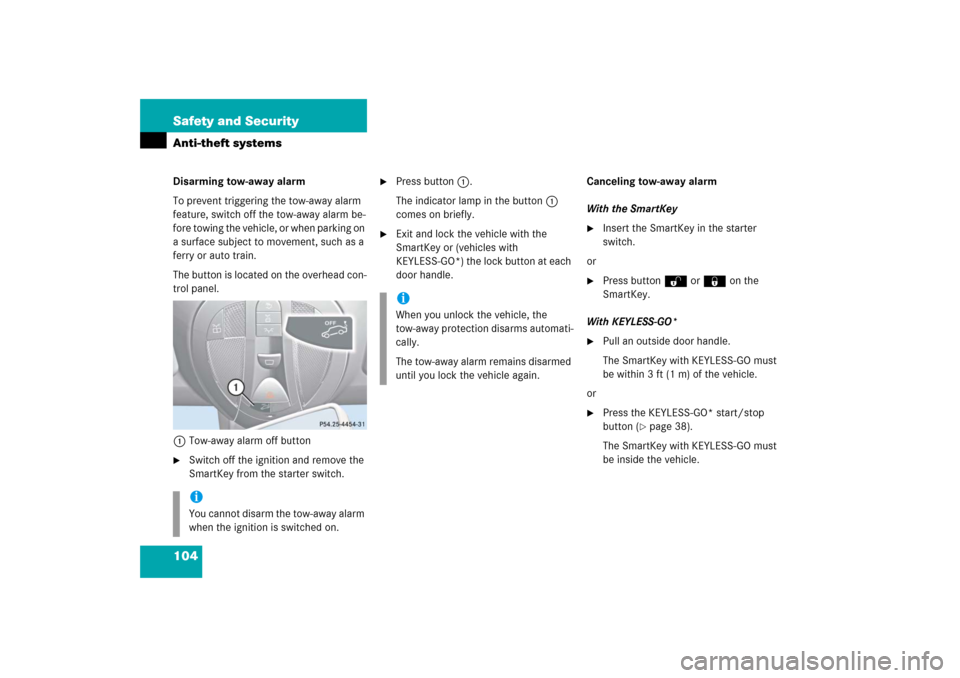
The button is located on the overhead con-
trol panel.
1Tow-away alarm off button�
Switch off the ignition and remove the
SmartKey from the starter switch.
�
Press button1.
The indicator lamp in the button1
comes on briefly.
�
Exit and lock the vehicle with the
SmartKey or (vehicles with
KEYLESS-GO*) the lock button at each
door handle.Canceling tow-away alarm
With the SmartKey
�
Insert the SmartKey in the starter
switch.
or
�
Press button Œ or ‹ on the
SmartKey.
With KEYLESS-GO*
�
Pull an outside door handle.
The SmartKey with KEYLESS-GO must
be within 3 ft (1 m) of the vehicle.
or
�
Press the KEYLESS-GO* start/stop
button (
�page 38).
The SmartKey with KEYLESS-GO must
be inside the vehicle.
iYou cannot disarm the tow-away alarm
when the ignition is switched on.
iWhen you unlock the vehicle, the
tow-away protection disarms automati-
cally.
The tow-away alarm remains disarmed
until you lock the vehicle again.
Page 128 of 521
127 Controls in detail
Locking and unlocking
Automatic central locking
The doors and the tailgate automatically
lock when the ignition is switched on and
the wheels are turning at vehicle speeds of
approximately 9 mph (15 km / h) or more.
You can open a locked door from the in-
side. Open door only when conditions are
safe to do so.For more information on towing the vehi-
cle, see “Towing the vehicle” (
�page 458).
You can deactivate the automatic locking
mode using the control system
(
�page 176).
Warning!
G
Monitor the closing procedure carefully to
make sure no one is in danger of being in-
jured. To prevent possible personal injury,
always keep hands and fingers away from
the cargo compartment opening when clos-
ing the tailgate. Be especially careful when
small children are around. To stop the clos-
ing procedure, do one of the following: �
press KEYLESS-GO locking / closing
switch 1
�
press tailgate closing switch1
(�page 125)
�
press button Š on the SmartKey with
KEYLESS-GO (
�page 111)
�
pull the remote tailgate switch (on the
driver’s door) (
�page 121)
Even with the SmartKey with KEYLESS-GO
removed from the vehicle, the locking/clos-
ing switch can be operated. Therefore, do
not leave children unattended in the vehicle,
or with access to an unlocked vehicle. Unsu-
pervised use of vehicle equipment may
cause an accident and/or serious personal
injury.Warning!
G
Only drive with the tailgate closed as,
among other dangers such as blocked visi-
bility, exhaust fumes may enter the vehicle
interior.
iThe doors unlock automatically after an
accident if the force of the impact ex-
ceeds a preset threshold.
The vehicle automatically locks when
the ignition is switched on and the
wheels are turning at vehicle speeds of
approximately 9 mph (15 km / h) or
more. You could therefore lock yourself
out when the vehicle�
is pushed or towed
�
is on a test stand
Page 131 of 521
130 Controls in detailSeatsFolding head restraints back with switch
in the center console
1Head restraint release switch�
Switch on the ignition (
�page 36).
�
Press the symbol-side on switch1 to
release the head restraints.
The head restraints will fold backward.Folding head restraints back manually
(rear outer seats only)
1Release button
�
Push release button1 and fold the
head restraints backward.Placing head restraints upright
�
Pull the head restraint forward until it
locks into position.!Make sure the head restraints engage
when placing them upright. Otherwise
their protective function cannot be as-
sured.
Page 134 of 521

133 Controls in detailSeats
Lumbar support
The curvature of the driver’s seat can be
adjusted to help enhance lower back sup-
port and seating comfort.
1Adjustment lever�
Move adjustment lever1 in direction
of the arrows until you have reached a
comfortable seating position.Drive - Dynamic seat* with multicon-
tour features
The Drive - Dynamic seat automatically ad-
justs the lateral support provided by the
backrest to your driving style.
The Drive - Dynamic seat electronically
controls the air pressure in the air cham-
bers of the backrest side bolsters. This
function improves driving comfort and
pleasure.
In addition, the Drive-Dynamic seat has a
movable seat cushion and inflatable air
cushions built into the backrest to provide
additional lumbar and side support.
The seat cushion movement, backrest
cushion height and curvature can be con-
tinuously varied with switches on the right
side of the seat on the driver side, or the
left side of the seat on the passenger side
after turning the SmartKey in the starter
switch to position2 or pressing the KEY-
LESS-GO* start/stop button twice.1Backrest center
2Backrest bottom
3Seat cushion depth
4Activate drive dynamic function
5Backrest side bolsters
6Massage function
�
Switch on the ignition (
�page 36).
Page 136 of 521
135 Controls in detailSeats
Seat heating*
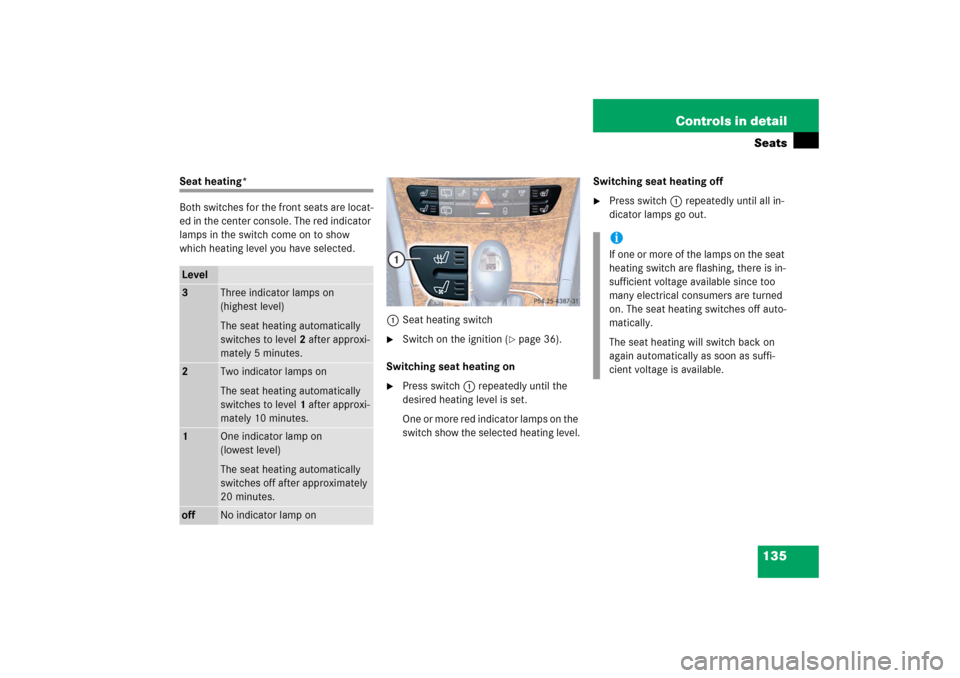
Both switches for the front seats are locat-
ed in the center console. The red indicator
lamps in the switch come on to show
which heating level you have selected.
1Seat heating switch
�
Switch on the ignition (
�page 36).
Switching seat heating on
�
Press switch1 repeatedly until the
desired heating level is set.
One or more red indicator lamps on the
switch show the selected heating level.Switching seat heating off
�
Press switch1 repeatedly until all in-
dicator lamps go out.
Level3
Three indicator lamps on
(highest level)
The seat heating automatically
switches to level2 after approxi-
mately 5 minutes.
2
Two indicator lamps on
The seat heating automatically
switches to level1 after approxi-
mately 10 minutes.
1
One indicator lamp on
(lowest level)
The seat heating automatically
switches off after approximately
20 minutes.
off
No indicator lamp on
iIf one or more of the lamps on the seat
heating switch are flashing, there is in-
sufficient voltage available since too
many electrical consumers are turned
on. The seat heating switches off auto-
matically.
The seat heating will switch back on
again automatically as soon as suffi-
cient voltage is available.
Page 137 of 521
136 Controls in detailSeatsSeat ventilation*
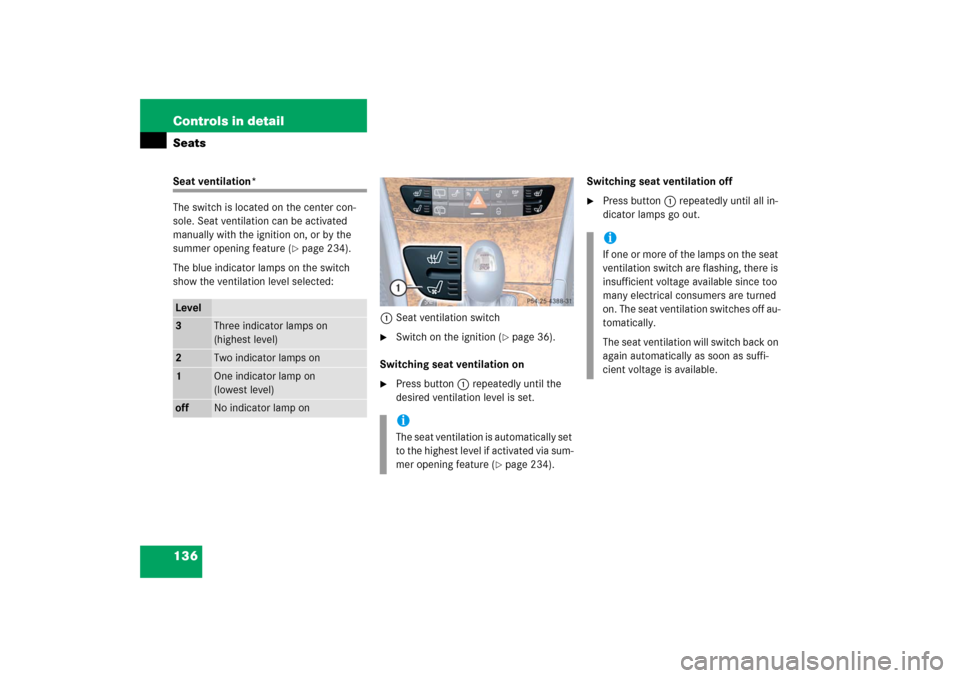
The switch is located on the center con-
sole. Seat ventilation can be activated
manually with the ignition on, or by the
summer opening feature (
�page 234).
The blue indicator lamps on the switch
show the ventilation level selected:
1Seat ventilation switch
�
Switch on the ignition (
�page 36).
Switching seat ventilation on
�
Press button1 repeatedly until the
desired ventilation level is set.Switching seat ventilation off
�
Press button1 repeatedly until all in-
dicator lamps go out.
Level3
Three indicator lamps on
(highest level)
2
Two indicator lamps on
1
One indicator lamp on
(lowest level)
off
No indicator lamp on
iThe seat ventilation is automatically set
to the highest level if activated via sum-
mer opening feature (
�page 234).
iIf one or more of the lamps on the seat
ventilation switch are flashing, there is
insufficient voltage available since too
many electrical consumers are turned
on. The seat ventilation switches off au-
tomatically.
The seat ventilation will switch back on
again automatically as soon as suffi-
cient voltage is available.