Page 217 of 489

216 Controls in detailAudio systemCalling up AUX mode�
Press and hold Q button until AUX
appears in the display.
Canceling AUX mode
�
Press any audio source button.
Radio operation
Selecting radio mode�
Press b button.
Calling up wavebands
You can choose from among the FM, AM
and WB wavebands.
Weather band (
�page 219).Calling up wavebands for radios without
SAT*
�
Press
FM or
AM soft key to switch be-
tween FM and AM.
The FM and AM wavebands are called
up one after another.
or
�
Press
WB soft key.
The weather band menu is called up.
The waveband currently selected
appears in the upper left-hand corner
of the display.
Calling up wavebands for radios with
SAT*
�
Press
FM, AM or
WB soft key repeatedly
until desired waveband has been se-
lected.
The FM, AM and WB wavebands are
called up one after another.The waveband currently selected
appears in the upper left-hand corner
of the display.
Selecting a station
The following options are available for se-
lecting a station:
�
Direct frequency input (
�page 217)
�
Manual tuning (
�page 217)
�
Automatic seek tuning (
�page 217)
�
Scan search (
�page 217)
�
Station memory (
�page 218)
�
Automatic station memory (Autostore)
(�page 218)
The station search proceeds in the follow-
ing frequency increments:
�
200 kHz in FM range
�
10 kHz in AM range
iFM waveband: 87.7......107.9 MHz
AM waveband: 530......1 710 KHz
Page 218 of 489

217 Controls in detail
Audio system
Direct frequency input�
Select desired waveband.
�
Press * button.
�
Enter desired frequency with buttons
1to R.Manual tuning
�
Select desired waveband.
�
Press S or Tbutton for approx-
imately three seconds.
�
Press button repeatedly until desired
frequency has been reached.
Step-by-step station tuning takes place
in ascending or descending order. Each
time the button is pressed, the radio
tunes further by 0.2 MHz. During man-
ual tuning, the radio is muted.
Automatic seek tuning
�
Select desired waveband.
�
Press S or T button briefly.
The radio will tune to the next highest
or next lowest receivable frequency.Scan search
�
Starting scan search�
Select desired waveband.
�
Press
SC soft key.
SC will appear in the display. The ra-
dio briefly tunes in all receivable
stations on the waveband selected.
�
Ending scan search�
Press
SC soft key or S or T.
The station last played will be se-
lected and
SC disappears from the
display.
iYou can only enter frequencies within
the respective waveband.
If a button is not pressed within
four seconds, the radio will return to
the last station tuned.
iIf no station is received after two
consecutive scans of the complete
frequency range, then the scan stops
at the frequency from which it began.
Page 219 of 489
218 Controls in detailAudio systemStation memory
You can store ten AM and ten FM stations
in the memory.�
Storing stations�
Tune in desired station.
�
Press and hold desired station
button1 to R until a brief
signal tone is heard.
The frequency is stored on the se-
lected station button.
�
Calling up stations�
Press desired station button1
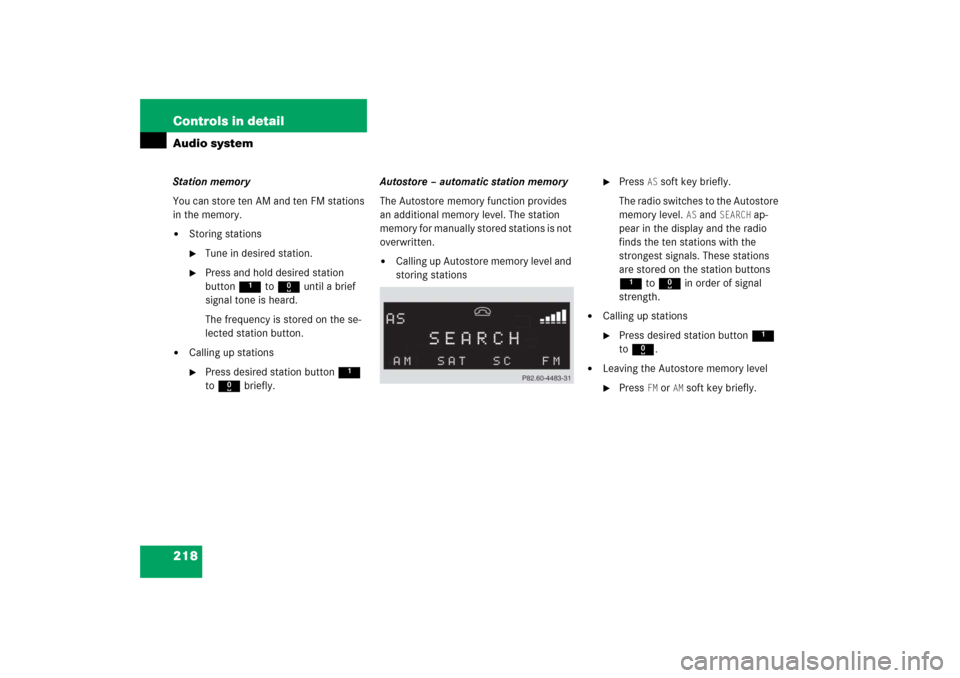
to R briefly.Autostore – automatic station memory
The Autostore memory function provides
an additional memory level. The station
memory for manually stored stations is not
overwritten.
�
Calling up Autostore memory level and
storing stations
�
Press
AS soft key briefly.
The radio switches to the Autostore
memory level.
AS and
SEARCH
ap-
pear in the display and the radio
finds the ten stations with the
strongest signals. These stations
are stored on the station buttons
1 to R in order of signal
strength.
�
Calling up stations�
Press desired station button1
to R.
�
Leaving the Autostore memory level�
Press
FM or
AM
soft key briefly.
Page 220 of 489

�
Mute on�
Press U button.
The radio mode is interrupted")
219 Controls in detail
Audio system
Interrupting radio mode
The radio mode is interrupted by an incom-
ing call on the telephone* (
�page 236)
�
Mute on�
Press U button.
The radio mode is interrupted and MUTED
appears in the display.
�
Mute off�
Press U button.
The radio mode is again active.
Weather band
�
Press
WB soft key.
The weather band station last received
is tuned in.Selecting a weather band station
directly
�
Select desired weather band station
with buttons 1 to 7.
If a station cannot be tuned in, a search
is automatically started.
Search
�
Press S or T button to tune in
the next receivable weather band sta-
tion.Scan search
�
Starting scan search�
Press
SC soft key.
SC will appear in the display. The ra-
dio briefly tunes in all receivable
weather band stations.
�
Ending scan search�
Press
SC soft key or S or T.
The weather band station last
played will be selected and
SC dis-
appears from the display.
iIf no weather band station is received
after three consecutive scans of the
complete frequency range, then the
scan stops at the channel with which it
began and
NO WB FOUND
appears in the
display.
If this happens, switch back to stan-
dard radio mode.
Page 222 of 489

221 Controls in detail
Audio system
Calling up the SAT main menu�
Press
SAT
soft key.
SAT
is displayed in the upper left-hand
corner of the display.
Prior to activation of the satellite radio
service (
�page 221).
After activation of satellite radio ser-
vice (
�page 221).
Prior to activation of the satellite radio
service
The telephone number of the SIRIUS
Service Center (888-539-7474) is dis-
played.
�
Press
ESN
soft key.
The twelve-digit electronic serial num-
ber (ESN) of the SAT tuner* installed in
your vehicle is displayed.
This information is required to call the
SIRIUS Service Center for an activation re-
quest.
After activation of the satellite radio
service
The satellite radio main menu appears.
The radio station selected last is audible,
provided it can be received.The first channel 001 is called up and the
PTY system changes to All categories.
If no station can be received,
ACQUIRING
appears in the display.
If the Satellite radio service is not
activated,
ACQUIRING
will also appear in the
radio display and
NO SAT
will appear in the
multifunction display.
iCredit card information may also be re-
quired for your application.
The activation process takes approxi-
mately five to ten minutes after calling
the SIRIUS Service Center.
iThe system will tune to a default sta-
tion if no station had been selected pre-
viously.
Page 224 of 489

223 Controls in detail
Audio system
Tuning via the program category list
The category list contains all currently re-
ceivable categories of programs. It is
arranged alphabetically.�
Selecting a category�
Press
PTY
soft key.
The current PTY category of the sta-
tion is displayed.
�
Press
<<<
or
>>>
soft key.
This switches between the individu-
al categories.
When changing the category, the chan-
nel selected last in the new category
becomes audible.The system will automatically switch to
a station of the selected category if the
currently selected station is not of the
selected category. Otherwise, the cur-
rently selected station remains tuned.
�
Tuning a station within the selected
category
The channels identified for the current-
ly selected category are arranged
numerically. Only one entry is visible at
a time.�
Press S or T button briefly.
The next station within the category
is started.
or
�
Press and hold S or T but-
ton for approximately three sec-
onds until desired station has been
reached.Tuning via scan search
Scan search is characterized as follows:
�
Scan search plays a channel for ap-
proximately eight seconds and then
skips to the next channel within the
current category.
�
Scan search can be terminated manu-
ally.
�
Press
SC soft key.
The search starts. SC appears in the
display.
�
Press
SC soft key again.
The search stops.
Page 225 of 489
 re-
lated to the current channel can be dis-
played.�
Press
INF
soft key.
The titl")
224 Controls in detailAudio systemObtaining additional text information
Additional text information (artist, title) re-
lated to the current channel can be dis-
played.�
Press
INF
soft key.
The title being played is displayed.
�
Press
INF
soft key again.
The name of the artist performing the
title being played is displayed.Storing stations
�
Tune in desired station.
�
Press and hold desired station button
1 to R until a brief signal tone is
heard.
The frequency is stored on the selected
station button.
The radio saves the current station at
the memory preset selected. The mem-
ory preset selected appears in the sta-
tus line, e.g. S3.Calling up the ESN information menu
�
Press
INF
soft key.
�
Press
ESN
soft key.
The twelve-digit electronic serial num-
ber (ESN) of the SAT tuner* installed in
your vehicle is displayed.
�
Press
RET
soft key to exit the menu.
iIf a button is not pressed within
four seconds, the radio will return to
the standard display.
iThere are ten presets available.
An existing entry is overwritten in the
memory list when a new entry is given.
Page 227 of 489

226 Controls in detailAudio systemDo not use CDs with an eight cm diameter,
not even with a CD adapter. Attempting to
play CDs with an eight cm diameter or
playing such CDs with an adapter may
cause damage to the CD drive. Such dam-
age is not covered by the Mercedes-Benz
Limited Warranty.
Should excessively high or low tempera-
tures occur while in CD changer mode*, CD ERROR
will appear in the display, and the
CD will be muted until the temperature has
reached an acceptable level for the system
to continue operation.
The single CD player and the CD changer*
plays audio CDs.
Tips on handling CDs
�
Handle CDs carefully to prevent inter-
ference during playback.
�
Avoid scratches, fingerprints and dust
on the CDs.
�
Do not write on CDs or apply any labels
or other material to them.
�
Clean CDs from time to time with a
commercially available cleaning cloth.
Never wipe the CD in a circular motion;
instead, wipe it in a straight line start-
ing in the center and moving outward.
Do not use solvents, anti-static sprays,
etc. for cleaning.
�
Replace the CD in its case after use.
�
Protect CDs from heat and direct sun-
light.
Operating the single CD player in the
audio system unit
Loading a CD
The single CD player in the audio system
unit has capacity for one CD. The CD slot
for loading the drive is located underneath
the soft keys.
�
Make sure the system is switched on.
�
Insert CD into CD slot. The label side of
the CD must face upwards.The system automatically pulls the CD
into the CD slot. The audio CD begins
to play.
!If a CD is already loaded, it must be
ejected before inserting a new CD. In-
serting a second CD in the slot with an-
other CD still loaded will cause damage
to the CD drive not covered by the
Mercedes-Benz Limited Warranty. iIf a CD has been inserted incorrectly or
cannot be read,
WRONG CD ERROR
will ap-
pear in the display.