Page 128 of 489

127 Controls in detailSeats
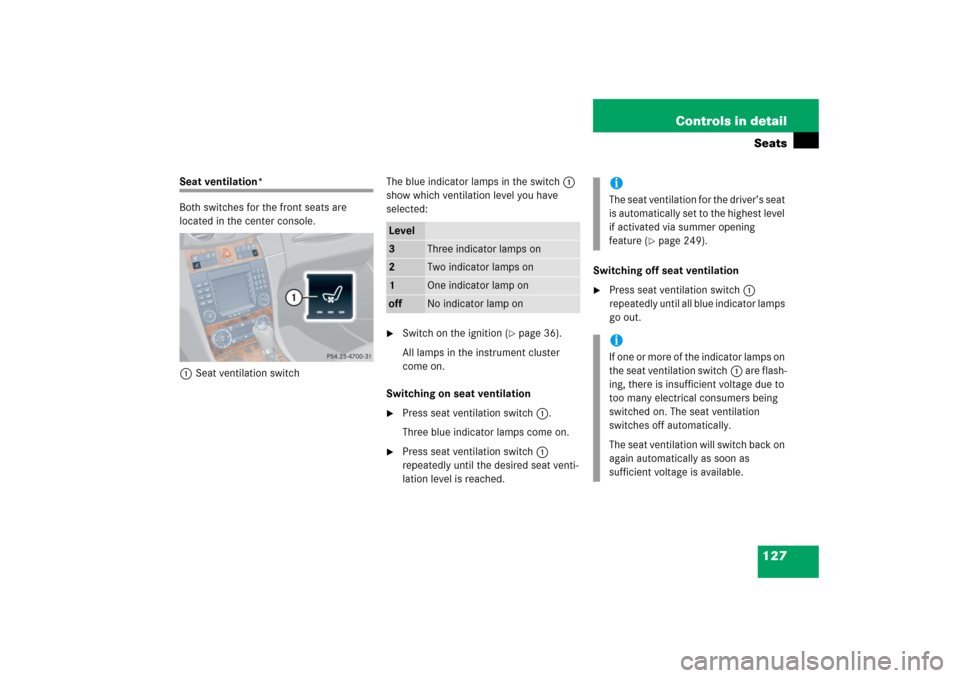
Seat ventilation*
Both switches for the front seats are
located in the center console.
1Seat ventilation switchThe blue indicator lamps in the switch1
show which ventilation level you have
selected:
�
Switch on the ignition (
�page 36).
All lamps in the instrument cluster
come on.
Switching on seat ventilation
�
Press seat ventilation switch1.
Three blue indicator lamps come on.
�
Press seat ventilation switch1
repeatedly until the desired seat venti-
lation level is reached.Switching off seat ventilation
�
Press seat ventilation switch1
repeatedly until all blue indicator lamps
go out.
Level3
Three indicator lamps on
2
Two indicator lamps on
1
One indicator lamp on
off
No indicator lamp on
iThe seat ventilation for the driver’s seat
is automatically set to the highest level
if activated via summer opening
feature (
�page 249).
iIf one or more of the indicator lamps on
the seat ventilation switch1 are flash-
ing, there is insufficient voltage due to
too many electrical consumers being
switched on. The seat ventilation
switches off automatically.
The seat ventilation will switch back on
again automatically as soon as
sufficient voltage is available.
Page 129 of 489

128 Controls in detailMemory functionPrior to operating the vehicle, the driver
should check and adjust the seat height,
seat position fore and aft, and seat back-
rest angle if necessary, to ensure adequate
control, reach and comfort. The head
restraint should also be adjusted for
proper height. See also the section on
air bags (
�page 63) for proper seat
positioning.
In addition, adjust the steering wheel to
ensure adequate control, reach, operation
and comfort. Both the interior and exterior
rear view mirrors should be adjusted for
adequate rear vision.
Fasten seat belts. Infants and small chil-
dren should be seated in a properly se-
cured restraint system that complies with
U.S. Federal Motor Vehicle Safety
Standards 213 and 225 and
Canadian Motor Vehicle Safety Standards
213 and 210.2.The following settings are stored when
using the buttons on the driver’s door:
�
Driver’s seat, backrest and head
restraint position
�
Steering wheel position
�
Exterior rear view mirror position
The following settings are stored when us-
ing the buttons on the passenger door:
�
Front passenger seat, backrest and
head restraint positionThe memory button and memory position
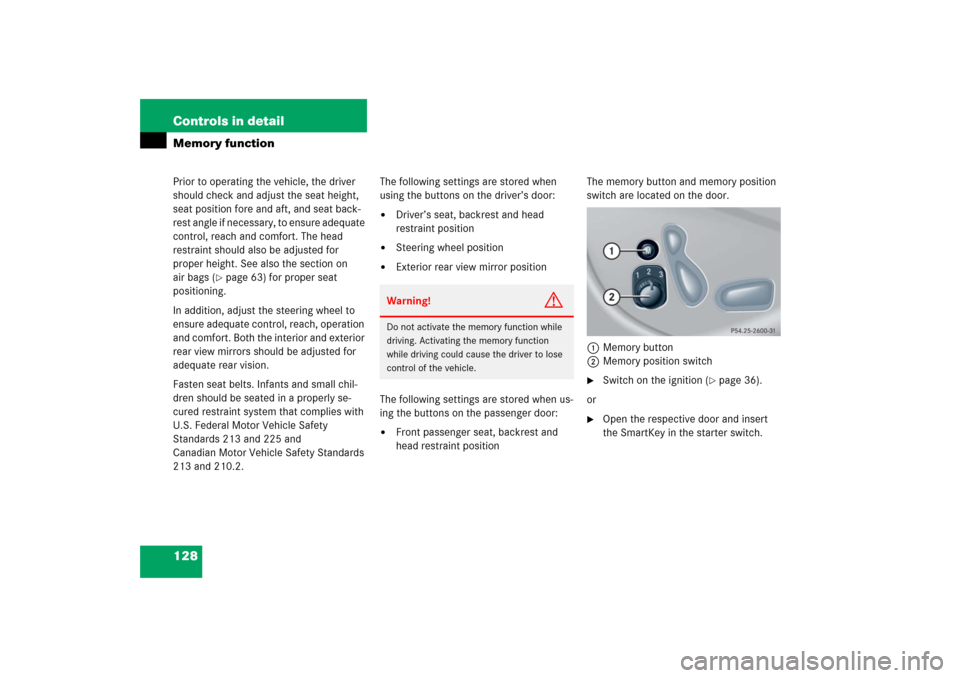
switch are located on the door.
1Memory button
2Memory position switch
�
Switch on the ignition (
�page 36).
or
�
Open the respective door and insert
the SmartKey in the starter switch.
Warning!
G
Do not activate the memory function while
driving. Activating the memory function
while driving could cause the driver to lose
control of the vehicle.
Page 131 of 489

130 Controls in detailMemory functionStoring exterior rear view mirror park-ing position
For easier parking, you can adjust the
passenger-side exterior rear view mirror so
that you can see the right rear wheel as
soon as you engage reverse gearR.
For information on activating the parking
position feature, see “Setting parking posi-
tion for exterior rear view mirror”
(�page 164) and “Activating exterior rear
view mirror parking position”
(�page 182).1Memory button
2Adjustment button
3Passenger side exterior rear view
mirror button
�
Stop the vehicle.
�
Switch on the ignition (
�page 36).
�
Press button3.
The passenger-side exterior rear view
mirror is selected.
�
Adjust the passenger-side exterior rear
view mirror with button2 so that you
see the rear wheel and the road curb.
�
Press memory button1.
�
Within three seconds, press bottom of
adjustment button2.
The parking position is stored if the
mirror does not move.iIf the mirror does move, repeat the
above steps. After the setting is stored
you can move the mirror again.
Page 138 of 489
137 Controls in detail
Lighting
Hazard warning flasher
The hazard warning flasher can be
switched on at all times, even with the
SmartKey or the SmartKey with
KEYLESS-GO* removed from the starter
switch or with the SmartKey with
KEYLESS-GO* removed from the vehicle.
The hazard warning flasher switches on
automatically when an air bag deploys.
The hazard warning flasher switch is
located on the upper part of the center
console.
1Hazard warning flasher switchSwitching on hazard warning flasher
�
Press hazard warning flasher
switch1.
All turn signals are flashing.Switching off hazard warning flasher
�
Press hazard warning flasher switch1
again.
iWith the hazard warning flasher
activated and the combination switch
set for either left or right turn, only the
respective turn signals will operate
when the ignition is switched on
(�page 36).
iIf the hazard warning flasher has been
activated automatically, press hazard
warning flasher switch1 once to
switch it off.
Page 141 of 489

140 Controls in detailInstrument clusterFor a full view illustration of the instrument
cluster, see “Instrument cluster”
(�page 24).
1Reset button
The instrument cluster is activated when
you
�
open a door
�
switch on the ignition (
�page 36)
�
press the reset button1
�
switch on the exterior lamps
You can change the instrument cluster
settings in the Instrument cluster submenu
of the control system (
�page 155).
Instrument cluster illumination
Use the reset button1 to adjust the
illumination brightness for the instrument
cluster.To brighten illumination
�
Turn reset button1 clockwise.
The instrument cluster illumination will
brighten.
To dim illumination
�
Turn reset button1 counterclock-
wise.
The instrument cluster illumination will
dim.
Warning!
G
No messages will be displayed if either the
instrument cluster or the multifunction
display is inoperative.
As a result, you will not be able to see infor-
mation about your driving conditions, such
as speed or outside temperature, warn-
ing/indicator lamps, malfunction/warning
messages or the failure of any systems.
Driving characteristics may be impaired.
If you must continue to drive, please do so
with added caution. Visit an authorized
Mercedes-Benz Center as soon as possible.
iThe instrument cluster illumination is
dimmed or brightened automatically to
suit ambient light conditions.
The instrument cluster illumination will
also be adjusted automatically when
you switch on the vehicle’s exterior
lamps.
Page 153 of 489

152 Controls in detailControl systemShould the vehicle’s system record any
conditions while driving, the number of
messages will reappear in the multifunc-
tion display when the SmartKey in the
starter switch is turned to position0 or
removed from the starter switch. With
KEYLESS-GO*, turn off the engine by
pressing the KEYLESS-GO* start/stop
button and open the driver’s door.
Settings menu
In the
Settings
menu there are two
functions:
�
The function
Reset to factory
settings?
, with which you can reset all
the settings to the original factory
settings.
�
A collection of submenus with which
you can make individual settings for
your vehicle.
�
Press buttonè orÿ repeatedly
until the
Settings
menu appears in the
multifunction display.Resetting all settings
You can reset all the functions of all
submenus to the factory settings.
�
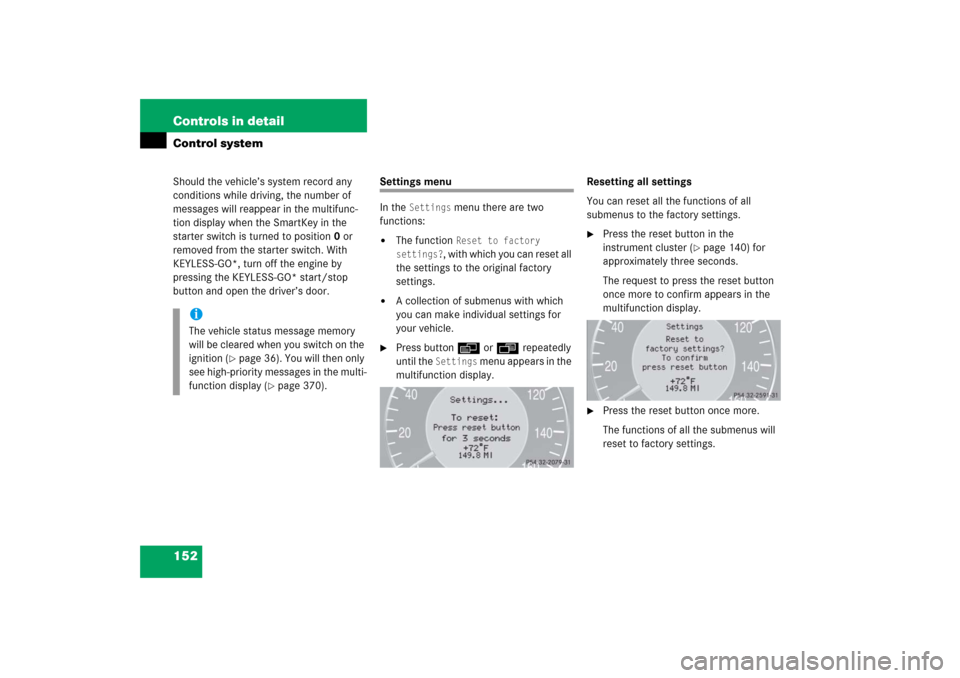
Press the reset button in the
instrument cluster (
�page 140) for
approximately three seconds.
The request to press the reset button
once more to confirm appears in the
multifunction display.
�
Press the reset button once more.
The functions of all the submenus will
reset to factory settings.
iThe vehicle status message memory
will be cleared when you switch on the
ignition (
�page 36). You will then only
see high-priority messages in the multi-
function display (
�page 370).
Page 167 of 489

166 Controls in detailControl systemFuel consumption since last reset�
Press buttonÿ orè repeatedly
until the first function of the trip com-
puter menu appears in the
multifunction display.
�
Press buttonj ork repeatedly
until the message
After reset
appears
in the multifunction display.
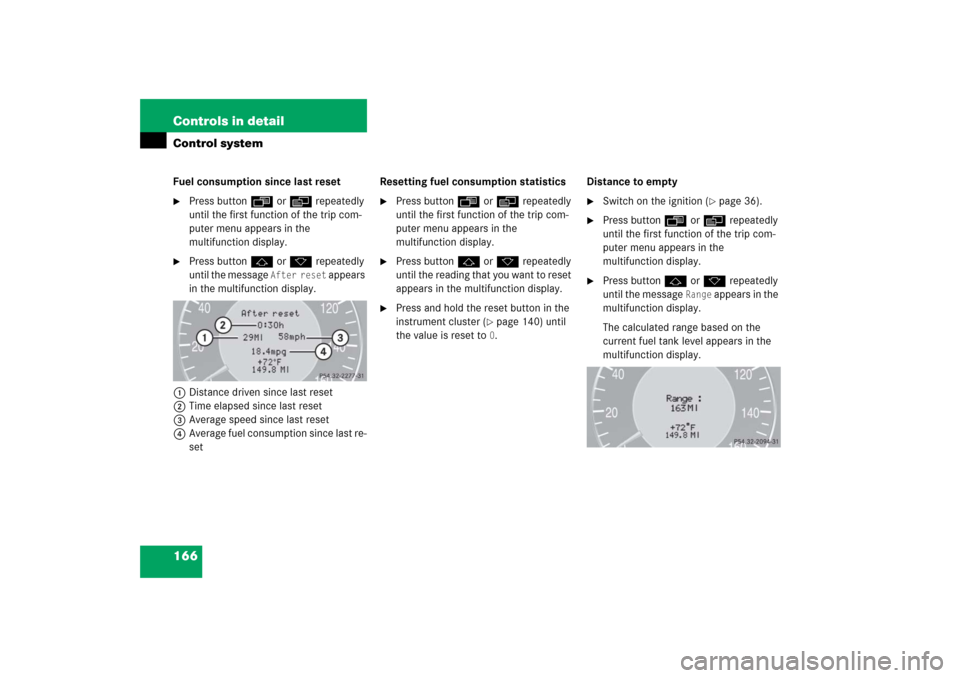
1Distance driven since last reset
2Time elapsed since last reset
3Average speed since last reset
4Average fuel consumption since last re-
setResetting fuel consumption statistics
�
Press buttonÿ orè repeatedly
until the first function of the trip com-
puter menu appears in the
multifunction display.
�
Press buttonj ork repeatedly
until the reading that you want to reset
appears in the multifunction display.
�
Press and hold the reset button in the
instrument cluster (
�page 140) until
the value is reset to 0.Distance to empty
�
Switch on the ignition (
�page 36).
�
Press buttonÿ orè repeatedly
until the first function of the trip com-
puter menu appears in the
multifunction display.
�
Press buttonj ork repeatedly
until the message
Range
appears in the
multifunction display.
The calculated range based on the
current fuel tank level appears in the
multifunction display.
Page 181 of 489
180 Controls in detailGood visibilityFor information on the windshield wipers,
see “Windshield wipers” (
�page 53).
Headlamp cleaning system*
The button is located on the left side of the
dashboard.
1Headlamp washer button�
Switch on the ignition (
�page 36).
�
Press button1.
The headlamps are cleaned with a
high-pressure water jet.For information on filling up the washer
reservoir, see “Windshield washer system
and headlamp cleaning system*”
(
�page 459).
Rear view mirrors
For more information on setting the rear
view mirrors, see “Mirrors” (
�page 43).
Interior rear view mirror, antiglare
position
1Lever
�
Tilt the mirror to the antiglare position
by moving lever1 towards the wind-
shield.
The interior rear view mirror is dimmed.
iThe headlamps will automatically be
cleaned when you have�
switched on the headlamps
and
�
operated the windshield wipers
with windshield washer fluid fifteen
times
When you switch off ignition, the
counter resets.