Page 130 of 473

129 Controls in detail
Control system
Menus, submenus and functions
Menu1Menu2Menu3Menu4Menu5Menu6Menu7
Standard
displayAUDIONAV*Vehicle status
message memorySettingsTrip computerTelephone*
(�page 130)(�page 131)(�page 134)(�page 134)(�page 135)(�page 150)(�page 152)
Commands/submenus
Run Flat
Indicator*
(Canada only)Select radio
stationShow route guid-
ance instructions,
current direction
traveledCall up vehicle mal-
function, warning and
system status messag-
es stored in memory
1
1The vehicle status message memory menu is only displayed if there is a message stored.
Reset to
factory
settingsFuel consumption
statistics after
startLoad phone
book
Digital speed-
ometer or out-
side temperatureSelect satellite
radio station*
(USA only)Instrument
cluster sub-
menuFuel consumption
statistics since
the last resetSearch for
name in
phone book
Call up main-
tenance service
displayOperate
CD player* Time/Date
submenuDistance to emp-
ty
Check engine oil
levelLighting
submenu
Vehicle
submenu
Convenience
submenu
Page 137 of 473
 f")
136 Controls in detail
Control system
Resetting all settings
You can reset all the functions of all
submenus to the factory settings.
�Press the reset button in the
instrument cluster (
�page 122) for
approximately 3 seconds.
The request to press the reset button
once more to confirm appears in the
multifunction display.
�Press the reset button once more.
The functions of all the submenus will
reset to factory settings.Submenus in the Settings menu
�Press buttonj.
The collection of the submenus
appears in the multifunction display.
�Press buttonç.
The selection marker moves to the next
submenu.
The submenus are arranged by hierarchy.
Scroll down with buttonç, scroll up
with buttonæ.
With the selection marker on the desired
submenu, use the buttonj to access
the individual functions within that sub-
menu. Once within the submenu, you can
use the button j to move to the next
function or the button k t o m o v e t o t h e
previous function within that submenu.
The settings themselves are made with
buttonæ orç.
i
The settings you have changed will not
be reset unless you confirm the action
by pressing the reset button a second
time. After approximately 5 seconds,
the
Settings menu reappears in the
multifunction display.
For safety reasons, the following
function are not reset while driving:
�the Hdlamp mode function in the
Lighting submenu
Page 138 of 473
137 Controls in detail
Control system
The table below shows what settings can
be changed within the various menus. Detailed instructions on making individual
settings can be found on the following
pages.
Instrument clusterTime/DateLightingVehicleConvenience
Select speedometer
display modeTime synchronization with head
unit*Set daytime running lamp
mode (USA only)Set automatic lock-
ingActivate easy-entry/exit
feature
Select languageSet time (hours)Set locator lightingSet parking position for
exterior rear view mirror
Select display (speed
display or outside
temperature) for status
indicatorSet time (minutes)Set night security
illumination
Select automatic time change
(Daylight Saving Time (DST)
summer/Standard time winter)Set interior lighting de-
layed shut-off
Set date (month)
Set date (day)
Set date (year)
Page 141 of 473

140 Controls in detail
Control system
Time/Date submenu
Access the
Time/Date submenu via the
Settings menu. Use the Time/Date
submenu to change the instrument cluster
display settings.
The following functions are available:Time synchronization with head unit*
This function can only be seen on vehicles
with COMAND* and navigation module*.
�Move the selection marker with
buttonæ orç to the
Time/Date
submenu.
�Press buttonj ork repeatedly
until the message
Time synchro.
w/Head Unit
appears in the multifunc-
tion display.
The selection marker is on the current
setting.
�Press buttonæ orç to select
the desired setting.Set the time (hours)
This function can be seen in vehicles with
audio system, or in vehicles with
COMAND* if the time synchronization with
head unit* feature was set to
Off.
�Move the selection marker with
buttonæ orç to the
Time/Date
submenu.
�Press buttonj ork repeatedly
until the message
Time Hours appears
in the multifunction display.
FunctionPage
Time synchronization with
head unit*140
Set time (hours)140
Set time (minutes)141
Select automatic time change
(Daylight Saving Time (DST)
summer/Standard time winter)142
Set date (month)142
Set date (day)143
Set date (year)143
i
Vehicles with COMAND*:
For information on setting the time,
refer to the separate COMAND
operating instructions.
Page 143 of 473
 summer/Standard
time winter)
This function can be seen in vehicles with
audio system, or in vehicles w")
142 Controls in detail
Control system
Select automatic time change (Daylight
Saving Time (DST) summer/Standard
time winter)
This function can be seen in vehicles with
audio system, or in vehicles with
COMAND* if the time synchronization with
head unit* feature was set to
Off.
�Move the selection marker with
buttonæ orç to the
Time/Date
submenu.
�Press buttonj ork repeatedly
until the message
Change-over
Summer / Winter time
appears in the
multifunction display.
The selection marker is on the current
setting.
�Press buttonæ orç to select if
the changeover between summer and
winter time should be automatic or
manual.
Set the date (month)
This function can be seen in vehicles with
audio system, or in vehicles with
COMAND* if the time synchronization with
head unit* feature was set to
Off.
�Move the selection marker with
buttonæ orç to the
Time/Date
submenu.
�Press buttonj ork repeatedly
until the message
Date Set MM appears
in the multifunction display.
The selection marker is on the month
setting.
�Press buttonæ orç to set the
month.
i
Vehicles with COMAND*:
For information on setting the date,
refer to the separate COMAND
operating instructions.
Page 145 of 473
144 Controls in detail
Control system
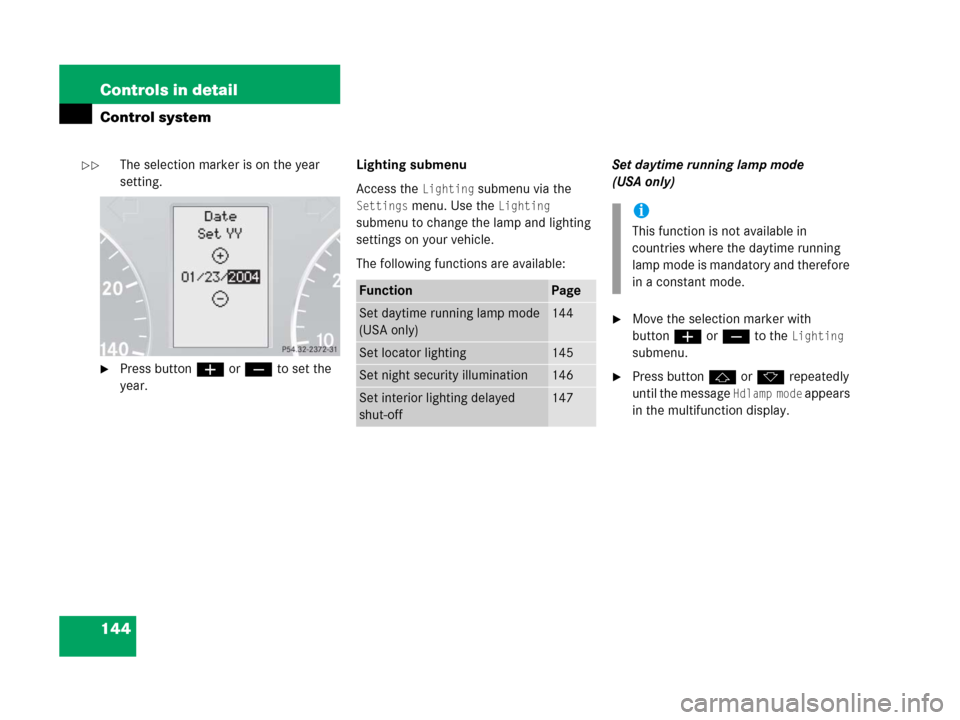
The selection marker is on the year
setting.
�Press buttonæ orç to set the
year.Lighting submenu
Access the
Lighting submenu via the
Settings menu. Use the Lighting
submenu to change the lamp and lighting
settings on your vehicle.
The following functions are available:Set daytime running lamp mode
(USA only)
�Move the selection marker with
buttonæ orç to the
Lighting
submenu.
�Press buttonj ork repeatedly
until the message
Hdlamp mode appears
in the multifunction display.
FunctionPage
Set daytime running lamp mode
(USA only)144
Set locator lighting145
Set night security illumination146
Set interior lighting delayed
shut-off147
i
This function is not available in
countries where the daytime running
lamp mode is mandatory and therefore
in a constant mode.
��
Page 146 of 473
 or daytime
running lamp mode (
Constant)
activated.")
145 Controls in detail
Control system
The selection marker is on the current
setting.
�Press buttonæ orç to select
manual operation (
Manual) or daytime
running lamp mode (
Constant)
activated.
With daytime running lamp mode activated
and the exterior lamp switch in
positionM orU, the low beam
headlamps are switched on when the
engine is running.In low ambient light conditions the
following lamps will switch on additionally:
�Parking lamps
�Tail lamps
�License plate lamps
�Side marker lamps
For more information on the daytime
running lamp mode, see “Lighting”
(
�page 114).Set locator lighting
With the locator lighting feature activated
and the exterior lamp switch in
positionU, the following lamps will
switch on during darkness when the vehi-
cle is unlocked with the SmartKey:
�Parking lamps
�Tail lamps
�License plate lamps
�Side marker lamps
�Front fog lamps
The locator lighting switches off when the
driver’s door is opened.
If you do not open a door after unlocking
the vehicle with the SmartKey, the lamps
will switch off automatically after approxi-
mately 40 seconds.
�Move the selection marker with
buttonæ orç to the
Lighting
submenu.
i
For safety reasons, resetting the set-
tings to factory settings (
�page 135)
while driving will not deactivate the
daytime running lamp mode.
The following message appears in the
multifunction display:
Lighting - Cannot be completely
reset to factory sets. while
driving.
��
Page 147 of 473

146 Controls in detail
Control system
�Press buttonj ork repeatedly
until the message
Surround lighting
appears in the multifunction display.
The selection marker is on the current
setting.
�Press buttonæ orç to switch
the locator lighting function
On.
�Turn the exterior lamp switch to
positionU when exiting the vehicle
(
�page 114).
The locator lighting feature is
activated.Set night security illumination
(Headlamps delayed shut-off)
Use this function to set whether or not the
exterior lamps illuminate during darkness
after exiting the vehicle and all doors
closed.
With the delayed shut-off feature activated
and the exterior lamp switch in
positionU before the engine is turned
off, the following lamps will switch on
when the engine is turned off and remain
lit for approximately 15 seconds:
�Parking lamps
�Tail lamps
�License plate lamps
�Side marker lamps
�Front fog lamps
If after turning off the engine you do not
open a door or do not close an opened
door, the lamps will automatically switch
off after 60 seconds.
�Move the selection marker with
buttonæ orç to the
Lighting
submenu.
�Press buttonj ork repeatedly
until the message
Hdlamp delay off
appears in the multifunction display.
The selection marker is on the current
setting.
i
You can reactivate this function within
10 minutes by opening a door.
��