Page 83 of 473

�BAS (Brake Assist System)
�ESP® (Electr")
82 Safety and Security
Driving safety systems
In this section you will find information on
the following driving safety systems:
�ABS (Antilock Brake System)
�BAS (Brake Assist System)
�ESP® (Electronic Stability Program)
ABS
The Antilock Brake System (ABS) regulates
the brake pressure so that the wheels do
not lock during braking. This allows you to
maintain the ability to steer your vehicle.
The ABS is functional above a speed of ap-
proximately 5 mph (8 km/h) independent
of road surface conditions.
On slippery road surfaces, the ABS will
respond even to light brake pressure.
The- indicator lamp in the instrument
cluster (
�page 24) comes on when you
switch on the ignition. It goes out when the
engine is running.
Warning!G
The following factors increase the risk of
accidents:
�Excessive speed, especially in turns
�Wet and slippery road surfaces
�Following another vehicle too closely
The ABS, BAS and ESP
® cannot reduce this
risk.
Always adjust your driving style to the
prevailing road and weather conditions.
i
In winter operation, the maximum
effectiveness of the ABS and ESP® is
only achieved with winter tires
(
�page 336), or snow chains as re-
quired.
Warning!G
Do not pump the brake pedal. Use firm,
steady brake pedal pressure instead. Pump-
ing the brake pedal defeats the purpose of
the ABS and significantly reduces braking
effectiveness.
Page 85 of 473
 operates in
emergency situations. If you apply the
brakes very quickly, the BAS automatically
provides full brake boo")
84 Safety and Security
Driving safety systems
BAS
The Brake Assist System (BAS) operates in
emergency situations. If you apply the
brakes very quickly, the BAS automatically
provides full brake boost, thereby poten-
tially reducing the braking distance.
�Apply continuous full braking pressure
until the emergency braking situation is
over.
The ABS will prevent the wheels from
locking.
When you release the brake pedal, the
brakes function again as normal. The BAS
is then deactivated.
ESP®
The Electronic Stability Program (ESP®) is
operational as soon as the engine is run-
ning and monitors the vehicle’s traction
(force of adhesive friction between the
tires and the road surface) and handling.
The ESP
® recognizes when a wheel is
spinning or if the vehicle starts to skid. By
applying brakes to the appropriate wheel
and by limiting the engine output, the ESP
®
works to stabilize the vehicle. The ESP® is
especially useful while driving off and on
wet or slippery road surfaces. The ESP
®
also stabilizes the vehicle during braking
maneuvers.
The ESP
® warning lampv in the
speedometer flashes when the ESP® is
engaged.
The ESP
® warning lampv in the
speedometer comes on when you switch
on the ignition. It goes out when the engine
is running.
Warning!G
If the BAS is malfunctioning, the brake sys-
tem is still functioning normally, but without
the additional brake boost available that
BAS would normally provide in an emergen-
cy braking maneuver. Therefore, the braking
distance may increase.
Warning!G
The BAS cannot prevent the natural laws of
physics from acting on the vehicle, nor can
it increase braking efficiency beyond that
afforded by the condition of the vehicle
brakes and tires or the traction afforded.
The BAS cannot prevent accidents, includ-
ing those resulting from excessive speed in
turns, following another vehicle too closely,
or hydroplaning. Only a safe, attentive, and
skillful driver can prevent accidents. The
capabilities of a BAS equipped vehicle must
never be exploited in a reckless or danger-
ous manner which could jeopardize the
user’s safety or the safety of others.
Page 89 of 473

88 Safety and Security
Anti-theft systems
Immobilizer
The immobilizer prevents unauthorized
persons from starting your vehicle.
Activating
�Remove the SmartKey from the starter
switch.
Deactivating
�Switch on the ignition (�page 33).
Anti-theft alarm system*
Once the alarm system has been armed, a
visual and audible alarm is triggered when
someone opens
�a door
�the trunk
�the hood
The alarm will stay on even if the activating
element (e. g. a door) is immediately
closed.
The alarm system will also be triggered
when
�someone attempts to raise the vehicle
(only vehicles with tow-away alarm)
�opening the vehicle with the
mechanical key
�someone opens a door from the inside
�someone opens the trunk with the
emergency release button
i
Starting the engine will also deactivate
the immobilizer.
In case the engine cannot be started
(yet the vehicle’s battery is charged),
the system is not operational. Contact
an authorized Mercedes-Benz Center
or call 1-800-FOR-MERCedes (in the
USA), or 1-800-387-0100 (in Canada).
i
If the alarm stays on for more than
30 seconds, a call to the Response
Center is initiated automatically by the
Tele Aid system* (
�page 264)
provided Tele Aid service was
subscribed to and properly activated,
and that necessary cellular service and
GPS coverage are available.
Page 92 of 473
91 Safety and Security
Anti-theft systems
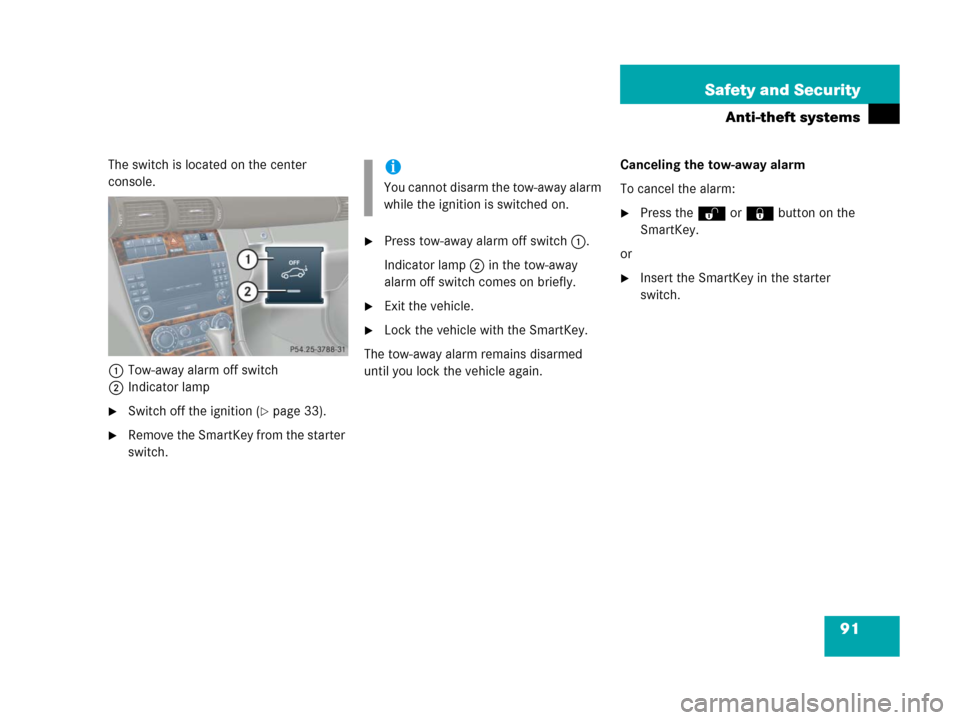
The switch is located on the center
console.
1Tow-away alarm off switch
2Indicator lamp
�Switch off the ignition (�page 33).
�Remove the SmartKey from the starter
switch.
�Press tow-away alarm off switch1.
Indicator lamp2 in the tow-away
alarm off switch comes on briefly.
�Exit the vehicle.
�Lock the vehicle with the SmartKey.
The tow-away alarm remains disarmed
until you lock the vehicle again.Canceling the tow-away alarm
To cancel the alarm:
�Press theŒ or‹ button on the
SmartKey.
or
�Insert the SmartKey in the starter
switch.
i
You cannot disarm the tow-away alarm
while the ignition is switched on.
Page 104 of 473
.
�Pull th")
103 Controls in detail
Locking and unlocking
Valet locking
The lock is located next to the handle
above the rear license plate recess.
1Neutral position
2Locked
�Close the trunk (�page 101).
�Pull the mechanical key out of the
SmartKey (
�page 386).
�Insert the mechanical key in the trunk
lid lock.
�Turn the mechanical key clockwise to
position2 and remove the mechani-
cal key in that position to lock the
trunk.
The trunk remains locked even when the
vehicle is centrally unlocked.
�Insert the mechanical key in the trunk
lid lock.
�Turn the mechanical key counterclock-
wise to neutral position1 and remove
the mechanical key in that position to
unlock the trunk.
You can now open the trunk
(
�page 99).
Automatic central locking
The doors and the trunk automatically lock
when the ignition is switched on and the
wheels are turning at vehicle speeds of
approximately 9 mph (15 km/h) or more.
You can open a locked door from the
inside. Open door only when conditions
are safe to do so.
You can deactivate the automatic locking
mode using the control system, see “Set
automatic locking” (
�page 147).
i
To deny any unauthorized person ac-
cess to the trunk, lock it separately
with the mechanical key. Leave only
the SmartKey less its mechanical key
with the vehicle.
i
You can only cancel the separate trunk
locking mode by means of the
mechanical key.
i
The doors unlock automatically after an
accident if the force of the impact
exceeds a preset threshold.
To prevent the vehicle door locks from
locking, deactivate the automatic
central locking when the vehicle
�is pushed or towed
�is on a test stand
Page 111 of 473

110 Controls in detail
Seats
Seat heating
Both switches for the front seats are locat-
ed in the center console. The red indicator
lamps in the switch come on to show heat-
ing level you have selected.
1Seat heating switch
2Indicator lamps
�Switch on the ignition (�page 33).Switching on seat heating
�Press switch1 once.
Three red indicator lamps2 in the
switch come on.
�Continue pressing switch1 until
desired seat heating level is reached.
Switching off seat heating
�Press switch1 repeatedly until all
indicator lamps2 go out.
Level
3Three indicator lamps on
(highest level).
After approximately 5 minutes,
seat heating is automatically
switched to level2.
2Two indicator lamps on.
After approximately 10 minutes,
seat heating is automatically
switched to level1.
1One indicator lamp on
(lowest level).
After approximately 20 minutes,
seat heating is automatically
switched off.
offNo indicator lamp on.
i
If one or more of the indicator
lamps2 on the seat heating switch
are flashing, there is insufficient volt-
age due to too many electrical consum-
ers are turned on. The seat heating
switches off automatically.
The seat heating will switch back on
again automatically as soon as
sufficient voltage is available.
Page 113 of 473
.
or
�Open the re")
112 Controls in detail
Memory function
The memory button and memory position
switch are located on the door.
1Memory button
2Memory position switch
�Switch on the ignition (�page 33).
or
�Open the respective door.
Storing positions into memory
�Adjust the seat, steering wheel and
exterior rear view mirrors to the
desired position (
�page 35).
�Turn memory position switch2 to the
desired memory position.
�Press memory button1.
�Release memory button1 and press
memory position switch2 within
3 seconds.
All settings are stored to the selected
position.
Recalling positions from memory
�Turn memory position switch2 to the
desired memory position.
�Press and hold memory position
switch2 until the seat, steering wheel
and exterior rear view mirrors have
completely moved to the stored
positions.
!
Do not operate the power seats using
the memory button if the seat backrest
is in an excessively reclined position.
Doing so could cause damage to front
or rear seats.
i
Releasing the memory position switch
stops movement to the stored
positions immediately.
Page 114 of 473
113 Controls in detail
Memory function
Storing exterior rear view mirror
parking position
For easier parking, you can adjust the
passenger-side exterior rear view mirror so
that you can see the right rear wheel as
soon as you engage reverse gearR.
For information on activating the parking
position feature, see “Activating exterior
rear view mirror parking position”
(
�page 170).1Memory button
2Adjustment button
3Passenger-side exterior rear view
mirror button
�Stop the vehicle in a safe location.
�Switch on the ignition (�page 33).
�Press button3.
The passenger-side exterior rear view
mirror is selected.
�Adjust the exterior rear view mirror
with button2 so that you see the rear
wheel and the road curb.
�Press memory button1.
�Within 3 seconds, press bottom of ad-
justment button2.
The parking position is stored if the
mirror does not move.
i
If the mirror does move, repeat the
above steps. After the setting is stored,
you can move the mirror again.