Page 152 of 202

150 Navigation*
During route guidance
�Manual
If you choose this option, the system
only switches to split screen by
pressing c.
The symbol _ indicates the present
setting.
�Move the E joystick in g or G
direction to select the option with the
symbol -.
�Press button E.
The option is changed.
�Press the Back soft key to confirm and
return to the map.Trail settings
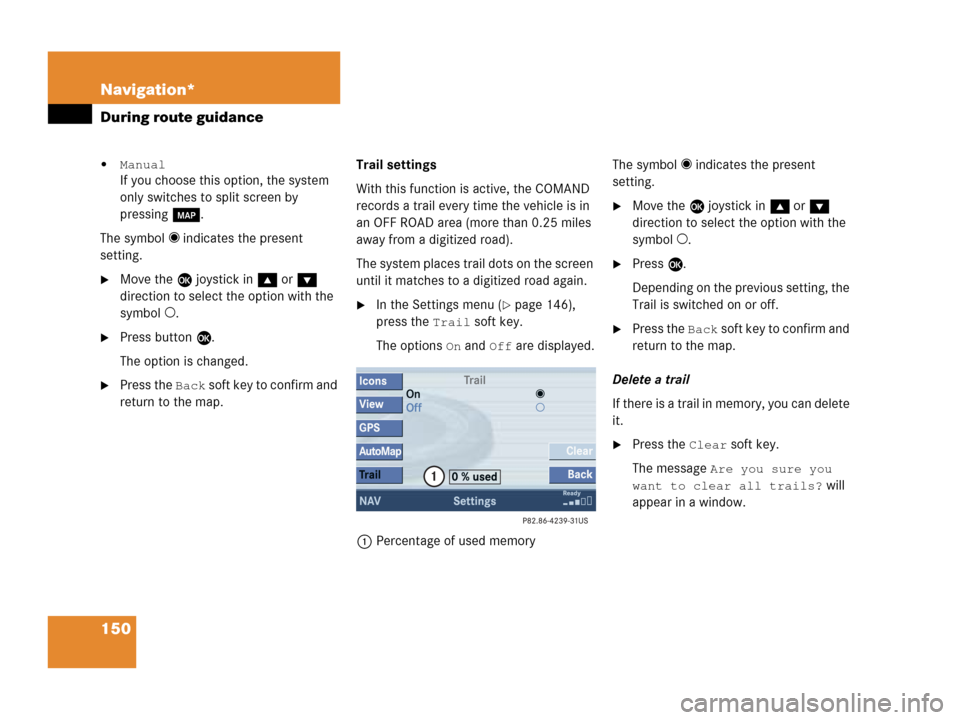
With this function is active, the COMAND
records a trail every time the vehicle is in
an OFF ROAD area (more than 0.25 miles
away from a digitized road).
The system places trail dots on the screen
until it matches to a digitized road again.
�In the Settings menu (�page 146),
press the
Trail soft key.
The options
On and Off are displayed.
1Percentage of used memoryThe symbol _ indicates the present
setting.
�Move the E joystick in g or G
direction to select the option with the
symbol -.
�Press E.
Depending on the previous setting, the
Trail is switched on or off.
�Press the Back s o f t k e y t o c o n f i rm a nd
return to the map.
Delete a trail
If there is a trail in memory, you can delete
it.
�Press the Clear soft key.
The message
Are you sure you
want to clear all trails?
will
appear in a window.
Page 156 of 202

154 Navigation*
Last destinations and destination memory
Create a new name
�Push the joystick to h, H, g or
G to select the characters. After each
selection, press E.
�Push the joystick to F or f to
select characters diagonally.
�Press E to confirm the entry.
The message
The address has
been saved as
will appear.
After that, the Start route guidance
menu, the
Last destinations
memory or the Today’s plan memory
reappear.Activating the destination memory
�Activate the Navigation main menu
(
�page 114).
�Push the joystick to g or G to
select menu item
Destination
memory
.
�Press E.
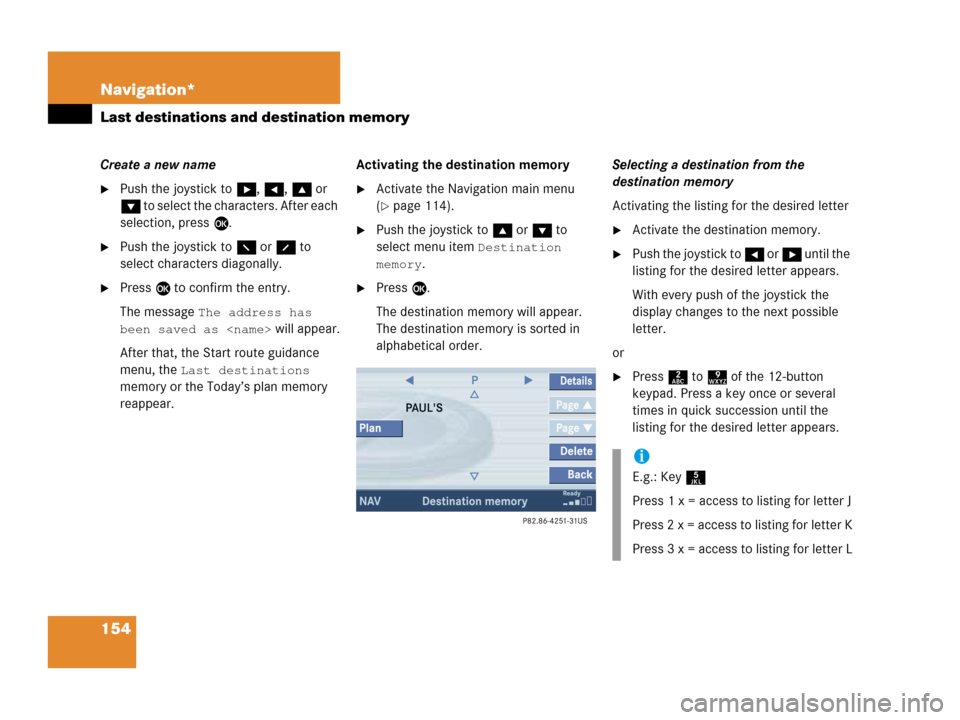
The destination memory will appear.
The destination memory is sorted in
alphabetical order.Selecting a destination from the
destination memory
Activating the listing for the desired letter
�Activate the destination memory.
�Push the joystick to H or h until the
listing for the desired letter appears.
With every push of the joystick the
display changes to the next possible
letter.
or
�Press 2 to 9 of the 12-button
keypad. Press a key once or several
times in quick succession until the
listing for the desired letter appears.
i
E.g.: Key 5
Press 1 x = access to listing for letter J
Press 2 x = access to listing for letter K
Press 3 x = access to listing for letter L
Page 179 of 202
177 System settings
System settings
�Push the joystick to g or G to
select the desired entry.
Daylight Savings Time:
Changes from summer to winter time.
Standard Time:
Changes from winter to summer time.
�Press E.
The System settings menu will appear.
The setting is saved.The language affects the menu text
displays and the voice output during route
guidance.
�In the System settings menu
(
�page 176), press the Lang. soft
key.
The languages list will appear.
OptionSymbol
Time change selected_
Time change not
selected-
Selecting the language
Page 181 of 202
179 System settings
System settings
�In the System settings menu, press the
Display soft key.You can use the following functions:
�set the display dimming characteristics
�adjust the display brightness
Setting the display dimming
characteristics
�Push the joystick to G or g to
select an entry.
Day mode
The display is continuously set to
daylight design.
Night mode
The display is continuously set to night-
time design.
Automatic
The display changes depending on the
ambient light sensor in the vehicle.
�Press E.
The setting is applied. The System
settings menu will appear.
Adjusting the display brightness
�Press the Bright. soft key.
�Push the joystick to H or h
direction to adjust the brightness.
Selecting display settings
OptionSymbol
Display mode selected_
Display mode not
selected-
Page 185 of 202
183 System settings
System settings
Canceling individualization
You can cancel individualization at any
time during either the first or second
stage. All existing data remains
unchanged.
�During any individualization stage,
press the
Cancel soft key.
Individualization is cancelled.
Deleting individualization
�In the Individualization menu, push the
joystick to G to select menu item
Delete individualization.
�Press E.
A prompt appears, which asks if you
really want to delete the data.
�Press E to confirm Yes.
The individualization is deleted.
�In the System settings menu, press the
Reset soft key.
The Reset inquiry menu will appear.
No
is highlighted.
i
This function is not available if no
individualization data has been saved.
Resetting all settings to the factory
settings
i
All your personal data, e.g. Last desti-
nation entries or Radio main menu pre-
set entries, will be deleted.
Page 187 of 202

185 Glossary
Audio source
This includes the systems radio and CD
(CD drive in the control unit, CD chan-
ger*).
Autostore
Enters the stations with the best recep-
tion (signal strength) into the autostore
memory in order of their reception
quality (from strong to weak).
Balance
Defines sound-center left/right.
Bit rate (MP3)
Measurement of transmission speed.
Indicates the number of bits transmit-
ted per time unit.
CD
(Compact Disc)
Digital storage medium in disc form.CD-R
(CD
Recordable)
->CD which can be read, and written
but not deleted.
CD-RW
(CD
Rewritable)
->CD which can be read, written and
deleted.
COMAND
(Co
ckpit Management and Data Sys-
tem)
Information and operating center for
vehicle sound and communications
systems, including the radio and
CD player, as well as for other optional
equipment (CD changer*, telephone*,
etc.).Coordinates
Indicate the geographical position on
the earth’s surface.
DVD
(D
igital Versatile Disc)
Digital storage medium for storing lar-
ge amounts of data.
Emergency call
This function places a call to a local
911 provider. It does not initiate a
->Tele Aid* call. Please note that the
911 emergency call system is a public
service. Using it without due cause is a
criminal offense.
Page 195 of 202

193 Index
time zone 176
via folder list 70
Voice control* settings 180
Setting
display dimming characteristics 179
map view 148
POI Icons displays 147
routing mode 116
SIM-CARD BLOCKED 96
SMS 171
Software Updates 165
Sound functions* 37
Speed-dialling 103
Starting
route guidance 133
Station
satellite radio* station
station selection via direct channel
entry 82Subscribing
to satellite radio* 79
Subsequent dialing 100
Switching
the GPS info setting on/off 148
to CD operation 55
to MP3 CD operation 68
to telephone* operation 96
Switching off
COMAND 34
hands-free microphone 104
telephone operation 92
Switching on
CD operation
CD changer* 56
CD drive in the COMAND 56
COMAND 34
hands-free microphone 104
satellite radio* operation 80
telephone operation 92T
Tele Aid* 173
TELEPHONE BEING ACTIVATED, PLEASE
WAIT. 91
TELEPHONE BEING DEACTIVATED, PLEA-
SE WAIT 92
TELEPHONE NOT AVAILABLE 97
TELEPHONE NOT INSERTED 97
The unlock code
entering 95
Three-way calling 104
Today’s plan 162
Traffic routes
minimizing 116
Trail settings 150
Treble 37