Page 232 of 651
OCCUPANT RESTRAINT SYSTEMS
211
CAUTION
�After inserting the tab, make sure the tab and buckle
are locked and that the lap and shoulder portions of
the belt are not twisted.
� Do not insert coins, clips, etc. in the buckle as this
may prevent your child from properly latching the tab
and buckle.
� If the seat belt does not function normally, it cannot
protect your child from death or serious injury.
Contact your Lexus dealer immediately. Do not
install the child restraint system on the seat until the
seat belt is fixed.
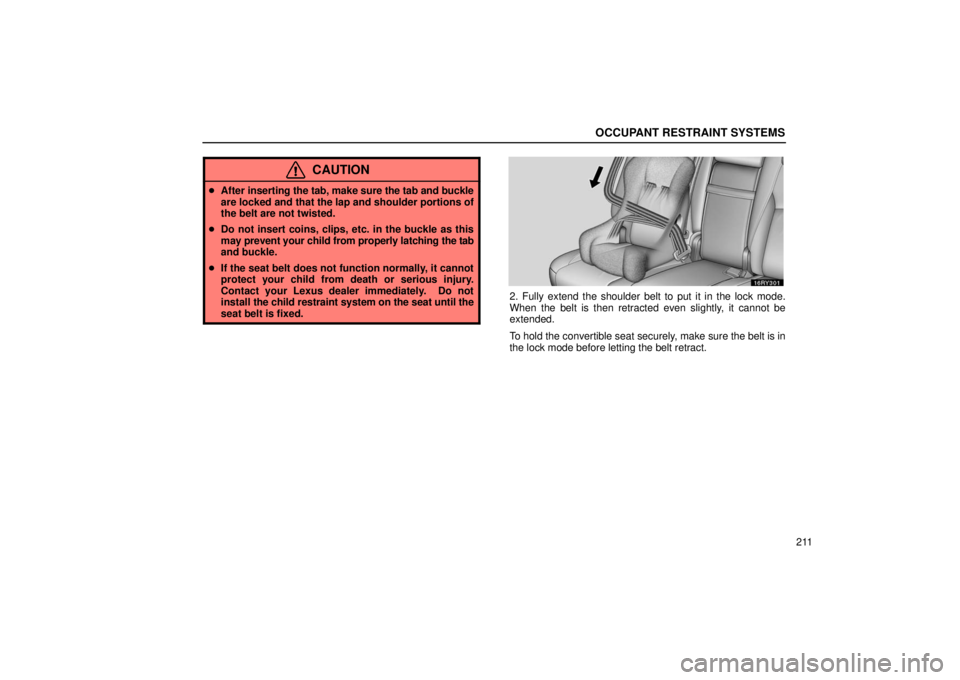
2. Fully extend the shoulder belt to put it in the lock mode.
When the belt is then retracted even slightly, it cannot be
extended.
To hold the convertible seat securely, make sure the belt is in
the lock mode before letting the belt retract.
Page 233 of 651
OCCUPANT RESTRAINT SYSTEMS
212
3. While pressing the convertible seat firmly against the seat
cushion and seatback, let the shoulder belt retract as far as it
will go to hold the convertible seat securely.
CAUTION
Push and pull the child restraint system in different
directions to be sure it is secure. Follow all the
installation instructions provided by its manufacturer.
Page 236 of 651
OCCUPANT RESTRAINT SYSTEMS
215
�1Same position2Same angle
�When installing a child restraint system in the rear
center position, adjust both seat cushions to the
same position and align both seatbacks at the same
angle. Otherwise, the child restraint system cannot
be securely restrained and this may cause death or
serious injuries in a collision.
1. Sit the child on a booster seat. Run the lap and shoulder belt
through or around the booster seat and across the child
following the instructions provided by its manufacturer and
insert the tab into the buckle taking care not to twist the belt.
Make sure the shoulder belt is correctly across the child’s
shoulder and that the lap belt is positioned as low as possible
on the child’s hips. See “Seat belts” on page 154 for details.
Page 240 of 651
OCCUPANT RESTRAINT SYSTEMS
219
3. Fix the child restraint system with the seat belt.
4. Latch the hook onto the anchor bracket and tighten the
top strap.
For instructions to install the child restraint system, see “Child
restraint system” on page 199.
CAUTION
Make sure the top strap is securely latched, and check
that the child restraint system is securely by pushing
and pulling it in different directions. Follow all the
installation instructions provided by its manufacturer.
Page 242 of 651
OCCUPANT RESTRAINT SYSTEMS
221
Child restraint system complying with the FMVSS213 or
CMVSS213
specification can be fixed to these anchorages. In
this case, it is not necessary to fix the child restraint system with
a seat belt on the vehicle. CHILD RESTRAINT SYSTEM INSTALLATION
�11st lock position
23rd lock position
1. Fold the seatback forward and then back to the 1st lock
position (most upright position) until it locks into place.
Adjust the seatback to the 3rd lock position.
Make sure the seatback is locked securely.
Page 244 of 651

OCCUPANT RESTRAINT SYSTEMS
223
2. Widen the gap between the seat cushion and seatback
slightly and confirm the position of the lower anchorages
near the button on the seatback.
3. Type A — Latch the hooks of lower straps onto the
anchorages and tighten the lower straps.
3. Type B — Latch the buckles onto the anchorages.
For owners in Canada —
The symbol on a child restraint
system indicates the presence of a lower connector system. If your child restraint system has a top strap, it should be
anchored. (For the installation of the top strap, see “Using a
top strap” on page 217.)
For installation details, refer
to the instruction manual equipped
with each product.
CAUTION
� When using the lower anchorages for the child
restraint system, be sure that there are no irregular
objects around the anchorages or that the seat belt is
not caught.
� Push and pull the child restraint system in different
directions to be sure it is secure. Follow all the
installation instructions provided by its
manufacturer.
� When using the lower anchorages for a child restraint
system, ensure that the seat is moved to the
rear�most position, with the seatback close to the
child restraint system.
Page 245 of 651
OCCUPANT RESTRAINT SYSTEMS
224
�After securing the child restraint system, never slide
or recline the seat.
� Do not install a child restraint system on the rear seat
if it interferes with the lock mechanism of the front
seats. This can cause death or serious injury to the
child and front passenger in case of sudden braking
or a collision.DRIVING POSITION MEMORY SYSTEM
A microcomputer will memorize the position of the driver’s
seat, and the positions of the tilt and telescopic steering, and
outside rear view mirrors. Two dif ferent driving position profiles
can be entered into the computer’s memory.
Recording a driving position in the computer’s memory can
only be done when the ignition k ey is in the “ON” position and
the selector lever is in the “P” position.
Page 261 of 651
STEERING WHEEL AND MIRRORS
240
CAUTION
�When doing the circling calibration, be sure to secure
a wide space, and watch out for people and vehicles
in the neighborhood. Do not violate any local traffic
rules while performing circling calibration.
� Do not adjust the display while the vehicle is moving.
Be sure to adjust the display only when the vehicle is
stopped.
VANITY MIRRORS
To use the vanity mirror, swing the sun visor down and
open the cover.
The vanity light comes on when you open the cover.
To adjust the brightness of the vanity light, slide the knob.