Page 245 of 442
AUDIO
ccxxxi
Turn this knob to the right to step up the station band or
to the left to step down.
Your radio automatically changes to stereo reception when a
stereo broadcast is received. “ST” appears on the display. If
the signal becomes weak, the radio reduces the amount of
channel separation to prevent the weak signal from creating
noise. If the signal becomes extremely weak, the radio
switches from stereo to mono reception. In this case, “ST”
disappears from the display.(b) Presetting a station
1. Tune in the desired station.
2. Push one of the station selector buttons (1 — 6) and
hold it until a beep is heard. This sets the station to the
button and the button number (1 — 6) appears on the
display.
Each
button can store one AM station and two FM stations. To
change the preset station to a different one, follow the same
procedure.
The preset station memory is cancelled when the power
source is interrupted by battery disconnection or a blown fuse.
Page 246 of 442

AUDIO
ccxxxii(c) Selecting a station
Tune in the desired station using one of the following methods.
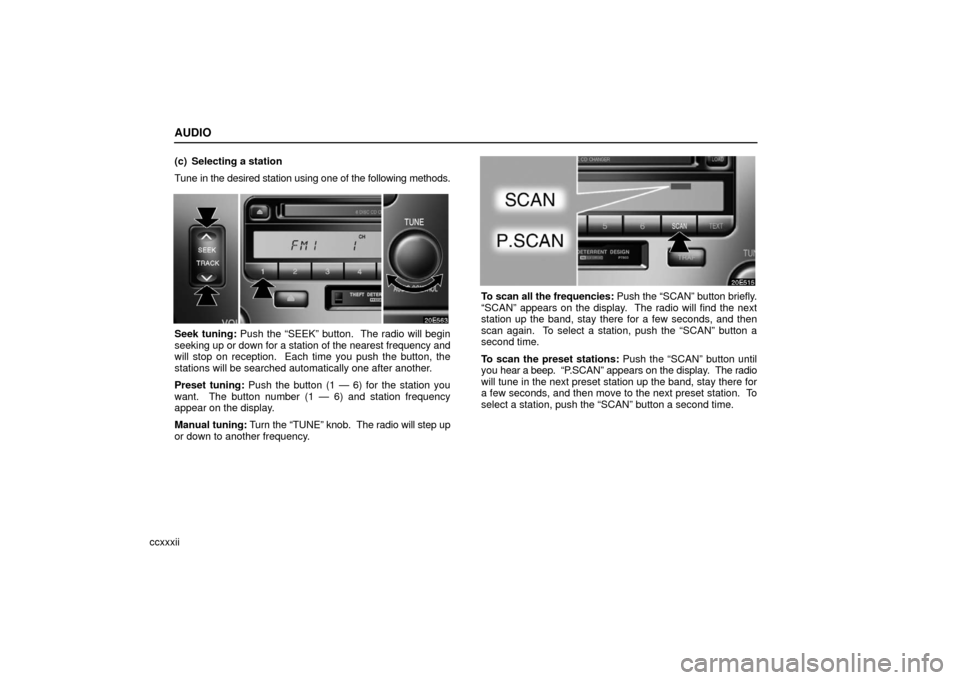
Seek tuning: Push the “SEEK” button. The radio will begin
seeking up
or down for a station of the nearest frequency and
will stop on reception. Each time you push the button, the
stations will be searched automatically one after another.
Preset tuning: Push the button (1 — 6) for the station you
want. The button number (1 — 6) and station frequency
appear on the display.
Manual tuning: Turn the “TUNE” knob. The radio will step up
or down to another frequency.
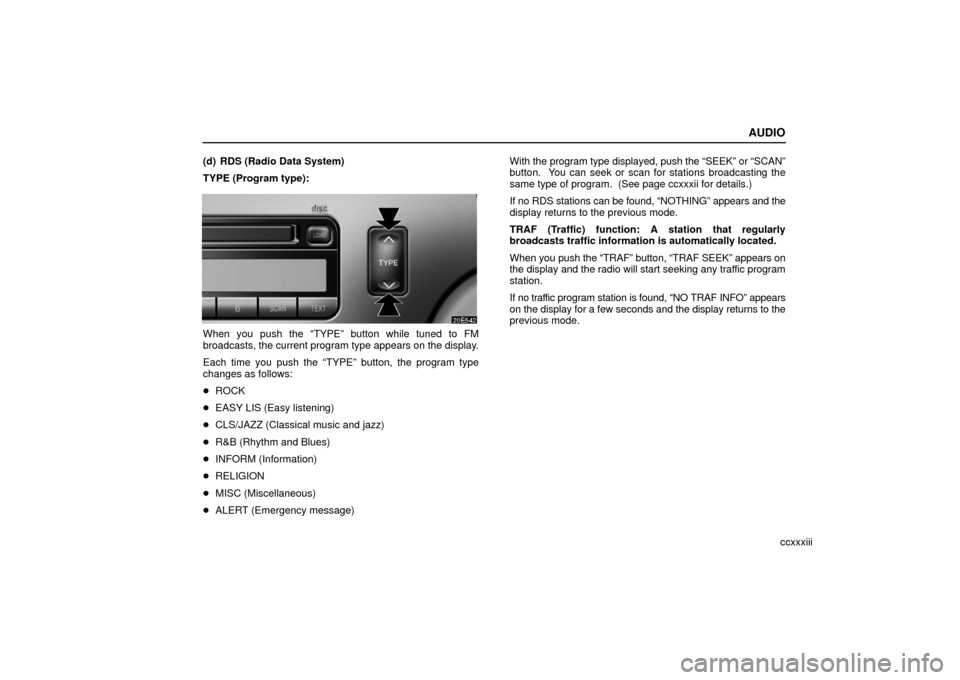
To scan all the frequencies: Push the “SCAN” button briefly.
“SCAN” appears on the display. The radio will find the next
station up the band, stay there for a few seconds, and then
scan again. To select a station, push the “SCAN” button a
second time.
To scan the preset stations: Push the “SCAN” button until
you hear a beep. “P .SCAN” appears on the display . The radio
will tune in the next preset station up the band, stay there for
a few seconds, and then move to the next preset station. To
select a station, push the “SCAN” button a second time.
Page 247 of 442

AUDIO
ccxxxiii
(d) RDS (Radio Data System)
TYPE (Program type):
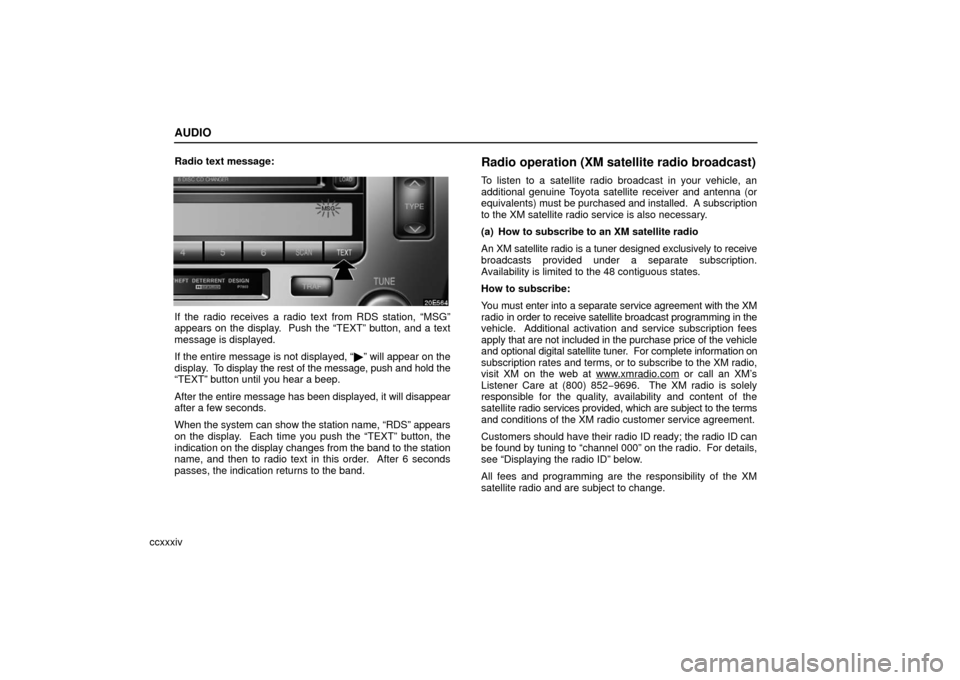
When you push the “TYPE” button while tuned to FM
broadcasts, the current program type appears on the display.
Each time you push the “TYPE” button, the program type
changes as follows:
�
ROCK
� EASY LIS (Easy listening)
� CLS/JAZZ (Classical music and jazz)
� R&B (Rhythm and Blues)
� INFORM (Information)
� RELIGION
� MISC (Miscellaneous)
� ALERT (Emergency message) With the
program type displayed, push the “SEEK” or “SCAN”
button. You can seek or scan for stations broadcasting the
same type of program. (See page ccxxxii for details.)
If no RDS stations can be found, “NOTHING” appears and the
display returns to the previous mode.
TRAF (Traffic) function: A station that regularly
broadcasts traffic information is automatically located.
When you push the “TRAF” button, “TRAF SEEK” appears on
the display and the radio will start seeking any traffic program
station.
If no traf fic program station is found, “NO TRAF INFO” appears
on the display for a few seconds and the display returns to the
previous mode.
Page 248 of 442

AUDIO
ccxxxivRadio text message:
If the radio receives a radio text from RDS station, “MSG”
appears on the display. Push the “TEXT” button, and a text
message is displayed.
If the entire message is not displayed, “
�” will appear on the
display. To display the rest of the message, push and hold the
“TEXT” button until you hear a beep.
After the entire message has been displayed, it will disappear
after a few seconds.
When the system can show the station name, “RDS” appears
on the display. Each time you push the “TEXT” button, the
indication on the display changes from the band to the station
name, and then to radio text in this order. After 6 seconds
passes, the indication returns to the band.
Radio operation (XM satellite radio broadcast)
To listen to a satellite radio broadcast in your vehicle, an
additional genuine Toyota satellite receiver and antenna (or
equivalents) must be purchased and installed. A subscription
to the XM satellite radio service is also necessary.
(a) How to subscribe to an XM satellite radio
An XM satellite radio is a tuner designed exclusively to receive
broadcasts provided under a separate subscription.
Availability is limited to the 48 contiguous states.
How to subscribe:
You must enter into a separate service agreement with the XM
radio in o rder to receive satellite broadcast programming in the
vehicle. Additional activation and service subscription fees
apply that are not inclu ded in the purchase price of the vehicle
and optional digital satellite tuner. For complete information on
subscription rates and terms, or to subscribe to the XM radio,
visit XM on the web at www.xmradio.com
or call an XM’s
Listener Care at (800) 852 −9696. The XM radio is solely
responsible for the quality, availability and content of the
satellite radio services provided, which are subject to the terms
and conditions of the XM radio customer service agreement.
Customers should have their radio ID ready; the radio ID can
be found by tuning to “channel 000” on the radio. For details,
see “Displaying the radio ID” below.
All fees and programming are the responsibility of the XM
satellite radio and are subject to change.
Page 249 of 442
AUDIO
ccxxxv
Satellite tuner technology notice:
Toyota’s satellite radio tuners are awarded Type Approval
Certificates from XM Satellite Radio Inc. on “May 7, 2004” as
proof of compatibility with the services offered by the XM
satellite radio.
(b) Displaying the radio ID
Each XM tuner is identified with a unique radio ID. You will
need the radio ID when activating XM service or when
reporting a problem.
If you select “CH 000” by turning the “TUNE” knob, the ID code\
of 8 alphanumeric characters appears. If you select another
channel, display of the ID code is canceled. Channel (000)
alternates the display between the radio ID and the specific
radio ID code.
(c) Listening to the satellite radio
Push the “AM·SAT” button to choose a SAT station.
Besides “AM”, “SAT1”, “SAT2” or “SAT3” appears on the
display.
Turn the “TUNE” knob clockwise to step up the channel. Turn
the knob counterclockwise to step down the channel.
Page 251 of 442
AUDIO
ccxxxvii
To scan the currently selected channel category: Quickly
push and release the “SCAN” button. “SCAN” appears on the
display. The radio will find the next channel in the same
channel category up the band, stay there for 5 seconds, and
then scan again. To stop scanning, push this button again.
To scan the preset channels: Push and hold the “SCAN”
button until you hear a beep. “P .SCAN” appears on the display.
The radio will tune in the next preset channel up the band, stay
there for 5 seconds, and then move to the next preset channel.
To stop scanning, push this button again. (f) Channel category
When
you push the “” or “” side of the “TYPE” button while
receiving a XM channel.
When the channel category appears, push either “
” or “”
side of the “TYPE” button to switch to the next or previous
category.
Page 252 of 442
AUDIO
ccxxxviii(g) Displaying the title and name
When you push the “TEXT” button, the display changes as
follows:
CH NAME
→ TITLE (SONG/PROGRAM TITLE) → NAME
(ARTIST NAME/FEATURE) → CH NUMBER → CH NAME Up to 10 alphanumeric characters can be displayed. (Some
information will not be fully displayed.)
If there is no song/program title or artist name/feature
associated w
ith the channel at that time, “− − − − − ” will appear
on the display.
This XM tuner supports “Audio Services” (Music and Talk) of
only XM satellite radio and “Text Information”* linked to the
respective audio services.
*: Text Information includes, Channel Name, (Artist) Name,
(Song) Title and Category Name.
Page 253 of 442

AUDIO
ccxxxix
(h) If the satellite radio tuner malfunctions
When
problems occur with the XM tuner, a message will appear on the display. Referring to the table below to identify the problem,
take the suggested corrective action.
ANTENNA
The XM antenna is not connected. Check whether the XM antenna cable is attached securely.
A short−circuit occurs in the antenna or the surrounding antenna cable. See a L\
exus certified
dealer.
UPDATING
You have not subscribed to the XM satellite radio. The radio is being upd\
ated with the latest
encryption code. Contact the XM satellite radio for subscription information. Whe\
n a contact
is canceled, you can choose the “CH000” and all free −to− air channels.
The premium channel you selected is not authorized. Wait for about 2 seconds until the radio
returns to the previous channel or “CH001”. If it does not change automatically, select another
channel. If you want to listen to the premium channel, contact the XM satellite\
radio.
NO SIGNALThe XM signal is too weak at the current location. Wait until your vehicle reaches a location
with a stronger signal.
LOADINGThe unit is acquiring audio or program information. Wait until the unit has received the infor-
mation.
OFF AIRThe channel you selected is not broadcasting any programming. Select ano\
ther channel.
− − −
The channel you selected is no longer available. Wait for about 2 seconds until the radio re-
turns to the previous channel or “CH001”. If it does not change automatica\
lly, select another
channel.
The XM Listener Care Center is also available on the phone, please call \
(800) 852 −9696 during the following hours:
Monday — Saturday: 7 a.m. — 1 a.m.
Sunday: 12 p.m. — 12 a.m.