Page 3296 of 3383

WHEEL AND TIRE ASSEMBLYWT-7
C
DF
G H
I
J
K L
M A
B
WT
Revision: November 2009 2006 QX56
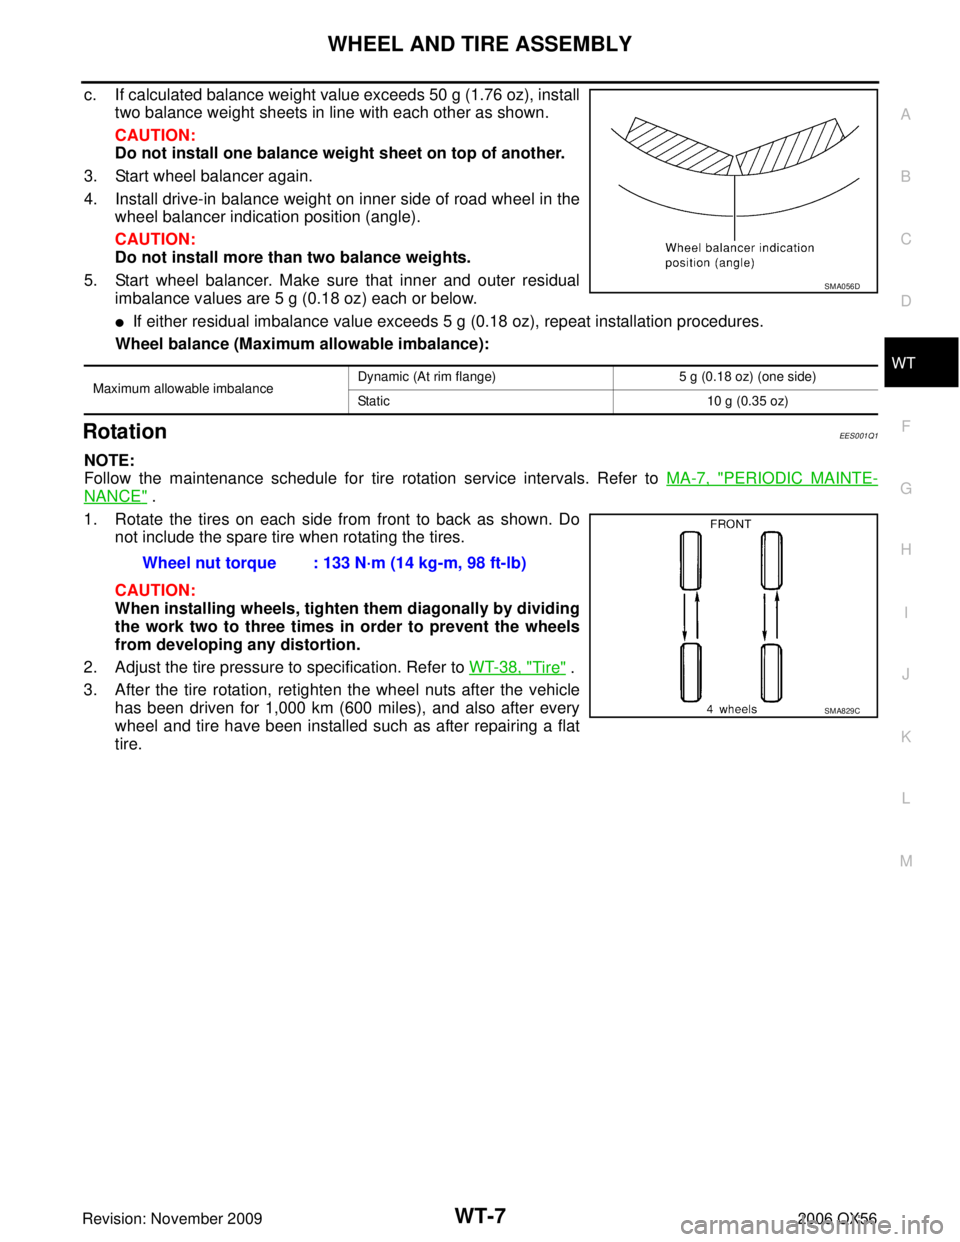
c. If calculated balance weight value exceeds 50 g (1.76 oz), install
two balance weight sheets in line with each other as shown.
CAUTION:
Do not install one balance weight sheet on top of another.
3. Start wheel balancer again.
4. Install drive-in balance weight on inner side of road wheel in the wheel balancer indication position (angle).
CAUTION:
Do not install more than two balance weights.
5. Start wheel balancer. Make sure that inner and outer residual imbalance values are 5 g (0.18 oz) each or below.
�If either residual imbalance value exceeds 5 g (0.18 oz), repeat installation procedures.
Wheel balance (Maximum allowable imbalance):
RotationEES001Q1
NOTE:
Follow the maintenance schedule for tire rotation service intervals. Refer to MA-7, "
PERIODIC MAINTE-
NANCE" .
1. Rotate the tires on each side from front to back as shown. Do not include the spare tire when rotating the tires.
CAUTION:
When installing wheels, tighten them diagonally by dividing
the work two to three times in order to prevent the wheels
from developing any distortion.
2. Adjust the tire pressure to specification. Refer to WT-38, "
Tire" .
3. After the tire rotation, retighten the wheel nuts after the vehicle has been driven for 1,000 km (600 miles), and also after every
wheel and tire have been installed such as after repairing a flat
tire.
Maximum allowable imbalance Dynamic (At rim flange)
5 g (0.18 oz) (one side)
Static 10 g (0.35 oz)
SMA056D
Wheel nut torque : 133 N·m (14 kg-m, 98 ft-lb)
SMA829C
Page 3306 of 3383
TROUBLE DIAGNOSESWT-17
C
DF
G H
I
J
K L
M A
B
WT
Revision: November 2009 2006 QX56
8. Inflate all tires to proper pressure. Refer to WT-38, "Tire" .
Activation tire position CONSULT-II
Front LH “YET ”
↓
“ DONE ”
Front RH
Rear RHRear LH
Page 3316 of 3383

TROUBLE DIAGNOSIS FOR SELF-DIAGNOSTIC ITEMSWT-27
C
DF
G H
I
J
K L
M A
B
WT
Revision: November 2009 2006 QX56
2. REPLACE TRANSMITTER
1. Check low tire pressure warning lamp again for flashing, replace malfunctioning transmitter.
2. Carry out ID registration of all transmitters.
Can ID registration of all transmitters be completed?
YES >> GO TO 3.
NO >> GO TO Inspection 1. Refer to WT-26, "
Inspection 1: Transmitter or Control Unit (BCM)" .
3. VEHICLE DRIVING
Drive at a speed of 40 km/h (25 MPH) or more for 3 minutes, and then drive the vehicle at any speed for 10
minutes. Then check all tire pressures with CONSULT-II “DATA MONITOR” within 5 minutes.
Does
“DATA MONITOR” display tire pressure as normal without any warning lamp?
YES >> Inspection End.
NO >> Replace malfunctioning transmitter, and perform Step 3 again. Refer to WT-36, "
Transmitter
(Pressure Sensor)" .
Inspection 3: Transmitter - 2EES001IF
MALFUNCTION CODE NO. 35, 36, 37 OR 38
1. CHECK ALL TIRE PRESSURES
Check all tire pressures. Refer to WT-38, "
Tire"
Are there any tires with pressure of 64 psi or more?
YES >> Adjust tire pressure to specified value.
NO >> GO TO 2.
2. VEHICLE DRIVING
1. Carry out ID registration of all transmitters.
2. Drive at a speed of 40 km/h (25 MPH) or more for several minutes without stopping. Check all tire pressures with CONSULT-II “DATA MONITOR ” within 15 minutes after vehicle speed
becomes 17 km/h (11 MPH).
>> Replace transmitter with new one if “DATA MONITOR” displays 64 psi or more. Refer to WT-36,
"Transmitter (Pressure Sensor)" . Then GO TO 3.
3. ID REGISTRATION AND VEHICLE DRIVING
1. Carry out ID registration of all transmitters.
2. Drive at a speed of 40 km/h (25 MPH) or more for 3 minutes, and then drive the vehicle at any speed for 10 minutes. Then check all tire pressures with CONSULT-II “DATA MONITOR” within 5 minutes.
Does
“DATA MONITOR” display tire pressure as normal without any warning lamp?
YES >> Inspection End.
NO >> GO TO the inspection applicable to DTC.