2006 HYUNDAI TUCSON display
[x] Cancel search: displayPage 67 of 289
1
FEATURES OF YOUR HYUNDAI
55
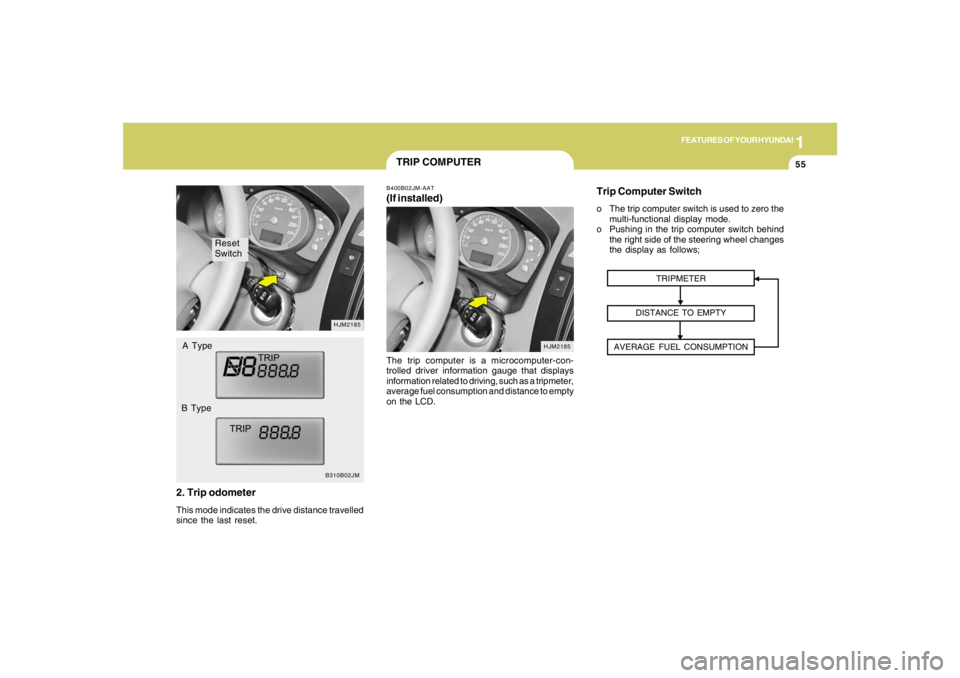
Reset
Switch
B310B02JMHJM2185
A Type
B Type2. Trip odometerThis mode indicates the drive distance travelled
since the last reset.
TRIP COMPUTERB400B02JM-AAT(If installed)The trip computer is a microcomputer-con-
trolled driver information gauge that displays
information related to driving, such as a tripmeter,
average fuel consumption and distance to empty
on the LCD.
HJM2185
TRIPMETER
DISTANCE TO EMPTY
AVERAGE FUEL CONSUMPTION
Trip Computer Switcho The trip computer switch is used to zero the
multi-functional display mode.
o Pushing in the trip computer switch behind
the right side of the steering wheel changes
the display as follows;
Page 68 of 289
1FEATURES OF YOUR HYUNDAI56
B400B02JM-A
NOTE:o The distance to empty can differ from
the actual tripmeter according to driving
condition habits.
o The distance to empty can vary accord-
ing to the driving conditions, driving
pattern or vehicle speed.3. Average Fuel ConsumptionA Type
B Type
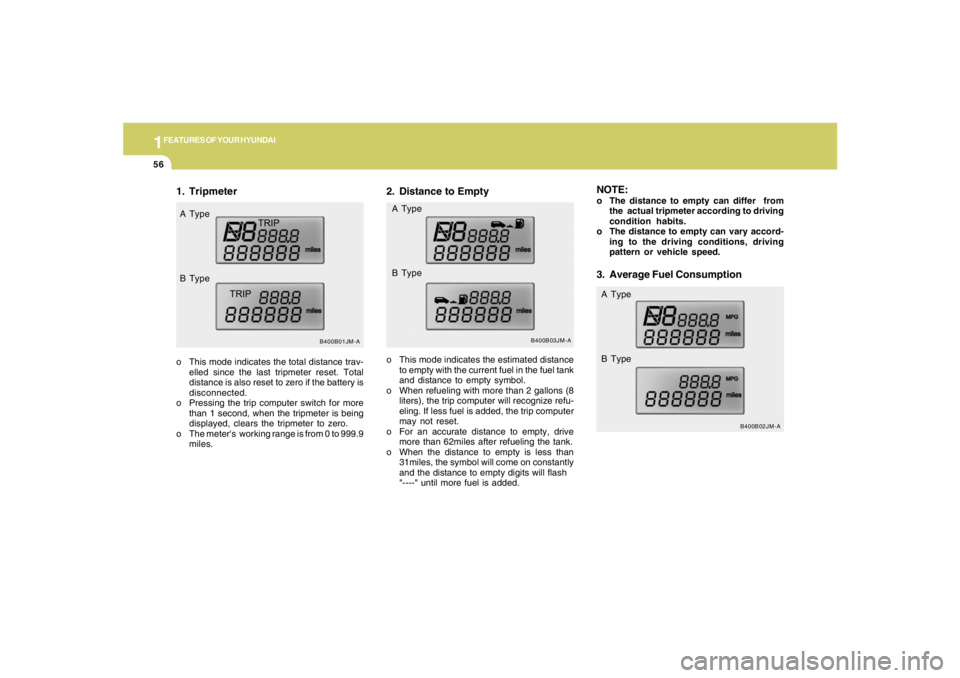
2. Distance to Empty
B400B03JM-A
o This mode indicates the estimated distance
to empty with the current fuel in the fuel tank
and distance to empty symbol.
o When refueling with more than 2 gallons (8
liters), the trip computer will recognize refu-
eling. If less fuel is added, the trip computer
may not reset.
o For an accurate distance to empty, drive
more than 62miles after refueling the tank.
o When the distance to empty is less than
31miles, the symbol will come on constantly
and the distance to empty digits will flash
"----" until more fuel is added. A Type
B Type
1. Tripmeter
B400B01JM-A
o This mode indicates the total distance trav-
elled since the last tripmeter reset. Total
distance is also reset to zero if the battery is
disconnected.
o Pressing the trip computer switch for more
than 1 second, when the tripmeter is being
displayed, clears the tripmeter to zero.
o The meter's working range is from 0 to 999.9
miles. A Type
B Type
Page 75 of 289
1
FEATURES OF YOUR HYUNDAI
63
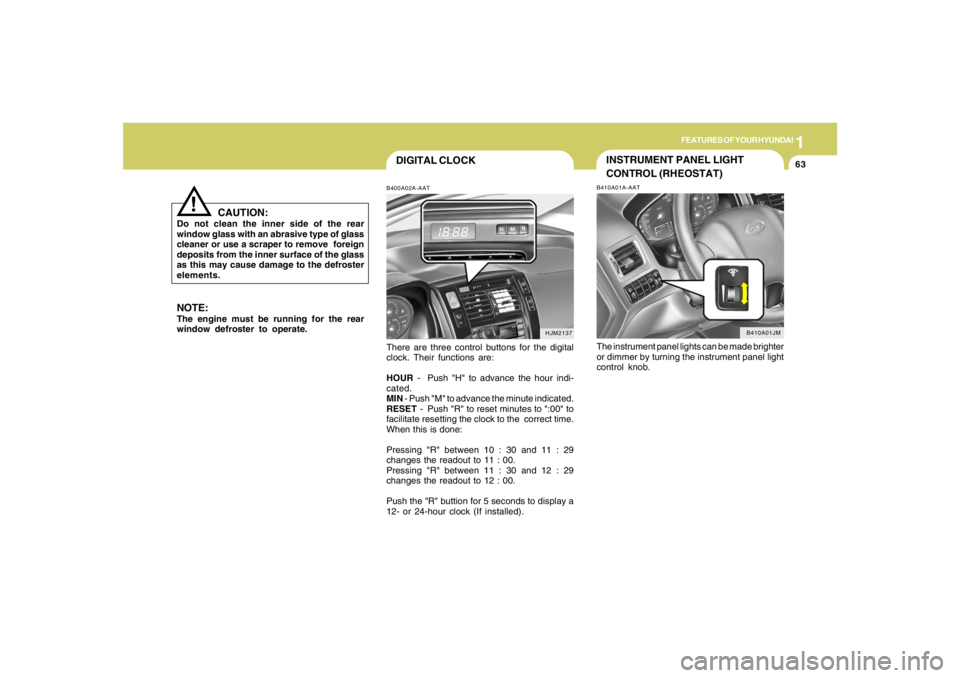
DIGITAL CLOCKB400A02A-AATThere are three control buttons for the digital
clock. Their functions are:
HOUR - Push "H" to advance the hour indi-
cated.
MIN - Push "M" to advance the minute indicated.
RESET - Push "R" to reset minutes to ":00" to
facilitate resetting the clock to the correct time.
When this is done:
Pressing "R" between 10 : 30 and 11 : 29
changes the readout to 11 : 00.
Pressing "R" between 11 : 30 and 12 : 29
changes the readout to 12 : 00.
Push the "R" buttion for 5 seconds to display a
12- or 24-hour clock (If installed).
HJM2137
NOTE:The engine must be running for the rear
window defroster to operate.
CAUTION:
Do not clean the inner side of the rear
window glass with an abrasive type of glass
cleaner or use a scraper to remove foreign
deposits from the inner surface of the glass
as this may cause damage to the defroster
elements.
!
INSTRUMENT PANEL LIGHT
CONTROL (RHEOSTAT)B410A01A-AATThe instrument panel lights can be made brighter
or dimmer by turning the instrument panel light
control knob.
B410A01JM
Page 85 of 289

1
FEATURES OF YOUR HYUNDAI
73
1. To operate Compass featurePress and release the button, then the vehicle's
directional heading will be displayed. Pressing
and releasing the button again will turn off the
display.
Heading display
- E : East
- W : West
- S : South
- N : North
ex) NE : North East2. Calibration procedurePress and hold the button for more than 9 but
less than 12 seconds. When the compass
memory is cleared a "C" will appear in the
display.
- Driving the vehicle in a circle at less than
5mph 2 times or until the compass heading
appears.
- Driving in a circle in right-handed direction
and opposite direction are possible, and if
the calibration is completed, the compass
heading will appear.
- Keep driving in a circle until a compass
heading appears.
DAY/NIGHT INSIDE REARVIEW
MIRRORB520A01A-AATManual TypeYour Hyundai is equipped with a day/night inside
rearview mirror. The "night" position is selected
by flipping the tab at the bottom of the mirror
toward you. In the "night" position, the glare of
headlights of cars behind you is reduced.
HJM2070B520C04JM-AAT
AUTOMATIC DIMMING REAR VIEW
MIRROR WITH COMPASS
(If installed)1. Status Indicator LED
2. Feature Control Button
3. Rear Light Sensor
4. Display Window
Automatic dimming rear view mirror controls
automatically the glare of headlights of the car
behind you when it turned on by pressing and
holding the button for more than 3 but less than
6 seconds.
It is turned off by pressing and holding the button
for same time once more.
B520C08JM
Page 86 of 289
1FEATURES OF YOUR HYUNDAI74
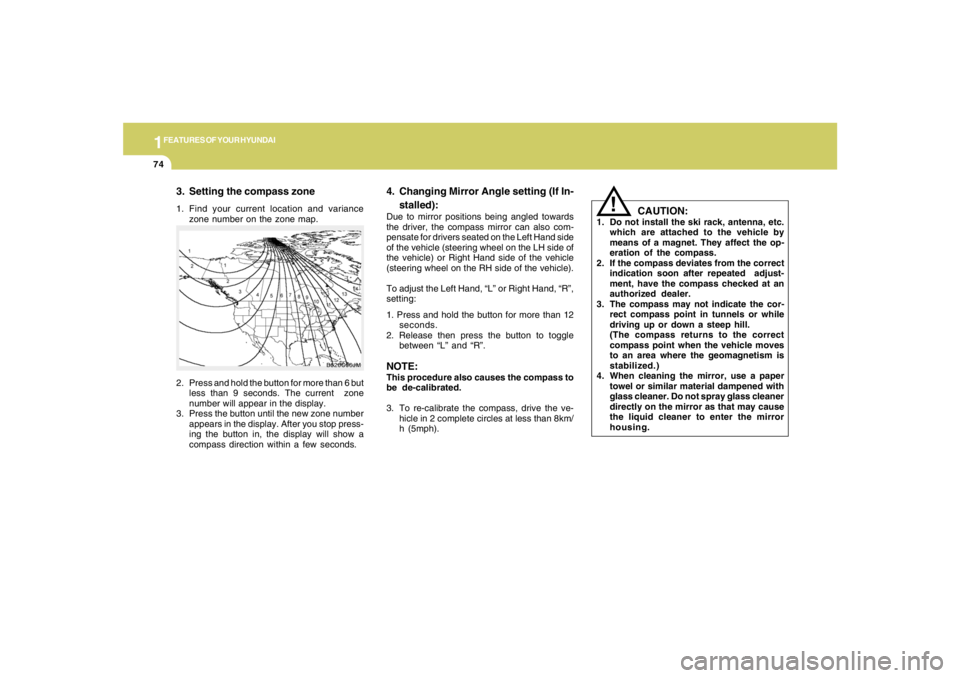
3. Setting the compass zone1. Find your current location and variance
zone number on the zone map.
CAUTION:
1. Do not install the ski rack, antenna, etc.
which are attached to the vehicle by
means of a magnet. They affect the op-
eration of the compass.
2. If the compass deviates from the correct
indication soon after repeated adjust-
ment, have the compass checked at an
authorized dealer.
3. The compass may not indicate the cor-
rect compass point in tunnels or while
driving up or down a steep hill.
(The compass returns to the correct
compass point when the vehicle moves
to an area where the geomagnetism is
stabilized.)
4. When cleaning the mirror, use a paper
towel or similar material dampened with
glass cleaner. Do not spray glass cleaner
directly on the mirror as that may cause
the liquid cleaner to enter the mirror
housing.
!
2. Press and hold the button for more than 6 but
less than 9 seconds. The current zone
number will appear in the display.
3. Press the button until the new zone number
appears in the display. After you stop press-
ing the button in, the display will show a
compass direction within a few seconds.
B520C06JM
4. Changing Mirror Angle setting (If In-
stalled):Due to mirror positions being angled towards
the driver, the compass mirror can also com-
pensate for drivers seated on the Left Hand side
of the vehicle (steering wheel on the LH side of
the vehicle) or Right Hand side of the vehicle
(steering wheel on the RH side of the vehicle).
To adjust the Left Hand, “L” or Right Hand, “R”,
setting:
1. Press and hold the button for more than 12
seconds.
2. Release then press the button to toggle
between “L” and “R”.NOTE:This procedure also causes the compass to
be de-calibrated.
3. To re-calibrate the compass, drive the ve-
hicle in 2 complete circles at less than 8km/
h (5mph).
Page 110 of 289
1FEATURES OF YOUR HYUNDAI98
AUTOMATIC HEATING AND COOLING CONTROL SYSTEMB970A01Y-AAT(If installed)Your Hyundai is equipped with an automatic
heating and cooling control system controlled
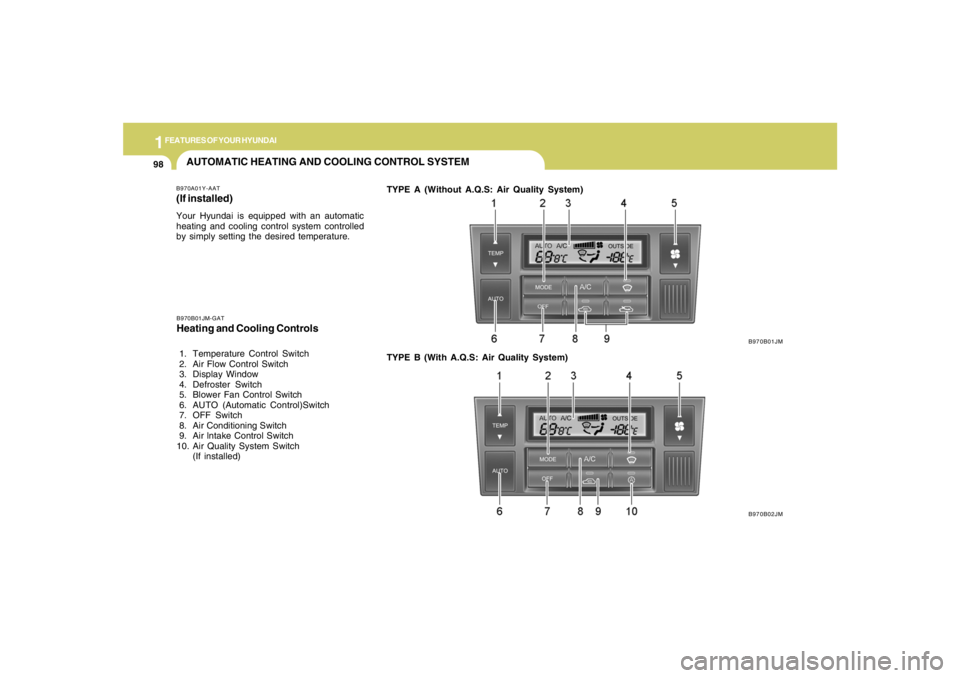
by simply setting the desired temperature.TYPE A (Without A.Q.S: Air Quality System)
B970B01JM
B970B02JM B970B01JM-GAT
Heating and Cooling Controls 1. Temperature Control Switch
2. Air Flow Control Switch
3. Display Window
4. Defroster Switch
5. Blower Fan Control Switch
6. AUTO (Automatic Control)Switch
7. OFF Switch
8. Air Conditioning Switch
9. Air lntake Control Switch
10. Air Quality System Switch
(If installed)TYPE B (With A.Q.S: Air Quality System)
Page 111 of 289

1
FEATURES OF YOUR HYUNDAI
9999999999
Photo sensor
HJM2086
NOTE:o If the battery has been discharged or
disconnected, the temperature mode will
reset to Centigrade degrees.
This is a normal condition and you can
change the temperature mode from Cen-
tigrade to Farenheit as follows;
Press the "TEMP" down button and
"AUTO" button simultaneously for 3
secs. The display shows that the unit of
temperature is adjusted to Centigrade or
Fahrenheit.
(°C
→ →→ →
→°F or °F
→ →→ →
→°C)
o Never place anything covering the sen-
sor which is located on the instrument
panel to ensure better control of the
heating and cooling system.
B970C01JM-AATAutomatic OperationThe FATC (Full Automatic Temperature Con-
trol) system automatically controls heating and
cooling by doing as follows:
1. Push the "AUTO" button. The indicator light
will illuminate confirming that the Face, Floor
and/or Bi-Level modes as well as the blower
speed and air conditioner will be controlled
automatically.2. Push the "TEMP" button to set the desired
temperature.
The temperature will increase to the maxi-
mum 90°F(32°C) by pushing the " " button.
Each push of the button will cause the tem-
perature to increase by 1°F(0.5°C).
The temperature will decrease to the mini-
mum 62°F(17°C) by pushing the " " button.
Each push of the button will cause the tem-
perature to decrease by 1°F(0.5°C).
HJM2124HJM2126
Page 120 of 289
1FEATURES OF YOUR HYUNDAI
108
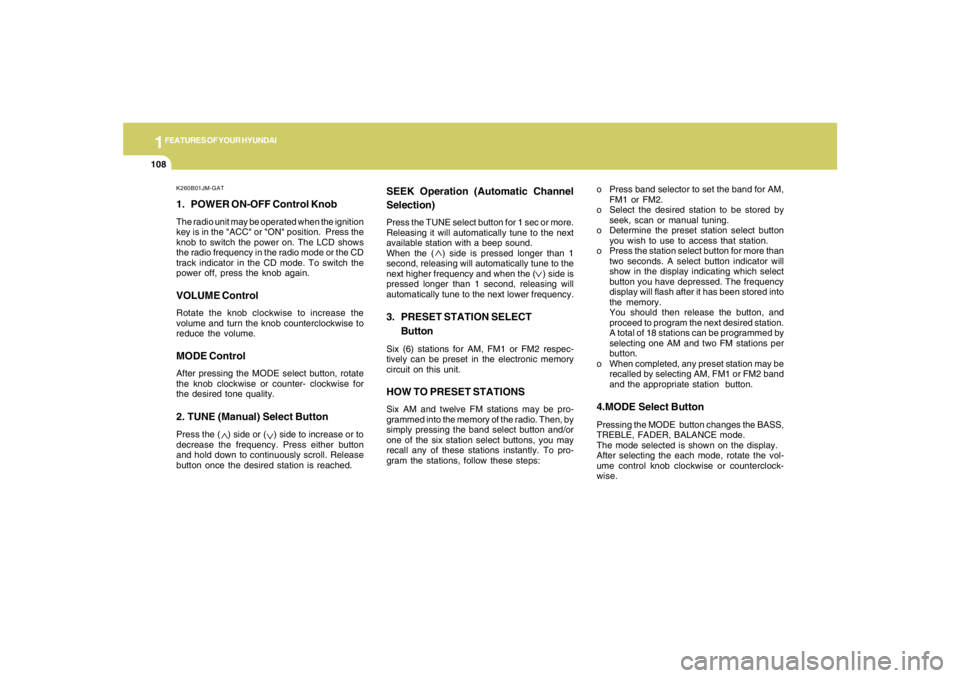
K260B01JM-GAT1. POWER ON-OFF Control KnobThe radio unit may be operated when the ignition
key is in the "ACC" or "ON" position. Press the
knob to switch the power on. The LCD shows
the radio frequency in the radio mode or the CD
track indicator in the CD mode. To switch the
power off, press the knob again.VOLUME ControlRotate the knob clockwise to increase the
volume and turn the knob counterclockwise to
reduce the volume.MODE ControlAfter pressing the MODE select button, rotate
the knob clockwise or counter- clockwise for
the desired tone quality.2. TUNE (Manual) Select ButtonPress the ( ) side or ( ) side to increase or to
decrease the frequency. Press either button
and hold down to continuously scroll. Release
button once the desired station is reached.
SEEK Operation (Automatic Channel
Selection)Press the TUNE select button for 1 sec or more.
Releasing it will automatically tune to the next
available station with a beep sound.
When the ( ) side is pressed longer than 1
second, releasing will automatically tune to the
next higher frequency and when the ( ) side is
pressed longer than 1 second, releasing will
automatically tune to the next lower frequency.3. PRESET STATION SELECT
ButtonSix (6) stations for AM, FM1 or FM2 respec-
tively can be preset in the electronic memory
circuit on this unit.HOW TO PRESET STATIONSSix AM and twelve FM stations may be pro-
grammed into the memory of the radio. Then, by
simply pressing the band select button and/or
one of the six station select buttons, you may
recall any of these stations instantly. To pro-
gram the stations, follow these steps:o Press band selector to set the band for AM,
FM1 or FM2.
o Select the desired station to be stored by
seek, scan or manual tuning.
o Determine the preset station select button
you wish to use to access that station.
o Press the station select button for more than
two seconds. A select button indicator will
show in the display indicating which select
button you have depressed. The frequency
display will flash after it has been stored into
the memory.
You should then release the button, and
proceed to program the next desired station.
A total of 18 stations can be programmed by
selecting one AM and two FM stations per
button.
o When completed, any preset station may be
recalled by selecting AM, FM1 or FM2 band
and the appropriate station button.
4.MODE Select ButtonPressing the MODE button changes the BASS,
TREBLE, FADER, BALANCE mode.
The mode selected is shown on the display.
After selecting the each mode, rotate the vol-
ume control knob clockwise or counterclock-
wise.