Page 160 of 539
2
DRIVING YOUR HYUNDAI
5
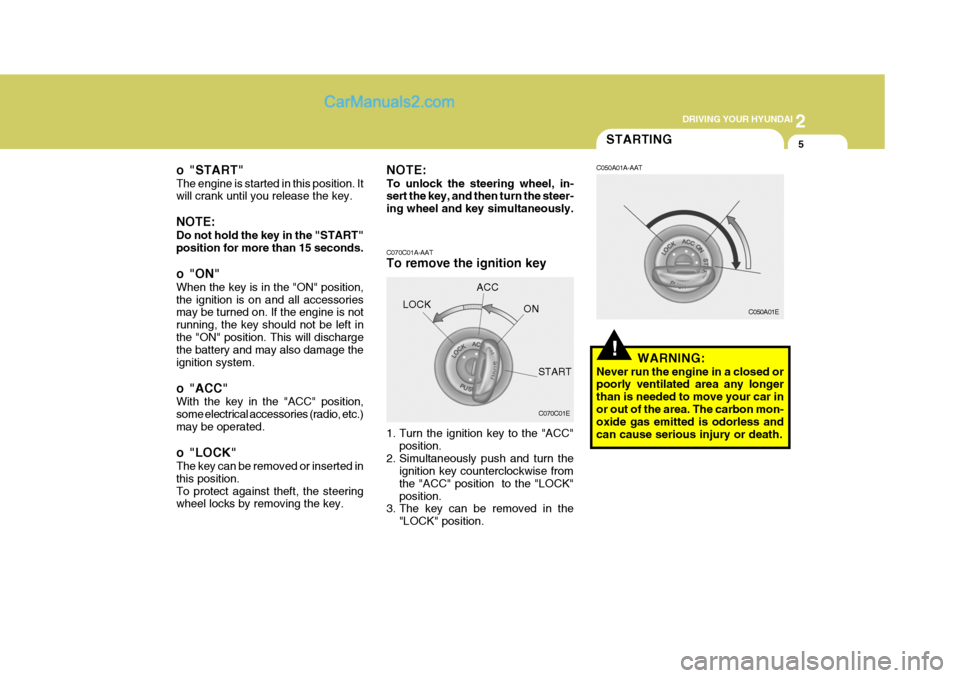
o "START" The engine is started in this position. It will crank until you release the key. NOTE: Do not hold the key in the "START" position for more than 15 seconds.
o "ON" When the key is in the "ON" position, the ignition is on and all accessories may be turned on. If the engine is not running, the key should not be left inthe "ON" position. This will discharge the battery and may also damage the ignition system.
o "ACC" With the key in the "ACC" position, some electrical accessories (radio, etc.)may be operated.
o "LOCK" The key can be removed or inserted in this position.To protect against theft, the steering wheel locks by removing the key.STARTING
!
NOTE: To unlock the steering wheel, in- sert the key, and then turn the steer- ing wheel and key simultaneously. C070C01A-AAT To remove the ignition key
1. Turn the ignition key to the "ACC" position.
2. Simultaneously push and turn the ignition key counterclockwise from the "ACC" position to the "LOCK"position.
3. The key can be removed in the
"LOCK" position.LOCK
C050A01A-AAT
WARNING:
Never run the engine in a closed or poorly ventilated area any longer than is needed to move your car inor out of the area. The carbon mon- oxide gas emitted is odorless and can cause serious injury or death.
C070C01E C050A01E
ACC
ON
START
Page 193 of 539
3 WHAT TO DO IN AN EMERGENCY
6
!
D040B03HP-GAT Handling the Spare Tire
1. Obtain the spare wheel rod (Jack
handle) after folding up the seat cushion of the second seat . To fold up the seat cushion, refer to the page 1-25. 2. Insert the spare wheel rod into the
hole in the upper pad of the rearbumper.
3. Connect the wheel nut wrench to
the spare wheel rod.
4. Turn the wheel nut wrench counter- clockwise and the spare tire willlower.
5. Remove the lift plate from the cen- ter of the spare tire after the spare tire is lowered completely. CAUTION:
When installing, turn the wheel nut wrench clockwise till you hear the crackle once or twice(Tightening torque : 3.87 kg.m). And make surethe spare tire is secured in the proper location.
HHP4015
HHP4025 HHP4026Installation is the reverse order of re- moval.
Page 196 of 539
3
WHAT TO DO IN AN EMERGENCY
9
D060D01A-AAT 4. Loosen Wheel Nuts
D065C02HP-GAT
3. Removing the Spare Wheel
Cap
Pry off the wheel cap, using the bar as shown in the illustration.
o Alloy Wheel Cap type
The wheel nuts should be loosened slightly before raising the car. To loosenthe nuts, turn the wrench handle coun- terclockwise. When doing this, be sure that the socket is seated completelyover the nut so it cannot slip off. For maximum leverage, position the wrench so the handle is to the right asshown in the illustration. Then, while holding the wrench near the end of the handle, pull up on it with steady pres-sure. Do not remove the nuts at this time. Just loosen them about one-half turn.D060E01A-AAT 5. Put the Jack in Place The base of the jack should be placed on firm, level ground. The jack should be positioned as shown in the illustra- tion.
Front
HHP4027 HHP4028
HHP4023
HHP4024
Rear
Page 197 of 539
3 WHAT TO DO IN AN EMERGENCY
10
Using the jack handle, turn the release valve clockwise until it reaches a stop. Move the jack handle up and down toraise the ram until just before the jack contacts the jacking point of the car. Position the jack with the jack handle. Position it only at the specified pointsindicated in the "Put the Jack in Place". Use of the jack at other points could damage the car.Moving the jack handle up and down to raise the ram.
Then fit the jack handle into the holder, and align the groove of the jack handle with the notch of the holder. HHP4016
HHP4017 HHP4018
D060F02HP-GAT 6. Raising the Car
o Open the lid at the left corner of the
luggage compartment.
o Loosen the hexagonal bolt, and then take out the jack. D060F01HP
Page 198 of 539
3
WHAT TO DO IN AN EMERGENCY
11
!
!
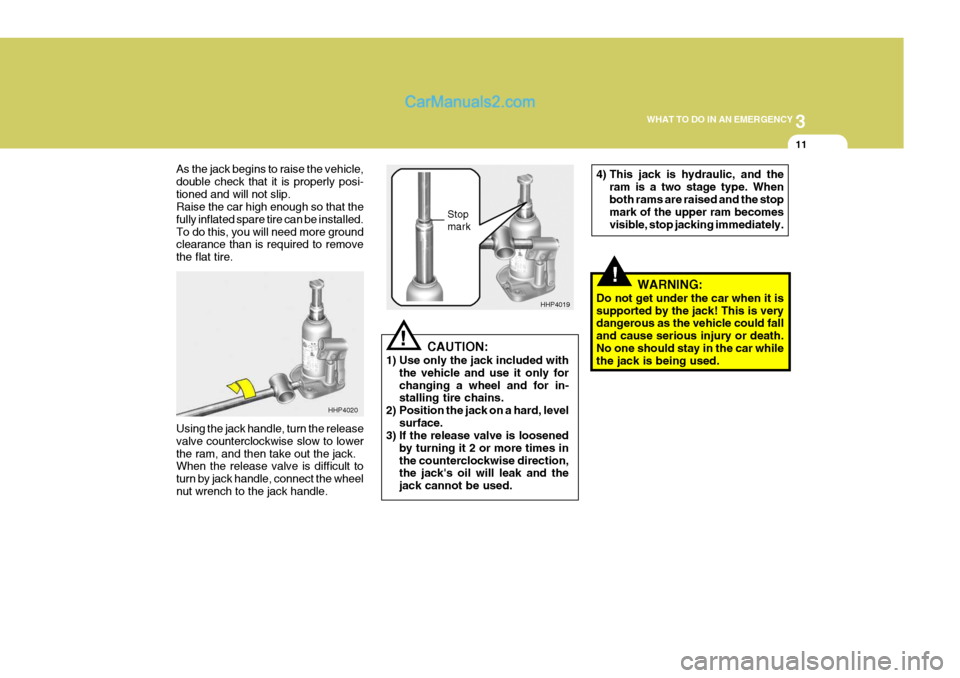
As the jack begins to raise the vehicle, double check that it is properly posi-tioned and will not slip. Raise the car high enough so that the fully inflated spare tire can be installed.To do this, you will need more ground clearance than is required to remove the flat tire. Using the jack handle, turn the release valve counterclockwise slow to lowerthe ram, and then take out the jack. When the release valve is difficult to turn by jack handle, connect the wheelnut wrench to the jack handle. CAUTION:
1) Use only the jack included with the vehicle and use it only forchanging a wheel and for in- stalling tire chains.
2) Position the jack on a hard, level surface.
3) If the release valve is loosened
by turning it 2 or more times in the counterclockwise direction, the jack's oil will leak and the jack cannot be used. Stop mark
HHP4020 HHP4019
WARNING:
Do not get under the car when it is supported by the jack! This is very dangerous as the vehicle could fall and cause serious injury or death.No one should stay in the car while the jack is being used.
4) This jack is hydraulic, and the
ram is a two stage type. When both rams are raised and the stop mark of the upper ram becomes visible, stop jacking immediately.
Page 236 of 539
6
DO-IT-YOURSELF MAINTENANCE
9
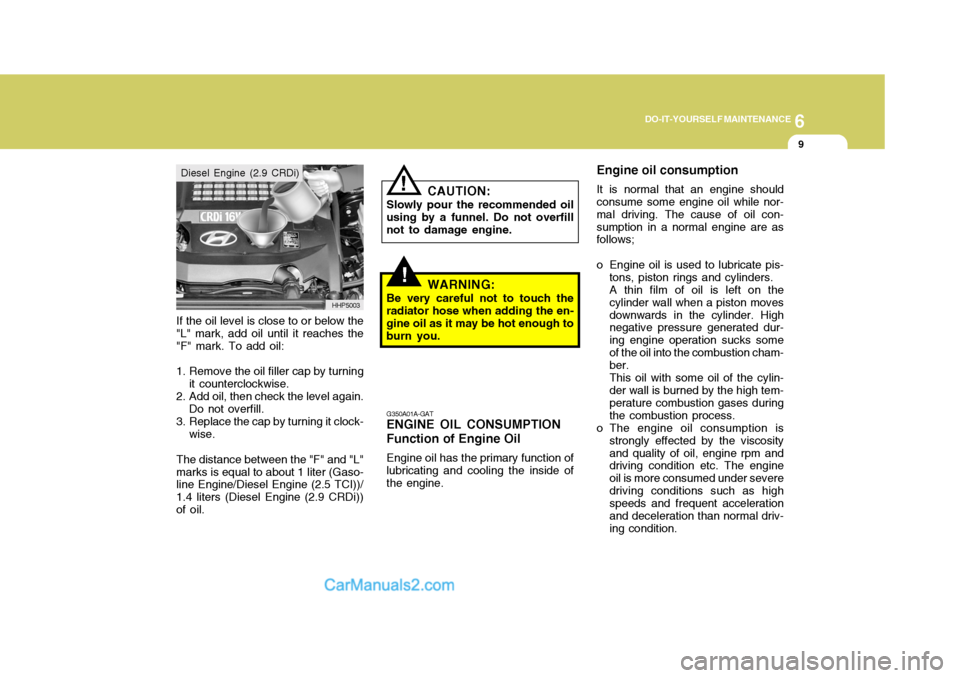
If the oil level is close to or below the "L" mark, add oil until it reaches the "F" mark. To add oil:
1. Remove the oil filler cap by turning it counterclockwise.
2. Add oil, then check the level again.
Do not overfill.
3. Replace the cap by turning it clock-
wise.
The distance between the "F" and "L"marks is equal to about 1 liter (Gaso- line Engine/Diesel Engine (2.5 TCI))/ 1.4 liters (Diesel Engine (2.9 CRDi))of oil. G350A01A-GAT
ENGINE OIL CONSUMPTION Function of Engine Oil
Engine oil has the primary function of lubricating and cooling the inside of the engine. Engine oil consumption It is normal that an engine should consume some engine oil while nor- mal driving. The cause of oil con-sumption in a normal engine are as follows;
o Engine oil is used to lubricate pis-
tons, piston rings and cylinders. A thin film of oil is left on thecylinder wall when a piston movesdownwards in the cylinder. High negative pressure generated dur- ing engine operation sucks someof the oil into the combustion cham- ber. This oil with some oil of the cylin- der wall is burned by the high tem- perature combustion gases duringthe combustion process.
o The engine oil consumption is strongly effected by the viscosityand quality of oil, engine rpm and driving condition etc. The engine oil is more consumed under severedriving conditions such as high speeds and frequent acceleration and deceleration than normal driv-ing condition.
HHP5003
Diesel Engine (2.9 CRDi)
!
!
CAUTION:
Slowly pour the recommended oil
using by a funnel. Do not overfill not to damage engine.
WARNING:
Be very careful not to touch the
radiator hose when adding the en-gine oil as it may be hot enough toburn you.
Page 237 of 539
6 DO-IT-YOURSELF MAINTENANCE
10CHANGING THE ENGINE OIL AND FILTER
!
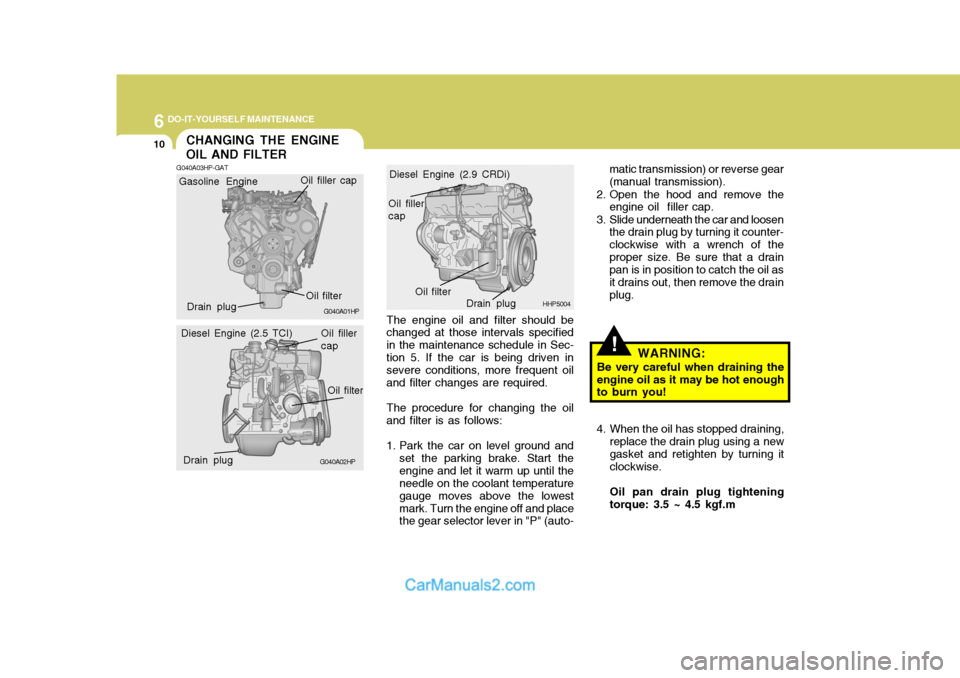
The engine oil and filter should be changed at those intervals specified in the maintenance schedule in Sec- tion 5. If the car is being driven in severe conditions, more frequent oiland filter changes are required. The procedure for changing the oil and filter is as follows:
1. Park the car on level ground and set the parking brake. Start the engine and let it warm up until the needle on the coolant temperature gauge moves above the lowestmark. Turn the engine off and place the gear selector lever in "P" (auto- WARNING:
Be very careful when draining the engine oil as it may be hot enough to burn you!
4. When the oil has stopped draining, replace the drain plug using a new gasket and retighten by turning itclockwise. Oil pan drain plug tightening torque: 3.5 ~ 4.5 kgf.m
G040A03HP-GAT
HHP5004
G040A01HP
G040A02HP matic transmission) or reverse gear (manual transmission).
2. Open the hood and remove the engine oil filler cap.
3. Slide underneath the car and loosen the drain plug by turning it counter-clockwise with a wrench of theproper size. Be sure that a drain pan is in position to catch the oil as it drains out, then remove the drainplug.
Diesel Engine (2.9 CRDi)
Diesel Engine (2.5 TCI)
Gasoline Engine
Oil filter
Drain plug Oil filler cap
Oil filler cap
Oil filter
Drain plug Oil filler cap
Oil filter
Drain plug
Page 238 of 539
6
DO-IT-YOURSELF MAINTENANCE
11CHECKING AND CHANG- ING THE ENGINE COOL- ANT
!
G050A01A-AAT
WARNING:
Do not remove the radiator cap when the engine is hot. When the engine is hot, the engine coolant is underpressure and may erupt through the opening if the cap is removed. You could be seriously burned if you donot observe this precaution. Do not remove the radiator cap until the radiator is cool to touch.
!
5. Remove the oil filter by turning it counterclockwise with a oil filter wrench of the proper size. A cer- tain amount of oil will come out when you remove the filter. So besure to have your drain pan in place underneath it.
6. Install a new oil filter in accordance with the instructions on the cartonor on the filter itself. Do not over- tighten (Tightening torque: Gaso-
line- 1.2 ~ 1.6 kgf.m, Diesel - 2.3 ~ 2.5 kgf.m) . Be sure that the
mounting surface on the engine is clean and that the old gasket is removed completely. Lubricate the new gasket on the filter with cleanengine oil before installation.
7. Remove the engine oil level dip- stick.
8. Refill the crankcase with the rec- ommended engine oil slowly. Referto the specification in chapter 9 for engine oil capacity.
! CAUTION:
Slowly pour the recommended oil by using a funnel. Do not overfill not to damage the engine. 9. Start the engine and check to be
sure no oil is leaking from thedrain plug or oil filter.
10.Shut off the engine and recheck
the oil level.
NOTE: Always dispose of used engine oil
in an environmentally acceptable manner. It is suggested that it be placed in a sealed container andtaken to a service station for recla- mation. Do not pour the oil on the ground or put it into the house-hold trash.
WARNING:
Used motor oil may cause irrita-
tion or cancer of the skin if left incontact with the skin for prolongedperiods of time. Wash your hands thoroughly with soap and warm water as soon as possible afterhandling used oil.