2006 Hyundai Accent brake
[x] Cancel search: brakePage 229 of 599

6
DO-IT-YOURSELF MAINTENANCE
11
!
G040B03FC-GAT
(Diesel Engine: Left hand drive type(E.C only)) The engine oil and filter should be changed at those intervals specified inthe maintenance schedule in Section 5. If the car is being driven in severe conditions, more frequent oil and filterchanges are required. The procedure for changing the oil and filter is as follows:
1. Park the car on level ground and set
the parking brake. Start the engine and let it warm up until the needle on the coolant temperature gauge movesabove the lowest mark. Turn the engine off and place the gear selec- tor lever in "P" (automatic) or reversegear (manual transaxle).
2. Open the hood and remove the en-
gine oil filler cap.
3. Slide underneath the car and loosen the oil pan drain plug by turning itcounterclockwise oil pan with awrench of the proper size. Be sure that a drain pan is in position to catch the oil as it drains out, thenremove the drain plug.
Engine oil drain plug
Oil filter
G040C01A
7. Refill the crankcase with the recom-mended engine oil. Refer to the specification in chapter 9 for engine oil capacity.
8. Start the engine and check to be sure no oil is leaking from the drainplug or oil filter.
9. Shut off the engine and recheck the
oil level.
NOTE: Always dispose of used engine oil in an environmentally acceptable man- ner. It is suggested that it be placedin a sealed container and taken to a service station for reclamation. Do not pour the oil on the ground or putit in with the household trash. WARNING:
Used motor oil may cause irritation or cancer of the skin if left in con- tact with the skin for prolonged peri-ods of time. Wash your hands thor- oughly with soap and warm water as soon as possible after handling usedoil.
Oil filler cap
Be sure that the mounting surface on the engine is clean and that theold gasket is removed completely. Lubricate the new gasket on the filter with clean engine oil beforeinstallation.
Page 232 of 599

6 DO-IT-YOURSELF MAINTENANCE
14
G050D01A
G050D02A-AAT To Change the Coolant The coolant should be changed at those intervals specified in the vehiclemaintenance schedule in Section 5.
CAUTION:
Engine coolant can damage the fin-ish of your car. If you spill engine coolant on the car, wash it off thor- oughly with clean water.
!
1. Park the car on level ground, set the parking brake and remove the ra- diator cap when cool.
2. Be sure your drain receptacle is in place. Open the drain cock on theradiator. Allow all the engine coolantto drain from the cooling system, then securely close the drain cock.
3. Check Section 9 for the capacity of the cooling system in your car. Then,following the manufacturer's direc- tions on the engine coolant contain-er, add the appropriate quantity of coolant to the radiator. 4. Turn the radiator cap counterclock-
wise without pressing down on it, until it stops. This relieves any pres- sure remaining in the cooling sys- tem. And remove the radiator capby pushing down and turning coun- terclockwise. Now fill the radiator with clean dem-ineralized or distilled water. Con- tinue to add clean demineralized or distilled water in small quantitiesuntil the fluid level stays up in the radiator neck. G050D02A
5. Start the engine, top off the radiator with water and then add engine coolant to the reservoir until thelevel is between "L" and "F".
6. Replace the radiator and reservoir
caps and check to be sure the draincocks are fully closed and not leak- ing.
Page 238 of 599

6 DO-IT-YOURSELF MAINTENANCE
20
!
CHECKING THE TRANSAXLE FLUID (AUTOMATIC)
G110A01E-AAT Transaxle fluid in the automatic transaxle should be checked at those intervals specified in the vehicle main- tenance schedule in Section 5. NOTE: Automatic transaxle fluid is basi- cally a red color. As driving distance increases, the fluid color turns dark-ish red gradually. It is normal condi- tion and you should not judge the need to replace based upon thechanging color. You must replace the automatic transaxle fluid in accordance withintervals specified in the vehicle maintenance schedule in section 5. G110B03A-AAT Recommended Fluid Your Hyundai automatic transaxle is specially designed to operate withHyundai Genuine ATF SP III, DIA- MOND ATF SP III or other brands approved by Hyundai Motor Co. Dam-age caused by a nonspecified fluid is not covered by your new vehicle limited warranty.
G110C02A-GAT Transaxle Fluid Capacity The fluid capacity of the automatic transaxle is 6.1 liters.
WARNING:
The transaxle fluid level should bechecked when the engine is at nor-mal operating temperature. This means that the engine, radiator, exhaust system etc., are very hot.Exercise great care not to burn your- self during this procedure. G110D02A-GAT To Check the Transaxle Fluid Level Park the car on level ground with the parking brake engaged. When thetransaxle fluid level is checked, the transaxle fluid should be at normal operating temperature and the engineidling.
While the engine is idling, apply thebrakes and move the gear selectorlever from "P" to each of its other positions -- "R", "N", "D", "2", "L" -- and then return to "N" or "P". With theengine still idling: C090A01A
Page 240 of 599

6 DO-IT-YOURSELF MAINTENANCE
22
!
CHECKING THE BRAKES
G120A01A-AAT
G120B01A-AAT Checking the Brake Fluid Level
! CAUTION:
Because brakes are essential to the safe operation of the car, it is sug-gested that they be checked and inspected by your Hyundai dealer. The brakes should be checked andinspected for wear at those inter- vals specified in the vehicle mainte- nance schedule in Section 5.
WARNING:
Use caution when handling brakefluid. It can damage your vision if itgets into your eyes. It will also dam- age your vehicle's paint if spilled on it and not removed immediately. G120C02A-AAT Recommended Brake Fluid Use only hydraulic brake fluid con- forming to DOT 3 or DOT 4 specifica-tions in your braking system. Follow the instructions printed on the con- tainer. G120D01A-AAT To Check the Fluid Level
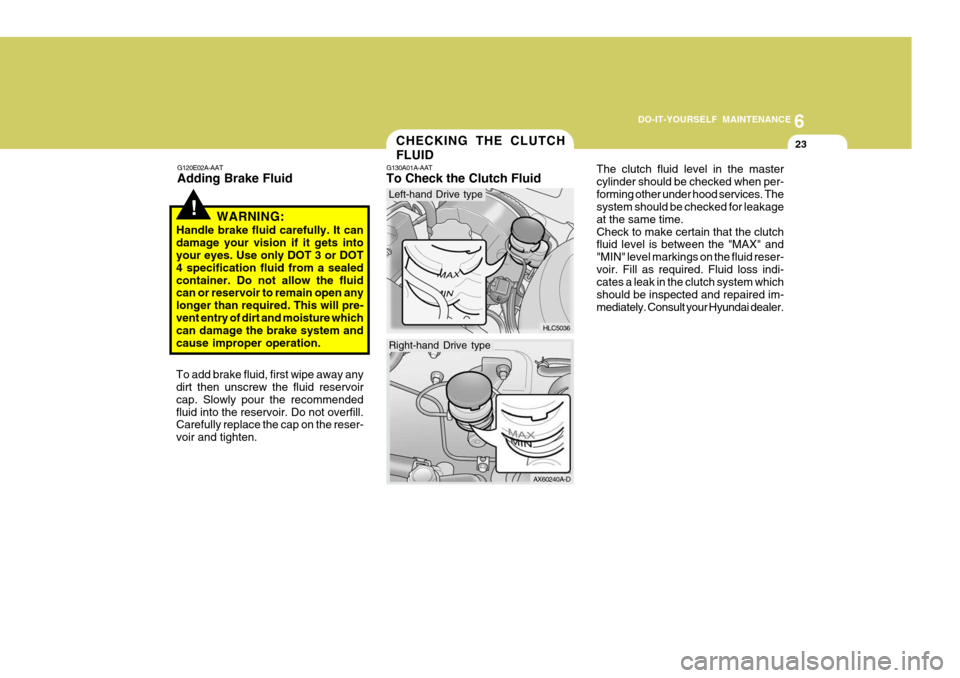
HLC5035The fluid level in the brake fluid reser- voir should be checked periodically. The level should be between the "MIN"and "MAX" marks on the side of the reservoir. If the level is at or below the "MIN" mark, carefully add fluid to bringit up to "MAX". Do not overfill.
Left-hand Drive type
HLC5035-D
Right-hand Drive type
Page 241 of 599

6
DO-IT-YOURSELF MAINTENANCE
23CHECKING THE CLUTCH FLUID
!
G120E02A-AAT Adding Brake Fluid
WARNING:
Handle brake fluid carefully. It can damage your vision if it gets into your eyes. Use only DOT 3 or DOT 4 specification fluid from a sealedcontainer. Do not allow the fluid can or reservoir to remain open any longer than required. This will pre-vent entry of dirt and moisture which can damage the brake system and cause improper operation. To add brake fluid, first wipe away any dirt then unscrew the fluid reservoir cap. Slowly pour the recommendedfluid into the reservoir. Do not overfill. Carefully replace the cap on the reser- voir and tighten. G130A01A-AAT To Check the Clutch Fluid
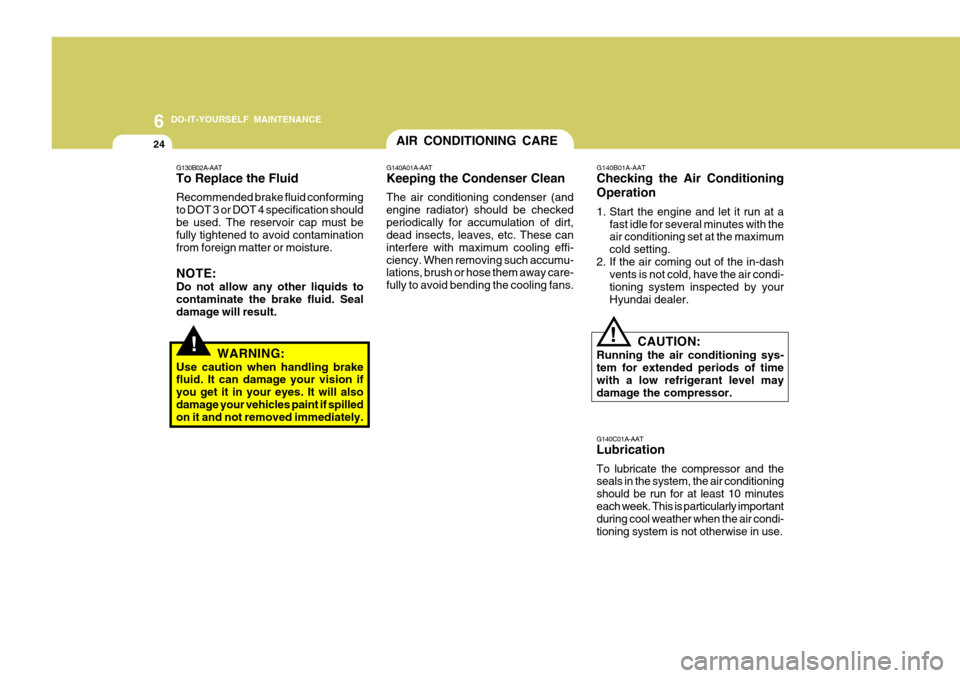
The clutch fluid level in the master cylinder should be checked when per-forming other under hood services. The system should be checked for leakage at the same time.Check to make certain that the clutch fluid level is between the "MAX" and "MIN" level markings on the fluid reser-voir. Fill as required. Fluid loss indi- cates a leak in the clutch system which should be inspected and repaired im-mediately. Consult your Hyundai dealer.
HLC5036
AX60240A-D
Left-hand Drive type
Right-hand Drive type
Page 242 of 599

6 DO-IT-YOURSELF MAINTENANCE
24
!
AIR CONDITIONING CARE
G140A01A-AAT Keeping the Condenser Clean The air conditioning condenser (and engine radiator) should be checkedperiodically for accumulation of dirt, dead insects, leaves, etc. These can interfere with maximum cooling effi-ciency. When removing such accumu- lations, brush or hose them away care- fully to avoid bending the cooling fans. G140B01A-AAT Checking the Air Conditioning Operation
1. Start the engine and let it run at a
fast idle for several minutes with the air conditioning set at the maximum cold setting.
2. If the air coming out of the in-dash vents is not cold, have the air condi-tioning system inspected by yourHyundai dealer.
G140C01A-AAT Lubrication To lubricate the compressor and the seals in the system, the air conditioning should be run for at least 10 minuteseach week. This is particularly important during cool weather when the air condi- tioning system is not otherwise in use.
! CAUTION:
Running the air conditioning sys- tem for extended periods of time with a low refrigerant level may damage the compressor.
G130B02A-AAT To Replace the Fluid Recommended brake fluid conforming to DOT 3 or DOT 4 specification shouldbe used. The reservoir cap must be fully tightened to avoid contamination from foreign matter or moisture. NOTE: Do not allow any other liquids to contaminate the brake fluid. Sealdamage will result.
WARNING:
Use caution when handling brake fluid. It can damage your vision if you get it in your eyes. It will alsodamage your vehicles paint if spilled on it and not removed immediately.
Page 245 of 599

6
DO-IT-YOURSELF MAINTENANCE
27CHECKING DRIVE BELTSCHECKING BRAKE PEDAL CLEARANCE
Water Pump Pulley
Alternator Pulley
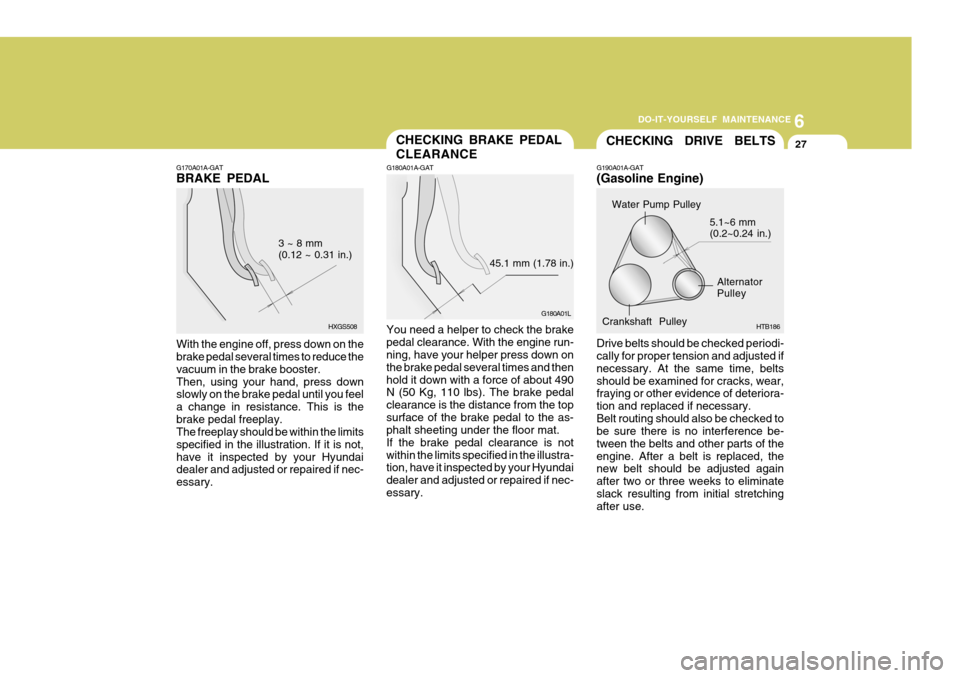
Crankshaft Pulley 5.1~6 mm(0.2~0.24 in.)
G190A01A-GAT (Gasoline Engine)
G180A01A-GAT
G180A01L
45.1 mm (1.78 in.)
You need a helper to check the brake pedal clearance. With the engine run- ning, have your helper press down on the brake pedal several times and thenhold it down with a force of about 490 N (50 Kg, 110 lbs). The brake pedal clearance is the distance from the topsurface of the brake pedal to the as- phalt sheeting under the floor mat. If the brake pedal clearance is notwithin the limits specified in the illustra- tion, have it inspected by your Hyundai dealer and adjusted or repaired if nec-essary. HTB186
G170A01A-GAT BRAKE PEDAL
HXGS508
3 ~ 8 mm (0.12 ~ 0.31 in.)
With the engine off, press down on the brake pedal several times to reduce the vacuum in the brake booster.Then, using your hand, press down slowly on the brake pedal until you feel a change in resistance. This is thebrake pedal freeplay. The freeplay should be within the limits specified in the illustration. If it is not,have it inspected by your Hyundai dealer and adjusted or repaired if nec- essary. Drive belts should be checked periodi- cally for proper tension and adjusted if necessary. At the same time, beltsshould be examined for cracks, wear, fraying or other evidence of deteriora- tion and replaced if necessary.Belt routing should also be checked to be sure there is no interference be- tween the belts and other parts of theengine. After a belt is replaced, the new belt should be adjusted again after two or three weeks to eliminateslack resulting from initial stretching after use.
Page 274 of 599

9 VEHICLE SPECIFICATIONS
2
Type Wheel free playRack stroke Oil pump type 4 DOOR
4260 (167.7)
1680 (66.1) 1395 (54.9) 2440 (96.1) 1435 (56.5)1425 (56.1)
ItemOverall length Overall width Overall height (unladen)Wheel base Wheel tread J030A02A-GAT TIRE
GASOLINE
MF45AH, MF55AH 90A (13.5V)
0.7 KW 0.9 KW
Dual hydraulic with brake booster Ventilated disc DrumCable operated on rear wheel
J010A01A-GAT MEASUREMENT
J060A01A-GAT FUEL SYSTEM
Rack and pinion 0 ~ 30 mm (0 ~ 1.18 in.) 134 mm (5.3 in.) Vane type
175/70 R13 185/60R14, 185/55 R15 Full size
StandardOption Spare
Front Rear
mm (in.)
J020A01A-GAT POWER STEERING Fuel tank Capacity Liter
45 Imp.gal
9.9
J040A03A-GAT ELECTRICAL
Item Battery Alternator Starter
J050A01A-GAT BRAKE Type Front brake typeRear brake type Parking brake
3/5 DOOR
4215 (165.9)
DIESEL
CMF60AH 90A(12V) 1.7 KW
-
Manual T/A Automatic T/A