2006 Hyundai Accent battery
[x] Cancel search: batteryPage 246 of 599

6 DO-IT-YOURSELF MAINTENANCE
28CHECKING AND REPLACING FUSES
CAUTION:
When replacing a fusible link, never use anything but a new fusible link with the same or lower amperagerating. Never use a piece of wire or a higher-rated fusible link. This could result in serious damage andcreate a fire hazard.!
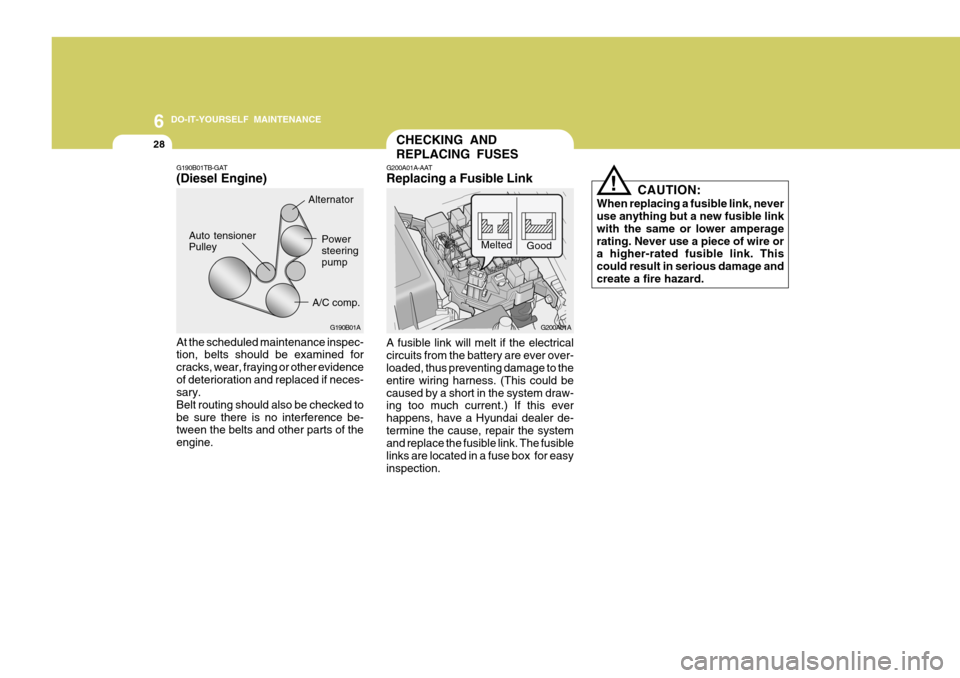
G200A01A-AAT Replacing a Fusible Link
G200A01A
Melted
Good
G190B01TB-GAT(Diesel Engine)
A/C comp.
Auto tensioner Pulley
G190B01A
AlternatorPower steering pump
At the scheduled maintenance inspec- tion, belts should be examined for cracks, wear, fraying or other evidenceof deterioration and replaced if neces- sary. Belt routing should also be checked tobe sure there is no interference be- tween the belts and other parts of the engine. A fusible link will melt if the electricalcircuits from the battery are ever over- loaded, thus preventing damage to the entire wiring harness. (This could becaused by a short in the system draw- ing too much current.) If this ever happens, have a Hyundai dealer de-termine the cause, repair the system and replace the fusible link. The fusible links are located in a fuse box for easyinspection.
Page 248 of 599

6 DO-IT-YOURSELF MAINTENANCE
30
!
CHECKING THE BATTERY
o If battery fluid is on your skin, flush
the affected areas with water for at least 15 minutes and then seek medi- cal assistance.
o If battery fluid is in your eyes, rinse
out your eyes with water and getmedical assistance as soon as pos- sible. While you are being driven toget medical assistance, continue to rinse your eyes by using a sponge or soft cloth saturated with water.
o If you swallow battery fluid, drink a large quantity of water or milk fol-lowed by milk of magnesia, eat araw egg or drink vegetable oil. Get medical assistance as soon as pos- sible.
While batteries are being charged (ei-ther by a battery charger or by thevehicle's alternator), they produce ex- plosive gases. Always observe these warnings to prevent injuries from oc-curring:
o Charge batteries only in a well ven- tilated area.
o Do not permit flames, sparks or
smoking in the area.
o Keep children away from the area.
CAUTION:
A burned-out fuse indicates that there is a problem in the electricalcircuit. If you replace a fuse and it blows as soon as the accessory is turned on, the problem is seriousand should be referred to a Hyun- dai dealer for diagnosis and repair. Never replace a fuse with anythingexcept a fuse with the same or a lower amperage rating. A higher capacity fuse could cause damage and create a fire hazard. NOTE: See page 6-42 for the fuse panel descriptions.
! G210A01A-AAT
WARNING:
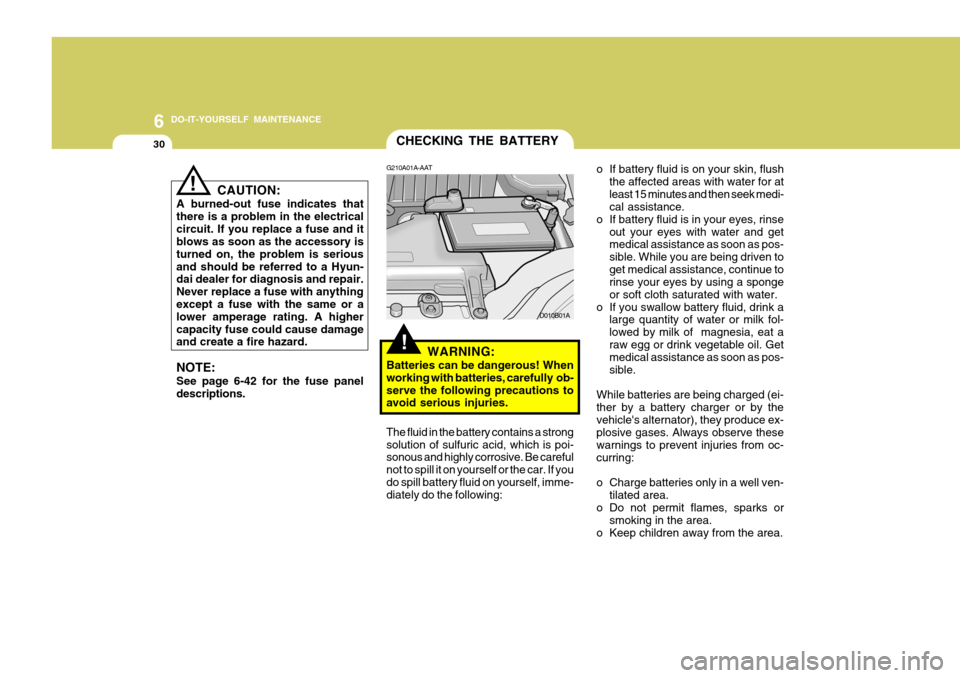
Batteries can be dangerous! When working with batteries, carefully ob-serve the following precautions to avoid serious injuries. D010B01A
The fluid in the battery contains a strong solution of sulfuric acid, which is poi- sonous and highly corrosive. Be careful not to spill it on yourself or the car. If youdo spill battery fluid on yourself, imme- diately do the following:
Page 249 of 599

6
DO-IT-YOURSELF MAINTENANCE
31
G210B01A-AAT Checking the Battery Keep the battery clean. Any evidence of corrosion around the battery postsor terminals should be removed using a solution of household baking soda and warm water. After the battery ter-minals are dry, cover them with a light coating of grease.
Keep batteries out of the reach of children because batteries contain highly cor- rosive SULFURIC ACID. Donot allow battery acid to con- tact your skin, eyes, cloth- ing or paint finish.If any electrolyte gets into your eyes, flush your eyes with clean water for at least15 minutes and get immedi- ate medical attention. If pos- sible, continue to applywater with a sponge or cloth until medical attention is re- ceived.If electrolyte gets on your skin, thoroughly wash the contacted area.If you feel a pain or a burn- ing sensation, get medical attention immediately.Wear eye protection when charging or working near a battery.Always provide ventilation when working in an en- closed space.
WARNING: Always read the following instructions carefully when handling a battery.Keep lighted cigarettes and all other flames or sparks away from the battery.Hydrogen, which is a highly combustible gas, is always present in battery cells andmay explode if ignited.!
o When lifting a plastic-cased bat- tery, excessive pressure on the case may cause battery acid to leak, resulting in personal injury. Lift with a battery carrier or withyour hands on opposite corners.
o Never attempt to charge the bat-
tery when the battery cables areconnected.
o The electrical ignition system
works with high voltage.Never touch these components with the engine running or the ignition switched on.
Page 260 of 599

6 DO-IT-YOURSELF MAINTENANCE
42
G200C02A-GAT Engine Compartment (Gasoline Engine)
HLC5027
NOTE:
Not all fuse panel descriptions in this manual may be applicable to your vehicle. It is accurate at the time of printing.
When you inspect the fuse box on your vehicle, refer to the fuse box label.FUSE RATING 120A50A 50A20A30A20A 30A 30A30A30A20A 10A 10A 10A 10A10A 10A10A15A 10A15A 15A 10A 25A PROTECTED COMPONENTS
Charging (Generator) Fuse 6, 7, 8, 9, Horn fuse, Room lamp fuse
Head lamp fuse, Front fog lamp fuse, Tail lamp relay, H/LP washer fuse
Engine control relay, Generator, Fuel pump relay, ECU #3 fuse Ignition power source, Start relayRadiator fan control Blower control ABS control, ABS bleeding connectorABS control, ABS bleeding connector Power window Condenser fan controlRadiator fan, Condenser fan, ECM, Oxygen sensor, Purge control valve,
SMATRA, Glow plug relay, Heater relay, Stop lamp switch A/C relayHorn relay Illumination lamps, Left rear combination lamp, License lamp, DRL control, Position lamp, H/LP washer relayRight rear combination lamp, License lamp, Position lamp Left head lamp, DRL control, Instrument cluster Right head lampFront fog lamp relay
Instrument cluster, Courtesy lamp, Trunk room lamp, ETACM, DLC, Door warning, Multipurpose check connectorAudio, Digital clock, Power antenna, A/C switch, Rear fog lamp switch Idle speed actuator, ECM, Camshaft position sensor, EGR actuator, Throttle plate actuatorECM Head lamp washer motor
Fuel pump relay, Fuel pump motor
ALT
BATTERY LAMPECU
IGN
RAD FAN
BLOWER
ABS ABS
P/WDW
COND FAN
ECU #1
A/CON COMP HORN
TAIL LH
TAIL RH
H/LP LH
H/LP RH
FRONT FOG
ROOM LP AUDIO
ECU #2 ECU#3
H/L WASHER
FUSIBLE
LINK
FUSE
DESCRIPTION
F/PUMP CHK (E50)
FUSE PANEL DESCRIPTION
Page 261 of 599

6
DO-IT-YOURSELF MAINTENANCE
43
HLC5026 FUSE RATING
120A50A 50A30A30A20A30A30A30A30A20A60A30A80A30A 10A 10A 10A 10A10A 10A10A15A 10A15A 15A 10A 25A PROTECTED COMPONENTS
Charging (Generator)Fuse 6, 7, 8, 9, Horn fuse, Room lamp fuse
Head lamp fuse, Front fog lamp fuse, Tail lamp relay, H/LP washer fuse
Engine control relay, Generator, Fuel pump relay, ECU #3 fuseIgnition power source, Start relayRadiator fan controlBlower controlABS control, ABS bleeding connectorABS control, ABS bleeding connectorPower windowCondenser fan controlAssist HeaterAssist HeaterGlow Plug relayFuel Heater Radiator fan, Condenser fan, ECM, Oxygen sensor, Purge control valve,
SMATRA, Glow plug relay, Heater relay, Stop lamp switchA/C relayHorn relayIllumination lamps, Left rear combination lamp, License lamp, DRL control,Position lamp, H/LP washer relayRight rear combination lamp, License lamp, Position lampLeft head lamp, DRL control, Instrument clusterRight head lampFront fog lamp relay
Instrument cluster, Courtesy lamp, Trunk room lamp, ETACM, DLC,Door warning, Multipurpose check connectorAudio, Digital clock, Power antenna, A/C switch, Rear fog lamp switchIdle speed actuator, ECM, Camshaft position sensor, EGR actuator,Throttle plate actuatorECMHead lamp washer motor
Fuel pump relay, Fuel pump motor
ALT
BATTERY LAMP
ECU (DSL) IGN
RAD FAN
BLOWER
ABS ABS
P/WDW
COND FAN
HTRHTR
GLOW F/HTR
ECU #1
A/CON COMP HORN
TAIL LH
TAIL RH
H/LP LH
H/LP RH
FRONT FOG
ROOM LP AUDIO
ECU #2 ECU#3
H/L WASHER
FUSIBLE
LINK
FUSEDESCRIPTION
F/PUMP CHK (E50)G200D02A-GAT Engine Compartment (Diesel Engine)
Page 274 of 599

9 VEHICLE SPECIFICATIONS
2
Type Wheel free playRack stroke Oil pump type 4 DOOR
4260 (167.7)
1680 (66.1) 1395 (54.9) 2440 (96.1) 1435 (56.5)1425 (56.1)
ItemOverall length Overall width Overall height (unladen)Wheel base Wheel tread J030A02A-GAT TIRE
GASOLINE
MF45AH, MF55AH 90A (13.5V)
0.7 KW 0.9 KW
Dual hydraulic with brake booster Ventilated disc DrumCable operated on rear wheel
J010A01A-GAT MEASUREMENT
J060A01A-GAT FUEL SYSTEM
Rack and pinion 0 ~ 30 mm (0 ~ 1.18 in.) 134 mm (5.3 in.) Vane type
175/70 R13 185/60R14, 185/55 R15 Full size
StandardOption Spare
Front Rear
mm (in.)
J020A01A-GAT POWER STEERING Fuel tank Capacity Liter
45 Imp.gal
9.9
J040A03A-GAT ELECTRICAL
Item Battery Alternator Starter
J050A01A-GAT BRAKE Type Front brake typeRear brake type Parking brake
3/5 DOOR
4215 (165.9)
DIESEL
CMF60AH 90A(12V) 1.7 KW
-
Manual T/A Automatic T/A
Page 278 of 599

10INDEX
2
A Airbag ........................................................................ 1-35
Dual-stage A irbag.................................................. 1-41
Side Impact Airbag ................................................ 1-45
Air Cleaner Filter ....................................................... 6-17
Air Conditioning Care ....................................................................... 6-24
Filter ............................................................. 1-92, 6-25 Operation ............................................................... 1-91
Switch ..................................................................... 1-91
Antenna ................................................................... 1-113
Ashtray ...................................................................... 1-68
Audio Fault Code .................................................... 1-110
B
Battery ............................................................. 2-19, 6-30 Brake Anti-lock system ..................................................... 2-16
Checking the brakes .............................................. 6-22
Fluid ....................................................................... 6-22
Pedal clearance ..................................................... 6-27
Pedal freepl ay ........................................................ 6-27
Practices ................................................................ 2-14
Breaking-In your New Hyundai ................................... 1-3
Bulbs Repl acement ................................................... 6-35
Bulbs Wat tage ........................................................... 6-41C
Care of Cassette Tapes ....................
..................... 1-111
Care of Disc ............................................................ 1-111
Cargo Area Cover ..................................................... 1-81
Cassette Tape Player O peration (H225)................1-102
Catalytic Converter ..................................................... 7-3
Child-Protector Rear Door Lock ................................. 1-8
Child Restraint System............................................. 1-26
Cigarette Lighter ....................................................... 1-68
Clock ......................................................................... 1-67
Clutch
Checking the cluch fluid ............... .......................... 6-23
Pedal freepl ay ........................................................ 6-26
Combination Light Daytime running light ............................................. 1-62
Headlight flasher .................................................... 1-62
Headlight swi tch ..................................................... 1-62
High-beam swi tch .................................................. 1-62
Lane change si gnal ................................................ 1-61
Turn signal oper ation............................................. 1-61
Compact Disc Player Operation (H 265) .................1-107
Cooling Fans ............................................................. 6-31
Corrosion protection
Cleaning the interior ................................................. 4-6
Protecting your Hyundai from corrosion .................. 4-2
Washing and waxing ................................................ 4-4
Page 294 of 599

1FEATURES OF YOUR HYUNDAI
12
!
WINDOW GLASS
B050A01A-AAT
To raise or lower the window, turn the window regulator handle clockwise or counterclockwise. WARNING:
When opening or closing the win- dows, make sure your passenger'sarms, hands and body are safely out of the way.
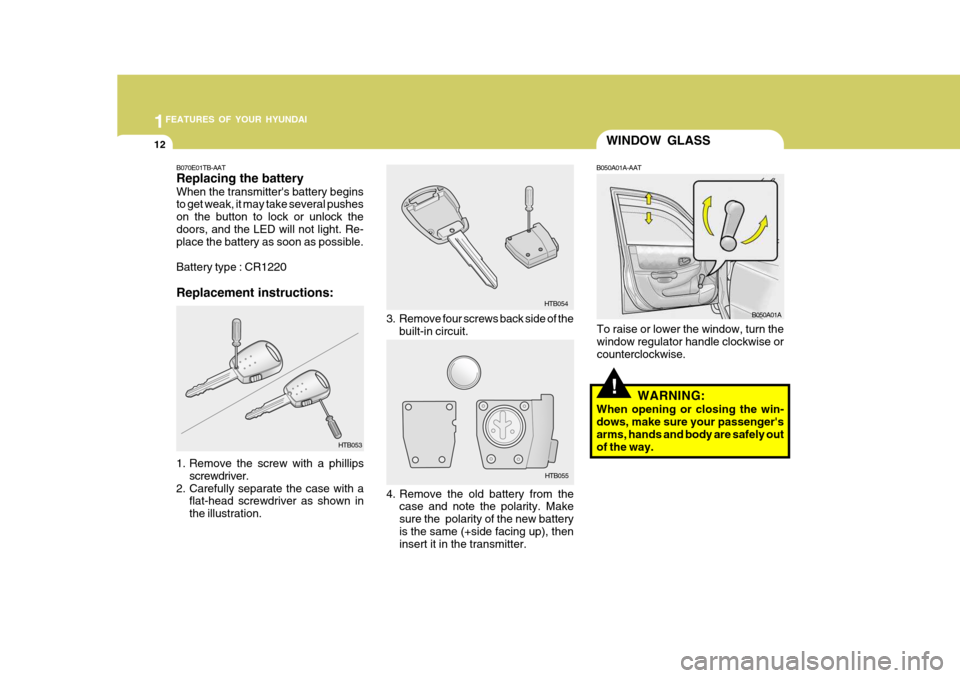
3. Remove four screws back side of the
built-in circuit.
4. Remove the old battery from the case and note the polarity. Make sure the polarity of the new batteryis the same (+side facing up), then insert it in the transmitter. HTB054
HTB055
B050A01A
B070E01TB-AAT Replacing the battery When the transmitter's battery begins to get weak, it may take several pushes on the button to lock or unlock thedoors, and the LED will not light. Re- place the battery as soon as possible. Battery type : CR1220 Replacement instructions:
1. Remove the screw with a phillips screwdriver.
2. Carefully separate the case with a flat-head screwdriver as shown in the illustration. HTB053