Page 92 of 320
Youcanopenthetailgatetwo
dif f erent ways:Drop it open by using the upper
handle.
Swingitopenbyusingtheright
lower handle.
To drop open the tailgate, pull up the
upper handle, then pull down the
tailgate. To close the tailgate, push
f irmly up until it latches.
Bef ore you open the tailgate a
dif f erent way (dropped open, and
then swung open), make sure it is
f ully closed.
Make sure all passengers and
objects are clear of the tailgate
bef ore opening and closing it, and
make sure the tailgate is closed
securely bef ore driving.
As a saf ety f eature, the upper handle
is disabled if you do not f ully close
the tailgate af ter it is swung open.
And the lower handle is disabled if
you do not f ully close the tailgate
af ter it is dropped open.
CONT INUED
Dual-Action Tailgate
To Drop Open the Tailgate
Inst rument s and Cont rols
89
NOTE:
UPPER HANDLE
�����—�
���—�����y�
�������������y���
�(�����������y���������y
Page 93 of 320

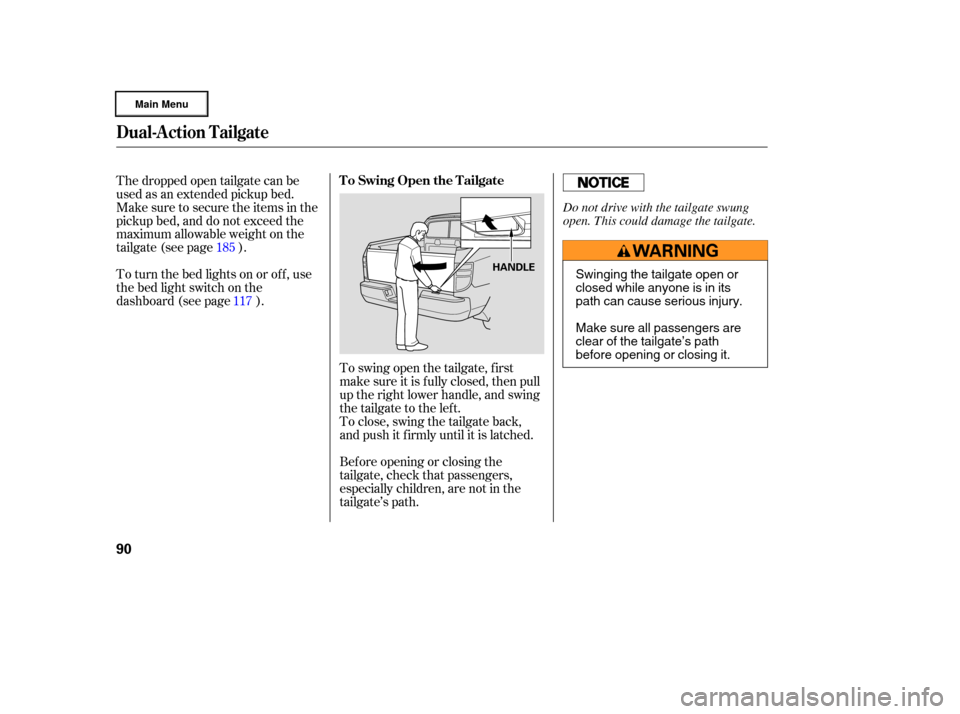
To swing open the tailgate, f irst
make sure it is f ully closed, then pull
up the right lower handle, and swing
the tailgate to the lef t.
To close, swing the tailgate back,
and push it f irmly until it is latched.
The dropped open tailgate can be
used as an extended pickup bed.
Make sure to secure the items in the
pickup bed, and do not exceed the
maximum allowable weight on the
tailgate(seepage ).
To turn the bed lights on or off, use
the bed light switch on the
dashboard (see page ).
Bef ore opening or closing the
tailgate, check that passengers,
especially children, are not in the
tailgate’s path.
117
185
Dual-Action Tailgate
T o Swing Open the T ailgate
90
HANDLESwinging the tailgate open or
closed while anyone is in its
path can cause serious injury.
Make sure all passengers are
clear of the tailgate’s path
before opening or closing it.
Do not drive with the tailgate swung
open. This could damage the tailgate.
�����—�
���—�����y�
�������������y���
�(�����������y���������y
Page 95 of 320

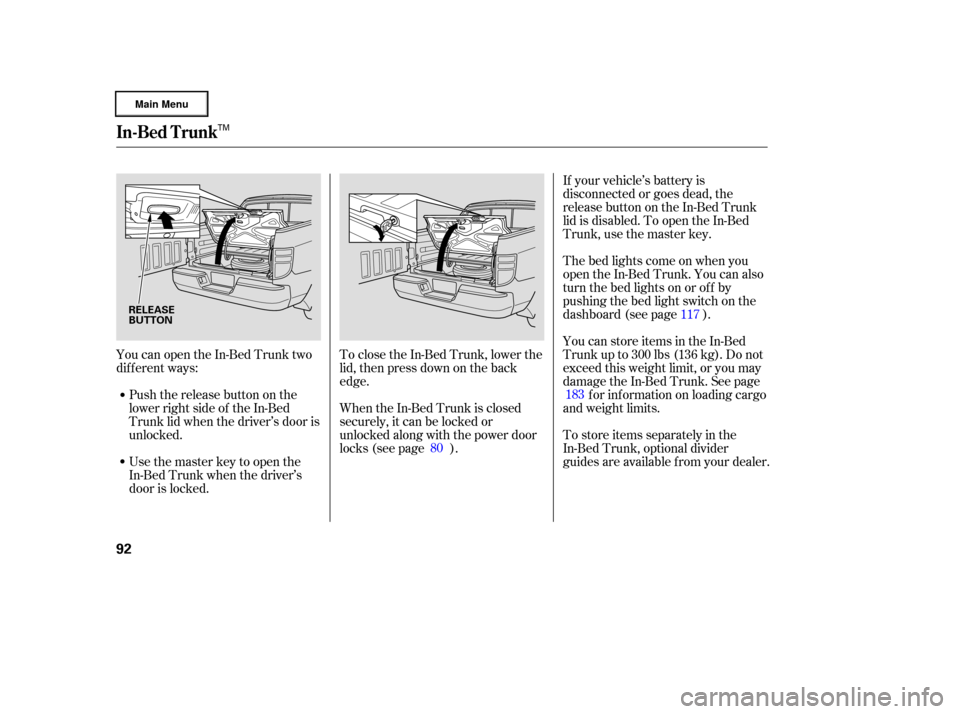
YoucanopentheIn-BedTrunktwo
dif f erent ways:Push the release button on the
lower right side of the In-Bed
Trunk lid when the driver’s door is
unlocked. To close the In-Bed Trunk, lower the
lid, then press down on the back
edge. If your vehicle’s battery is
disconnected or goes dead, the
release button on the In-Bed Trunk
lid is disabled. To open the In-Bed
Trunk, use the master key.
Usethemasterkeytoopenthe
In-Bed Trunk when the driver’s
door is locked. Thebedlightscomeonwhenyou
open the In-Bed Trunk. You can also
turn the bed lights on or off by
pushing the bed light switch on the
dashboard (see page ).
You can store items in the In-Bed
Trunk up to 300 lbs (136 kg). Do not
exceed this weight limit, or you may
damage the In-Bed Trunk. See page
f or inf ormation on loading cargo
and weight limits.
To store items separately in the
In-Bed Trunk, optional divider
guides are available f rom your dealer.
When the In-Bed Trunk is closed
securely, it can be locked or
unlocked along with the power door
locks (see page ). 117
183
80
In-Bed Trunk
92
RELEASE
BUTTON
TM
�����—�
���—�����y�
�������������y���
�(�����������y���������y
Page 96 of 320

To avoid damaging the key and key
cylinder of the In-Bed Trunk lid, do
notclosethetailgatewhenthekeyis
in the lid.As a saf ety f eature, your vehicle has
a release lever on the latch of the
In-Bed Trunk lid so it can be opened
f rom the inside. To open the In-Bed
Trunk, push the release lever in the
direction of the arrow.
Parents should decide if their
children should be shown how to use
this f eature. For more inf ormation
about child saf ety, see page .
To avoid damaging the seal on the
In-Bed Trunk lid, remove any debris
from the lid’s mating surface before
you close it.
To avoid damaging the bottom of the
In-Bed Trunk, do not drive over large
obstacles, and do not use it as a
jacking point to raise the vehicle. To avoid damaging the In-Bed Trunk
lid, and to prevent items f rom being
thrown about the vehicle and
possibly hurting someone in an
accident or sudden stop, be sure the
In-Bed Trunk lid is securely closed
bef ore driving away. This indicator on the instrument
panel reminds you that the In-Bed
Trunk is open (see page ). 34
66 Emergency Opener
In-Bed T runk Open
Indicator
In-Bed Trunk
Inst rument s and Cont rols
93
TM
�����—�
���—�����y�
������
������y���
�(�����������y���������y
Page 103 of 320
The lef t and right rear seat cushions
can be lifted up separately to make
room f or cargo.
Remove any items from the seat
beforeyoufolduptheseatcushion.To f old a rear seat cushion, pull up
the lever on the outside of the
cushion. The seat cushion pops up,
and the seat legs store underneath it.
Push the cushion firmly against the
seat-back to lock it in place.To return the seat cushion to its
original position, pull the lever
outward, then push down the seat
cushion slowly.
Make sure the seat cushion is locked
securely and the seat legs are
positioned properly in the f loor guide.
Seats
Folding the Rear Seats
100
LEGS
FLOOR GUIDE
�����—�
���—�����y�
�������������y���
�(�����������y���
�����y
Page 104 of 320

In HI, the heater turns of f when the
seat gets warm, and turns back on
after the seat temperature drops.
In LO, the heater runs continuously.
It does not cycle with temperature
changes.
Follow these precautions when using
the seat heaters:Use the HI setting only to heat the
seats quickly, because it draws
large amounts of current f rom the
battery.
If the engine is lef t idling f or an
extended period, do not use the
seat heaters, even on the LO
setting. It can weaken the battery,
causing hard starting.
Make sure all items in the cargo area
are secured. Loose items can f ly
f orward and cause injury if you have
to brake hard (See
on page ).
You can also store small items under
the rear seats. Make sure to secure
the items so they will not shift while
you are driving.
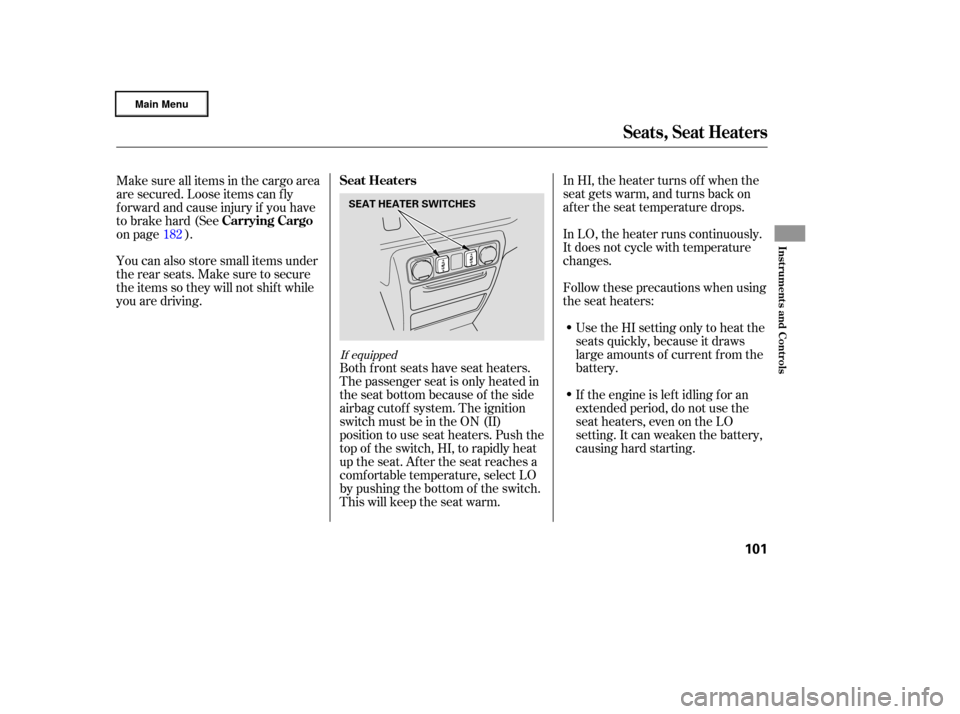
Both front seats have seat heaters.
The passenger seat is only heated in
the seat bottom because of the side
airbag cutoff system. The ignition
switch must be in the ON (II)
position to use seat heaters. Push the
top of the switch, HI, to rapidly heat
up the seat. After the seat reaches a
comf ortable temperature, select LO
by pushing the bottom of the switch.
This will keep the seat warm.
182
If equipped
Seat Heaters
Carrying Cargo
Seats, Seat Heaters
Inst rument s and Cont rols
101
SEAT HEATER SWITCHES
�����—�
���—�����y�
���������
���y���
�(�����������y���
�����y
Page 122 of 320

The standard audio system has
many f eatures. This section
describes those f eatures and how to
use them. (If you selected an
optional audio system, ref er to the
operating instructions that came
with it.)
Your vehicle has an anti-theft audio
system that requires a code number
to enable it. The heating and air conditioning
system in your vehicle provides a
comf ortable driving environment in
all weather conditions.
The security system helps to
discourage vandalism and thef t of
your vehicle..............
Vents, Heating, and A/C .120
...........................
Using the A/C .124
Using Automatic Climate ...................................
Control .126
........................
Rear Ventilation .127
..........
Dual Temperature Control .128
..............
Climate Control Sensors .130
..........
Playing the AM/FM Radio .131
............
AM/FM Radio Reception .138
.
Playing the XM
Satellite Radio . 140
..........
Playing a CD, CD Changer . 146
....................
Protecting Your CDs .157
CD Player/Changer Error ...................................
Messages .158
................
Remote Audio Controls . 159
...
Playing an Optional Audio Unit . 159
.................
Radio Thef t Protection . 160
..........................
Setting the Clock .161
............................
Security System .162
...............................
Cruise Control .163
.........................................
Compass .166
HomeLink Universal ................................
Transceiver .169
On all models except RT and
Canadian LX
Features
Features
119
�����—�
���—�����y�
�������������y���
�(�����������y���
�����y
Page 165 of 320

The security system automatically
sets 15 seconds after you lock the
doors, hood, and the In-Bed Trunk.
For the system to activate, you must
lock the doors f rom the outside with
the key, driver’s lock tab, door lock
switch, or remote transmitter. The
security system indicator above the
driver’s door lock tab starts blinking
immediately to show you the system
is setting itself .Once the security system is set,
opening any door (without using the
key or the remote transmitter), the
hood, or the In-Bed Trunk, will cause
it to alarm. It also alarms if the radio
and navigation components are
removed f rom the dashboard or the
wiring is cut.
The security system helps to protect
your vehicle and valuables f rom thef t.
The horn sounds and a combination
of headlights, parking lights, license
plate lights, and taillights f lash if
someone attempts to break into your
vehicleorremovetheradio.This
alarm continues f or 2 minutes, then
the system resets. To reset an
alarming system before the 2
minutes have elapsed, unlock the
driver’s door with the key or the
remote transmitter.
The security system will not set if
the hood, In-Bed Trunk, or any door
is not f ully closed. If the system will
not set, check the door and tailgate
open monitor and In-Bed Trunk open
indicator on the instrument panel
(see pages and ) to see if the
doors and In-Bed Trunk are f ully
closed. Since it is not part of the
monitor display, manually check the
hood.
Use the remote transmitter
to quickly check that the hood,
In-Bed Trunk, and all doors are
closed. Push the lock button twice
within 5 seconds. There should be an
audible conf irmation beep.
Do not attempt to alter this system
or add other devices to it. 61 66
If equipped
Security System
162
NOTE:
SECURITY SYSTEM INDICATOR
�����—�
���—�����y�
�����������
�y���
�(�����������y���
�����y