Page 62 of 320

The instrument panel has many
indicators to give you important
inf ormation about your vehicle.
If you turn the ignition switch to ON
(II) bef ore f astening your seat belt,
the beeper sounds and the indicator
f lashes. If you do not f asten your
seat belt bef ore the beeper stops, the
indicator stops f lashing but remains
on.
If you continue driving without
f astening your seat belt, the beeper
sounds and the indicator f lashes
again at regular intervals.See page .
The engine can be severely damaged
if this indicator f lashes or stays on
when the engine is running. For
more information, see page .
If this indicator comes on when the
engine is running, the battery is not
being charged. For more inf ormation,
see page .
This indicator comes on when you
turn the ignition switch to ON (II). It
reminds you and your passengers to
f asten your seat belts. A beeper also
sounds if you have not f astened your
seat belt.
This indicator comes on brief ly when
you turn the ignition switch to ON
(II). If it comes on at any other time,
it indicates a potential problem with
your f ront airbags. This indicator will
also alert you to a potential problem
with your side airbags, passenger’s
side airbag automatic cutoff system,
side curtain airbags, rollover sensor,
or automatic seat belt tensioners.
For more inf ormation, see page .
This indicator comes on when you
turn the ignition switch to ON (II). If
it comes on at any other time, it
indicates that the passenger’s side
airbag has automatically shut off.
For more inf ormation, see page .
279
278
278 27
28
Seat Belt Reminder
Indicator
Malf unction Indicator
Lamp
L ow Oil Pressure
Indicator
Charging System
IndicatorSupplemental Restraint
System Indicator
Side Airbag Of f
Indicator
Instrument Panel Indicators
Inst rument s and Cont rols
59
U.S. Canada
�����—�
���—�����y�
���������
���y���
�(�����������y���������y
Page 71 of 320

This meter shows the number of
miles (U.S.) or kilometers (Canada)
driven since you last reset it.
There are two trip meters: TRIP A
and TRIP B. Switch between these
displays by pressing the SELECT
button repeatedly. Each trip meter
works independently, so you can
keep track of two dif f erent distances.To reset a trip meter, display it, and
then press and hold the RESET
button until the number resets to
‘‘0.0’’. Both trip meters will reset if
the vehicle’s battery goes dead or is
disconnected. And both continue to
track mileage, even when only one is
displayed.
This shows how much f uel you have.
It may show slightly more or less
than the actual amount. Driving
uphill or make turns can cause the
needle to f luctuate or the low f uel
indicator to come on early. The
needle returns to the bottom after
you turn of f the ignition.
Trip Meter Fuel Gauge
Gauges
68
SELECT BUTTON
RESET BUTTON
Avoid driving with an extremely low
f uel level. Running out of f uel could
cause the engine to misf ire, damaging
the catalytic converter.
�����—�
���—�����y�
�������������y���
�(�����������y���������y
Page 88 of 320

�µ
�µTurn the ignition switch to the ON
(II) position.Pushandholdtherearof the
master door lock switch on the
driver’s door. You will hear a
clicking sound af ter about 5
seconds.
Make sure the shif t lever is in
Park (P), and open the driver’s
door. Release the switch, and turn the
ignition switch to the
ACCESSORY (I) position within 5
seconds.
If your vehicle’s battery is removed
or goes dead, the auto door lock/
unlock setting is reset to the
deactivated mode.
Pushandholdtherearof the
master door lock switch on the
driver’s door. You will hear a
clicking sound. Continue to hold
down the switch:
Until you hear one click (af ter
about 5 seconds) to activate the
driver’s door unlock f eature.
Or, until you hear a second click
(af ter about 10 seconds) to
activate the all doors unlock
feature.
Release the switch, turn the
ignition switch to the
ACCESSORY (I) position within 5
seconds and move the shif t lever
to Park (P).
Set the parking brake.4.
5.
1.
2.
3.
5.
6.
Door L ocks
To turn the auto door unlock modes
off:
Inst rument s and Cont rols
85
�����—�����—�
���y�
�������������y���
�(�����������y���������y
Page 90 of 320
Avoid dropping or throwing the
transmitter.
Protect the transmitter from
extreme temperature.
Do not immerse the transmitter in
any liquid.
If you lose a transmitter, the
replacement needs to be
reprogrammed by your dealer.Remove the screw at the base of
the transmitter with a small
Phillips-head screwdriver.
To replace the battery: Battery type: CR1616 If it takes several pushes on the
button to lock or unlock the doors,
replace the battery as soon as
possible.
Inside the transmitter, separate
the inner cover f rom the keypad
by releasing the two tabs on the
cover. Separate the transmitter by prying
its middle seam with your
f ingernail.
1. 2.
3.
CONT INUED
Remote Transmitter
Remote Transmitter Care
Replacing the Transmitter
Battery
Inst rument s and Cont rols
87
SCREWBATTERY
�����—�
���—�����y�
�������������y���
�(�����������y���������y
Page 91 of 320
�´
As required by the FCC:This device complies with Part 15 of theFCC rules. Operation is subject to thef ollowing two conditions: (1) This devicemay not cause harmf ul interf erence, and(2) this device must accept anyinterf erence received, includinginterf erence that may cause undesiredoperation.
Changes or modif ications not expresslyapproved by the party responsible f orcompliance could void the user’sauthority to operate the equipment.
This device complies with IndustryCanada Standard RSS-210.Operation is subject to the f ollowing twoconditions: (1) this device may not causeinterf erence, and (2) this device mustaccept any interf erence that may causeundesired operation of the device.Remove the old battery from the
back of the inner cover, and insert
a new battery into the back of the
cover with the side f acing down.
Install the parts in reverse order.
4.
5.
Remote Transmitter
88
�����—�
���—�����y�
���������
���y���
�(�����������y���������y
Page 95 of 320

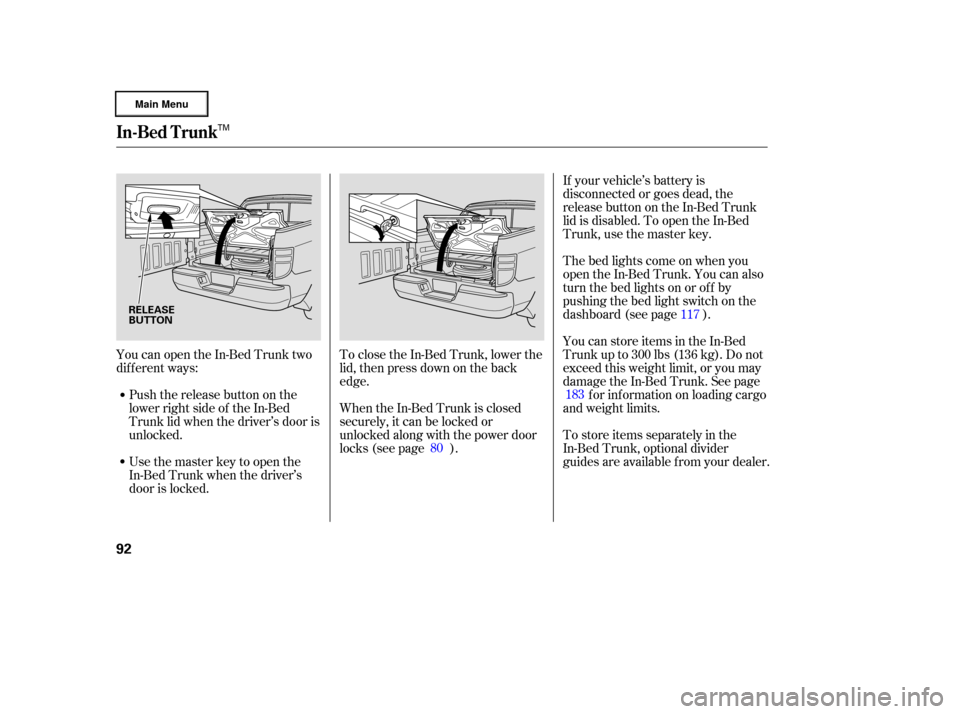
YoucanopentheIn-BedTrunktwo
dif f erent ways:Push the release button on the
lower right side of the In-Bed
Trunk lid when the driver’s door is
unlocked. To close the In-Bed Trunk, lower the
lid, then press down on the back
edge. If your vehicle’s battery is
disconnected or goes dead, the
release button on the In-Bed Trunk
lid is disabled. To open the In-Bed
Trunk, use the master key.
Usethemasterkeytoopenthe
In-Bed Trunk when the driver’s
door is locked. Thebedlightscomeonwhenyou
open the In-Bed Trunk. You can also
turn the bed lights on or off by
pushing the bed light switch on the
dashboard (see page ).
You can store items in the In-Bed
Trunk up to 300 lbs (136 kg). Do not
exceed this weight limit, or you may
damage the In-Bed Trunk. See page
f or inf ormation on loading cargo
and weight limits.
To store items separately in the
In-Bed Trunk, optional divider
guides are available f rom your dealer.
When the In-Bed Trunk is closed
securely, it can be locked or
unlocked along with the power door
locks (see page ). 117
183
80
In-Bed Trunk
92
RELEASE
BUTTON
TM
�����—�
���—�����y�
�������������y���
�(�����������y���������y
Page 104 of 320

In HI, the heater turns of f when the
seat gets warm, and turns back on
after the seat temperature drops.
In LO, the heater runs continuously.
It does not cycle with temperature
changes.
Follow these precautions when using
the seat heaters:Use the HI setting only to heat the
seats quickly, because it draws
large amounts of current f rom the
battery.
If the engine is lef t idling f or an
extended period, do not use the
seat heaters, even on the LO
setting. It can weaken the battery,
causing hard starting.
Make sure all items in the cargo area
are secured. Loose items can f ly
f orward and cause injury if you have
to brake hard (See
on page ).
You can also store small items under
the rear seats. Make sure to secure
the items so they will not shift while
you are driving.
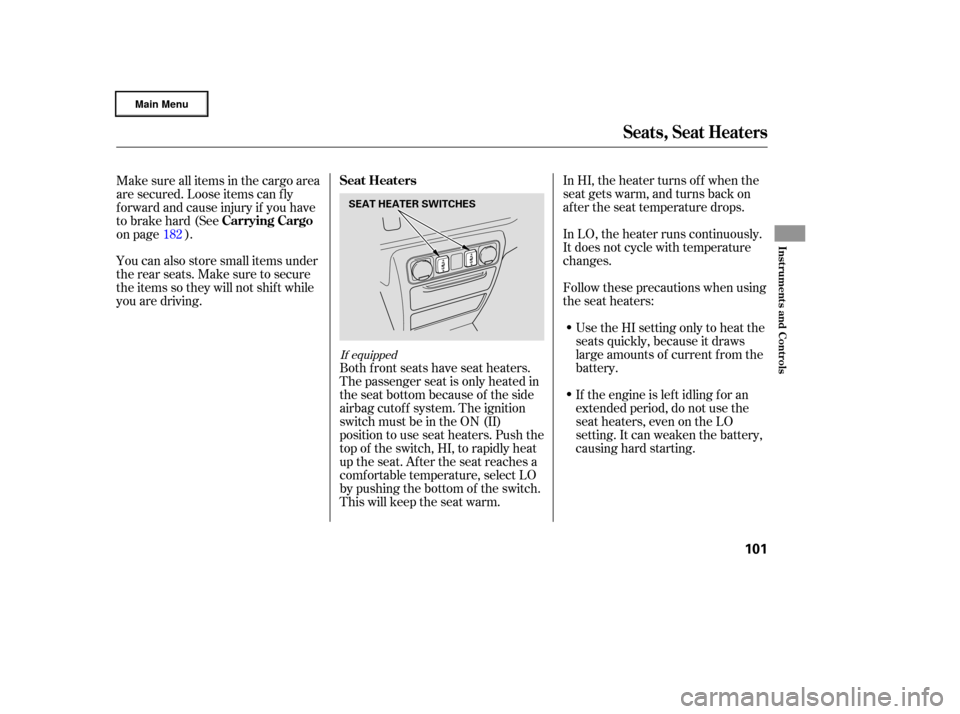
Both front seats have seat heaters.
The passenger seat is only heated in
the seat bottom because of the side
airbag cutoff system. The ignition
switch must be in the ON (II)
position to use seat heaters. Push the
top of the switch, HI, to rapidly heat
up the seat. After the seat reaches a
comf ortable temperature, select LO
by pushing the bottom of the switch.
This will keep the seat warm.
182
If equipped
Seat Heaters
Carrying Cargo
Seats, Seat Heaters
Inst rument s and Cont rols
101
SEAT HEATER SWITCHES
�����—�
���—�����y�
���������
���y���
�(�����������y���
�����y
Page 163 of 320

Your vehicle’s audio system will
disable itself if it is disconnected
f rom electrical power f or any reason.
To make it work again, you must
enter a specific code with the preset
bars. Because there are hundreds of
number combinations possible f rom
the f ive digits, making the system
work without knowing the exact
code is nearly impossible.
Youshouldhavereceivedacardthat
lists your audio system’s code and
serial numbers. It is best to store this
card in a saf e place at home. In
addition, you should write the audio
system’s serial number in this owner’s
manual.
If you lose the card, you must obtain
the code number f rom your dealer.
To do this, you will need the audio
system’s serial number.If your vehicle’s battery is
disconnected or goes dead, or the
radio f use is removed, the audio
system will disable itself . If this
happens, you will see ‘‘CODE’’ in the
frequencydisplaythenexttimeyou
turn on the system. Use the preset
bars to enter the code. The code is
locatedontheradiocodecard
included in your owner’s manual kit.
When it is entered correctly, the
radio will start playing.
If you make a mistake entering the
code, do not start over; complete the
sequence, then enter the correct
code. You have ten tries to enter the
correct code. If you are unsuccessf ul
in ten attempts, you must then leave
the system on f or 1 hour bef ore
trying again.
Radio T hef t Protection
160
�����—�
���—�����y�
������
������y���
�(�����������y���
�����y