Page 119 of 420
When you push the LOCK button on
the remote transmitter, some
exterior lights f lash, and a beeper
sounds when you push the LOCK
button again within 5 seconds to
verify that the doors and the tailgate
arelockedandthesecuritysystem
has set (see page ). You can
customize the exterior lights not to
f lash and the beeper not to sound.While the multi-information display
shows ‘‘DOOR·WINDOW SETUP,’’
press the SEL/RESET button on the
steering wheel. Then press the
INFO button repeatedly until you see
‘‘KEYLESS LOCK
ACKNOWLEDGMENT’’ as shown
above.Press SEL/RESET button, then
press the INFO button.
Each time you press the INFO
button, the display changes to ‘‘ON,’’
to ‘‘OFF,’’ then to ‘‘EXIT.’’
Select ‘‘ON’’ or ‘‘OFF’’ by pressing
the INFO button, and enter your
selection by pressing the SEL/
RESET button.
137
K eyless L ock A cknowledgment
Multi-Inf ormation Display
118
Page 121 of 420
If you unlock the doors and the
tailgate with the remote transmitter,
but do not open any of the doors or
thetailgatewithin30seconds,the
doors and the tailgate automatically
relock and the security system sets.
You can change this relock time
f rom 30 seconds to 60 or 90 seconds.While the multi-information display
shows ‘‘DOOR·WINDOW SETUP,’’
press the SEL/RESET button on the
steering wheel. Then press the
INFO button repeatedly until you see
‘‘SECURITY RELOCK TIMER’’ as
shown above.Press the SEL/RESET button, then
press the INFO button.
Each time you press the INFO
button, the time changes f rom ‘‘30
sec,’’ to ‘‘60 sec,’’ and then to ‘‘90 sec.’’
Select the desired relock time by
pressing the INFO button, and enter
your selection by pressing the SEL/
RESET button.
Securit y Relock T imer
Multi-Inf ormation Display
120
Page 123 of 420
With ‘‘WIPER SETUP’’ shown on the
multi-inf ormation display, press the
SEL/RESET button on the steering
wheel. The display changes to
‘‘FRONT WIPER ACTION’’ as
shown above.
Press the SEL/RESET button, then
press the INFO button.Each time you press the INFO
button, the display changes f rom
‘‘WITH VEH SPD,’’ to
‘‘INTERMITTENT,’’ and then to
‘‘EXIT.’’
Press the INFO button to select
‘‘WITH VEH SPD’’ or
‘‘INTERMITTENT,’’ and enter your
selection by pressing the SEL/
RESET button.
When ‘‘WIPER SETUP’’ is shown on
the multi-information display, the
action of the windshield wipers can
be changed. To do this, ref er to the
f ollowing procedure. Wiper Setup
Front Wiper A ct ion
Multi-Inf ormation Display
122
Page 192 of 420

The standard audio system has
many f eatures. This section
describes those f eatures and how to
use them. (If you selected an
optional audio system, ref er to the
operating instructions that came
with it.) The heating and air conditioning
system in your vehicle provides a
comf ortable driving environment in
all weather conditions.
The security system helps to
discourage vandalism and thef t of
your vehicle. Your vehicle has an anti-theft audio
system that requires a code number
to enable it..............
Vents, Heating, and A/C .192
Using Automatic Climate ...................................
Control .197
.........
Using the Rear A/C Unit .198
...................
Rear Climate Control .201
..............
Climate Control Sensors .202
..........
Playing the AM/FM Radio .203
............
AM/FM Radio Reception .209
...
Playing the XM Satellite Radio .211
..................................
Playing a CD .217
...................................
CD Changer .220
....................
Protecting Your CDs .226
.....
CD Changer Error Messages .227
...............................
Playing a Tape .228
.............
Steering Wheel Controls .233
.................
Radio Thef t Protection .234
........
Rear Entertainment System .235
..........................
Playable DVDs .263
............................
Security System .268
...............................
Cruise Control .269
HomeLink Universal ................................
Transceiver .272
................
Parking Sensor System .277
.
Rear View Camera and Monitor .281
Features
Features
191
Page 234 of 420

�´
�µ �´
�µ
�´ �µ
�Û�Ý
The MODE button changes the
mode. Pressing the button
repeatedly selects FM1, FM2, AM,
XM Radio (U.S. models), CD (if a
disc is loaded) or a tape (if the
optional tape player is installed and a
tape is loaded).
If you are listening to the radio, use
the CH button to change stations.
Each time you press the top ( ) of
the button, the system goes to the
next preset station on the band you
are listening to. Press the bottom
( ) to go back to the previous
station. If youareplayingaCD,thesystem
skips to the beginning of the next
track each time you press the top
( ) of the CH button. Press the
bottom ( ) to return to the
beginning of the current track. Press
it again to return to the previous
track. You will see the disc and track
numbers in the display.
Three controls f or the audio system
are mounted in the steering wheel
hub. They let you control basic
f unctions without removing your
hand f rom the steering wheel. If youareplayingatape,pressthe
top ( ) of the CH button to advance
to the next selection. Press the
bottom( )togobacktothe
previous selection. The system
senses a silent period, then goes
back to play mode.
The VOL button adjusts the volume
up ( ) or down ( ). Press the top
or bottom of the button and hold it
until the desired volume is reached,
then release it.
On EX, EX-L and Touring models
Steering Wheel Controls
Features
233
MODE BUTTON
VOL BUTTON
CH BUTTON
Page 307 of 420

�Î
You should never pump the brake pedal.
Let the ABS work f or you by always
keeping f irm, steady pressure on the
brake pedal. This is sometimes
ref erred to as ‘‘stomp and steer.’’
You will f eel a pulsation in the brake
pedal when the ABS activates, and
you may hear some noise. This is
normal: it is the ABS rapidly
pumpingthebrakes.Ondry
pavement, you will need to press on
thebrakepedalveryhardbeforethe
ABS activates. However, you may
feel the ABS activate immediately if
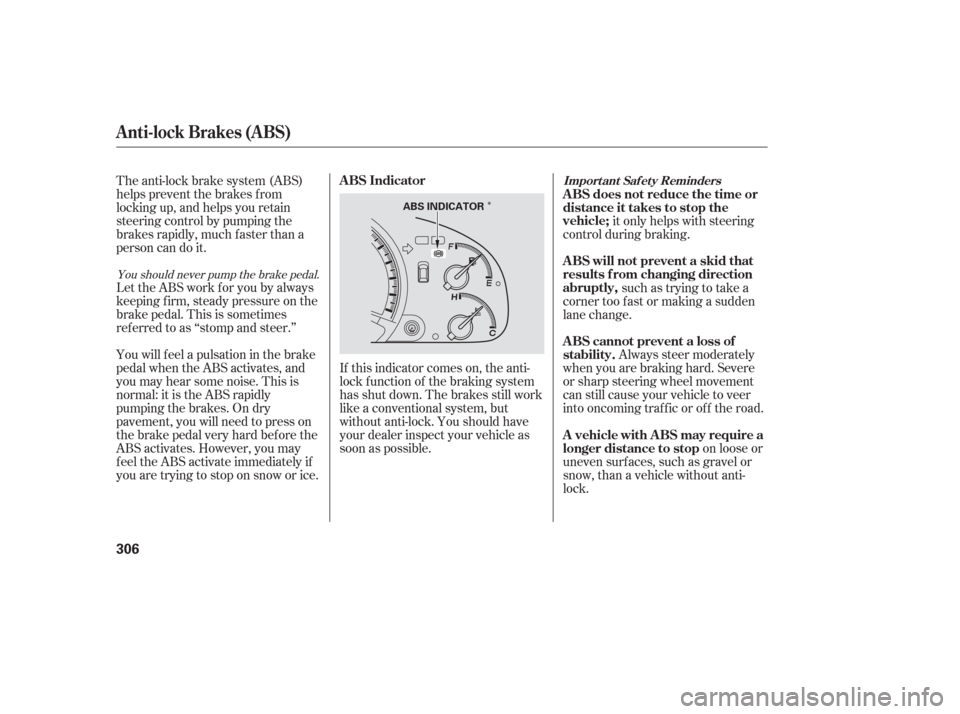
you are trying to stop on snow or ice.If this indicator comes on, the anti-
lock f unction of the braking system
has shut down. The brakes still work
like a conventional system, but
without anti-lock. You should have
your dealer inspect your vehicle as
soon as possible.
on loose or
uneven surf aces, such as gravel or
snow, than a vehicle without anti-
lock. Always steer moderately
when you are braking hard. Severe
or sharp steering wheel movement
can still cause your vehicle to veer
into oncoming traffic or off the road. such as trying to take a
corner too f ast or making a sudden
lane change. it only helps with steering
control during braking.
The anti-lock brake system (ABS)
helps prevent the brakes f rom
locking up, and helps you retain
steering control by pumping the
brakes rapidly, much f aster than a
person can do it.
Anti-lock Brakes (ABS)
ABS Indicator
A vehicle with A BS may require a
longer distance to stop A BS cannot prevent a loss of
stability. A BS will not prevent a skid that
results f rom changing direction
abruptly, A BS does not reduce the time or
distance it takes to stop the
vehicle;Import ant Saf et y Reminders
306
ABS INDICATOR
Page 310 of 420
Your vehicle is equipped with a tire
pressure monitoring system (TPMS)
that turns on every time you start the
engine and monitors the pressure in
your tires while driving.
You will see the above display on the
multi-inf ormation display when you
turn the ignition switch to ON (II)
andpresstheINFObuttononthe
steering wheel six times.To see the inf lation pressures of all
f our tires, press the SEL/RESET
buttononthesteeringwheel.The
display changes as shown above.
Each tire has its own pressure
sensor. If the air pressure of a tire
becomes signif icantly low, the
sensor in that tire immediately sends
a signal that causes the low tire
pressure indicator in the instrument
panel to come on. If this happens,
you will see which tire is losing the
pressure in the multi-information
display along with a ‘‘CHECK TIRE
PRESSURE’’ message.
CONT INUED
On U.S. Touring model only
Tire Pressure Monitoring System (TPMS)
Driving
309
Page 315 of 420

The best way to conf irm that vehicle
and trailer weights are within limits
is to have them checked at a public
scale.
Using a suitable scale or a special
tongue load gauge, check the tongue
load the f irst time you set up a
towing combination (a f ully-loaded
vehicle and trailer), then recheck the
tongue load whenever the conditions
change.If the total trailer weight is more
than 1,850 lbs (840 kg), you must
also use a weight distributing hitch.
This device transf ers weight f rom
the vehicle’s rear wheels to the f ront
wheels, and to the trailer’s wheels.
Caref ully f ollow the hitch maker’s
instructions f or proper installation
and adjustment.
Always use saf ety chains when you
tow a trailer. Make sure the chains
are secured to the trailer and hitch,
and that they cross under the tongue
and can catch the trailer if it
becomes unhitched. Leave enough
slack to allow the trailer to turn
corners easily, but do not let the
chains drag on the ground.
Towing generally requires a variety
of supplemental equipment,
depending on the size of your trailer,
how much load you are towing, and
where you tow. To ensure the best
quality, we recommend that you
purchase Honda equipment
whenever possible.
Discuss your needs with your trailer
sales or rental agency, and f ollow the
guidelines in this section. Also make
sure that all equipment is properly
installed and meets f ederal, state,
province, and local regulations.
Any hitch used on your vehicle must
be properly bolted to the underbody,
using the six threaded holes
provided. A hitch and the required
f luid coolers designed especially f or
your Odyssey can be obtained f rom
your Honda dealer.
Towing a Trailer
Checking L oads
T owing Equipment and
A ccessoriesWeight Distributing Hitch
Saf et y Chains
Hitches
314