Page 158 of 420
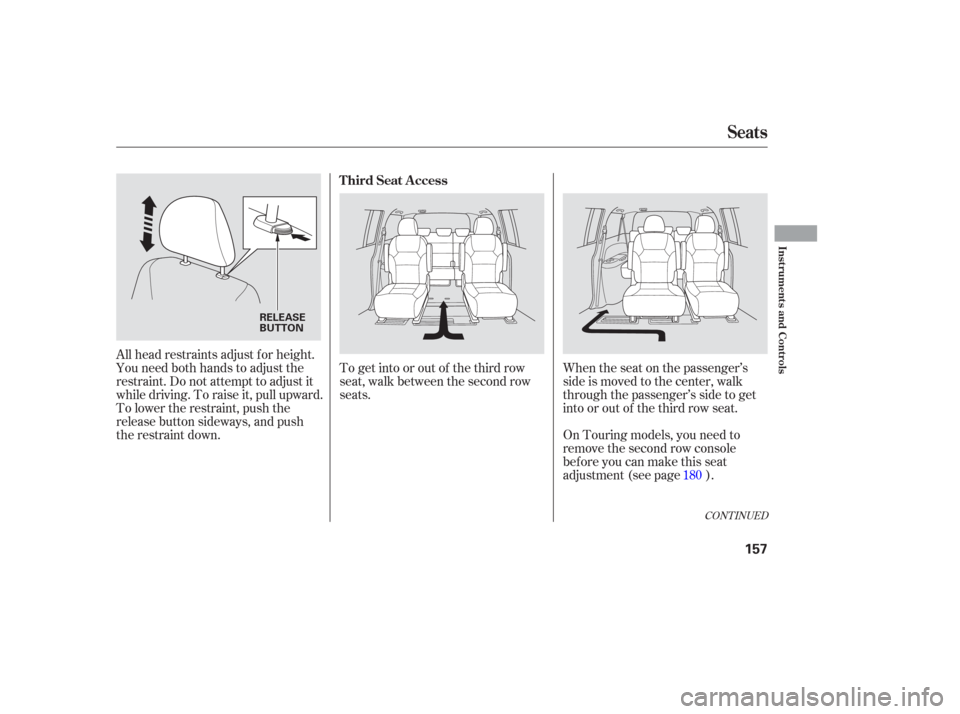
To get into or out of the third row
seat, walk between the second row
seats.When the seat on the passenger’s
side is moved to the center, walk
through the passenger’s side to get
into or out of the third row seat.
All head restraints adjust f or height.
You need both hands to adjust the
restraint. Do not attempt to adjust it
while driving. To raise it, pull upward.
To lower the restraint, push the
release button sideways, and push
the restraint down.
On Touring models, you need to
remove the second row console
before you can make this seat
adjustment (see page ). 180
CONT INUED
T hird Seat A ccess
Seats
Inst rument s and Cont rols
157
RELEASE
BUTTON
Page 159 of 420
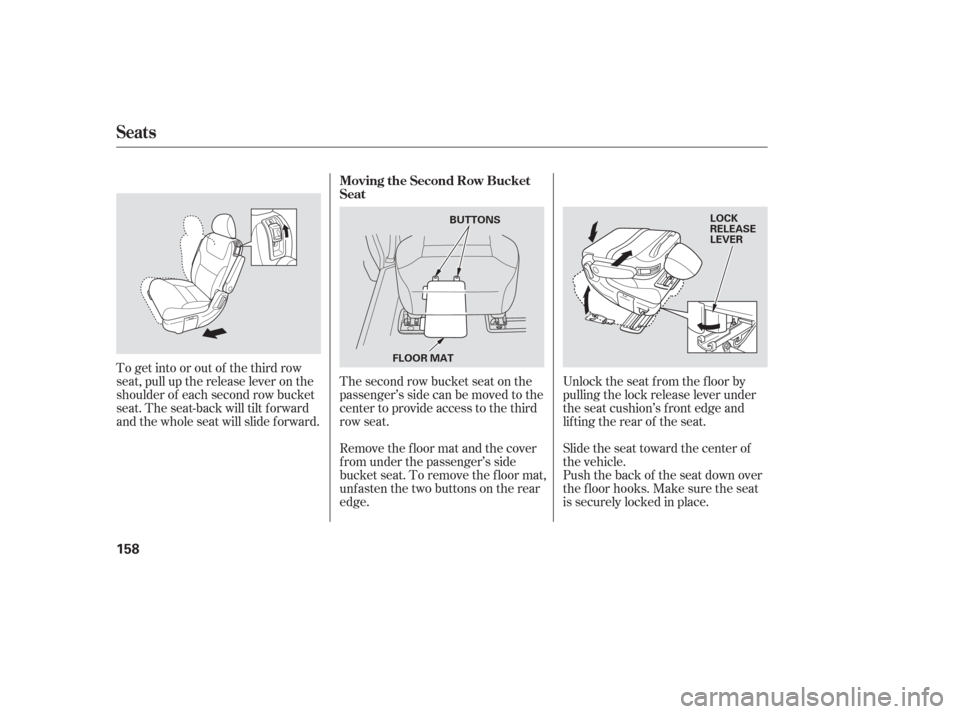
Unlock the seat f rom the f loor by
pulling the lock release lever under
the seat cushion’s f ront edge and
lifting the rear of the seat.
Slide the seat toward the center of
the vehicle.
The second row bucket seat on the
passenger’s side can be moved to the
center to provide access to the third
row seat.
To get into or out of the third row
seat, pull up the release lever on the
shoulder of each second row bucket
seat. The seat-back will tilt forward
and the whole seat will slide f orward.
Push the back of the seat down over
the f loor hooks. Make sure the seat
is securely locked in place.
Remove the f loor mat and the cover
f rom under the passenger’s side
bucket seat. To remove the floor mat,
unfasten the two buttons on the rear
edge. Moving the Second Row Bucket
Seat
Seats
158
LOCK
RELEASE
LEVER
BUTTONS
FLOOR MAT
Page 160 of 420
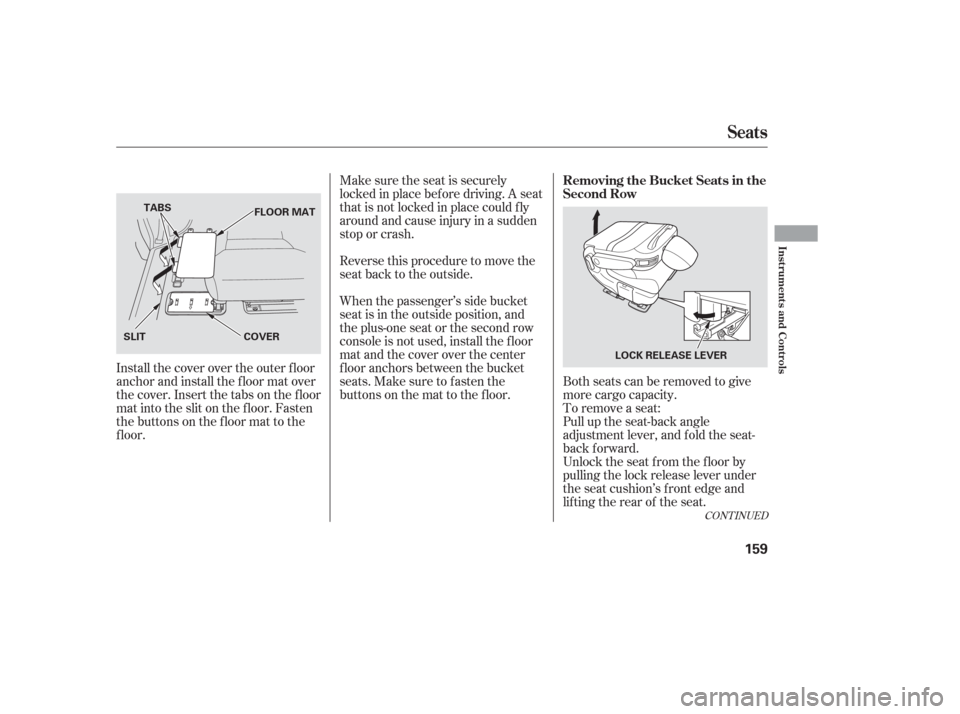
Both seats can be removed to give
more cargo capacity.
Make sure the seat is securely
locked in place bef ore driving. A seat
thatisnotlockedinplacecouldfly
around and cause injury in a sudden
stop or crash.
Reversethisproceduretomovethe
seat back to the outside.
When the passenger’s side bucket
seat is in the outside position, and
theplus-oneseatorthesecondrow
console is not used, install the f loor
mat and the cover over the center
f loor anchors between the bucket
seats. Make sure to f asten the
buttons on the mat to the floor.
Install the cover over the outer floor
anchor and install the floor mat over
the cover. Insert the tabs on the f loor
mat into the slit on the f loor. Fasten
the buttons on the floor mat to the
f loor. To remove a seat:
Pull up the seat-back angle
adjustment lever, and fold the seat-
back f orward.
Unlock the seat f rom the f loor by
pulling the lock release lever under
the seat cushion’s f ront edge and
lifting the rear of the seat.
CONT INUED
Seats
Removing the Bucket Seats in the
Second Row
Inst rument s and Cont rols
159
LOCK RELEASE LEVER
SLIT
COVER
TABS
FLOOR MAT
Page 162 of 420
CONT INUED
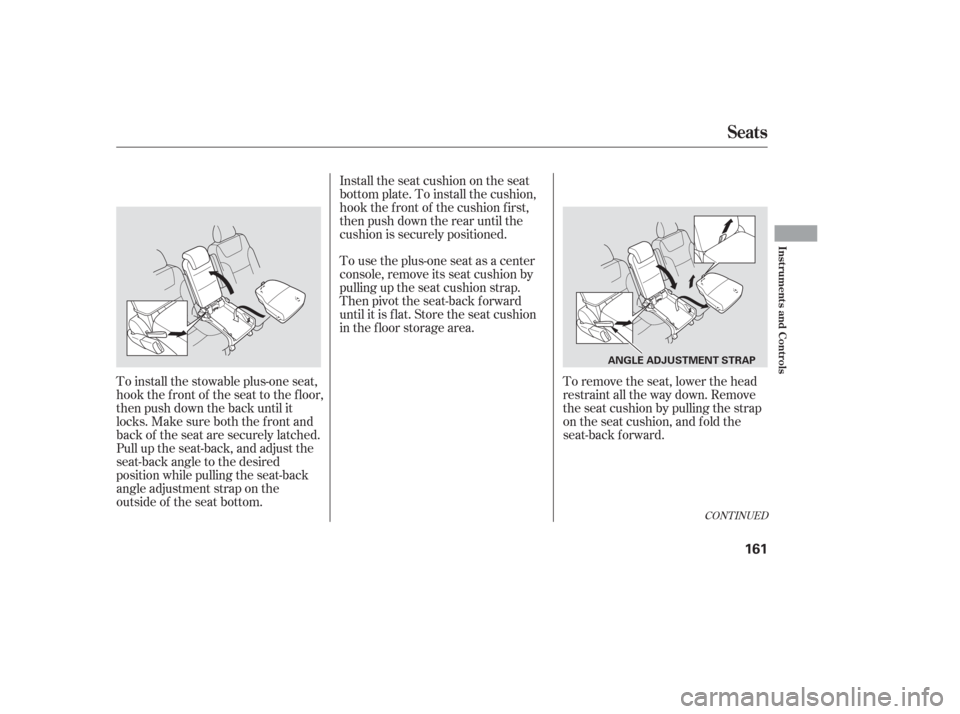
To remove the seat, lower the head
restraint all the way down. Remove
the seat cushion by pulling the strap
on the seat cushion, and f old the
seat-back forward.
To install the stowable plus-one seat,
hook the f ront of the seat to the f loor,
then push down the back until it
locks. Make sure both the f ront and
back of the seat are securely latched.
Pull up the seat-back, and adjust the
seat-back angle to the desired
position while pulling the seat-back
angle adjustment strap on the
outside of the seat bottom. Install the seat cushion on the seat
bottom plate. To install the cushion,
hook the f ront of the cushion f irst,
then push down the rear until the
cushion is securely positioned.
To use the plus-one seat as a center
console, remove its seat cushion by
pulling up the seat cushion strap.
Then pivot the seat-back forward
until it is f lat. Store the seat cushion
in the f loor storage area.
Seats
Inst rument s and Cont rols
161
ANGLE ADJUSTMENT STRAP
Page 163 of 420
To create more cargo space, you can
f old the one-motion third row ‘‘Magic
Seat’’ into the floor recess.Unlatch the detachable seat belt
anchor center seat belt, and let the
belt retract all the way into the
ceiling. Place the latch plate and
anchor latch into their holding
slots.
Lower the head restraints f ully.
Always remove an unsecured seat
f rom the vehicle bef ore driving. A
seat that is not locked in place could
be thrown about and cause injury in
a sudden stop or crash.
Thestowableplus-oneseatassembly
canbestoredinthefloorstorage
area between the f ront seats and the
secondrowseats.Todothis,remove
theLazySusanfromthefloor
storage area.
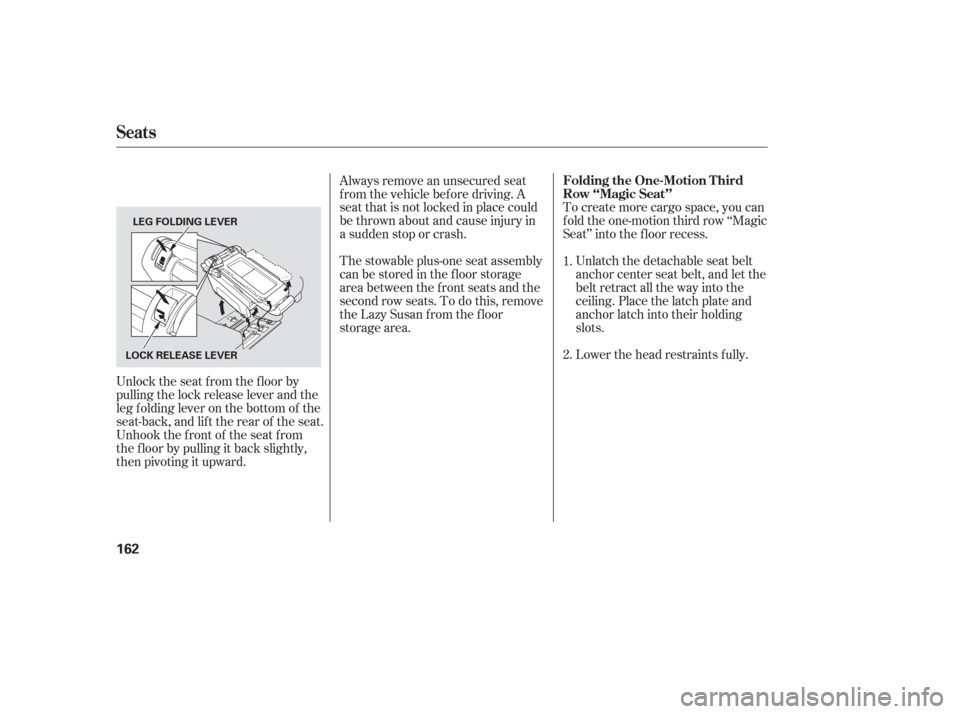
Unlock the seat f rom the f loor by
pulling the lock release lever and the
leg f olding lever on the bottom of the
seat-back, and lift the rear of the seat.
Unhook the f ront of the seat f rom
the f loor by pulling it back slightly,
then pivoting it upward. 1.
2.
Seats
Folding the One-Motion T hird
Row ‘‘Magic Seat’’
162
LOCK RELEASE LEVER
LEG FOLDING LEVER
Page 165 of 420
Follow these precautions when using
the seat heaters:Use the HI setting only to heat the
seats quickly, because it draws
large amounts of current f rom the
battery.
If the engine is lef t idling f or an
extended period, do not use the
seat heaters, even on the LO
setting. It can weaken the battery,
causing hard starting.
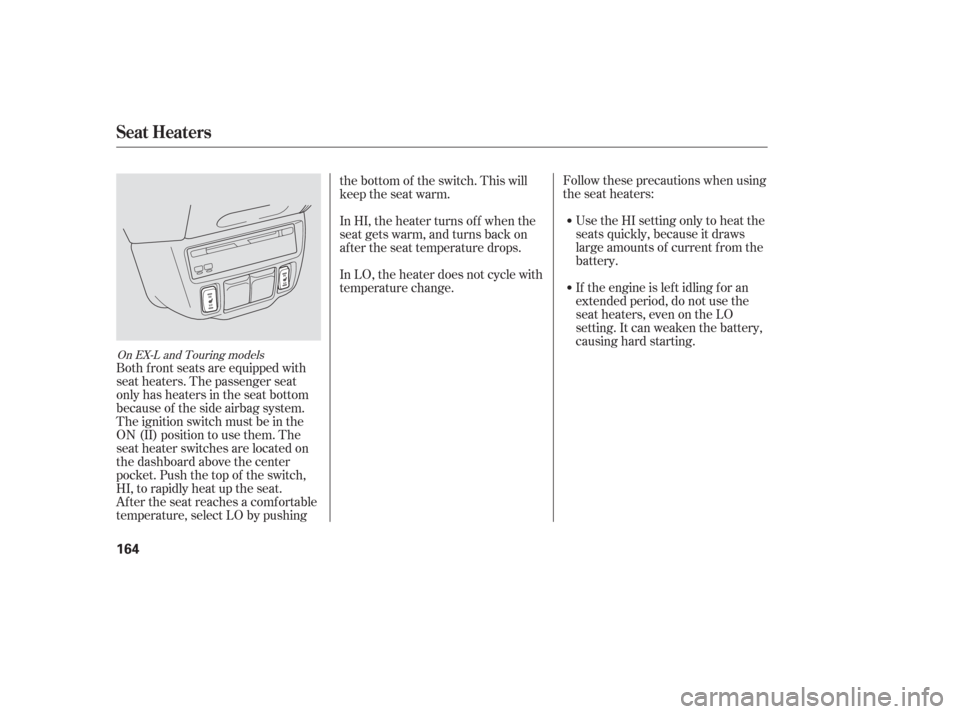
Both f ront seats are equipped with
seat heaters. The passenger seat
only has heaters in the seat bottom
because of the side airbag system.
The ignition switch must be in the
ON (II) position to use them. The
seat heater switches are located on
the dashboard above the center
pocket. Push the top of the switch,
HI, to rapidly heat up the seat.
After the seat reaches a comfortable
temperature, select LO by pushing the bottom of the switch. This will
keep the seat warm.
In HI, the heater turns of f when the
seat gets warm, and turns back on
after the seat temperature drops.
In LO, the heater does not cycle with
temperature change.
On EX-L and Touring models
Seat Heaters
164
Page 171 of 420
To tilt up the back of the moonroof ,
press and hold the center button
( ). To close the moonroof ,
press and hold the top of the switch
( ). To open the moonroof ,
press and hold the bottom of the
switch ( ).The moonroof has a key-of f delay.
You can still open and close the
moonroof f or up to 10 minutes af ter
you turn of f the ignition. The key-of f
delay cancels as soon as you open
either f ront door. You must then
turn the ignition to the ON (II)
position f or the moonroof to operate.
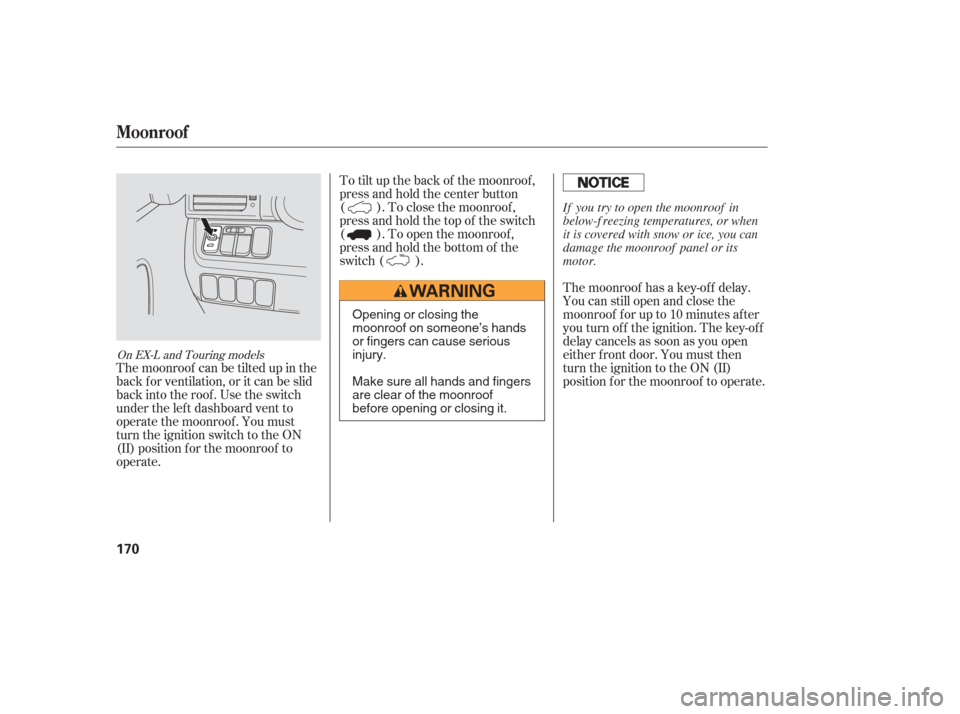
The moonroof can be tilted up in the
back f or ventilation, or it can be slid
back into the roof. Use the switch
under the lef t dashboard vent to
operate the moonroof . You must
turn the ignition switch to the ON
(II) position f or the moonroof to
operate.
On EX-L and Touring models
Moonroof
170
Opening or closing the
moonroof on someone’s hands
or fingers can cause serious
injury.
Make sure all hands and fingers
are clear of the moonroof
before opening or closing it. If you try to open the moonroof in
below-f reezing temperatures, or when
it is covered with snow or ice, you can
damage the moonroof panel or its
motor.
Page 173 of 420
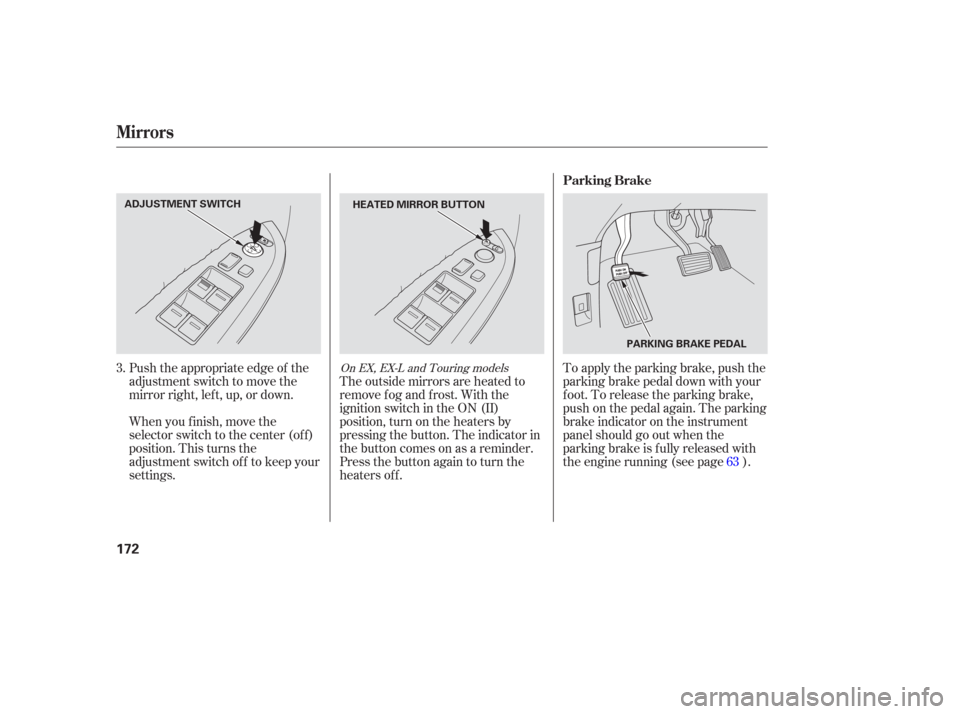
Push the appropriate edge of the
adjustment switch to move the
mirrorright,left,up,ordown.
When you f inish, move the
selector switch to the center (off)
position. This turns the
adjustment switch of f to keep your
settings.The outside mirrors are heated to
remove fog and frost. With the
ignition switch in the ON (II)
position, turn on the heaters by
pressing the button. The indicator in
the button comes on as a reminder.
Press the button again to turn the
heaters off. To apply the parking brake, push the
parking brake pedal down with your
f oot. To release the parking brake,
push on the pedal again. The parking
brake indicator on the instrument
panel should go out when the
parking brake is f ully released with
the engine running (see page ).
3.
63On EX, EX-L and Touring models
Mirrors
Parking Brake
172
ADJUSTMENT SWITCHHEATED MIRROR BUTTON
PARKING BRAKE PEDAL