Page 169 of 420

Start the engine. Push down and
hold the driver’s window switch
until the window is f ully open.
Pull and hold the driver’s window
switch to close the window
completely, then hold the switch
f or about 2 seconds.Press the UNLOCK button a
second time, and hold it. The
passenger’s doors unlock, and all
f our windows start to open. To
stop the windows, release the
button.
To open the windows f urther,
pressthebuttonagainandholdit.
If the windows stop bef ore the
desired position, repeat steps 1
and 2.
You cannot close the windows with
the remote transmitter.
If the power windows do not operate
properly af ter resetting, have your
vehicle checked by your dealer. Press the UNLOCK button once
to unlock the driver’s door.
You can open all of the windows
from the outside with the remote
transmitter.
If your vehicle’s battery is
disconnected or goes dead, or the
driver’s window f use is removed, the
AUTO f unction will be disabled. The
power window system needs to be
reset af ter reconnecting the battery
or installing the f use.
1.
2.
3.
1. 2.
On EX, EX-L and Touring models
Opening the Windows with the
Remote Transmitter
Power Windows
168
Page 207 of 420
�µ�µ
�µ
The preset f requencies will be lost if
your vehicle’s battery goes dead, is
disconnected, or the radio f use is
removed.
Press the A. SEL button. ‘‘A.SEL’’
f lashes in the display, and the system
goes into scan mode f or several
seconds. It stores the f requencies of
six AM and twelve FM stations in
the preset buttons. To turn of f auto select, press the
A. SEL button. This restores the
presets you originally set.
You will see a ‘‘0’’ displayed af ter
pressing a preset button if auto
select cannot f ind a strong station f or
every preset button. If you do not like the stations auto
select has stored, you can store
other f requencies on the preset
buttons. Use the TUNE, SEEK, or
SCAN functions to find stations, then
store them in the preset buttons as
described.
If you are
traveling far from home and can no
longer receive your preset stations,
you can use the auto select feature to
find stations in the local area.
Press the SOUND (TUNE) knob
repeatedly to display the bass, treble,
balance, and f ader settings.
Eachmodeisshowninthedisplayas
it changes. Turn the SOUND
(TUNE) knob to adjust the setting to
your liking. When the level reaches
the center, you will see ‘‘CENTER’’
in the display. The system will
automatically return the display to
the selected audio mode about 5
seconds af ter you stop adjusting a
mode. Use the TRE/BAS
modes to adjust the tone to your
liking.
These two
modes adjust the strength of the
sound coming f rom each speaker.
BAL adjusts the side-to-side strength,
while FAD adjusts the f ront-to-back
strength.
Adjusting the Sound
AUTO SELECT
Treble/Bass
Balance/Fader
Playing the AM/FM Radio
206
Page 214 of 420

�µ�µ
�µ�´ �µ
�µ
On models with a rear entertainment
system and a navigation system, you
cannot listen to XM Radio and a disc
at the same time. For example, when
XM Radio is playing on the f ront
speakers, you cannot listen to a disc
on the rear speakers, or vice versa.
The scan f unction gives
you a sampling of all channels while
in the channel mode. In the category
mode, only the channels within that
category are scanned. To activate
scan, press the SCAN/RPT button or
touch the SCAN icon on the audio
display. The system plays each
channel in numerical order f or a f ew seconds, then selects the next
channel. When you hear a channel
you want to continue listening to,
press the button or touch the icon
again.
Press either side of
the bar ( or ) to select another
category.
In the category mode, only channels
within that category can be selected.
In the channel mode, all channelscan be selected.
Use the TUNE knob, or the
CATEGORY or SCAN buttons to
tune to a desired channel. You can
also touch the SCAN icon on the
audio display. Press the XM RADIO button.
Either XM1 or XM2 will show in
the display.
To store a channel: Youcanstoreupto12
preset channels using the six preset
buttons or preset icons on the audio
display. Each button stores one
channel f rom the XM1 band and one
channel f rom the XM2 band.
The presets will be lost if your
vehicle’s battery goes dead, is
disconnected, or the radio f use is
removed. Once a channel is stored, press and
release the proper preset button
(icon) to tune to it.Press the XM RADIO button again
or touch the other XM icon (XM1
or XM2) on the audio display.
Store the next six channels using
steps 2 and 3. Repeat steps 2 and 3 to store the
f irst six channels. Pick the preset button (icon) you
want f or that channel. Press and
hold the button (icon) until you
hear a beep.
Turn the tune knob lef t or
right to select channels. In the
category mode, you can only select
channels within that category.
1.
2.3.
4.
5.
Playing the XMSatellite Radio
SCAN CATEGORY
Preset
TUNE
Features
213
Page 233 of 420
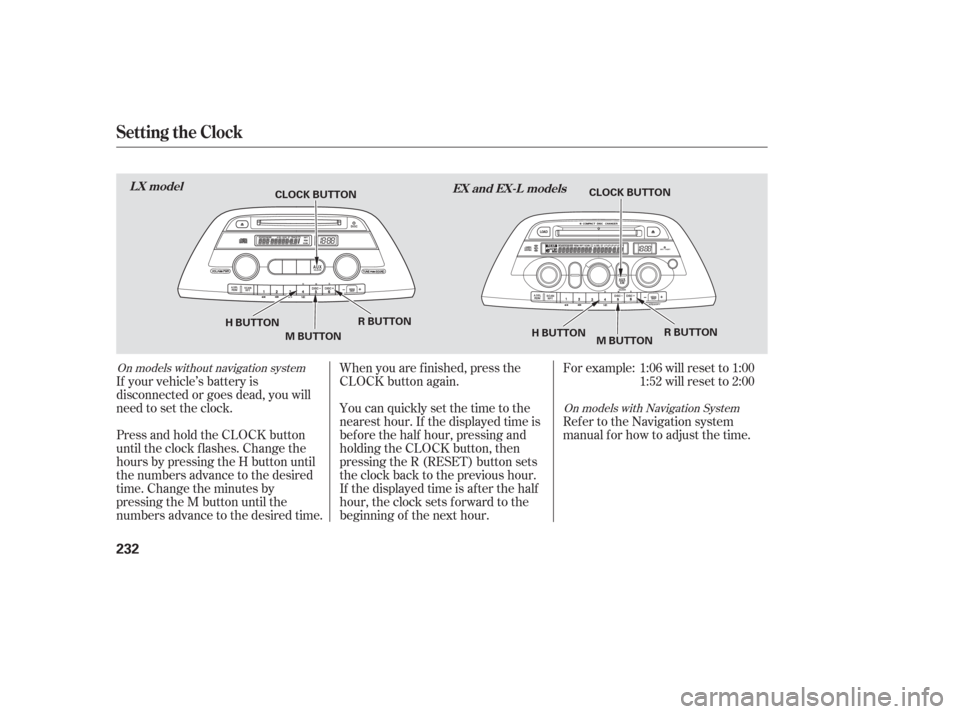
If your vehicle’s battery is
disconnected or goes dead, you will
need to set the clock.You can quickly set the time to the
nearest hour. If the displayed time is
bef ore the half hour, pressing and
holding the CLOCK button, then
pressing the R (RESET) button sets
the clock back to the previous hour.
If the displayed time is after the half
hour, the clock sets f orward to the
beginning of the next hour. When you are f inished, press the
CLOCK button again.For example: 1:06 will reset to 1:00
1:52 will reset to 2:00
Press and hold the CLOCK button
until the clock f lashes. Change the
hours by pressing the H button until
the numbers advance to the desired
time. Change the minutes by
pressing the M button until the
numbers advance to the desired time. Ref er to the Navigation system
manual f or how to adjust the time.
On models with Navigation System
On models without navigation system
Setting the Clock
LX model
EX and EX-L models
232
CLOCK BUTTON
H BUTTON R BUTTON
M BUTTON CLOCK BUTTON
H BUTTON R BUTTON
M BUTTON
Page 235 of 420
Your vehicle’s audio system will
disable itself if it is disconnected
f rom electrical power f or any reason.
To make it work again, you must
enter a specif ic f ive-digit code with
the preset buttons. Because there
are hundreds of number
combinations possible f rom the f ive
digits, making the system work
without knowing the exact code is
nearly impossible.
Youshouldhavereceivedacardthat
lists your audio system code number
and serial number. It is best to store
this card in a saf e place at home. In
addition, you should write the audio
system’s serial number in this
Owner’s Manual.
If youshouldhappentolosethecard,
you must obtain the code number
f rom a Honda dealer. To do this, you
will need the system’s serial number.If your vehicle’s battery is discon-
nected or goes dead, or the radio
f use is removed, the audio system
will disable itself . If this happens,
youwillsee‘‘ ’’inthe
frequencydisplaythenexttimeyou
turn on the system. Use the preset
buttons to enter the five-digit code.
The code is located on the radio code
card included in your Owner’s
Manual kit. When it is entered
correctly, the radio will start playing.
If you make a mistake entering the
code, do not start over; complete the
f ive-digit sequence, then enter the
correct code. You have 10 tries to
enter the correct code. If you are
unsuccessf ul in 10 attempts, you
must then leave the system on for 1
hour bef ore trying again.
You will have to store your favorite
stations in the preset buttons after
the system begins working. Your
original settings were lost when the
power was disconnected.
On EX, EX-L and Touring models
Radio T hef t Protection
234
Page 263 of 420
If it takes several pushes on the
button to operate the rear
entertainment system, have your
dealer replace the batteries as soon
as possible.
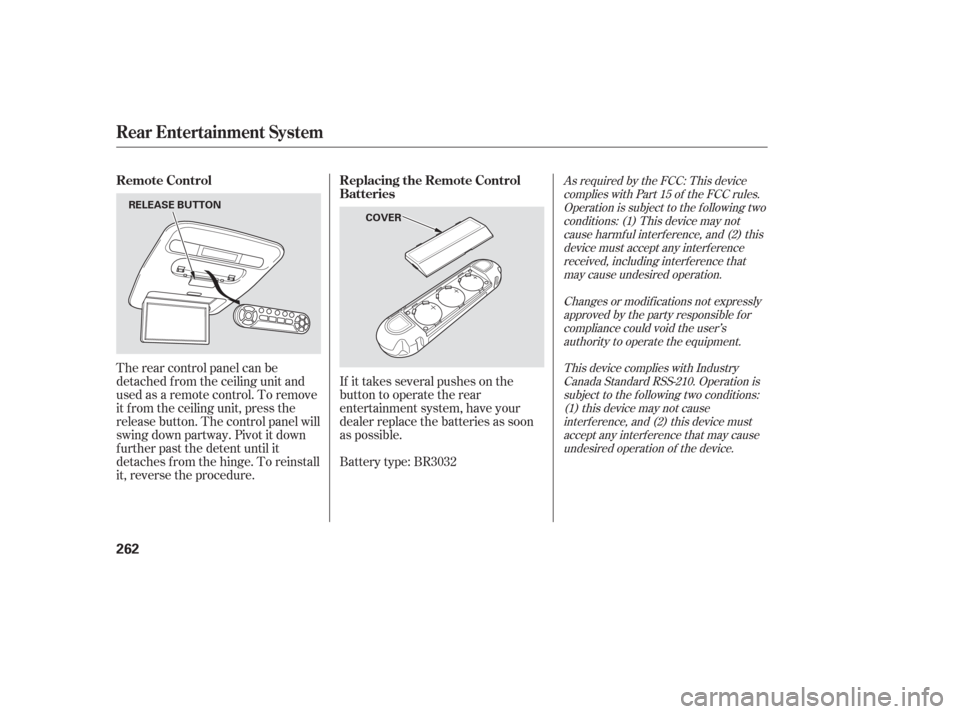
The rear control panel can be
detached f rom the ceiling unit and
used as a remote control. To remove
it f rom the ceiling unit, press the
release button. The control panel will
swing down partway. Pivot it down
f urther past the detent until it
detaches f rom the hinge. To reinstall
it, reverse the procedure.
Battery type: BR3032
As required by the FCC: This device
complies with Part 15 of the FCC rules.Operation is subject to the f ollowing twoconditions: (1) This device may notcause harmf ul interf erence, and (2) thisdevice must accept any interf erencereceived, including interf erence thatmay cause undesired operation.
Changes or modif ications not expresslyapproved by the party responsible f orcompliance could void the user’sauthority to operate the equipment.
This device complies with IndustryCanada Standard RSS-210. Operation issubject to the f ollowing two conditions:(1) this device may not causeinterf erence, and (2) this device mustaccept any interf erence that may causeundesired operation of the device.Remote Control Replacing the Remote Control
Batteries
Rear Entertainment System
262
COVER
RELEASE BUTTON
Page 266 of 420
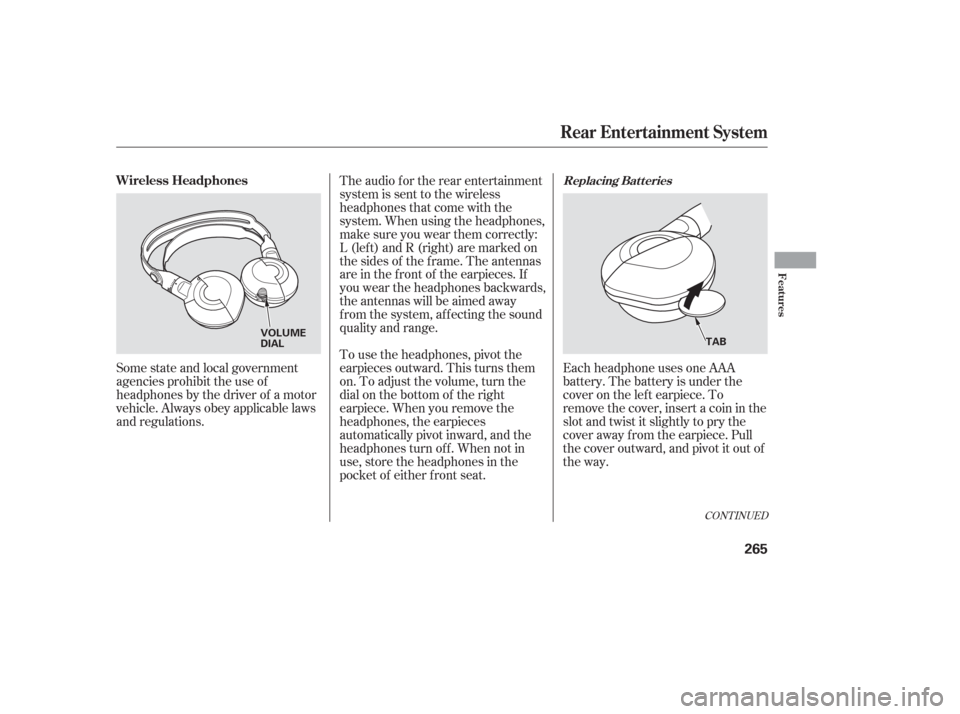
Each headphone uses one AAA
battery. The battery is under the
cover on the lef t earpiece. To
remove the cover, insert a coin in the
slot and twist it slightly to pry the
cover away f rom the earpiece. Pull
the cover outward, and pivot it out of
the way.
Some state and local government
agencies prohibit the use of
headphones by the driver of a motor
vehicle. Always obey applicable laws
and regulations. The audio f or the rear entertainment
system is sent to the wireless
headphones that come with the
system. When using the headphones,
make sure you wear them correctly:
L (lef t) and R (right) are marked on
the sides of the frame. The antennas
are in the f ront of the earpieces. If
you wear the headphones backwards,
the antennas will be aimed away
from the system, affecting the sound
quality and range.
To use the headphones, pivot the
earpieces outward. This turns them
on. To adjust the volume, turn the
dial on the bottom of the right
earpiece. When you remove the
headphones, the earpieces
automatically pivot inward, and the
headphones turn of f . When not in
use, store the headphones in the
pocket of either f ront seat.
CONT INUED
Replacing Bat t eriesWireless Headphones
Rear Entertainment System
Features
265
VOLUME
DIAL
TAB
Page 267 of 420
Auxiliary input jacks and headphone
connectors f or the rear
entertainment system are under the
third seat armrest on the driver’s
side. To access these connectors,
open the cover by pulling up on the
lever.The system will accept auxiliary
inputs f rom standard video games
and video equipment.
Some video game power supplies
may cause poor picture quality.
V=Videojack
L = Lef t audio jack
R = Right audio jack
Remove the battery. Install the new
battery in the earpice as shown in
the diagram next to the battery slot.
Slide the cover back into place on the
earpiece, then press down on the
back edge to lock it in place. Auxiliary Input Jacks
Rear Entertainment System
266
COVER
BATTERY ARMREST
LEVER
AUXILIARY INPUT JACKS