Page 52 of 288

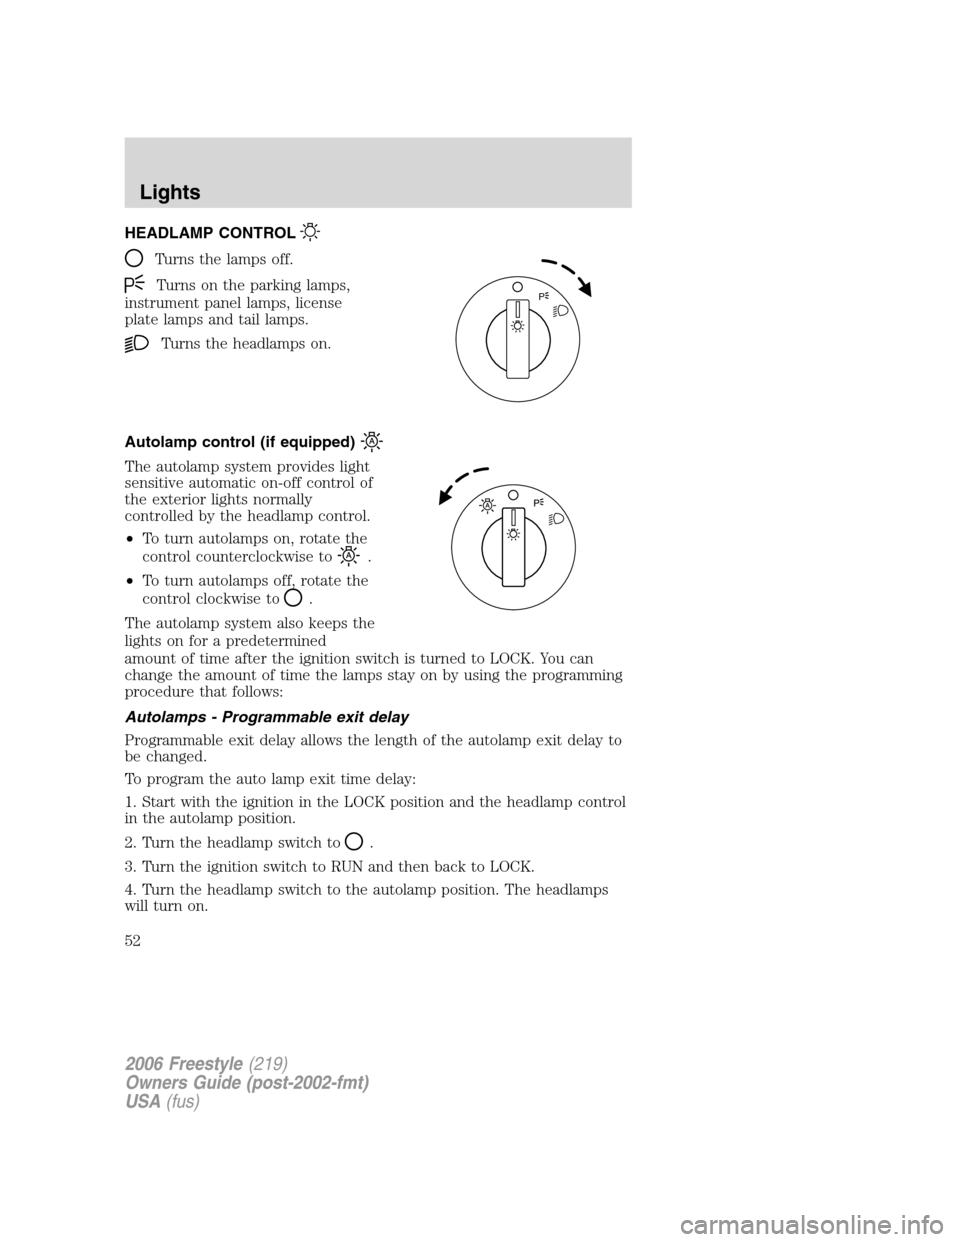
HEADLAMP CONTROL
Turns the lamps off.
Turns on the parking lamps,
instrument panel lamps, license
plate lamps and tail lamps.
Turns the headlamps on.
Autolamp control (if equipped)
The autolamp system provides light
sensitive automatic on-off control of
the exterior lights normally
controlled by the headlamp control.
•To turn autolamps on, rotate the
control counterclockwise to
.
•To turn autolamps off, rotate the
control clockwise to
.
The autolamp system also keeps the
lights on for a predetermined
amount of time after the ignition switch is turned to LOCK. You can
change the amount of time the lamps stay on by using the programming
procedure that follows:
Autolamps - Programmable exit delay
Programmable exit delay allows the length of the autolamp exit delay to
be changed.
To program the auto lamp exit time delay:
1. Start with the ignition in the LOCK position and the headlamp control
in the autolamp position.
2. Turn the headlamp switch to
.
3. Turn the ignition switch to RUN and then back to LOCK.
4. Turn the headlamp switch to the autolamp position. The headlamps
will turn on.
P
2006 Freestyle(219)
Owners Guide (post-2002-fmt)
USA(fus)
Lights
52
Page 55 of 288

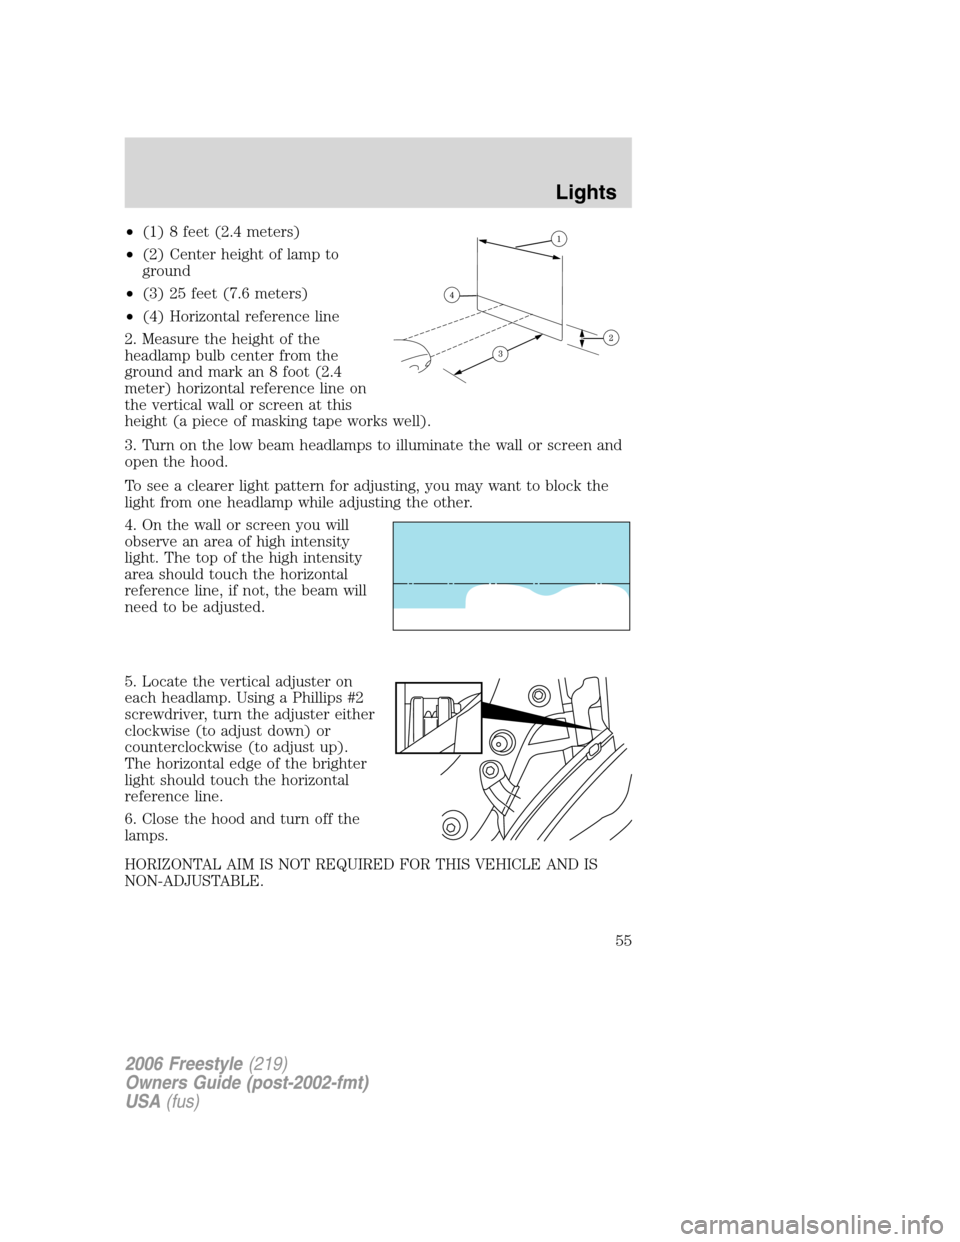
•(1) 8 feet (2.4 meters)
•(2) Center height of lamp to
ground
•(3) 25 feet (7.6 meters)
•(4) Horizontal reference line
2. Measure the height of the
headlamp bulb center from the
ground and mark an 8 foot (2.4
meter) horizontal reference line on
the vertical wall or screen at this
height (a piece of masking tape works well).
3. Turn on the low beam headlamps to illuminate the wall or screen and
open the hood.
To see a clearer light pattern for adjusting, you may want to block the
light from one headlamp while adjusting the other.
4. On the wall or screen you will
observe an area of high intensity
light. The top of the high intensity
area should touch the horizontal
reference line, if not, the beam will
need to be adjusted.
5. Locate the vertical adjuster on
each headlamp. Using a Phillips #2
screwdriver, turn the adjuster either
clockwise (to adjust down) or
counterclockwise (to adjust up).
The horizontal edge of the brighter
light should touch the horizontal
reference line.
6. Close the hood and turn off the
lamps.
HORIZONTAL AIM IS NOT REQUIRED FOR THIS VEHICLE AND IS
NON-ADJUSTABLE.
2006 Freestyle(219)
Owners Guide (post-2002-fmt)
USA(fus)
Lights
55
Page 57 of 288

Using the right bulbs
Replacement bulbs are specified in the chart below. Headlamp bulbs must
be marked with an authorized “D.O.T.” for North America and an “E” for
Europe to assure lamp performance, light brightness and pattern and safe
visibility. The correct bulbs will not damage the lamp assembly or void the
lamp assembly warranty and will provide quality bulb burn time.
Function Number of bulbs Trade number
Front park/turn lamp 23157AK or
3157A (amber)
Front sidemarker lamp 2 168
Headlamp 2 9008 H13
Tail/brake/turn signal lamp 2 4057K
Backup lamp 2 3156
License plate lamp 2 168
High-mount brake lamp 5 W5W
Foglamp (if equipped) 2 H11 LL
Map lamp 2 12V6W
Dome/reading lamps 6 578
All replacement bulbs are clear in color except where noted.
To replace all instrument panel lights - see your authorized dealer.
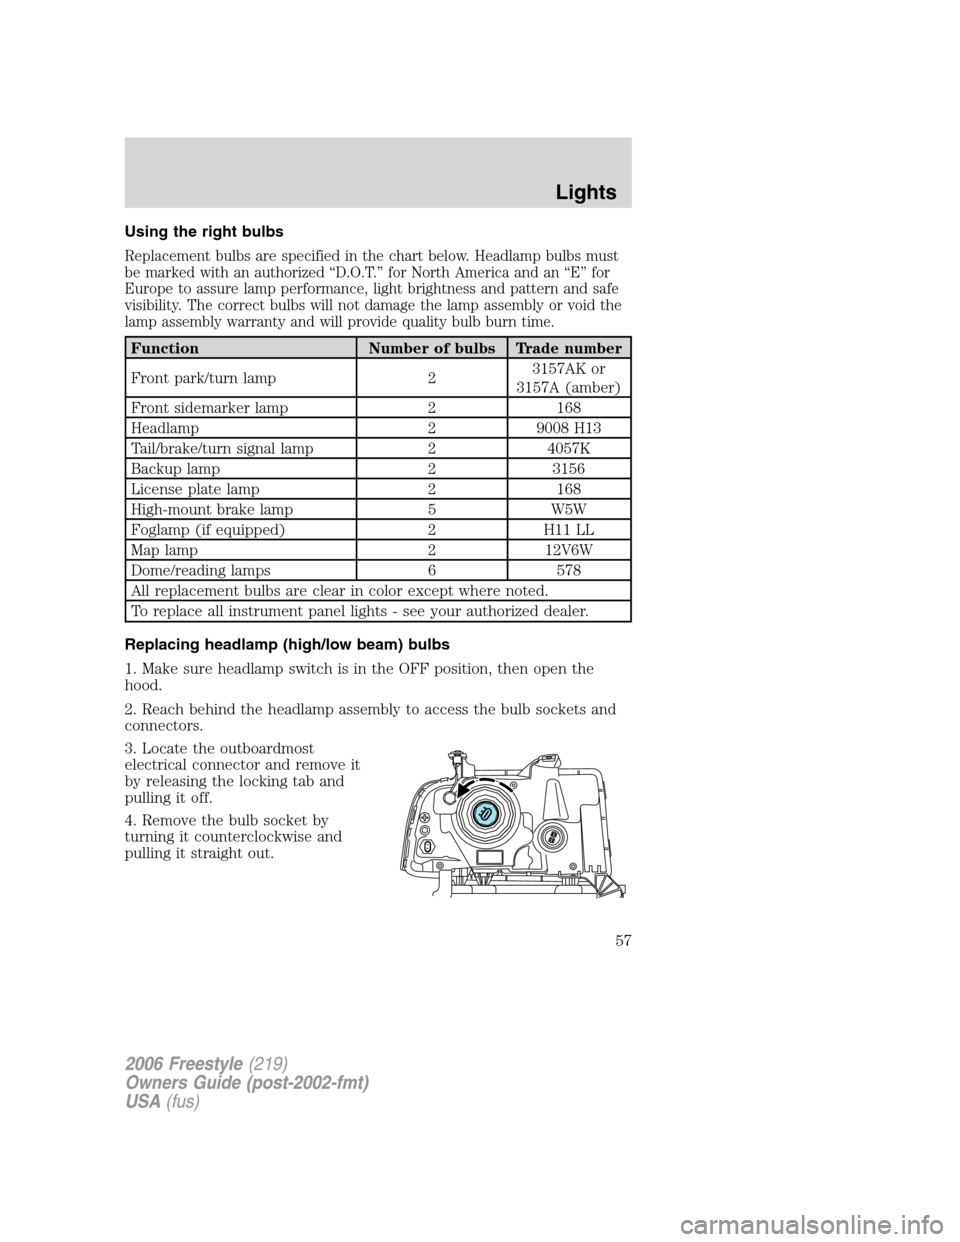
Replacing headlamp (high/low beam) bulbs
1. Make sure headlamp switch is in the OFF position, then open the
hood.
2. Reach behind the headlamp assembly to access the bulb sockets and
connectors.
3. Locate the outboardmost
electrical connector and remove it
by releasing the locking tab and
pulling it off.
4. Remove the bulb socket by
turning it counterclockwise and
pulling it straight out.
2006 Freestyle(219)
Owners Guide (post-2002-fmt)
USA(fus)
Lights
57
Page 58 of 288
Handle a halogen headlamp bulb carefully and keep out of
children’s reach. Grasp the bulb only by its plastic base and do
not touch the glass. The oil from your hand could cause the bulb to
break the next time the headlamps are operated.
Install the new bulb(s) in reverse order.
Replacing front parking lamp/turn signal bulbs
1. Make sure headlamp switch is in the OFF position, then open the
hood.
2. Reach behind the headlamp assembly to access the bulb sockets and
connectors.
3. Remove the bulb socket by
turning it counterclockwise and
pulling it straight out.
4. To remove the bulb, pull it
straight out of the bulb socket.
Install the new bulb(s) in reverse order.
Replacing front sidemarker bulbs
1. Make sure headlamp switch is in the OFF position, then open the
hood.
2. Reach behind the headlamp assembly to access the bulb sockets and
connectors.
2006 Freestyle(219)
Owners Guide (post-2002-fmt)
USA(fus)
Lights
58
Page 59 of 288
3. Locate the front sidemarker lamp
electrical connector and remove it
by pulling it off.
4. Remove the bulb socket by
turning it counterclockwise and
pulling it straight out.
5. To remove the bulb, pull it
straight out of the bulb socket.
Install the new bulb(s) in reverse order.
Replacing stop/tail/turn/backup bulbs
The stop, tail, turn and backup lamp bulbs are located in the tail lamp
assembly. Follow the same steps to replace either bulb.
1. Make sure the headlamp switch is
in the OFF position and open the
liftgate.
2. Remove the two screws in the
liftgate opening, then pull the lamp
assembly away from the vehicle.
3. Remove the bulb socket by
rotating it counterclockwise, then
pulling it out of the lamp assembly.
4. Pull the bulb straight from the
socket.
Install new bulb(s) in reverse order.
2006 Freestyle(219)
Owners Guide (post-2002-fmt)
USA(fus)
Lights
59
Page 60 of 288
Replacing high-mount brake lamp bulbs
1. Make sure the ignition control is
in the OFF position.
2. Remove the two screws.
3. Unclip the bulb holder from the
reflector.
4. Pull the bulb straight out.
Install in reverse order.
Replacing license plate lamp bulbs
1. Make sure the headlamp switch is
in the OFF position.
2. Remove the screw from the
license plate lamp assembly and pull
it down.
3. Remove bulb socket by turning
counterclockwise.
4. Carefully pull the bulb out from
the socket.
Install new bulb(s) in reverse order.
Replacing foglamp bulbs
1. Make sure the foglamp switch is
in the OFF position.
2. Remove the bulb socket from the
foglamp by turning
counterclockwise.
3. Disconnect the electrical
connector.
Install the new bulb in reverse order.
2006 Freestyle(219)
Owners Guide (post-2002-fmt)
USA(fus)
Lights
60
Page 62 of 288

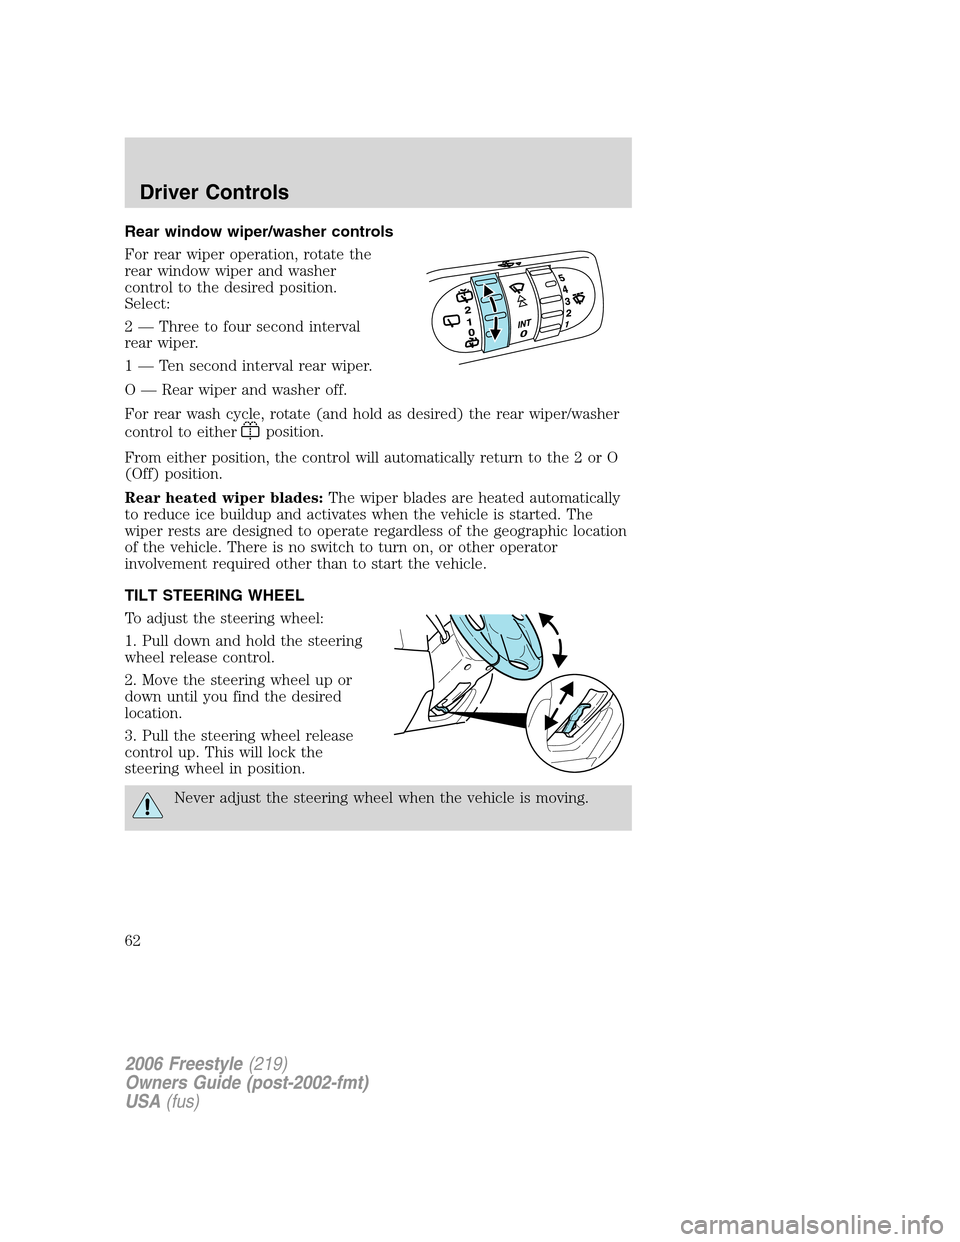
Rear window wiper/washer controls
For rear wiper operation, rotate the
rear window wiper and washer
control to the desired position.
Select:
2 — Three to four second interval
rear wiper.
1 — Ten second interval rear wiper.
O — Rear wiper and washer off.
For rear wash cycle, rotate (and hold as desired) the rear wiper/washer
control to either
position.
From either position, the control will automatically return to the 2 or O
(Off) position.
Rear heated wiper blades:The wiper blades are heated automatically
to reduce ice buildup and activates when the vehicle is started. The
wiper rests are designed to operate regardless of the geographic location
of the vehicle. There is no switch to turn on, or other operator
involvement required other than to start the vehicle.
TILT STEERING WHEEL
To adjust the steering wheel:
1. Pull down and hold the steering
wheel release control.
2. Move the steering wheel up or
down until you find the desired
location.
3. Pull the steering wheel release
control up. This will lock the
steering wheel in position.
Never adjust the steering wheel when the vehicle is moving.
2006 Freestyle(219)
Owners Guide (post-2002-fmt)
USA(fus)
Driver Controls
62
Page 65 of 288

Pull down on the housing to lock it
in place. Adjust the mirror, as
needed, in any direction.
The rear view mirror may have to
be adjusted to its lower arm position
to prevent interference when the
conversation mirror is extended
down.
AUXILIARY POWER POINT (12VDC)
Power outlets are designed for accessory plugs only. Do not insert
any other object in the power outlet as this will damage the
outlet and blow the fuse. Do not hang any type of accessory or
accessory bracket from the plug. Improper use of the power
outlet can cause damage not covered by your warranty.
The auxiliary power points are
located on the instrument panel, in
the center console utility
compartment and on the left-hand
trim panel.
Do not use the power point for
operating the cigarette lighter
element (if equipped).
To prevent the fuse from being
blown, do not use the power
point(s) over the vehicle capacity of 12 VDC/180W.
To prevent the battery from being discharged, do not use the power
point longer than necessary when the engine is not running.
Always keep the power point caps closed when not being used.
Cigar/Cigarette lighter (if equipped)
Do not plug optional electrical accessories into the cigarette lighter
socket.
Do not hold the lighter in with your hand while it is heating, this will
damage the lighter element and socket. The lighter will be released from
its heating position when it is ready to be used.
Improper use of the lighter can cause damage not covered by your
warranty.
PULL
DOWN
TO LOCK
2006 Freestyle(219)
Owners Guide (post-2002-fmt)
USA(fus)
Driver Controls
65