2006 FORD EXPLORER service indicator
[x] Cancel search: service indicatorPage 13 of 328
bulb works. If any light remains on after starting the vehicle, refer to the
respective system warning light for additional information.
Note:Some Warning Lights will display in the Message Center as words
and function the same as the warning light.
Note:Depending on which options your vehicle has, some indicators
may not be present in your vehicle.
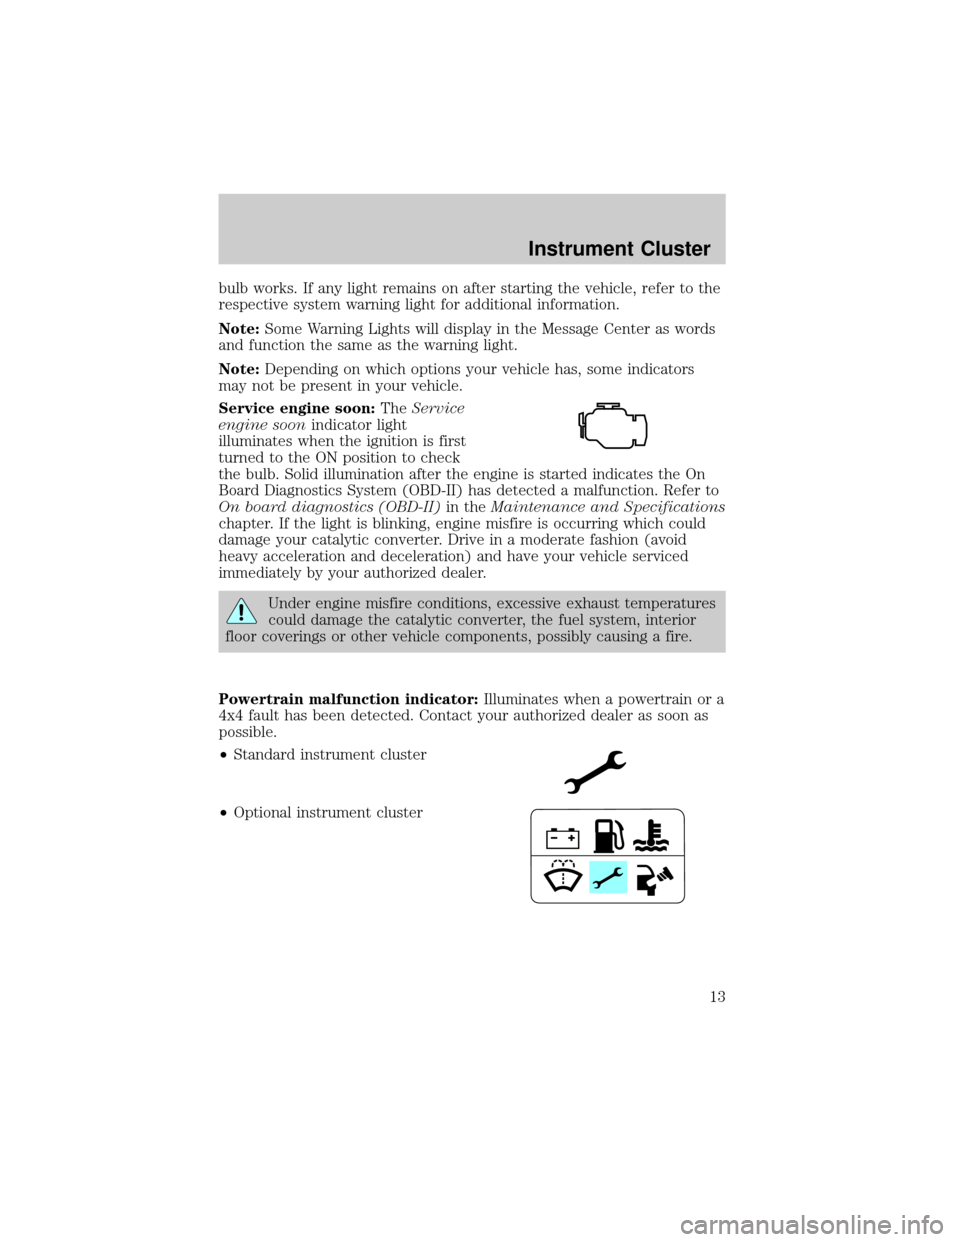
Service engine soon:TheService
engine soonindicator light
illuminates when the ignition is first
turned to the ON position to check
the bulb. Solid illumination after the engine is started indicates the On
Board Diagnostics System (OBD-II) has detected a malfunction. Refer to
On board diagnostics (OBD-II)in theMaintenance and Specifications
chapter. If the light is blinking, engine misfire is occurring which could
damage your catalytic converter. Drive in a moderate fashion (avoid
heavy acceleration and deceleration) and have your vehicle serviced
immediately by your authorized dealer.
Under engine misfire conditions, excessive exhaust temperatures
could damage the catalytic converter, the fuel system, interior
floor coverings or other vehicle components, possibly causing a fire.
Powertrain malfunction indicator:Illuminates when a powertrain or a
4x4 fault has been detected. Contact your authorized dealer as soon as
possible.
²Standard instrument cluster
²Optional instrument cluster
Instrument Cluster
13
Page 17 of 328
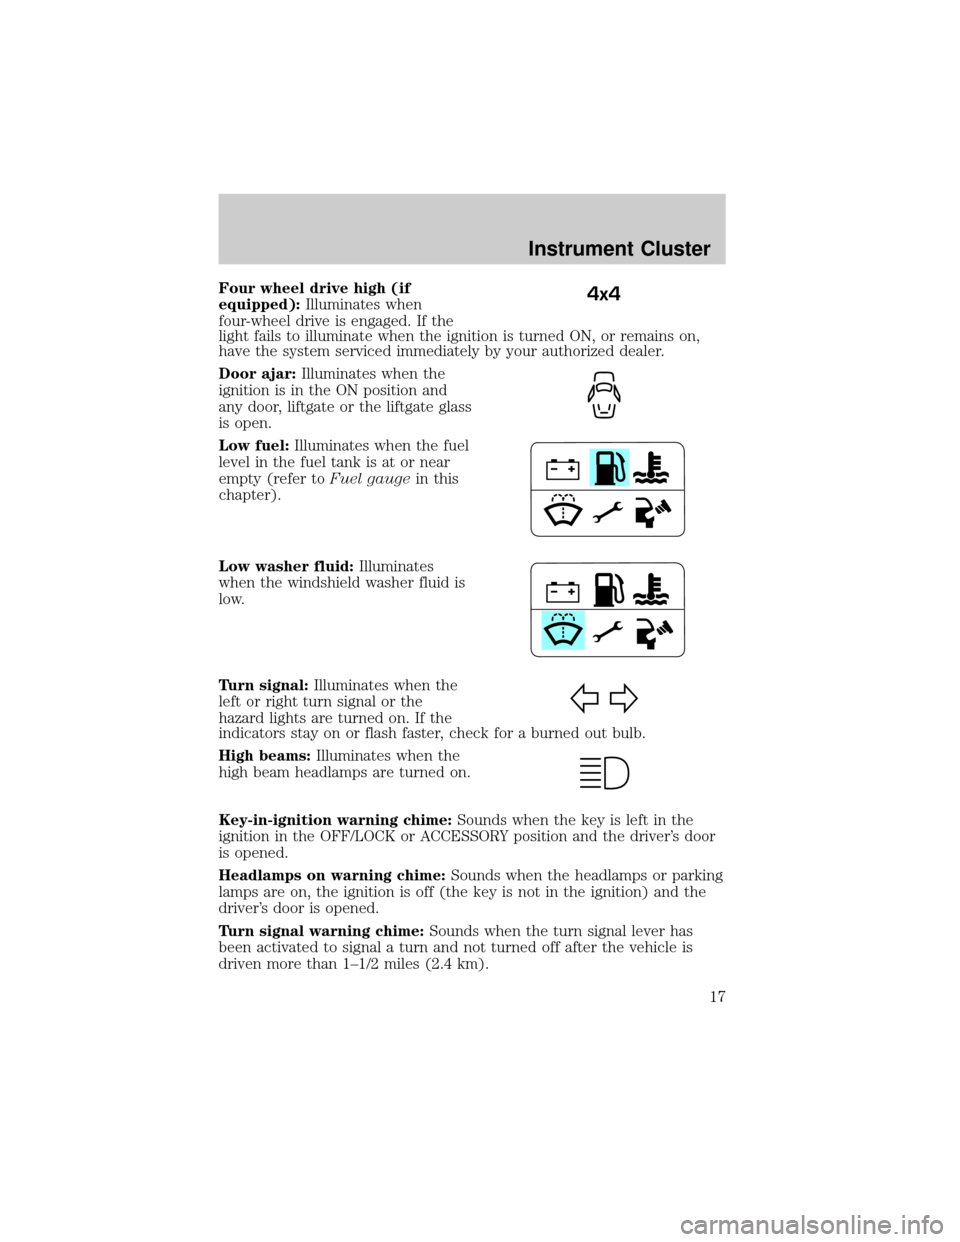
Four wheel drive high (if
equipped):Illuminates when
four-wheel drive is engaged. If the
light fails to illuminate when the ignition is turned ON, or remains on,
have the system serviced immediately by your authorized dealer.
Door ajar:Illuminates when the
ignition is in the ON position and
any door, liftgate or the liftgate glass
is open.
Low fuel:Illuminates when the fuel
level in the fuel tank is at or near
empty (refer toFuel gaugein this
chapter).
Low washer fluid:Illuminates
when the windshield washer fluid is
low.
Turn signal:Illuminates when the
left or right turn signal or the
hazard lights are turned on. If the
indicators stay on or flash faster, check for a burned out bulb.
High beams:Illuminates when the
high beam headlamps are turned on.
Key-in-ignition warning chime:Sounds when the key is left in the
ignition in the OFF/LOCK or ACCESSORY position and the driver's door
is opened.
Headlamps on warning chime:Sounds when the headlamps or parking
lamps are on, the ignition is off (the key is not in the ignition) and the
driver's door is opened.
Turn signal warning chime:Sounds when the turn signal lever has
been activated to signal a turn and not turned off after the vehicle is
driven more than 1±1/2 miles (2.4 km).4x4
Instrument Cluster
17
Page 111 of 328

6. Release the 3²4.
The user should receive a horn chirp to indicate the system has been
disabled or a chirp followed by a honk to indicate the system has been
enabled.
Message center procedure
For information on activating/deactivating the autounlock feature using
the vehicle's message center (if equipped), refer toMessage center
information in theDriver Controlschapter.
SECURILOCKYPASSIVE ANTI-THEFT SYSTEM
SecuriLockypassive anti-theft system is an engine immobilization
system. This system is designed to help prevent the engine from being
started unless acoded key programmed to your vehicleis used. The
use of the wrong type of coded key may lead to a ªno-startº condition.
Your vehicle comes with two coded keys; additional coded keys may be
purchased from your authorized dealer. The authorized dealer can
program your spare keys to your vehicle or you can program the keys
yourself. Refer toProgramming spare keysfor instructions on how to
program the coded key.
Note:The SecuriLockypassive anti-theft system is not compatible with
non-Ford aftermarket remote start systems. Use of these systems may
result in vehicle starting problems and a loss of security protection.
Note:Large metallic objects, electronic devices that are used to
purchase gasoline or similar items, or a second coded key on the same
key chain may cause vehicle starting issues. You need to prevent these
objects from touching the coded key while starting the engine. These
objects will not cause damage to the coded key, but may cause a
momentary issue if they are too close to the key when starting the
engine. If a problem occurs, turn the ignition off, remove all objects on
the key chain away from the coded key and restart the engine.
Anti-theft indicator
The anti-theft indicator is located on top of the instrument panel.
²When the ignition is in the 1 (OFF/LOCK) position, the indicator will
flash once every 2 seconds to indicate the SecuriLockysystem is
functioning as a theft deterrent.
²When the ignition is in the 3 (ON) position, the indicator will glow for
3 seconds to indicate normal system functionality.
If a problem occurs with the SecuriLockysystem, the indicator will flash
rapidly or glow steadily when the ignition is in the 3 (ON) position. If this
occurs, the vehicle should be taken to an authorized dealer for service.
Locks and Security
111
Page 112 of 328

Automatic arming
The vehicle is armed immediately
after switching the ignition to the 2
(ACCESSORY) position.
The theft indicator will flash every
two seconds when the vehicle is
armed.
Automatic disarming
Switching the ignition to the 3 (ON) position with acoded keydisarms
the vehicle.
²The theft indicator will illuminate for three seconds and then go out.
²If the theft indicator stays on for an extended period of time or
flashes rapidly, have the system serviced by your authorized dealer.
Replacement keys
If your keys are lost or stolen and you don't have an extra coded key,
you will need to have your vehicle towed to an authorized dealer. The
key codes need to be erased from your vehicle and new coded keys will
need to be programmed.
Replacing coded keys can be very costly. Store an extra programmed key
away from the vehicle in a safe place to help prevent any
inconveniences. Please visit an authorized dealer to purchase additional
spare or replacement keys.
Programming spare keys
You can program your own coded keys to your vehicle.
Tips:
²A maximum of eight keys can be coded to your vehicle.
²Only use SecuriLockykeys.
²You must have two previously programmed coded keys (keys that
already operate your vehicle's engine) and the new unprogrammed
key(s) readily accessible.
²If two previously programmed coded keys are not available, you must
take your vehicle to your authorized dealer to have the spare key(s)
programmed.
4
3
2
1
Locks and Security
112
Page 149 of 328
To reduce the risk of possible serious injury:
Do not stow objects in seat back map pocket (if equipped) or
hang objects off seat back if a child is in the front passenger seat.
Do not place objects underneath the front passenger seat or between
the seat and the center console (if equipped).
Check the ªpassenger airbag offº or ªpass airbag offº indicator lamp for
proper airbag Status.
Failure to follow these instructions may interfere with the front
passenger seat sensing system.
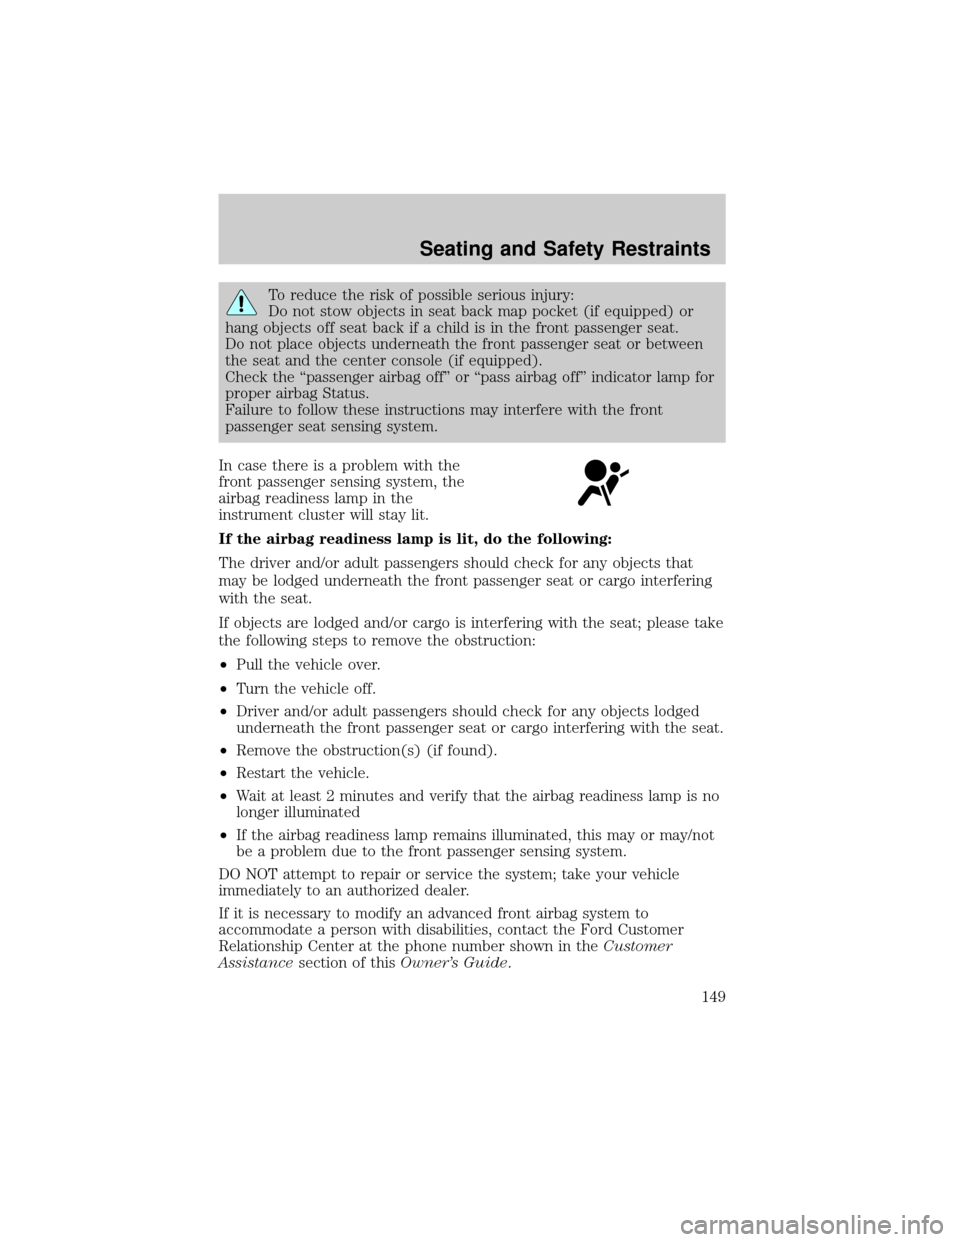
In case there is a problem with the
front passenger sensing system, the
airbag readiness lamp in the
instrument cluster will stay lit.
If the airbag readiness lamp is lit, do the following:
The driver and/or adult passengers should check for any objects that
may be lodged underneath the front passenger seat or cargo interfering
with the seat.
If objects are lodged and/or cargo is interfering with the seat; please take
the following steps to remove the obstruction:
²Pull the vehicle over.
²Turn the vehicle off.
²Driver and/or adult passengers should check for any objects lodged
underneath the front passenger seat or cargo interfering with the seat.
²Remove the obstruction(s) (if found).
²Restart the vehicle.
²Wait at least 2 minutes and verify that the airbag readiness lamp is no
longer illuminated
²If the airbag readiness lamp remains illuminated, this may or may/not
be a problem due to the front passenger sensing system.
DO NOT attempt to repair or service the system; take your vehicle
immediately to an authorized dealer.
If it is necessary to modify an advanced front airbag system to
accommodate a person with disabilities, contact the Ford Customer
Relationship Center at the phone number shown in theCustomer
Assistancesection of thisOwner's Guide.
Seating and Safety Restraints
149
Page 182 of 328
tread grooves. Check for holes or cuts that may permit air leakage from
the tire and make necessary repairs. Also inspect the tire sidewalls for
cracking, cuts, bruises and other signs of damage or excessive wear. If
internal damage to the tire is suspected, have the tire demounted and
inspected in case it needs to be repaired or replaced. For your safety,
tires that are damaged or show signs of excessive wear should not be
used because they are more likely to blow out or fail.
Improper or inadequate vehicle maintenance can cause tires to wear
abnormally. Inspect all your tires, including the spare, frequently, and
replace them if one or more of the following conditions exist:
Tire wear
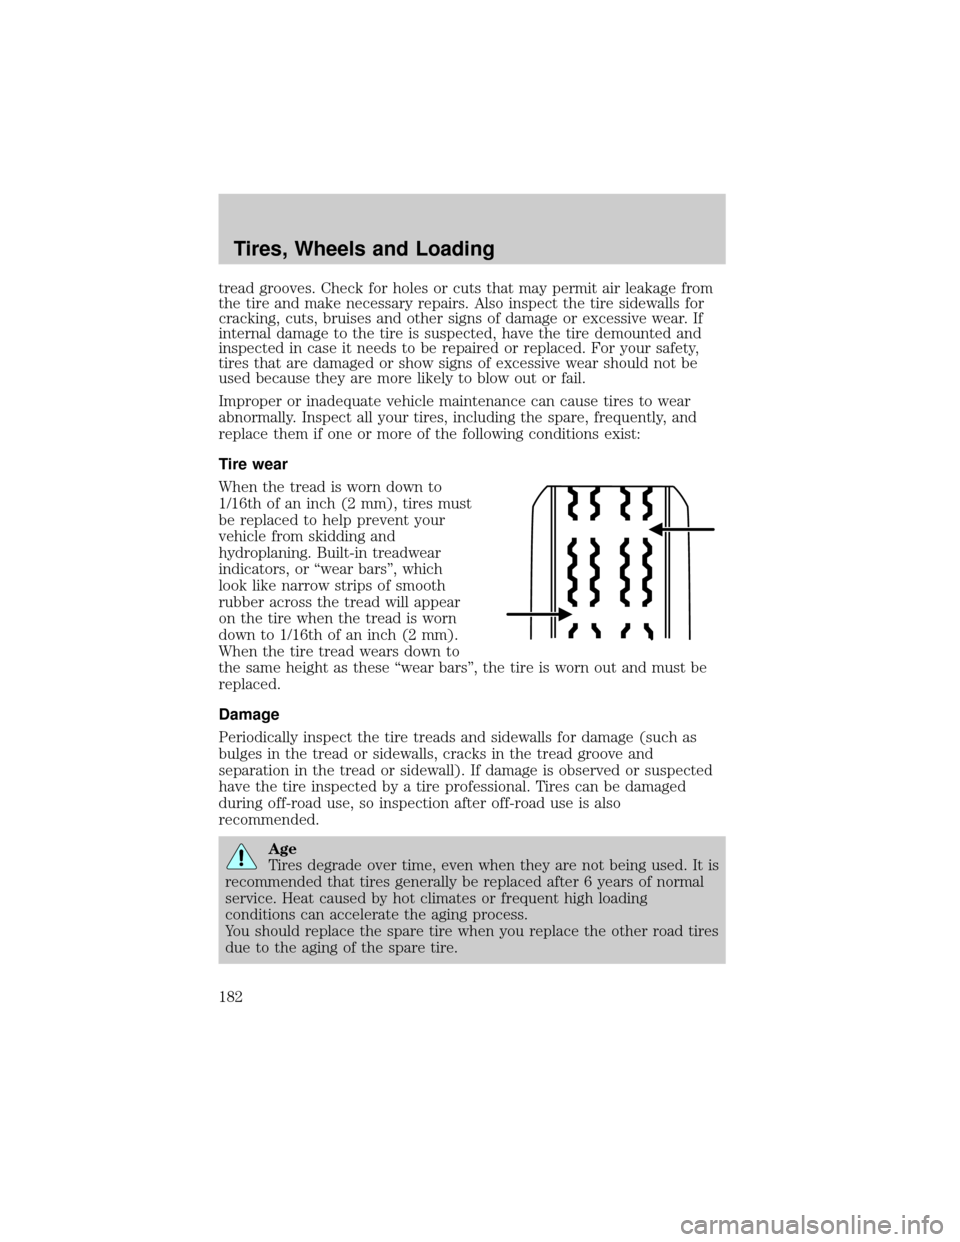
When the tread is worn down to
1/16th of an inch (2 mm), tires must
be replaced to help prevent your
vehicle from skidding and
hydroplaning. Built-in treadwear
indicators, or ªwear barsº, which
look like narrow strips of smooth
rubber across the tread will appear
on the tire when the tread is worn
down to 1/16th of an inch (2 mm).
When the tire tread wears down to
the same height as these ªwear barsº, the tire is worn out and must be
replaced.
Damage
Periodically inspect the tire treads and sidewalls for damage (such as
bulges in the tread or sidewalls, cracks in the tread groove and
separation in the tread or sidewall). If damage is observed or suspected
have the tire inspected by a tire professional. Tires can be damaged
during off-road use, so inspection after off-road use is also
recommended.
Age
Tires degrade over time, even when they are not being used. It is
recommended that tires generally be replaced after 6 years of normal
service. Heat caused by hot climates or frequent high loading
conditions can accelerate the aging process.
You should replace the spare tire when you replace the other road tires
due to the aging of the spare tire.
Tires, Wheels and Loading
182
Page 215 of 328
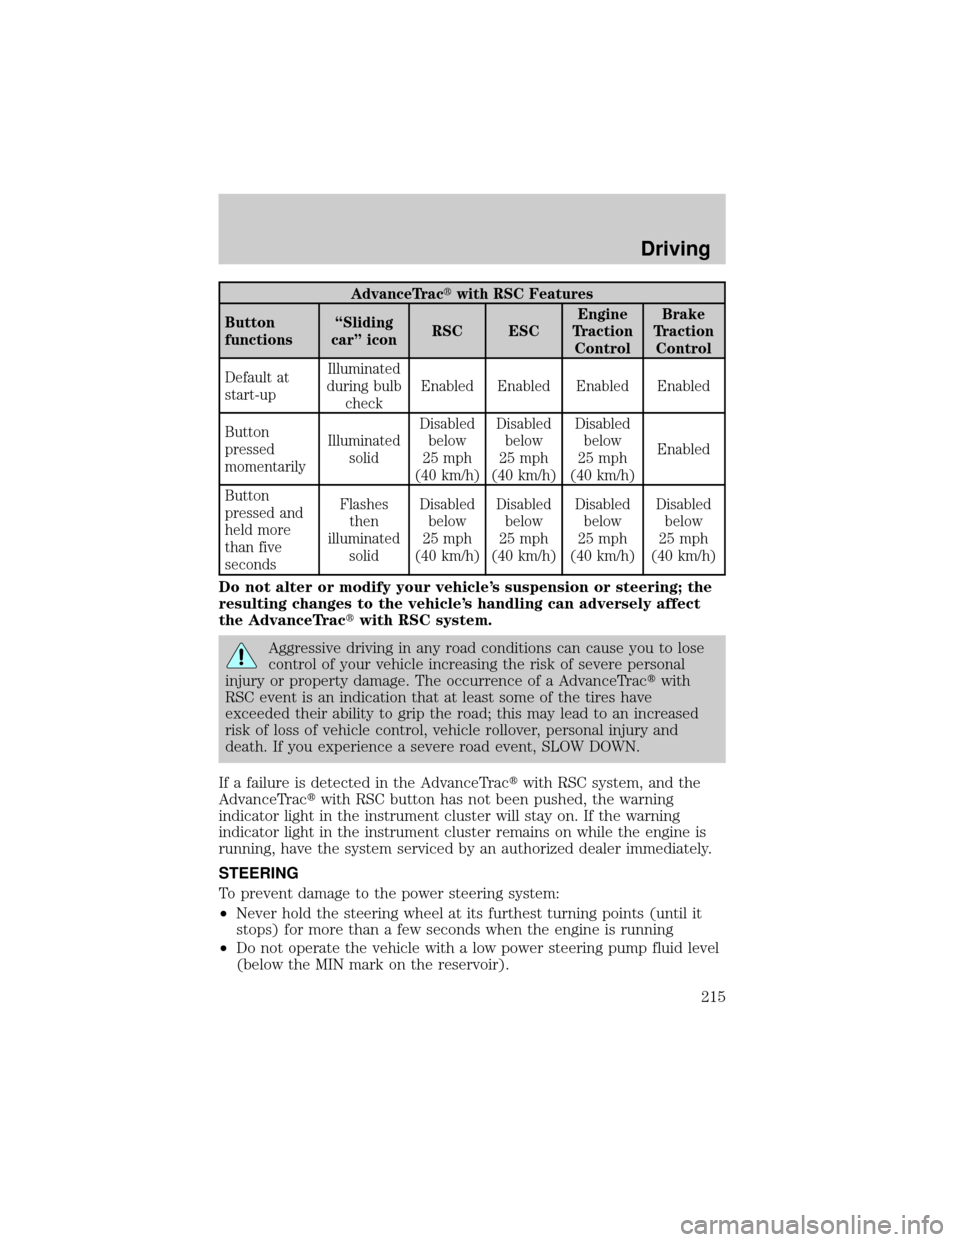
AdvanceTractwith RSC Features
Button
functionsªSliding
carº iconRSC ESCEngine
Traction
ControlBrake
Traction
Control
Default at
start-upIlluminated
during bulb
checkEnabled Enabled Enabled Enabled
Button
pressed
momentarilyIlluminated
solidDisabled
below
25 mph
(40 km/h)Disabled
below
25 mph
(40 km/h)Disabled
below
25 mph
(40 km/h)Enabled
Button
pressed and
held more
than five
secondsFlashes
then
illuminated
solidDisabled
below
25 mph
(40 km/h)Disabled
below
25 mph
(40 km/h)Disabled
below
25 mph
(40 km/h)Disabled
below
25 mph
(40 km/h)
Do not alter or modify your vehicle's suspension or steering; the
resulting changes to the vehicle's handling can adversely affect
the AdvanceTractwith RSC system.
Aggressive driving in any road conditions can cause you to lose
control of your vehicle increasing the risk of severe personal
injury or property damage. The occurrence of a AdvanceTractwith
RSC event is an indication that at least some of the tires have
exceeded their ability to grip the road; this may lead to an increased
risk of loss of vehicle control, vehicle rollover, personal injury and
death. If you experience a severe road event, SLOW DOWN.
If a failure is detected in the AdvanceTractwith RSC system, and the
AdvanceTractwith RSC button has not been pushed, the warning
indicator light in the instrument cluster will stay on. If the warning
indicator light in the instrument cluster remains on while the engine is
running, have the system serviced by an authorized dealer immediately.
STEERING
To prevent damage to the power steering system:
²Never hold the steering wheel at its furthest turning points (until it
stops) for more than a few seconds when the engine is running
²Do not operate the vehicle with a low power steering pump fluid level
(below the MIN mark on the reservoir).
Driving
215
Page 249 of 328

When driving with the full-size dissimilar spare tire/wheel additional
caution should be given to:
²Towing a trailer
²Driving vehicles equipped with a camper body
²Driving vehicles with a load on the cargo rack
Drive cautiously when using a full-size dissimilar spare tire/wheel and
seek service as soon as possible.
Stopping and securing the vehicle
1. If you get a flat tire while driving,
do not apply the brake heavily;
instead, gradually decrease your
speed. Hold the steering wheel
firmly and slowly move to a safe
place on the side of the road.
2. Park on a level surface, activate
the hazard flashers and set the
parking brake.
3. Place gearshift lever in P (Park)
and turn engine OFF.
When one of the rear wheels is off the ground, the transmission
alone will not prevent the vehicle from moving or slipping off the
jack, even if the transmission is in P (Park).
Note:Passengers should not remain
in the vehicle when the vehicle is
being jacked.
4. Block the wheel that is diagonally
opposite of the flat tire using the
wheel chock provided with your
vehicle.
Location of the spare tire and tools
Note:If your vehicle is equipped with the tire pressure monitoring
system (TPMS), the system indicator light will illuminate when the spare
is in use. To restore the full functionality of the TPMS system, all road
wheels equipped with the tire pressure monitoring sensors must be
mounted on the vehicle
Roadside Emergencies
249