Page 102 of 360
4. Rotate the bulb socket counterclockwise and remove from lamp
assembly.
5. Pull bulb straight out of socket and snap in the new bulb.
6. Install the bulb socket into the lamp assembly and rotate clockwise.
7. Carefully install the tail lamp assembly on the vehicle by securing the
lamp assembly with two screws.
High-mount brakelamp
To change the high-mount
brakelamp bulbs:
1. Remove the two screws holding
the lamp assembly in place.
2. Pull the lamp assembly straight
out.
3. Remove the wire harness.
4. Depress the four tabs that hold
the light assembly on, one at a time,
and pull the black bulb carrier away
from the lamp.
5. Pull the old bulb out and replace
with the new bulb.
6. Snap the black bulb carrier into
the lamp assembly.
7. Replace the wire harness.
8. Replace the lamp assembly.
2006 Expedition(exd)
Owners Guide (post-2002-fmt)
USA(fus)
Lights
102
Page 103 of 360
Replacing foglamp bulbs
Handle a halogen headlamp bulb carefully and keep out of
children’s reach. Grasp the bulb only by its plastic base and do
not touch the glass. The oil from your hand could cause the bulb to
break the next time the headlamps are operated.
1. Make sure the headlamp switch is
in the OFF position and the engine
is not running.
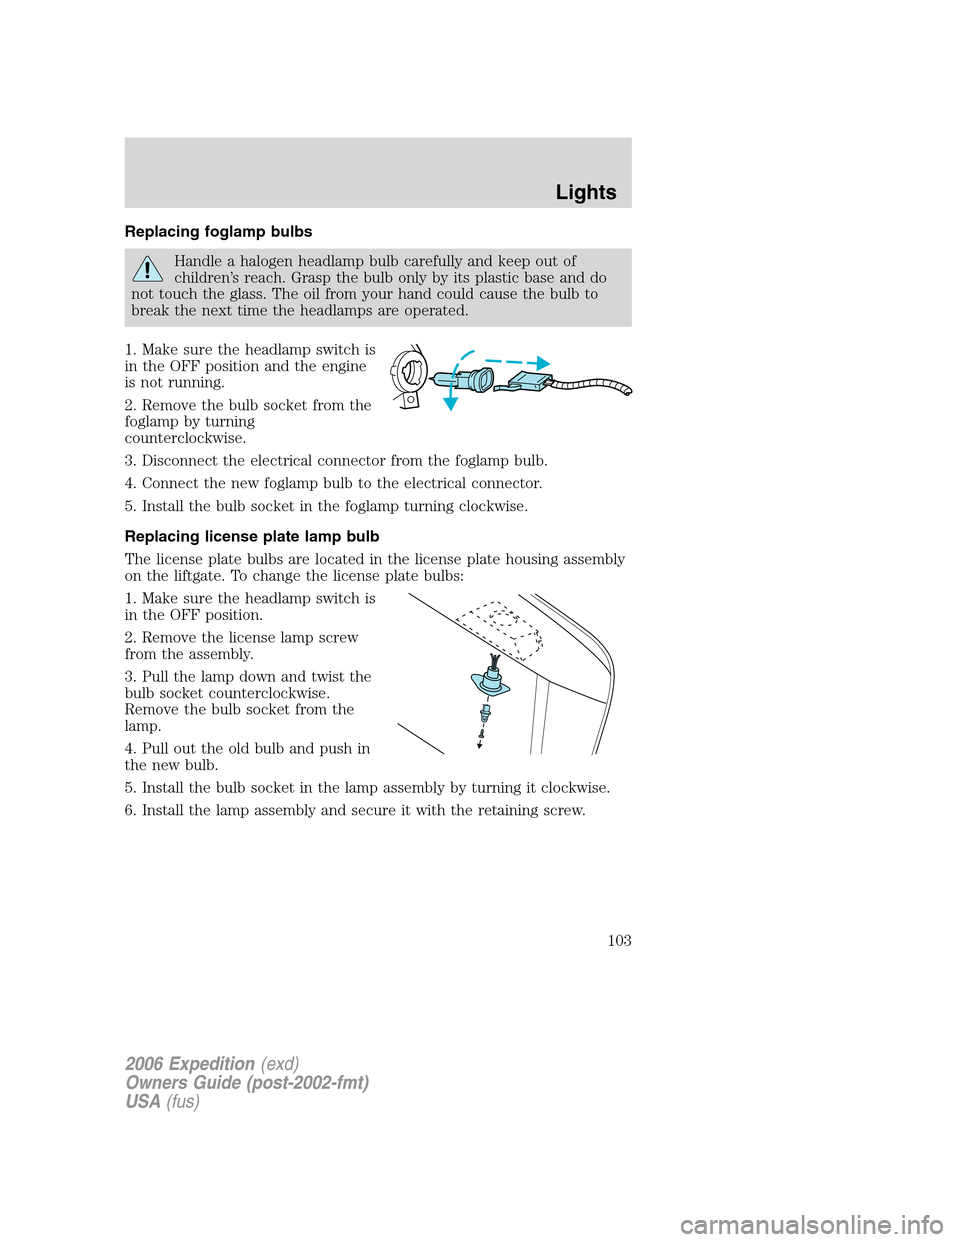
2. Remove the bulb socket from the
foglamp by turning
counterclockwise.
3. Disconnect the electrical connector from the foglamp bulb.
4. Connect the new foglamp bulb to the electrical connector.
5. Install the bulb socket in the foglamp turning clockwise.
Replacing license plate lamp bulb
The license plate bulbs are located in the license plate housing assembly
on the liftgate. To change the license plate bulbs:
1. Make sure the headlamp switch is
in the OFF position.
2. Remove the license lamp screw
from the assembly.
3. Pull the lamp down and twist the
bulb socket counterclockwise.
Remove the bulb socket from the
lamp.
4. Pull out the old bulb and push in
the new bulb.
5. Install the bulb socket in the lamp assembly by turning it clockwise.
6. Install the lamp assembly and secure it with the retaining screw.
2006 Expedition(exd)
Owners Guide (post-2002-fmt)
USA(fus)
Lights
103
Page 112 of 360
MIRRORS
Automatic dimming inside rear view mirror (if equipped)
Your vehicle may be equipped with
an inside rear view mirror with an
auto-dimming function. The
electrochromic day/night mirror will
change from the normal (high
reflective) state to the non-glare
(darkened) state when bright lights (glare) reach the mirror. When the
mirror detects bright light from behind the vehicle, it will automatically
adjust (darken) to minimize glare.
The mirror will automatically return to the normal state whenever the
vehicle is placed in R (Reverse) to ensure a bright clear view when
backing up.
Do not block the sensor on the backside of the inside rear view mirror
since this may impair proper mirror performance.
POWER SIDE VIEW MIRRORS
The ignition can be in any position to adjust the power side view mirrors.
To adjust your mirrors:
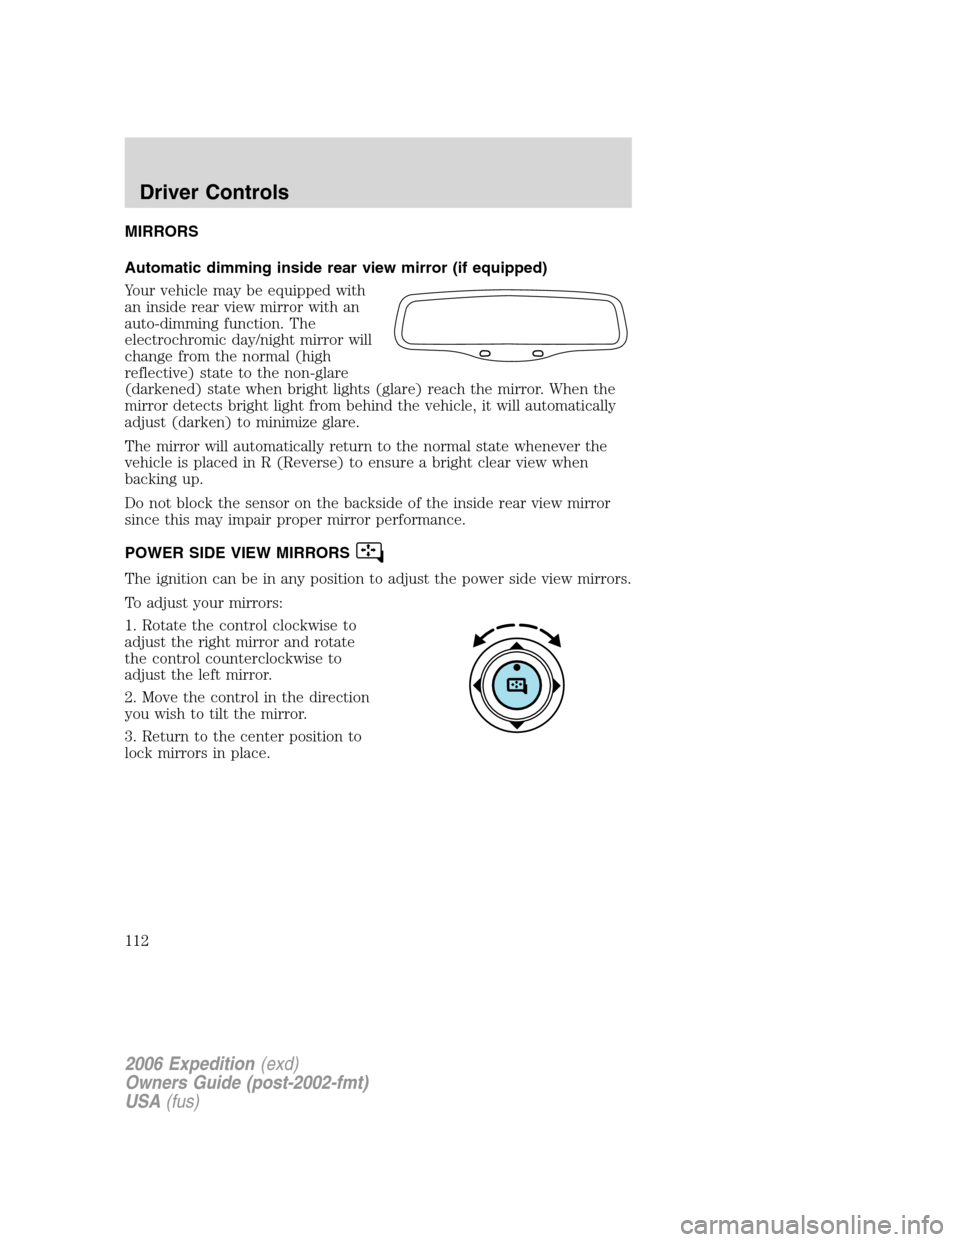
1. Rotate the control clockwise to
adjust the right mirror and rotate
the control counterclockwise to
adjust the left mirror.
2. Move the control in the direction
you wish to tilt the mirror.
3. Return to the center position to
lock mirrors in place.
2006 Expedition(exd)
Owners Guide (post-2002-fmt)
USA(fus)
Driver Controls
112
Page 246 of 360
air suspension system will stay active for 40 minutes after the ignition is
turned off to accommodate any load changes. (The air compressor may
run when the vehicle is off; this is normal.)
The air suspension shut-off switch is
located behind an access panel on
the left rear quarter trim panel, near
the liftgate. To remove the panel,
turn the control counterclockwise.
On vehicles equipped with
air suspension, turn the air
suspension and the ignition switch
off prior to jacking, hoisting or
towing your vehicle.
Press the bottom portion of the
switch to turn off the air
suspension.
LIMITED-SLIP AXLE (IF EQUIPPED)
This axle provides added traction on slippery surfaces, particularly when
one wheel is on a poor traction surface. Under normal conditions, the
limited slip axle functions like a standard rear axle.
2006 Expedition(exd)
Owners Guide (post-2002-fmt)
USA(fus)
Driving
246
Page 279 of 360
•Towing a trailer
•Driving vehicles equipped with a camper body
•Driving vehicles with a load on the cargo rack
Drive cautiously when using a dissimilar spare tire/wheel and seek
service as soon as possible.
Spare tire information
Note:If your vehicle is equipped with the tire pressure monitoring
system (TPMS), the system indicator light will illuminate when the spare
is in use. To restore the full functionality of the TPMS system, all road
wheels equipped with the tire pressure monitoring sensors must be
mounted on the vehicle
If your vehicle is equipped with TPMS, have a flat tire serviced by an
authorized dealer in order to prevent damage to the TPMS sensor, refer
toTire Pressure Monitoring System (TPMS)in theTires, Wheels and
Loadingchapter. Replace the spare tire with a road tire as soon as
possible.
Location of the spare tire and tools
The spare tire and tools for your vehicle are stowed in the following
locations:
Item Location
Spare tire Under the vehicle, just forward of
the rear bumper
Jack tools and jacking instructions Under the access panel located in
the floor compartment behind the
rear seat
Removing the jack and tools
1. Open the liftgate, then locate the access panel on the floor behind the
3rd row seat. Unlatch and remove the panel.
2. Remove the jack and tools assembly tray from the compartment by
turning the wing-nut counterclockwise to relieve tension against the jack
assembly tray.
3. Unsnap the wheel lug nut wrench, jack extension and handle from the
plastic tray. Remove the jack and instruction sheet from the tray
assembly.
2006 Expedition(exd)
Owners Guide (post-2002-fmt)
USA(fus)
Roadside Emergencies
279
Page 280 of 360
Removing the spare tire
1. Fold the rear seat down. Refer to
Rear seatsin theSeating and
safety restraintschapter.
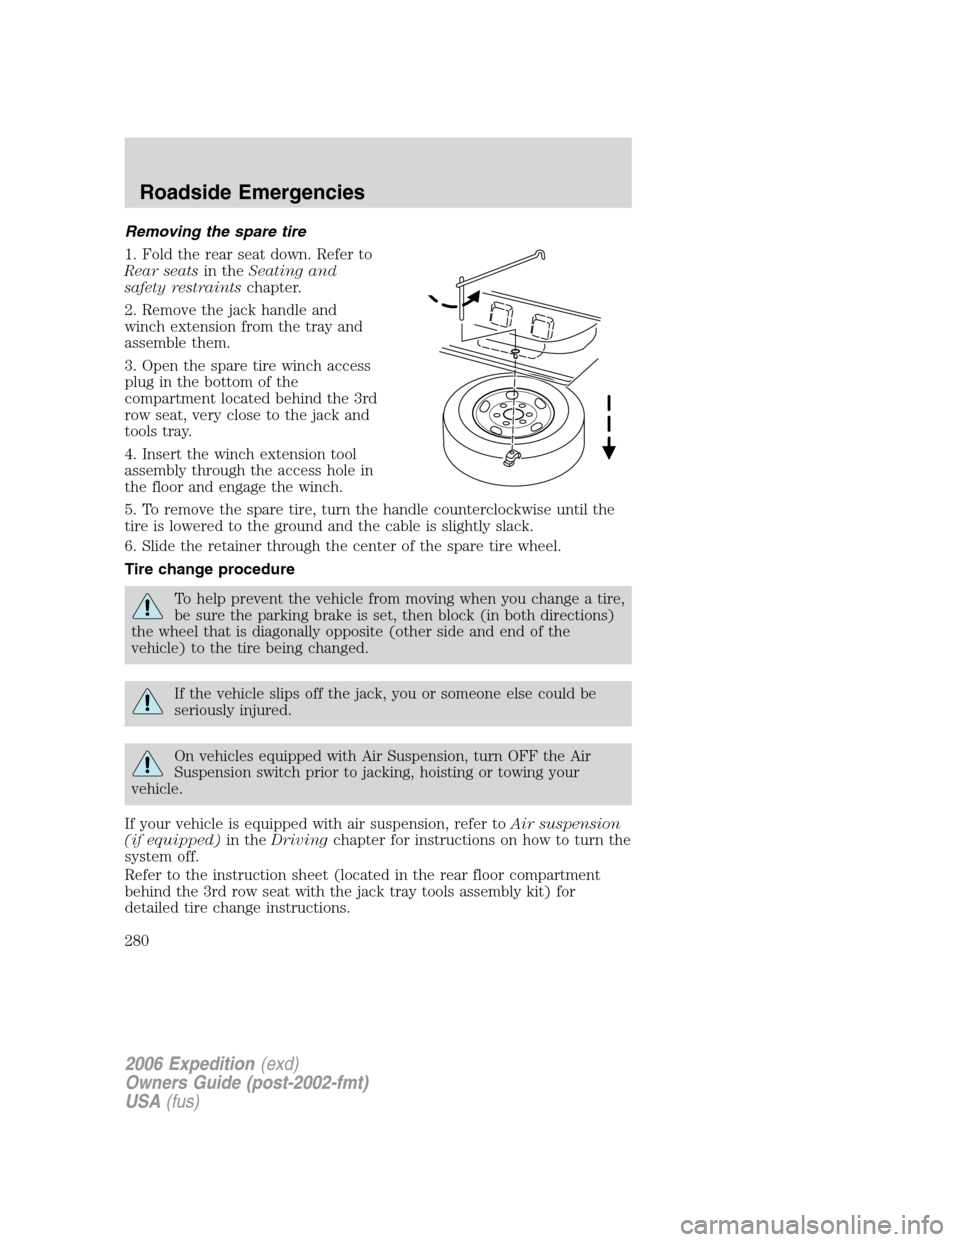
2. Remove the jack handle and
winch extension from the tray and
assemble them.
3. Open the spare tire winch access
plug in the bottom of the
compartment located behind the 3rd
row seat, very close to the jack and
tools tray.
4. Insert the winch extension tool
assembly through the access hole in
the floor and engage the winch.
5. To remove the spare tire, turn the handle counterclockwise until the
tire is lowered to the ground and the cable is slightly slack.
6. Slide the retainer through the center of the spare tire wheel.
Tire change procedure
To help prevent the vehicle from moving when you change a tire,
be sure the parking brake is set, then block (in both directions)
the wheel that is diagonally opposite (other side and end of the
vehicle) to the tire being changed.
If the vehicle slips off the jack, you or someone else could be
seriously injured.
On vehicles equipped with Air Suspension, turn OFF the Air
Suspension switch prior to jacking, hoisting or towing your
vehicle.
If your vehicle is equipped with air suspension, refer toAir suspension
(if equipped)in theDrivingchapter for instructions on how to turn the
system off.
Refer to the instruction sheet (located in the rear floor compartment
behind the 3rd row seat with the jack tray tools assembly kit) for
detailed tire change instructions.
2006 Expedition(exd)
Owners Guide (post-2002-fmt)
USA(fus)
Roadside Emergencies
280
Page 281 of 360
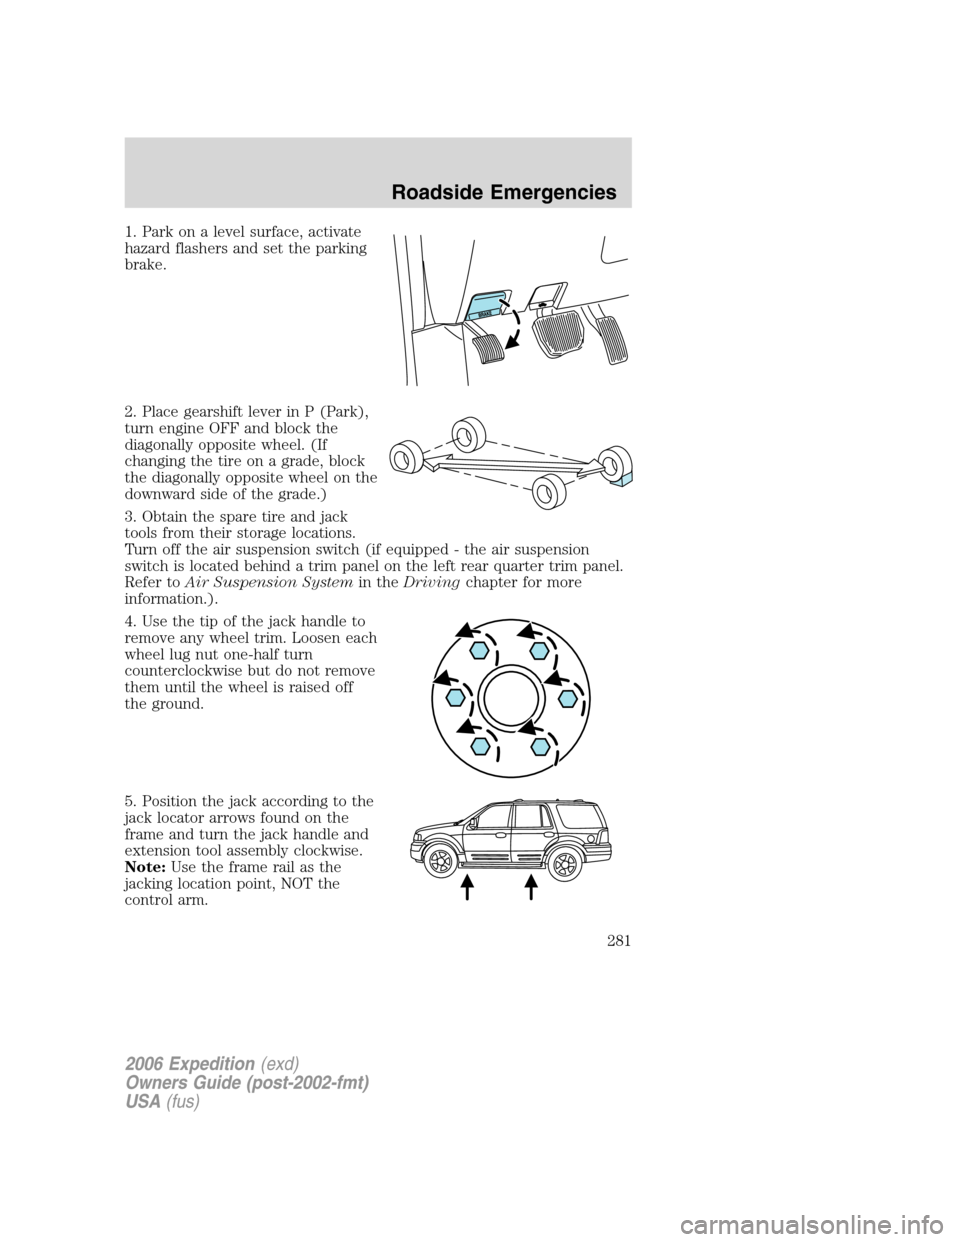
1. Park on a level surface, activate
hazard flashers and set the parking
brake.
2. Place gearshift lever in P (Park),
turn engine OFF and block the
diagonally opposite wheel. (If
changing the tire on a grade, block
the diagonally opposite wheel on the
downward side of the grade.)
3. Obtain the spare tire and jack
tools from their storage locations.
Turn off the air suspension switch (if equipped - the air suspension
switch is located behind a trim panel on the left rear quarter trim panel.
Refer toAir Suspension Systemin theDrivingchapter for more
information.).
4. Use the tip of the jack handle to
remove any wheel trim. Loosen each
wheel lug nut one-half turn
counterclockwise but do not remove
them until the wheel is raised off
the ground.
5. Position the jack according to the
jack locator arrows found on the
frame and turn the jack handle and
extension tool assembly clockwise.
Note:Use the frame rail as the
jacking location point, NOT the
control arm.
2006 Expedition(exd)
Owners Guide (post-2002-fmt)
USA(fus)
Roadside Emergencies
281
Page 283 of 360
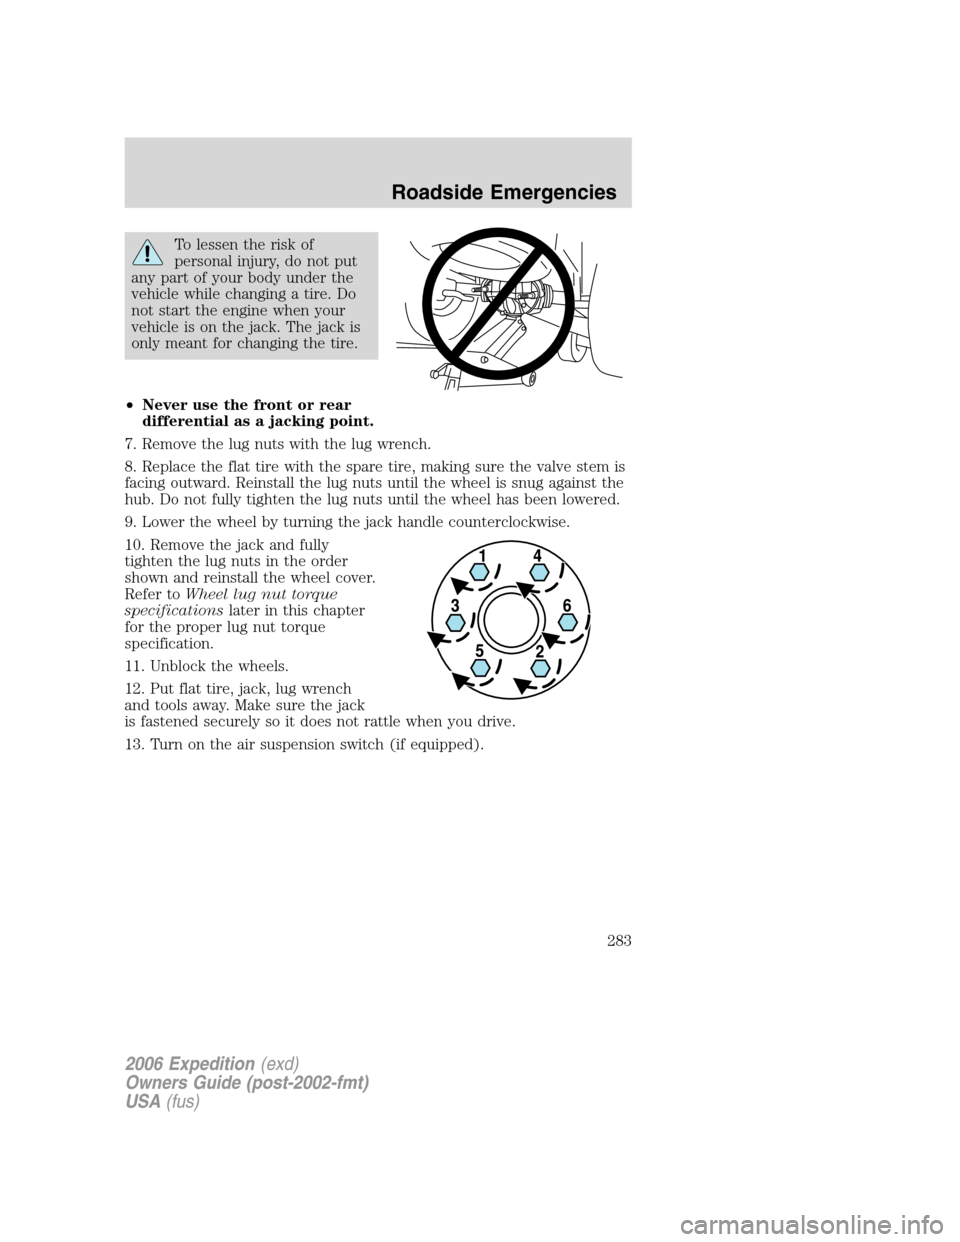
To lessen the risk of
personal injury, do not put
any part of your body under the
vehicle while changing a tire. Do
not start the engine when your
vehicle is on the jack. The jack is
only meant for changing the tire.
•Never use the front or rear
differential as a jacking point.
7. Remove the lug nuts with the lug wrench.
8. Replace the flat tire with the spare tire, making sure the valve stem is
facing outward. Reinstall the lug nuts until the wheel is snug against the
hub. Do not fully tighten the lug nuts until the wheel has been lowered.
9. Lower the wheel by turning the jack handle counterclockwise.
10. Remove the jack and fully
tighten the lug nuts in the order
shown and reinstall the wheel cover.
Refer toWheel lug nut torque
specificationslater in this chapter
for the proper lug nut torque
specification.
11. Unblock the wheels.
12. Put flat tire, jack, lug wrench
and tools away. Make sure the jack
is fastened securely so it does not rattle when you drive.
13. Turn on the air suspension switch (if equipped).
2006 Expedition(exd)
Owners Guide (post-2002-fmt)
USA(fus)
Roadside Emergencies
283