2006 FORD EXPEDITION clock
[x] Cancel search: clockPage 21 of 360
FF (Fast Forward):Works in tape
and CD modes.
In the tape mode, tape direction
automatically reverses when the end of the tape is reached. Fast forward
is stopped by pressing FF again.
In CD mode, FF advances the CD within the current track.
10.AUX:Press to toggle between
the current playing media and DVD
(if equipped).
SCAN:Press for a brief sampling of
radio stations, tape selections or CD
tracks. Press again to deactivate
scan mode.
11.Phone/MUTE:Press to mute
the playing media. Press again to
return to the playing media.
12.MENU:Press to access the
following options:
•AUTOSET:Press MENU until AUTOSET is displayed. Press
TEXT/SEL to turn this function on or off. AUTOSET allows you to set
the strongest local radio stations without losing your original manually
set preset stations for AM/FM1/FM2. If there are less than six strong
stations available on the frequency band, the remaining memory
preset controls will all store the last strong station available.
•Speed sensitive volume(if equipped): Radio volume changes
automatically and slightly with vehicle speed to compensate for road
and wind noise. Recommended level is 1–3. Level 0 turns the feature
off and level 7 is the maximum setting. To engage the speed sensitive
volume feature, press MENU until speed VOL X appears in the display.
Press TEXT/SEL to increase (
) decrease () volume
compensation levels. The selected level will appear in the display.
•Setting the clock:Press MENU until SELECT HOUR or SELECT
MINS is displayed. Press SEL to increase (
) or decrease ().
•Compression:In CD/MP3 modes, select to bring loud and soft
passages together for a more consistent listening level.
2006 Expedition(exd)
Owners Guide (post-2002-fmt)
USA(fus)
Entertainment Systems
21
Page 25 of 360
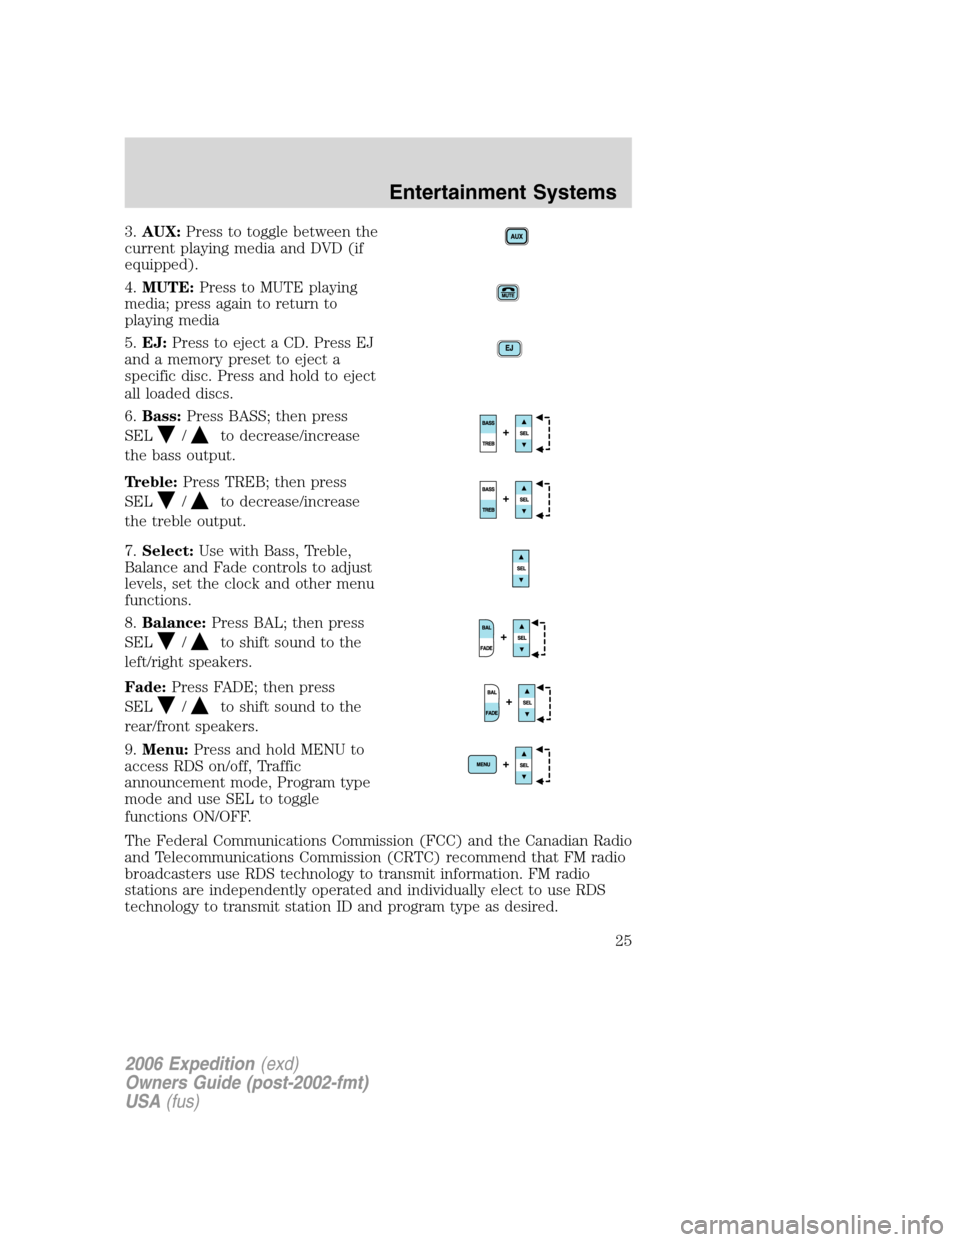
3.AUX:Press to toggle between the
current playing media and DVD (if
equipped).
4.MUTE:Press to MUTE playing
media; press again to return to
playing media
5.EJ:Press to eject a CD. Press EJ
and a memory preset to eject a
specific disc. Press and hold to eject
all loaded discs.
6.Bass:Press BASS; then press
SEL
/to decrease/increase
the bass output.
Treble:Press TREB; then press
SEL
/to decrease/increase
the treble output.
7.Select:Use with Bass, Treble,
Balance and Fade controls to adjust
levels, set the clock and other menu
functions.
8.Balance:Press BAL; then press
SEL
/to shift sound to the
left/right speakers.
Fade:Press FADE; then press
SEL
/to shift sound to the
rear/front speakers.
9.Menu:Press and hold MENU to
access RDS on/off, Traffic
announcement mode, Program type
mode and use SEL to toggle
functions ON/OFF.
The Federal Communications Commission (FCC) and the Canadian Radio
and Telecommunications Commission (CRTC) recommend that FM radio
broadcasters use RDS technology to transmit information. FM radio
stations are independently operated and individually elect to use RDS
technology to transmit station ID and program type as desired.
2006 Expedition(exd)
Owners Guide (post-2002-fmt)
USA(fus)
Entertainment Systems
25
Page 26 of 360
Traffic (if equipped):Allows you to hear traffic broadcasts. With the
feature ON, press SEEK or SCAN to find a station broadcasting a traffic
report (if it is broadcasting RDS data).Traffic information is not
available in most U.S. markets.
FIND Program type (if equipped):Allows you to search
RDS-equipped stations for a certain category of music format: Classic,
Country, Info, Jazz, Oldies, R&B, Religious, Rock, Soft, Top 40.
Show TYPE (if equipped):Displays the station’s call letters and
format.
Compression:Brings soft and loud CD passages together for a more
consistent listening level when in CD mode. Press MENU until
compression status is displayed. Press the SEL control to enable the
compression feature when COMPRESS OFF is displayed. Press the SEL
control again to disable the feature when COMPRESS ON is displayed.
Occupancy mode (if equipped):Press SEL to select ALL, DRIVER or
REAR SEAT occupancy mode.
Folder/Track Mode:In MP3 mode, press MENU until MODE appears in
the display. Use SEL to toggle between FOLDER (only tracks within
selected folder are accessible) or TRACK (all tracks on the disc are
accessible).
Autoset:Allows you to set the strongest local radio stations without
losing your original manually set preset stations for AM/FM1/FM2 . Press
MENU until AUTOSET appears in the display. Press SEL to toggle
ON/OFF. When the six strongest stations are filled, the station stored in
preset 1 will begin playing. If there are less than six strong stations, the
system will store the last one in the remaining presets. Press again to
disengage.
Speed sensitive volume:Radio volume changes automatically and
slightly with vehicle speed to compensate for road and wind noise.
Recommended level is 1–3. Level 0 turns the feature off and level 7 is
the maximum setting.
Press MENU until SPEED VOL X appears in the display. Then press SEL
to increase (
) or decrease () the volume setting. The level will
appear in the display.
Setting the clock:Press MENU until SELECT HOUR or SELECT
MINUTE is displayed. Use SEL to manually increase (
) or decrease
(
) the hours/minutes. Press MENU again to disengage clock mode.
2006 Expedition(exd)
Owners Guide (post-2002-fmt)
USA(fus)
Entertainment Systems
26
Page 80 of 360

Display options
Use this feature to change the
display setting. This feature can be
accessed by selecting “Display
Options” within the Main Menu.
Use the cursor control to select one
of the following options:
•MODE — auto (automatic), day
or night display settings.
•BRIGHTNESS— provides manual adjustment for screen brightness.
•Turn Display Off— Turns the display off. Press any button to turn the
display back on again.
System options
•Language Selection: Use the
cursor control to select and enter
the desired voice and text
language.
•Clock Setting: Your vehicle is equipped
with a clock in the VNR system. To set the clock:
1. Access the CLOCK screen.
2. Press the ADJUST control to
select the hours or minutes to set.
3. Use the cursor control to increase
or decrease the hours or minutes.
4. Press DONE to set the time.
5. Select the SET soft key to
synchronize/set the minutes and
seconds to GPS time. The hours will remain at the user set value.
You may choose to set the clock to a 12 or 24 hour display.
2006 Expedition(exd)
Owners Guide (post-2002-fmt)
USA(fus)
Entertainment Systems
80
Page 93 of 360

HEADLAMP CONTROL
Rotate the headlamp control to the
first position
to turn on the
parking lamps. Rotate to the second
position
to turn on the
headlamps.
Autolamp control
The autolamp system provides light
sensitive automatic on-off control of
the exterior lights normally
controlled by the headlamp control.
The autolamp system also keeps the
lights on for approximately 20
seconds or on vehicles equipped
with a message center, you can
select a delay from 0–180 seconds, after the ignition switch is turned to
OFF.
•To turn autolamps on, rotate the control counterclockwise.
•To turn autolamps off, rotate the control clockwise to OFF.
High beams
Push the lever toward the
instrument panel to activate. Pull
the lever towards you to deactivate.
A
INT2OFFOFFINT1
2006 Expedition(exd)
Owners Guide (post-2002-fmt)
USA(fus)
Lights
93
Page 96 of 360

5. Locate the vertical adjuster on
each headlamp, then use a 10 mm
socket/wrench to turn the adjuster
either counterclockwise (to adjust
down) or clockwise (to adjust up)
aligning the upper edge of the light
pattern up to the horizontal line.
6. HORIZONTAL AIM IS NOT
REQUIRED FOR THIS VEHICLE
AND IS NON-ADJUSTABLE.
7. Repeat Steps 3–5 for the other headlamp.
8. Close the hood and turn off the lamps.
TURN SIGNAL CONTROL
•Push down to activate the left
turn signal.
•Push up to activate the right turn
signal.
INTERIOR LAMPS
Front row map lamps (if equipped)
To turn on the map lamps, press the
rear edge of the lamp.
INT2OFFOFFINT1
2006 Expedition(exd)
Owners Guide (post-2002-fmt)
USA(fus)
Lights
96
Page 100 of 360
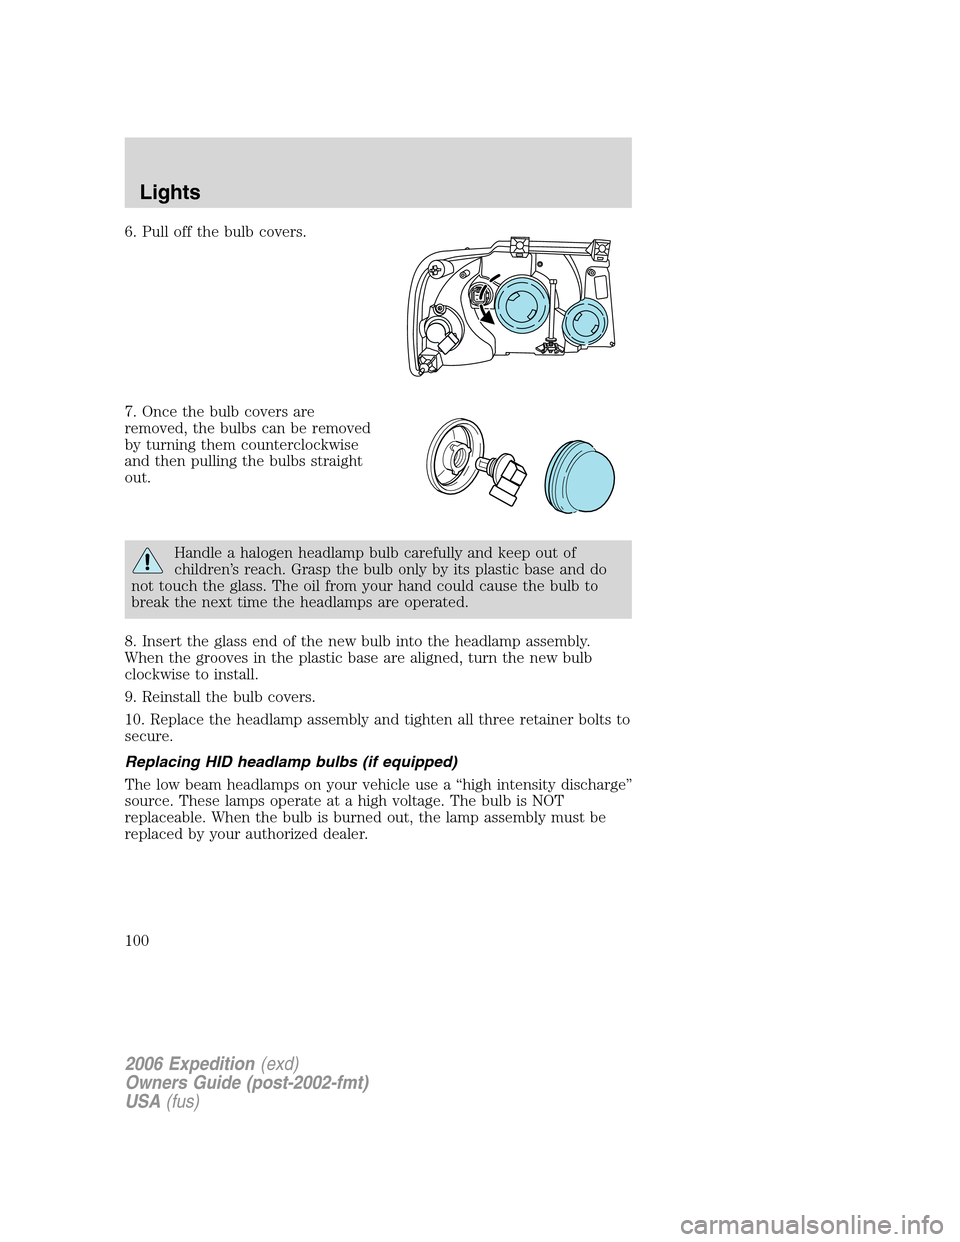
6. Pull off the bulb covers.
7. Once the bulb covers are
removed, the bulbs can be removed
by turning them counterclockwise
and then pulling the bulbs straight
out.
Handle a halogen headlamp bulb carefully and keep out of
children’s reach. Grasp the bulb only by its plastic base and do
not touch the glass. The oil from your hand could cause the bulb to
break the next time the headlamps are operated.
8. Insert the glass end of the new bulb into the headlamp assembly.
When the grooves in the plastic base are aligned, turn the new bulb
clockwise to install.
9. Reinstall the bulb covers.
10. Replace the headlamp assembly and tighten all three retainer bolts to
secure.
Replacing HID headlamp bulbs (if equipped)
The low beam headlamps on your vehicle use a “high intensity discharge”
source. These lamps operate at a high voltage. The bulb is NOT
replaceable. When the bulb is burned out, the lamp assembly must be
replaced by your authorized dealer.
2006 Expedition(exd)
Owners Guide (post-2002-fmt)
USA(fus)
Lights
100
Page 101 of 360
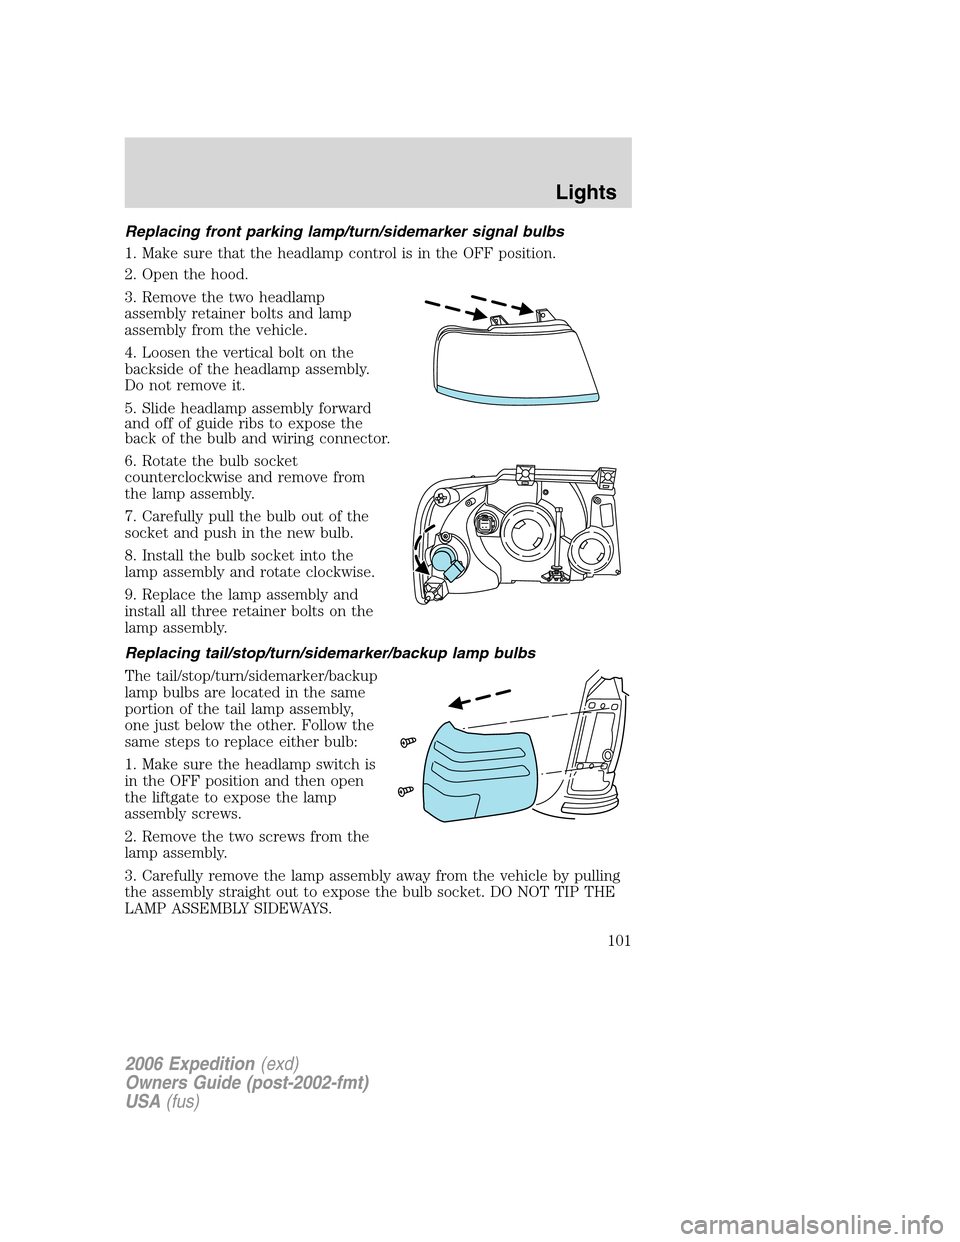
Replacing front parking lamp/turn/sidemarker signal bulbs
1. Make sure that the headlamp control is in the OFF position.
2. Open the hood.
3. Remove the two headlamp
assembly retainer bolts and lamp
assembly from the vehicle.
4. Loosen the vertical bolt on the
backside of the headlamp assembly.
Do not remove it.
5. Slide headlamp assembly forward
and off of guide ribs to expose the
back of the bulb and wiring connector.
6. Rotate the bulb socket
counterclockwise and remove from
the lamp assembly.
7. Carefully pull the bulb out of the
socket and push in the new bulb.
8. Install the bulb socket into the
lamp assembly and rotate clockwise.
9. Replace the lamp assembly and
install all three retainer bolts on the
lamp assembly.
Replacing tail/stop/turn/sidemarker/backup lamp bulbs
The tail/stop/turn/sidemarker/backup
lamp bulbs are located in the same
portion of the tail lamp assembly,
one just below the other. Follow the
same steps to replace either bulb:
1. Make sure the headlamp switch is
in the OFF position and then open
the liftgate to expose the lamp
assembly screws.
2. Remove the two screws from the
lamp assembly.
3. Carefully remove the lamp assembly away from the vehicle by pulling
the assembly straight out to expose the bulb socket. DO NOT TIP THE
LAMP ASSEMBLY SIDEWAYS.
2006 Expedition(exd)
Owners Guide (post-2002-fmt)
USA(fus)
Lights
101