Page 128 of 166

127
CONNECT NAV+
To set a new Date/Time (only with
ignition key at ON), select the “Date
& time” icon and then press the knob
15-fig. 1.
To set day, month, year, hours, min-
utes, mode (12h /24h), rotate the
knob 15-fig. 1to the required setting
and then press the knob 15-fig. 1,
each field will be activated in sequence.
Setting “GG”: selectday rotating
the knob 15-fig. 1and press it to con-
firm.
Setting “MMM”: select month rotat-
ing the knob 15-fig. 1and press it to
confirm.Setting AAAA: select year rotating
the knob 15-fig. 1and press it to con-
firm.
Setting HH: select hour rotating the
knob 15-fig. 1and press it to confirm.
Setting MM: select minutes rotating
the knob 15-fig. 1and press it to con-
firm.
Setting MODO (12h / 24h): select
12h or 24h mode rotating the knob
15-fig. 1and press it to confirm.
To activate the required settings, se-
lect and confirm “OK” by turning and
pressing the knob 15-fig. 1.IMPORTANTDuring setting,
hours (HH) are always displayed with
24h mode, regardless of set mode.
IMPORTANTIf set mode is 24h,
the display shows time using digits be-
tween 0 and 23; if set mode is 12h, the
display shows time using digits be-
tween 1 and 12.
Page 129 of 166
128
CONNECT NAV+
VEHICLE
To display the relevant screen page,
press one of the keypad keys 16-
fig. 1under VEHICLE.
Choosing this Setup option two dif-
ferent setting menus are displayed, ac-
cording to the car version.
Instrument panel
buzzer volume
To adjust the volume of warning/fail-
ure indications (buzzer) given by the
instrument panel.
The buzzer volume can be adjusted
on 8 levels.
IMPORTANT The buzzer can be
adjusted but not excluded.Rotate and press the knob 15-fig. 1
to select and confirm “Instrument pan-
el buzzer volume”.
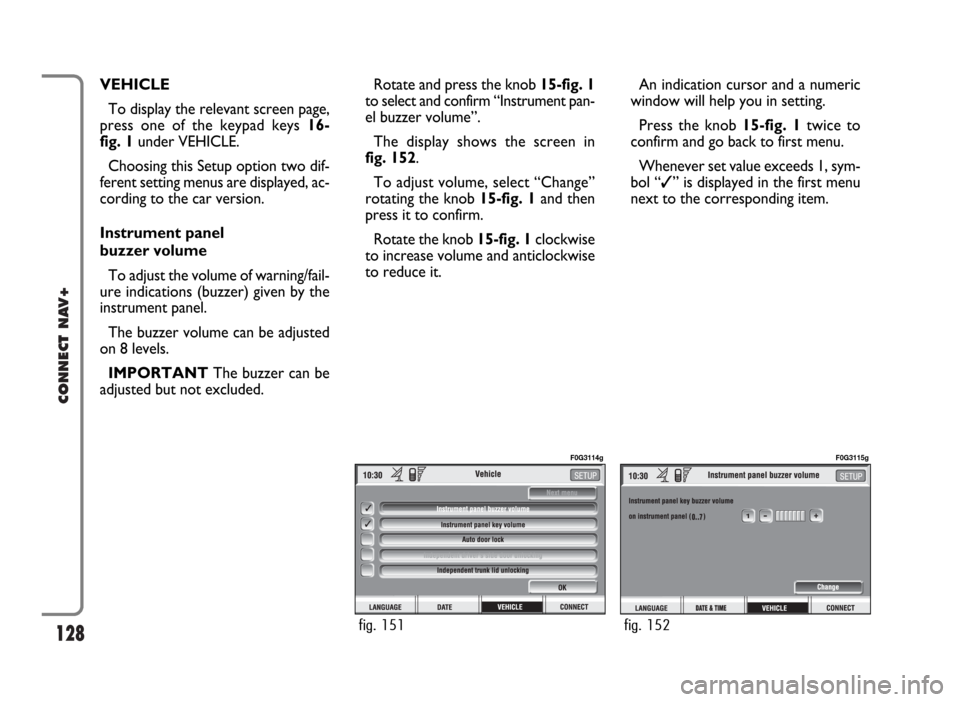
The display shows the screen in
fig. 152.
To adjust volume, select “Change”
rotating the knob 15-fig. 1and then
press it to confirm.
Rotate the knob 15-fig. 1clockwise
to increase volume and anticlockwise
to reduce it.An indication cursor and a numeric
window will help you in setting.
Press the knob 15-fig. 1twice to
confirm and go back to first menu.
Whenever set value exceeds 1, sym-
bol “✓” is displayed in the first menu
next to the corresponding item.
fig. 151
F0G3114g
fig. 152
F0G3115g
Page 130 of 166
129
CONNECT NAV+
Instrument panel key volume
To adjust or mute instrument panel
key volume (MODE, Ô, Õ).
Instrument panel key volume can be
adjusted on 8 levels. Buzzer volume
can be adjusted and also excluded.
Rotate and press the knob 15-fig. 1
to select and confirm “Instrument pan-
el key volume”.
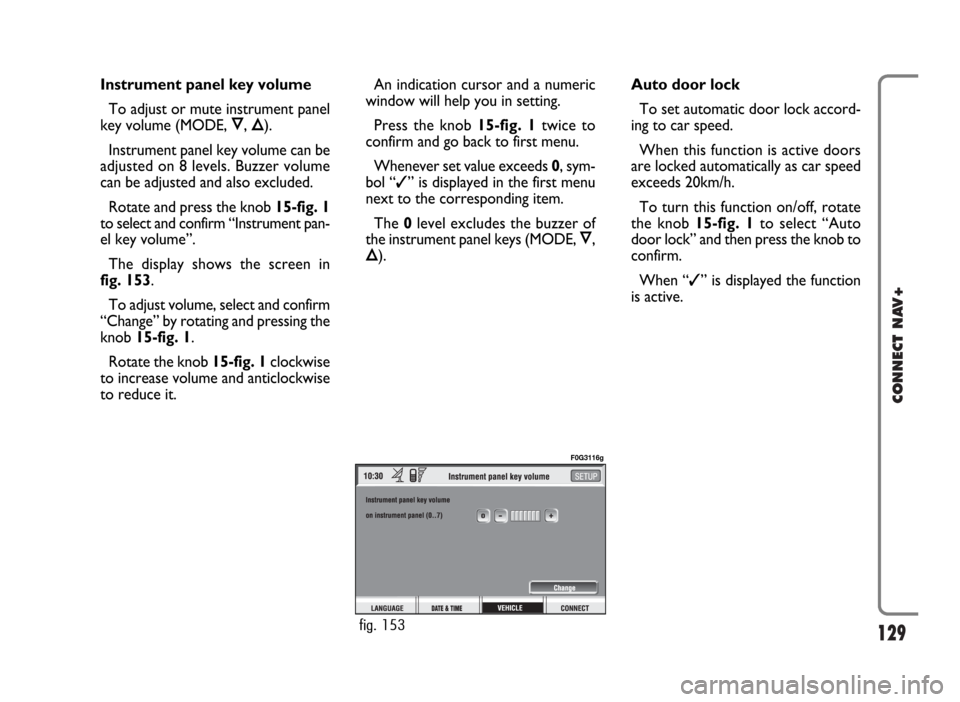
The display shows the screen in
fig. 153.
To adjust volume, select and confirm
“Change” by rotating and pressing the
knob 15-fig. 1.
Rotate the knob 15-fig. 1clockwise
to increase volume and anticlockwise
to reduce it.An indication cursor and a numeric
window will help you in setting.
Press the knob 15-fig. 1twice to
confirm and go back to first menu.
Whenever set value exceeds 0, sym-
bol “✓” is displayed in the first menu
next to the corresponding item.
The 0level excludes the buzzer of
the instrument panel keys (MODE, Ô,
Õ).Auto door lock
To set automatic door lock accord-
ing to car speed.
When this function is active doors
are locked automatically as car speed
exceeds 20km/h.
To turn this function on/off, rotate
the knob 15-fig. 1to select “Auto
door lock” and then press the knob to
confirm.
When “✓” is displayed the function
is active.
fig. 153
F0G3116g
Page 131 of 166
130
CONNECT NAV+
Independent driver’s side
door unlocking
IMPORTANTThis setting is pro-
vided on certain car versions only.
To activate/deactivate independent
driver’s side door unlocking.
When this function is on only the dri-
ver’s door will be unlocked.
When this function is off all doors
will be unlocked.
To turn this function on/off, rotate
the knob 15-fig. 1to select “Inde-
pendent driver’s side door unlocking”
and then press the knob to confirm.
When “✓” is displayed the function
is active.
Independent trunk lid opening
To activate/deactivate independent
trunk lid unlocking.
When this function is on, trunk lid
stays locked when the other doors are
unlocked.
When this function is off, trunk lid
is unlocked like the other doors.To turn this function on/off, rotate
the knob 15-fig. 1 to select “Inde-
pendent trunk lid opening” and then
press the knob to confirm.
When “✓” is displayed the function
is active.
OK
To activate and to store settings, se-
lect “OK” by rotating and pressing the
knob 15-fig. 1.
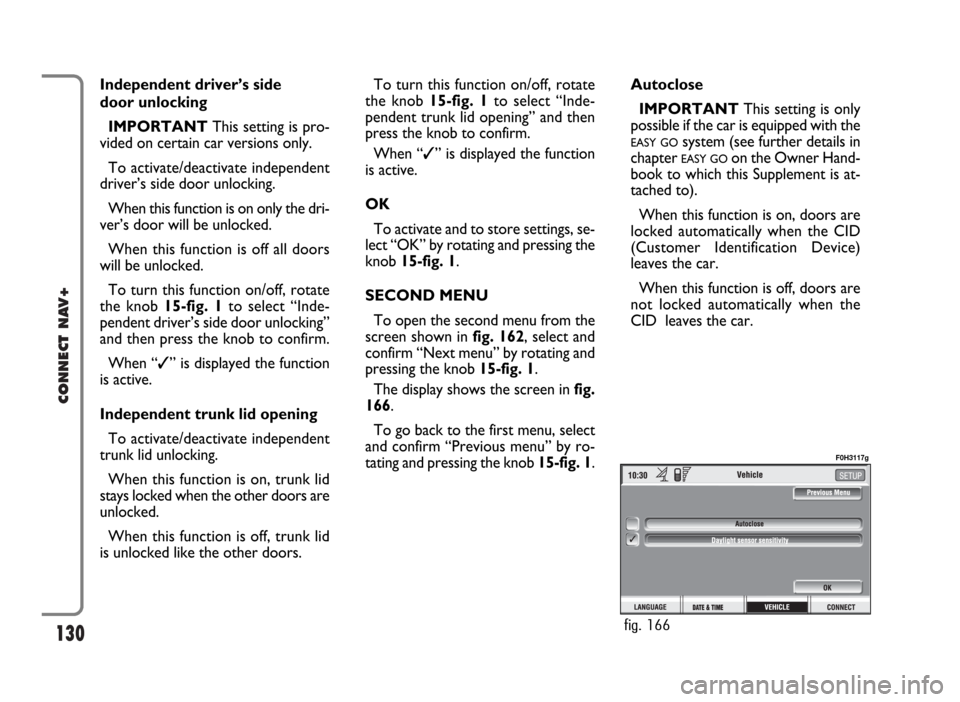
SECOND MENU
To open the second menu from the
screen shown in fig. 162, select and
confirm “Next menu” by rotating and
pressing the knob 15-fig. 1.
The display shows the screen in fig.
166.
To go back to the first menu, select
and confirm “Previous menu” by ro-
tating and pressing the knob 15-fig. 1.Autoclose
IMPORTANT This setting is only
possible if the car is equipped with the
EASY GOsystem (see further details in
chapter
EASY GOon the Owner Hand-
book to which this Supplement is at-
tached to).
When this function is on, doors are
locked automatically when the CID
(Customer Identification Device)
leaves the car.
When this function is off, doors are
not locked automatically when the
CID leaves the car.
fig. 166
F0H3117g
Page 132 of 166
131
CONNECT NAV+
To turn this function on/off, select
and confirm “Autoclose” by rotating
and pressing the knob 15-fig. 1.
When “✓” is displayed the function
is active.
OK
To activate and to store settings, se-
lect and confirm “OK” by rotating and
pressing the knob 15-fig. 1.Daylight sensor sensitivity
IMPORTANTThis setting is only
available if the car is equipped with
daylight sensor.
To adjust daylight sensor sensitivity,
select and confirm “Daylight sensor
sensitivity” by turning and pressing the
knob 15-fig.1.
The display shows the screen in fig.
167
Then select “Change” by rotating the
knob 15-fig.1and press it to confirm.
Turn the knob 15-fig.1clockwise to
increase the sensitivity level and anti-
clockwise to reduce it.Setting is aided by a cursor and a nu-
meric window.
Press the knob 15-fig.1twice to
confirm and go back to first menu.
fig. 167
F0H3118g
Page 133 of 166
132
CONNECT NAV+
CONNECT (settings)
To display the relevant screen page,
press one of the keypad keys 16-
fig. 1under CONNECT.
A new screen fig. 168is displayed
where it possible to choose the fol-
lowing:
– Instrument panel
– Video
– Power OFF.
– UnitsINSTRUMENT PANEL
Select icon “Instrument panel” by
turning an pressing knob 15-fig. 1to
confirm to set repetition of radio
and/or phone info on the instrument
panel display fig. 169.
To turn this function on/off, rotate
and press the knob 15-fig. 1.
When “✓” is displayed the function
is active.
To activate and to store settings, se-
lect and confirm “OK” by rotating and
pressing the knob 15-fig. 1.IMPORTANTSetting can only be
changed with ignition key at ON.
Available settings are the following:
TRIP B info duplication on
instrument panel
fig. 168
F0H3119g
fig. 169
F0H3120g
Page 135 of 166
– “Deactivation independent of igni-
tion key”.
Current activated setting will be high-
lighted.
Select the required setting by rotat-
ing the knob 15-fig. 1and then press
it to confirm.
Press “ESC” 14-fig. 1to go back to
previous screen.
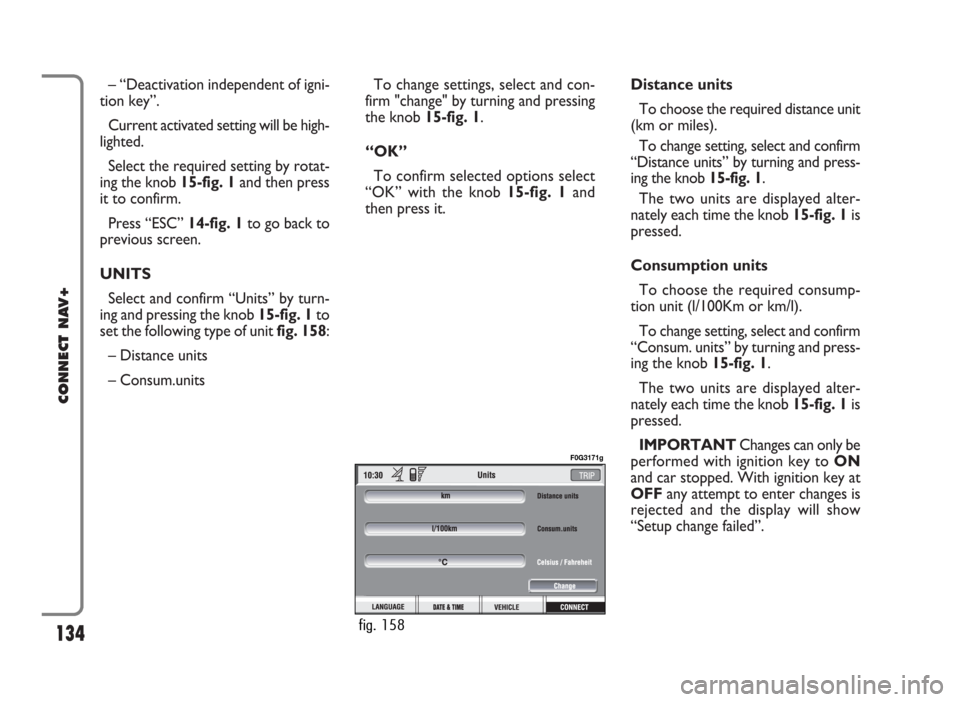
UNITS
Select and confirm “Units” by turn-
ing and pressing the knob 15-fig. 1to
set the following type of unit fig. 158:
– Distance units
– Consum.unitsTo change settings, select and con-
firm "change" by turning and pressing
the knob 15-fig. 1.
“OK”
To confirm selected options select
“OK” with the knob 15-fig. 1and
then press it.Distance units
To choose the required distance unit
(km or miles).
To change setting, select and confirm
“Distance units” by turning and press-
ing the knob 15-fig. 1.
The two units are displayed alter-
nately each time the knob 15-fig. 1is
pressed.
Consumption units
To choose the required consump-
tion unit (l/100Km or km/l).
To change setting, select and confirm
“Consum. units” by turning and press-
ing the knob 15-fig. 1.
The two units are displayed alter-
nately each time the knob 15-fig. 1is
pressed.
IMPORTANTChanges can only be
performed with ignition key to ON
and car stopped. With ignition key at
OFFany attempt to enter changes is
rejected and the display will show
“Setup change failed”.
134
CONNECT NAV+
fig. 158
F0G3171g
Page 141 of 166
140
CONNECT NAV+
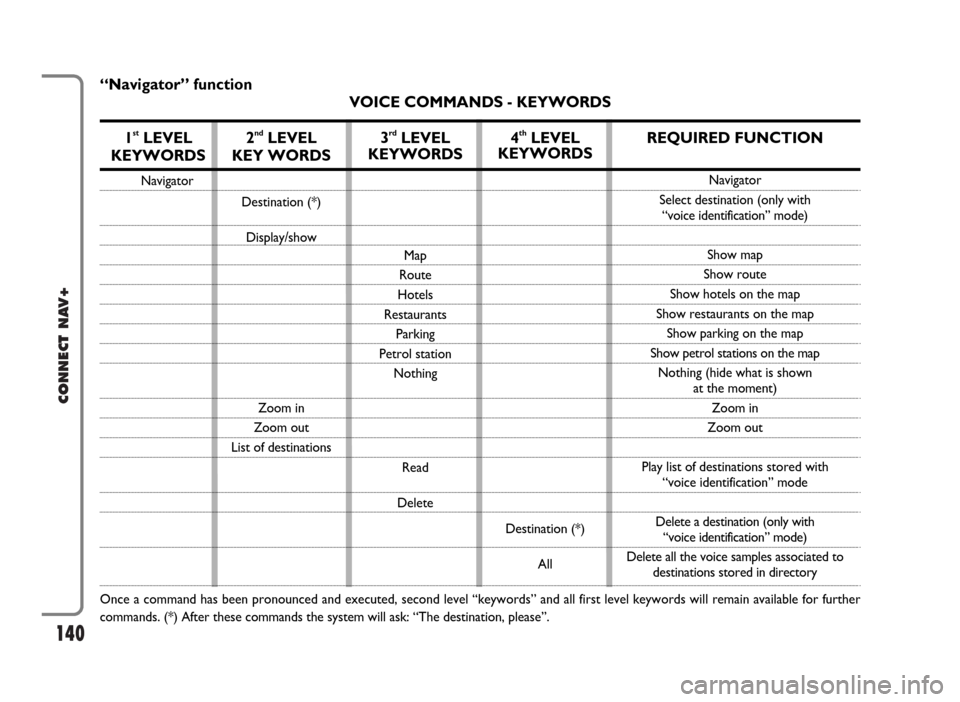
“Navigator” function
VOICE COMMANDS - KEYWORDS
1
stLEVEL
KEYWORDS
Navigator
Once a command has been pronounced and executed, second level “keywords” and all first level keywords will remain available for further
commands. (*) After these commands the system will ask: “The destination, please”.
2ndLEVEL
KEY WORDS
Destination (*)
Display/show
Zoom in
Zoom out
List of destinations
3rdLEVEL
KEYWORDS
Map
Route
Hotels
Restaurants
Parking
Petrol station
Nothing
Read
Delete
4thLEVEL
KEYWORDS
Destination (*)
All
REQUIRED FUNCTION
Navigator
Select destination (only with
“voice identification” mode)
Show map
Show route
Show hotels on the map
Show restaurants on the map
Show parking on the map
Show petrol stations on the map
Nothing (hide what is shown
at the moment)
Zoom in
Zoom out
Play list of destinations stored with
“voice identification” mode
Delete a destination (only with
“voice identification” mode)
Delete all the voice samples associated to
destinations stored in directory