Page 117 of 166
116
CONNECT NAV+
GENERAL INFORMATION
The on-board computer provides a
series of helpful data relevant to cur-
rent travel (e.g.: times, distances,
speed, fuel consumption). Certain in-
formation is only available with navi-
gation function on and depends on set
navigation route.
IMPORTANTCertain informa-
tion/operations hereafter described
are available/possible only with ignition
key turned to ON.
TRIP menu allows to set the desired
distance and fuel consumption mea-
sure unit.
TRIP menu also allows to input a
number of events (e.g. Tyre replace-
ment..., Birthday…) that can be trig-
gered both on set date or mileage.To display on-board computer
screen, press “TRIP” key 4-fig. 1.
To perform new settings or to have
information about TRIP settings, press
keypad16-fig. 1buttons: “TRIP”,
“TRIP B”, “SPEED”, “MY CAR”, “IN-
FO” or “RESET”.“GENERAL TRIP”
and “TRIP B” FUNCTION
Pressing button TRIP 4-fig.1 on the
CONNECT Nav+ system front pan-
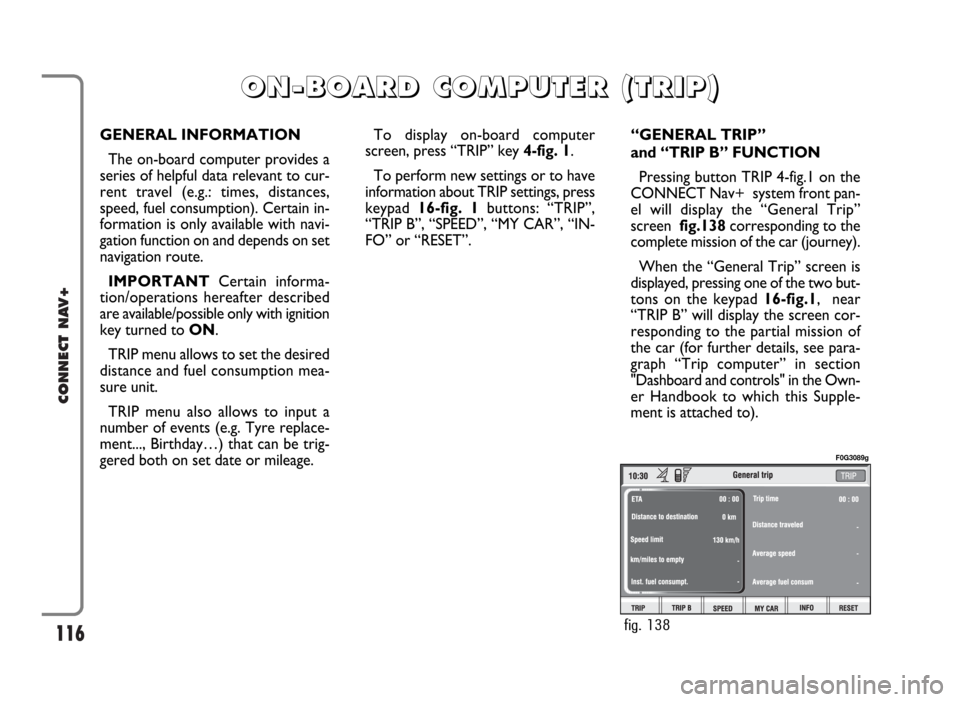
el will display the “General Trip”
screen fig.138corresponding to the
complete mission of the car (journey).
When the “General Trip” screen is
displayed, pressing one of the two but-
tons on the keypad 16-fig.1, near
“TRIP B” will display the screen cor-
responding to the partial mission of
the car (for further details, see para-
graph “Trip computer” in section
"Dashboard and controls" in the Own-
er Handbook to which this Supple-
ment is attached to).
O O
N N
- -
B B
O O
A A
R R
D D
C C
O O
M M
P P
U U
T T
E E
R R
( (
T T
R R
I I
P P
) )
fig. 138
F0G3089g
Page 118 of 166
117
CONNECT NAV+
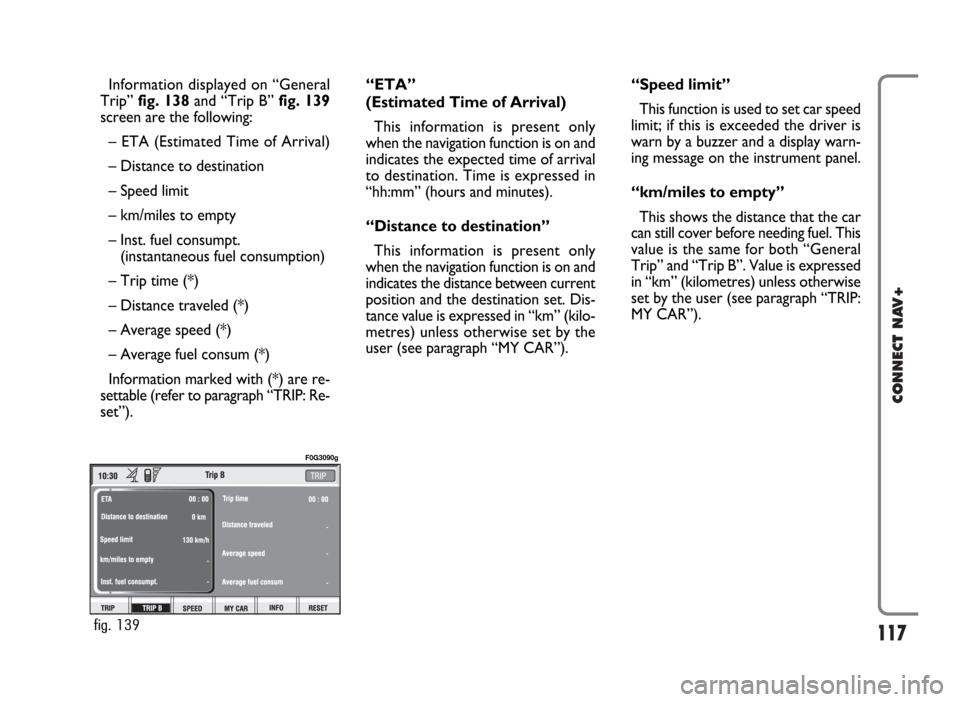
Information displayed on “General
Trip” fig. 138and “Trip B” fig. 139
screen are the following:
– ETA (Estimated Time of Arrival)
– Distance to destination
– Speed limit
– km/miles to empty
– Inst. fuel consumpt.
(instantaneous fuel consumption)
– Trip time (*)
– Distance traveled (*)
– Average speed (*)
– Average fuel consum (*)
Information marked with (*) are re-
settable (refer to paragraph “TRIP: Re-
set”).“ETA”
(Estimated Time of Arrival)
This information is present only
when the navigation function is on and
indicates the expected time of arrival
to destination. Time is expressed in
“hh:mm” (hours and minutes).
“Distance to destination”
This information is present only
when the navigation function is on and
indicates the distance between current
position and the destination set. Dis-
tance value is expressed in “km” (kilo-
metres) unless otherwise set by the
user (see paragraph “MY CAR”).“Speed limit”
This function is used to set car speed
limit; if this is exceeded the driver is
warn by a buzzer and a display warn-
ing message on the instrument panel.
“km/miles to empty”
This shows the distance that the car
can still cover before needing fuel. This
value is the same for both “General
Trip” and “Trip B”. Value is expressed
in “km” (kilometres) unless otherwise
set by the user (see paragraph “TRIP:
MY CAR”).
fig. 139
F0G3090g
Page 120 of 166
119
CONNECT NAV+
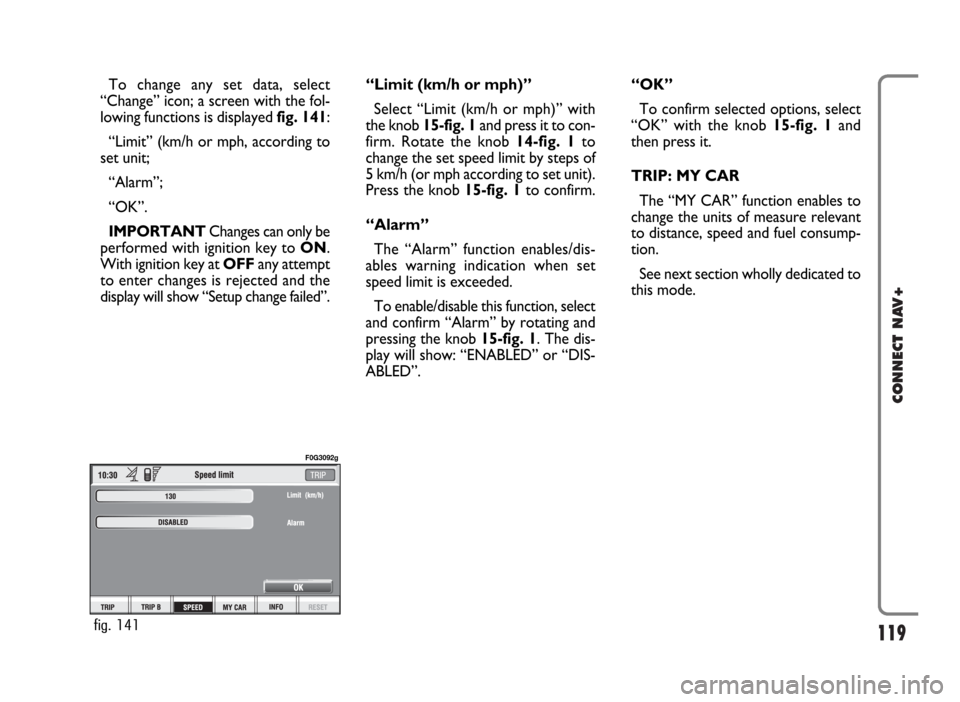
To change any set data, select
“Change” icon; a screen with the fol-
lowing functions is displayed fig. 141:
“Limit” (km/h or mph, according to
set unit;
“Alarm”;
“OK”.
IMPORTANTChanges can only be
performed with ignition key to ON.
With ignition key at OFFany attempt
to enter changes is rejected and the
display will show “Setup change failed”.“Limit (km/h or mph)”
Select “Limit (km/h or mph)” with
the knob 15-fig. 1and press it to con-
firm. Rotate the knob14-fig. 1to
change the set speed limit by steps of
5 km/h (or mph according to set unit).
Press the knob 15-fig. 1to confirm.
“Alarm”
The “Alarm” function enables/dis-
ables warning indication when set
speed limit is exceeded.
To enable/disable this function, select
and confirm “Alarm” by rotating and
pressing the knob 15-fig. 1. The dis-
play will show: “ENABLED” or “DIS-
ABLED”.“OK”
To confirm selected options, select
“OK” with the knob 15-fig. 1and
then press it.
TRIP: MY CAR
The “MY CAR” function enables to
change the units of measure relevant
to distance, speed and fuel consump-
tion.
See next section wholly dedicated to
this mode.
fig. 141
F0G3092g
Page 121 of 166
120
CONNECT NAV+
TRIP: INFO
Pressing one of the keypad keys16-
fig. 1, on “INFO” fig. 138 - 139, dis-
plays fig. 142screen showing the fol-
lowing functions:
“Maintenance Info”;
“Personal info”.“Maintenance Info” function
“Service Info” gives information rel-
evant to next Scheduled Servicing op-
eration expressed in km or mi and
days to go before servicing (for cer-
tain versions only).To display the required information,
select “Maintenance Info” with the
knob 15-fig. 1and press it to con-
firm; screen in fig. 143is displayed.
fig. 142
F0G3169g
fig. 143
F0G3170g
Page 122 of 166
121
CONNECT NAV+
“Personal info” function
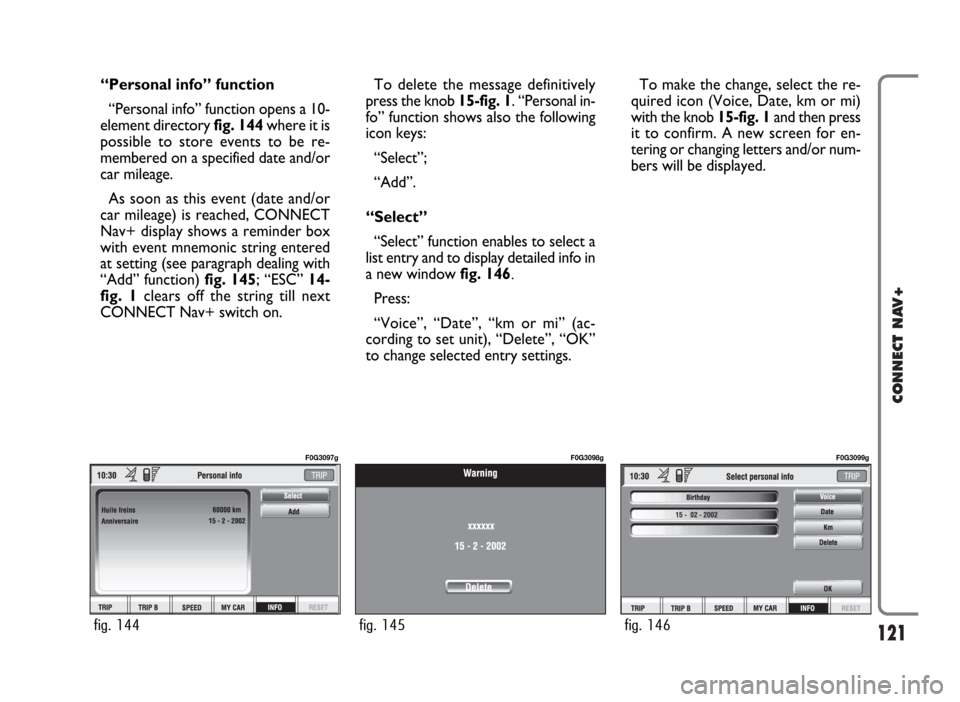
“Personal info” function opens a 10-
element directory fig. 144where it is
possible to store events to be re-
membered on a specified date and/or
car mileage.
As soon as this event (date and/or
car mileage) is reached, CONNECT
Nav+ display shows a reminder box
with event mnemonic string entered
at setting (see paragraph dealing with
“Add” function) fig. 145; “ESC” 14-
fig. 1clears off the string till next
CONNECT Nav+ switch on.To delete the message definitively
press the knob 15-fig. 1. “Personal in-
fo” function shows also the following
icon keys:
“Select”;
“Add”.
“Select”
“Select” function enables to select a
list entry and to display detailed info in
a new window fig. 146.
Press:
“Voice”, “Date”, “km or mi” (ac-
cording to set unit), “Delete”, “OK”
to change selected entry settings.To make the change, select the re-
quired icon (Voice, Date, km or mi)
with the knob 15-fig. 1and then press
it to confirm. A new screen for en-
tering or changing letters and/or num-
bers will be displayed.
fig. 144
F0G3097g
fig. 145
F0G3098g
fig. 146
F0G3099g
Page 125 of 166
124
CONNECT NAV+
The MY CAR mode enables to set
different car and CONNECT Nav+
system operating modes and parame-
ters.
Parameters and operating modes
have been grouped in the following
four areas:
– LANGUAGE
– DATE & TIME
– VEHICLE
– CONNECT.
Every above area is then divided in
different sub-areas. Read carefully
through this chapter to learn any fea-
tures offered by CONNECT Nav+
system.
To enter the MY CAR mode, press
the “TRIP” key 4-fig. 1on the front
panel, then press one of the two keys
set under the “MY CAR” icon key.
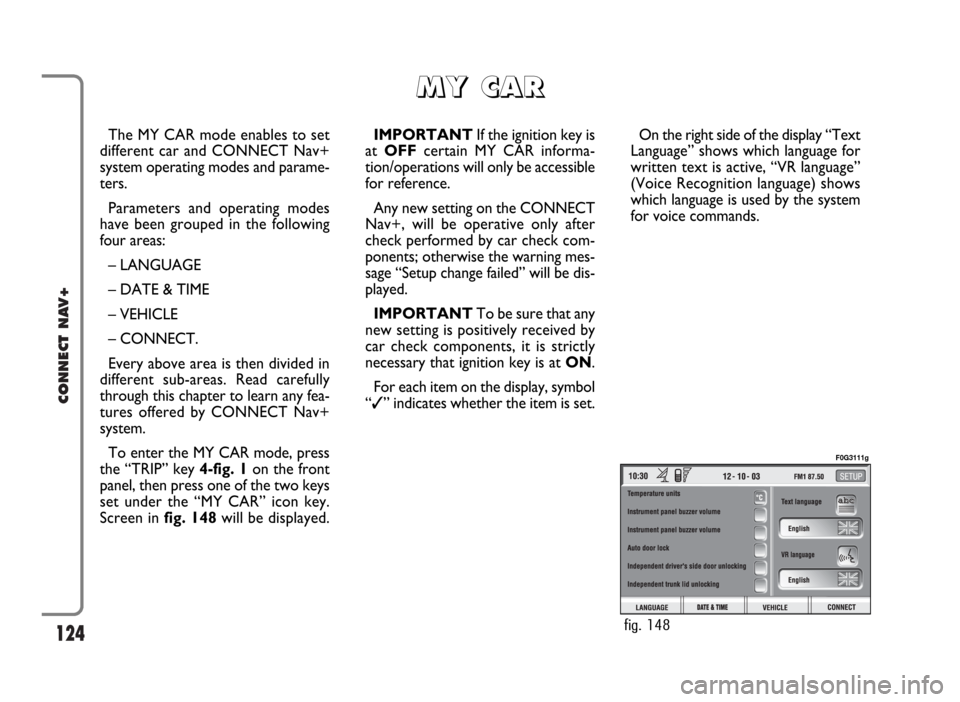
Screen in fig. 148will be displayed.IMPORTANTIf the ignition key is
at OFFcertain MY CAR informa-
tion/operations will only be accessible
for reference.
Any new setting on the CONNECT
Nav+, will be operative only after
check performed by car check com-
ponents; otherwise the warning mes-
sage “Setup change failed” will be dis-
played.
IMPORTANTTo be sure that any
new setting is positively received by
car check components, it is strictly
necessary that ignition key is at ON.
For each item on the display, symbol
“✓” indicates whether the item is set.On the right side of the display “Text
Language” shows which language for
written text is active, “VR language”
(Voice Recognition language) shows
which language is used by the system
for voice commands.
M M
Y Y
C C
A A
R R
fig. 148
F0G3111g
Page 126 of 166
125
CONNECT NAV+
IMPORTANTSetting (whatever)
language will start the updating pro-
cedure for both the written text and
for voice commands and instructions.
The written text (strings) will be up-
dated immediately upon selecting the
language. To update voice command
and message language the Setup CD
shall be inserted. if the Setup CD is not
inserted when requested, the required
voice command and message language
will not be updated.
To change parameters and operating
modes, press keypad keys 16-fig. 1
under LANGUAGE, DATE & TIME,
VEHICLE or CONNECT.
This operation will display the spe-
cific screen thus allowing the desired
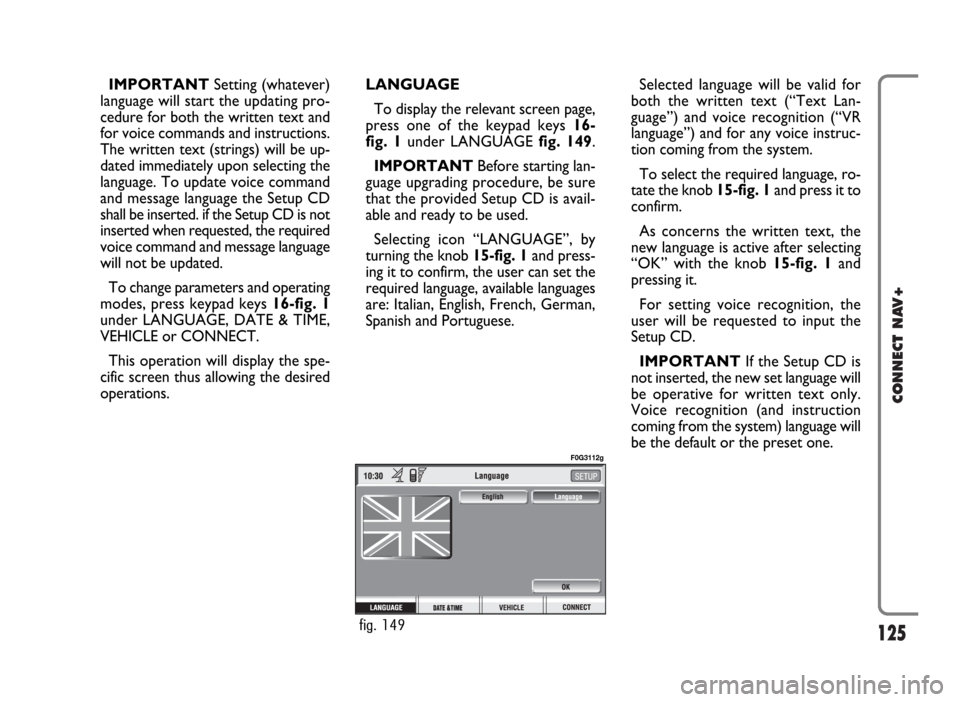
operations.LANGUAGE
To display the relevant screen page,
press one of the keypad keys 16-
fig. 1under LANGUAGE fig. 149.
IMPORTANTBefore starting lan-
guage upgrading procedure, be sure
that the provided Setup CD is avail-
able and ready to be used.
Selecting icon “LANGUAGE”, by
turning the knob 15-fig. 1and press-
ing it to confirm, the user can set the
required language, available languages
are: Italian, English, French, German,
Spanish and Portuguese.Selected language will be valid for
both the written text (“Text Lan-
guage”) and voice recognition (“VR
language”) and for any voice instruc-
tion coming from the system.
To select the required language, ro-
tate the knob 15-fig. 1and press it to
confirm.
As concerns the written text, the
new language is active after selecting
“OK” with the knob 15-fig. 1and
pressing it.
For setting voice recognition, the
user will be requested to input the
Setup CD.
IMPORTANTIf the Setup CD is
not inserted, the new set language will
be operative for written text only.
Voice recognition (and instruction
coming from the system) language will
be the default or the preset one.
fig. 149
F0G3112g
Page 127 of 166
126
CONNECT NAV+
The display will show the following
string:
“Insert Setup CD to change language
of messages and voice commands.
Press ESC to cancel”.
If the Setup CD is inserted the fol-
lowing message will be permanently
displayed:
“System will be unavailable for a few
seconds and calls in progress will be
terminated. Press ENTER to continue
or ESC to cancel”.
If the knob 15-fig. 1has been
pressed, the following message will be
displayed permanently:
“Message and voice command lan-
guage change in progress. Do not turn
off system. Please wait”.
The end of the procedure is indicat-
ed by the following message:
“Message and voice command lan-
guage change concluded correctly”.If some errors occur during language
updating, the following message will be
displayed:
“Language change failed. Please re-
peat procedure”.
This message asks the user to repeat
the above procedure.
Whenever the system is switched on
turning the ignition key to ON, the
language module is checked and if the
system finds a fault the following mes-
sage is displayed:
“Voice commands and messages not
available. Please change the language”.
This message asks the user to repeat
language change procedure.
The user shall set again the desired
language in the SETUP menu and then
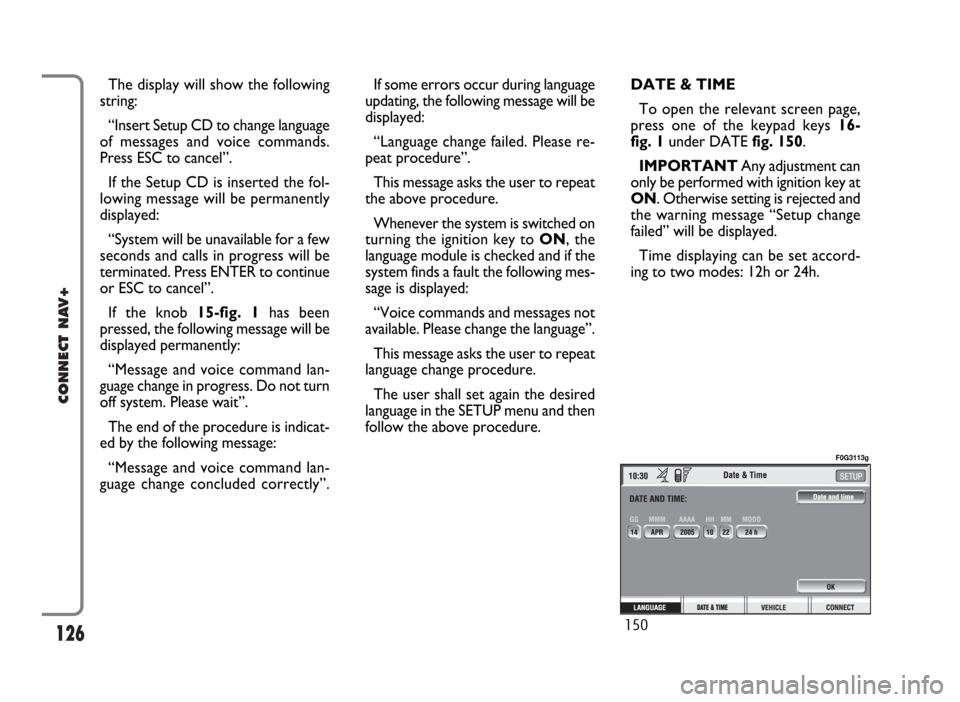
follow the above procedure.DATE & TIME
To open the relevant screen page,
press one of the keypad keys 16-
fig. 1under DATE fig. 150.
IMPORTANTAny adjustment can
only be performed with ignition key at
ON. Otherwise setting is rejected and
the warning message “Setup change
failed” will be displayed.
Time displaying can be set accord-
ing to two modes: 12h or 24h.
150
F0G3113g