2006 CHEVROLET TAHOE brake
[x] Cancel search: brakePage 346 of 540
For example, adding a 700 lb (318 kg) snow plow
actually adds more than 700 lbs (318 kg) to the front
axle. Using the formula, if the snow plow is 4 ft (122 cm)
in front of the front axle and the wheel base is
10 ft (305 cm), then:
W = 700 lb (318 kg)
A = 4 ft (122 cm)
W.B. = 10 ft (305 cm)
(W x (A + W.B.))/W.B. = (700 x (4 + 10))/10 =
980 lbs (445 kg)
So, if your vehicle’s front axle reserve capacity is more
than 980 lbs (445 kg), you could add the snow plow
without exceeding the front GAWR.
Q:What if I want to add heavier equipment to my
vehicle?
A:You can add heavier equipment on the front of the
vehicle if you compensate for it by carrying fewer
passengers, less cargo, or by positioning cargo
towards the rear. This has the effect of reducing the
load on the front. However, the front GAWR, rear
GAWR and the gross vehicle weight rating (GVWR)
must never be exceeded.
{CAUTION:
On some vehicles that have certain front
mounted equipment, such as a snow plow, it
may be possible to load the front axle to the
front gross axle weight rating (GAWR) but not
have enough weight on the rear axle to have
proper braking performance. If your brakes can
not work properly, you could have a crash. To
help your brakes work properly when a snow
plow is installed, always follow the snow plow
manufacturer or installer’s recommendation for
rear ballast to ensure a proper front and rear
weight distribution ratio, even though the
actual front weight may be less than the front
GAWR, and the total vehicle weight is less
than the gross vehicle weight rating (GVWR).
Maintaining a proper front and rear weight
distribution ratio is necessary to provide
proper braking performance.
4-56
Page 349 of 540
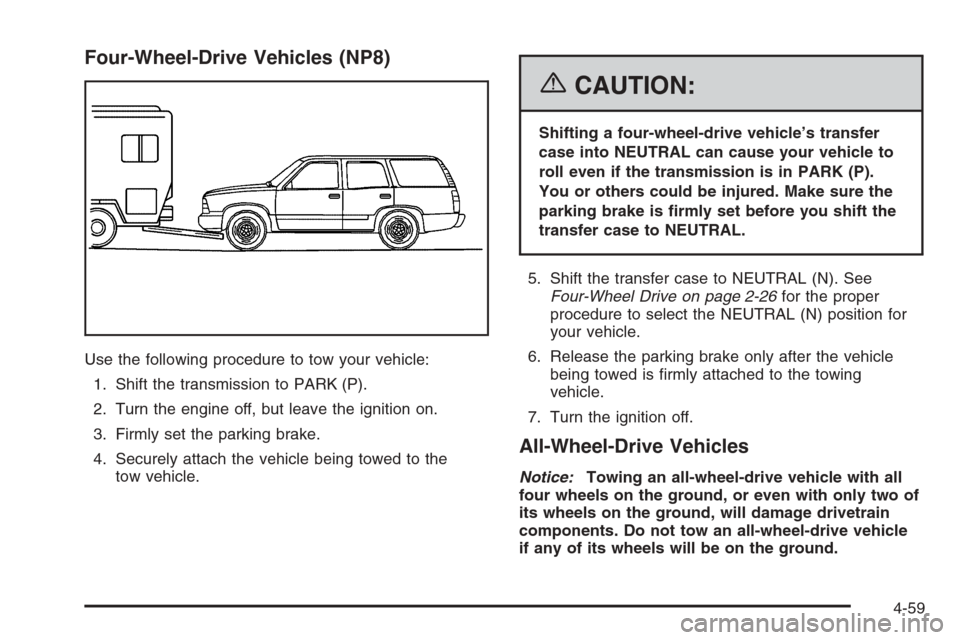
Four-Wheel-Drive Vehicles (NP8)
Use the following procedure to tow your vehicle:
1. Shift the transmission to PARK (P).
2. Turn the engine off, but leave the ignition on.
3. Firmly set the parking brake.
4. Securely attach the vehicle being towed to the
tow vehicle.
{CAUTION:
Shifting a four-wheel-drive vehicle’s transfer
case into NEUTRAL can cause your vehicle to
roll even if the transmission is in PARK (P).
You or others could be injured. Make sure the
parking brake is �rmly set before you shift the
transfer case to NEUTRAL.
5. Shift the transfer case to NEUTRAL (N). See
Four-Wheel Drive on page 2-26for the proper
procedure to select the NEUTRAL (N) position for
your vehicle.
6. Release the parking brake only after the vehicle
being towed is �rmly attached to the towing
vehicle.
7. Turn the ignition off.
All-Wheel-Drive Vehicles
Notice:Towing an all-wheel-drive vehicle with all
four wheels on the ground, or even with only two of
its wheels on the ground, will damage drivetrain
components. Do not tow an all-wheel-drive vehicle
if any of its wheels will be on the ground.
4-59
Page 350 of 540
Dolly Towing
Two-Wheel-Drive Vehicles
Notice:If you tow a two-wheel-drive vehicle with
the rear wheels on the ground, the transmission
could be damaged. The repairs would not be
covered by your warranty. Never tow your vehicle
with the rear wheels on the ground.
Two-wheel-drive vehicles should not be towed with
the rear wheels on the ground. Two-wheel-drive
transmissions have no provisions for internal lubrication
while being towed.
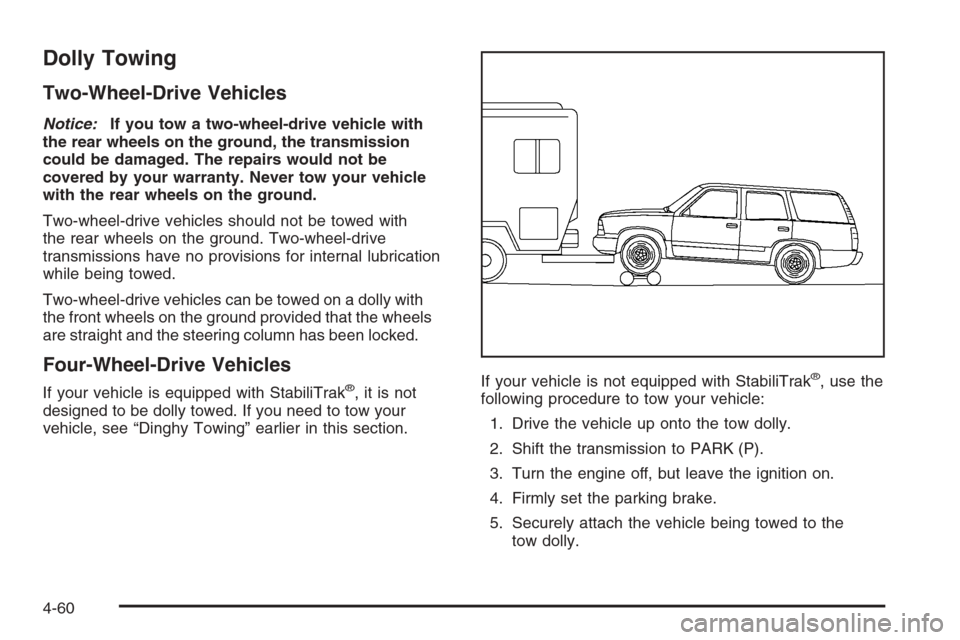
Two-wheel-drive vehicles can be towed on a dolly with
the front wheels on the ground provided that the wheels
are straight and the steering column has been locked.
Four-Wheel-Drive Vehicles
If your vehicle is equipped with StabiliTrak®,itisnot
designed to be dolly towed. If you need to tow your
vehicle, see “Dinghy Towing” earlier in this section.If your vehicle is not equipped with StabiliTrak
®, use the
following procedure to tow your vehicle:
1. Drive the vehicle up onto the tow dolly.
2. Shift the transmission to PARK (P).
3. Turn the engine off, but leave the ignition on.
4. Firmly set the parking brake.
5. Securely attach the vehicle being towed to the
tow dolly.
4-60
Page 351 of 540
{CAUTION:
Shifting a four-wheel-drive vehicle’s transfer
case into NEUTRAL can cause your vehicle to
roll even if the transmission is in PARK (P).
You or others could be injured. Make sure the
parking brake is �rmly set before you shift the
transfer case to NEUTRAL.
6. Shift the transfer case to NEUTRAL. See
Four-Wheel Drive on page 2-26for the proper
procedure to select the NEUTRAL position for
your vehicle.
7. Release the parking brake only after the vehicle
being towed is �rmly attached to the towing
vehicle.
8. Turn the ignition off and lock the steering column.
All-Wheel-Drive Vehicles
Notice:Towing an all-wheel-drive vehicle with all
four wheels on the ground, or even with only two of
its wheels on the ground, will damage drivetrain
components. Do not tow an all-wheel-drive vehicle
if any of its wheels will be on the ground.
Level Control
Automatic Level Control
The automatic level control rear suspension is available
on C/K 1500 vehicles and comes as a part of the
Autoride
®suspension, if equipped.
This type of level control is fully automatic and will
provide a better leveled riding position as well as better
handling under a variety of passenger and loading
conditions. An air compressor connected to the rear
shocks will raise or lower the rear of the vehicle
to maintain proper vehicle height. The system is
activated when the ignition key is turned to RUN and
will automatically adjust vehicle height thereafter.
The system may exhaust (lower vehicle height) for up to
ten minutes after the ignition key has been turned off.
You may hear the air compressor operating when
the height is being adjusted.
If a self-equalizing hitch is being used, it is
recommended to allow the shocks to in�ate, thereby
leveling the vehicle prior to adjusting the hitch.
4-61
Page 352 of 540
Autoride®
If equipped, the Autoride®feature will provide a superior
vehicle ride and handling under a variety of passenger
and loading conditions.
The system is fully automatic and uses a computer
controller to continuously monitor vehicle speed, wheel
to body position, lift/dive and steering position of the
vehicle. The controller then sends signals to each shock
absorber to independently adjust the damping level to
provide the optimum vehicle ride.
Autoride
®also interacts with the tow/haul switch that,
when engaged, will provide additional control of the
shock absorbers. This additional control results in better
ride and handling characteristics when the vehicle is
loaded or towing a trailer. SeeTow/Haul Mode Light
on page 3-50for more information.
Towing a Trailer
Do not tow a trailer during break-in. SeeNew Vehicle
Break-In on page 2-18for more information.
{CAUTION:
If you do not use the correct equipment and
drive properly, you can lose control when you
pull a trailer. For example, if the trailer is too
heavy, the brakes may not work well — or even
at all. You and your passengers could be
seriously injured. Pull a trailer only if you have
followed all the steps in this section. Ask your
dealer for advice and information about towing
a trailer with your vehicle.
Notice:Pulling a trailer improperly can damage
your vehicle and result in costly repairs not covered
by your warranty. To pull a trailer correctly, follow
the advice in this part, and see your dealer for
important information about towing a trailer with
your vehicle.
To identify the trailering capacity of your vehicle, you
should read the information in “Weight of the Trailer”
that appears later in this section.
4-62
Page 361 of 540
Safety Chains
You should always attach safety chains between your
vehicle and your trailer. Cross the safety chains
under the tongue of the trailer to help prevent the tongue
from contacting the road if it becomes separated from
the hitch.
If you are towing a trailer up to 5,000 lbs (2 270 kg)
with a factory-installed step bumper, you may attach
the safety chains to the attaching points on the bumper.
If you are towing a trailer up to your vehicle’s trailer
rating limit, you may attach the safety chains to
the attaching point on the hitch platform. If you are
towing with an aftermarket hitch, following the trailer or
hitch manufacturer’s recommendation for attaching
safety chains. Always leave just enough slack so you
can turn with your rig. Never allow safety chains to drag
on the ground.
Trailer Brakes
If your trailer weighs more than 2,000 lbs (900 kg)
loaded, then it needs its own brakes — and they must
be adequate. Be sure to read and follow the instructions
for the trailer brakes so you’ll be able to install, adjust
and maintain them properly.
If your vehicle is equipped with StabiliTrak
®, your trailer
cannot tap into the vehicle’s hydraulic brake system.
Your trailer brake system can tap into the vehicle’s
hydraulic brake system only if:
The trailer parts can withstand 3,000 psi
(20 650 kPa) of pressure.
The trailer’s brake system will use less than
0.02 cubic inches (0.3 cc) of �uid from your vehicle’s
master cylinder. Otherwise, both braking systems
won’t work well. You could even lose your brakes.
If everything checks out this far, make the brake tap at
the port on the master cylinder that sends the �uid
to the rear brakes. But don’t use copper tubing for this.
If you do, it will bend and �nally break off. Use steel
brake tubing.
4-71
Page 362 of 540

Driving with a Trailer
{CAUTION:
If you have a rear-most window open and you
pull a trailer with your vehicle, carbon
monoxide (CO) could come into your vehicle.
You cannot see or smell CO. It can cause
unconsciousness or death. SeeEngine
Exhaust on page 2-36. To maximize your safety
when towing a trailer:
Have your exhaust system inspected for
leaks, and make necessary repairs before
starting on your trip.
Keep the rear-most windows closed.
If exhaust does come into your vehicle
through a window in the rear or another
opening, drive with your front, main
heating or cooling system on and with the
fan on any speed. This will bring fresh,
outside air into your vehicle. Do not use
the climate control setting for maximum air
because it only recirculates the air inside
your vehicle. SeeClimate Control System
on page 3-21.Towing a trailer requires a certain amount of experience.
Before setting out for the open road, you’ll want to get
to know your rig. Acquaint yourself with the feel of
handling and braking with the added weight of the trailer.
And always keep in mind that the vehicle you are
driving is now a good deal longer and not nearly as
responsive as your vehicle is by itself.
Before you start, check all trailer hitch parts and
attachments, safety chains, electrical connector, lamps,
tires and mirror adjustment. If the trailer has electric
brakes, start your vehicle and trailer moving and then
apply the trailer brake controller by hand to be sure
the brakes are working. This lets you check your
electrical connection at the same time.
During your trip, check occasionally to be sure that the
load is secure, and that the lamps and any trailer
brakes are still working.
4-72
Page 364 of 540
Driving On Grades
Reduce speed and shift to a lower gearbeforeyou start
down a long or steep downgrade. If you don’t shift
down, you might have to use your brakes so much that
they would get hot and no longer work well.
You can tow in DRIVE (D). You may want to shift the
transmission to THIRD (3) or, if necessary, a lower gear
selection if the transmission shifts too often (e.g., under
heavy loads and/or hilly conditions).
You may also want to activate the tow/haul mode if the
transmission shifts too often. See “Tow/Haul Mode”
earlier in this section for more information.
When towing at high altitude on steep uphill grades,
consider the following: Engine coolant at or near
sea level will boil at a lower temperature than at higher
altitudes. If you turn your engine off immediately
after towing at high altitude on steep uphill grades, your
vehicle may show signs similar to engine overheating.
To avoid this, let the engine run while parked (preferably
on level ground) with the automatic transmission in
PARK (P) for a few minutes before turning the engine
off. If you do get the overheat warning, seeEngine
Overheating on page 5-28.
Parking on Hills
{CAUTION:
You really should not park your vehicle, with a
trailer attached, on a hill. If something goes
wrong, your rig could start to move. People
can be injured, and both your vehicle and the
trailer can be damaged.
But if you ever have to park your rig on a hill, here’s
how to do it:
1. Apply your regular brake, but don’t shift into
PARK (P) yet.
2. Have someone place chocks under the trailer
wheels.
3. When the wheel chocks are in place, release the
regular brakes until the chocks absorb the load.
4. Reapply the regular brakes. Then apply your
parking brake and shift into PARK (P).
5. If you have a four-wheel-drive vehicle, be sure the
transfer case is in a drive gear and not in NEUTRAL.
6. Release the regular brakes.
4-74