2006 CHEVROLET TAHOE brake
[x] Cancel search: brakePage 161 of 540

A. Dome Lamp Override Button. SeeDome Lamp
Override on page 3-19.
B. Headlamp Controls. SeeHeadlamps on page 3-14.
C. Air Outlets. SeeOutlet Adjustment on page 3-30.
D. Automatic Transfer Case Buttons, Rear Window
Wiper/Washer Control, and Fog Lamps Button.
SeeFour-Wheel Drive on page 2-26,
Rear Window Wiper/Washer on page 3-10,
Fog Lamps on page 3-17.
E. Turn Signal/Multifunction Lever. SeeTurn
Signal/Multifunction Lever on page 3-7.
F. Instrument Panel Cluster. SeeInstrument Panel
Cluster on page 3-35.
G. Gearshift Lever. SeeAutomatic Transmission
Operation on page 2-23.
H. Tow/Haul Selector Button (If Equipped). See
Tow/Haul Mode on page 2-26.
I. Audio System. SeeAudio System(s) on page 3-72.
J. Climate Control System. SeeClimate Control
System on page 3-21,Dual Climate Control System
on page 3-22,orDual Automatic Climate Control
System on page 3-25.
K. Instrument Panel Fuse Block. SeeInstrument Panel
Fuse Block on page 5-110.L. Hood Release. SeeHood Release on page 5-11.
M. Steering Wheel Control Buttons (If Equipped).
SeeDriver Information Center (DIC) on page 3-51
andAudio Steering Wheel Controls on page 3-130.
N. Center Instrument Panel Fuse Block. SeeCenter
Instrument Panel Fuse Block on page 5-112.
O. Tilt Wheel Lever. SeeTilt Wheel on page 3-6.
P. Parking Brake Release. SeeParking Brake on
page 2-32.
Q. Cigarette Lighter (If Equipped). SeeAshtray(s) and
Cigarette Lighter on page 3-21.
R. Accessory Power Outlet. SeeAccessory Power
Outlet(s) on page 3-20.
S. StabiliTrak
®Button (If Equipped). SeeStabiliTrak®
System on page 4-9.
T. Glovebox. SeeGlove Box on page 2-56.
Hazard Warning Flashers
Your hazard warning �ashers let you warn others. They
also let police know you have a problem. Your front
and rear turn signal lamps will �ash on and off.
3-5
Page 167 of 540
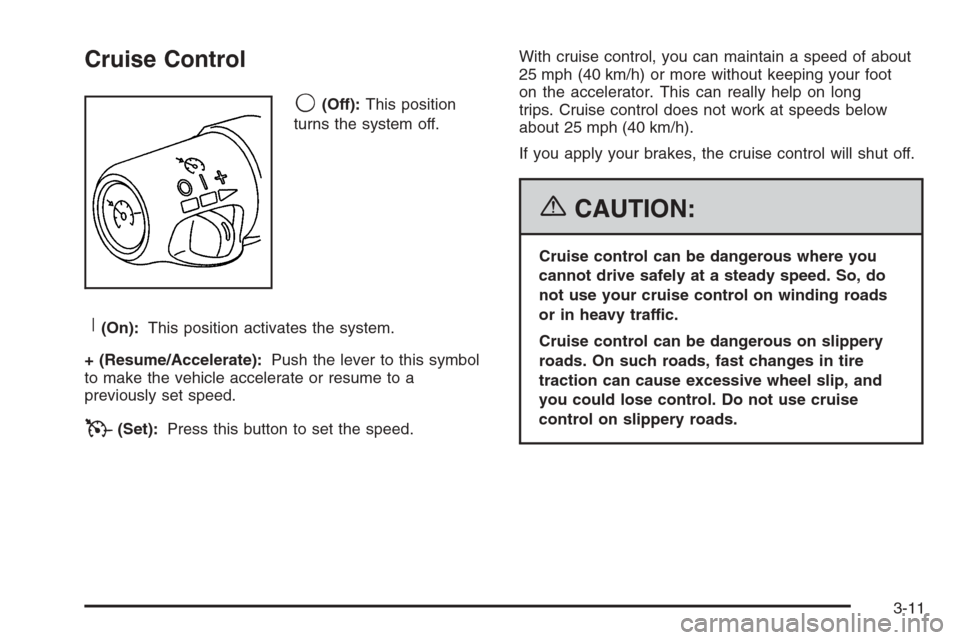
Cruise Control
9(Off):This position
turns the system off.
R(On):This position activates the system.
+ (Resume/Accelerate):Push the lever to this symbol
to make the vehicle accelerate or resume to a
previously set speed.
T(Set):Press this button to set the speed.With cruise control, you can maintain a speed of about
25 mph (40 km/h) or more without keeping your foot
on the accelerator. This can really help on long
trips. Cruise control does not work at speeds below
about 25 mph (40 km/h).
If you apply your brakes, the cruise control will shut off.
{CAUTION:
Cruise control can be dangerous where you
cannot drive safely at a steady speed. So, do
not use your cruise control on winding roads
or in heavy traffic.
Cruise control can be dangerous on slippery
roads. On such roads, fast changes in tire
traction can cause excessive wheel slip, and
you could lose control. Do not use cruise
control on slippery roads.
3-11
Page 168 of 540
Setting Cruise Control
{CAUTION:
If you leave your cruise control on when you
are not using cruise, you might hit a button
and go into cruise when you do not want to.
You could be startled and even lose control.
Keep the cruise control switch off until you
want to use cruise control.
1. Move the cruise control switch to on.
2. Get up to the speed you want.
3. Press in the set button at the end of the lever and
release it.
4. Take your foot off the accelerator pedal.
The cruise symbol on the
instrument panel will
illuminate when the cruise
control is engaged.
Resuming a Set Speed
Suppose you set your cruise control at a desired speed
and then you apply the brake. This, of course,
disengages the cruise control. But you don’t need to
reset it.
Once you’re going about 25 mph (40 km/h) or more, you
can move the cruise control switch brie�y from on to
resume/accelerate.
You’ll go right back up to your chosen speed and
stay there.
If you hold the switch at resume/accelerate the vehicle
will keep going faster until you release the switch or
apply the brake. So unless you want to go faster, don’t
hold the switch at resume/accelerate.
3-12
Page 169 of 540
Increasing Speed While Using
Cruise Control
There are two ways to go to a higher speed:
Use the accelerator pedal to get to the higher
speed. Press the set button at the end of the lever,
then release the button and the accelerator
pedal. You’ll now cruise at the higher speed. If the
accelerator pedal is held longer than 60 seconds,
cruise control will turn off.
Move the cruise switch from on to resume/
accelerate. Hold it there until you get up to the
speed you want, and then release the switch.
To increase your speed in very small amounts,
move the switch brie�y to resume/accelerate.
Each time you do this, your vehicle will go about
1 mph (1.6 km/h) faster.
Reducing Speed While Using
Cruise Control
Press in the button at the end of the lever until you
reach the lower speed you want, then release it.
To slow down in very small amounts, brie�y press
the set button. Each time you do this, you’ll go
about 1 mph (1.6 km/h) slower.
Passing Another Vehicle While Using
Cruise Control
Use the accelerator pedal to increase your speed.
When you take your foot off the pedal, your vehicle will
slow down to the cruise control speed you set earlier.
Using Cruise Control on Hills
How well your cruise control will work on hills depends
upon your speed, load and the steepness of the
hills. When going up steep hills, you may want to
step on the accelerator pedal to maintain your speed.
When going downhill, you may have to brake or shift
to a lower gear to keep your speed down. Of course,
applying the brake takes you out of cruise control.
Many drivers �nd this to be too much trouble and don’t
use cruise control on steep hills.
3-13
Page 170 of 540

Ending Cruise Control
There are four ways to turn off the cruise control:
Step lightly on the brake pedal,
move the cruise control switch to off, or
shift the transmission to NEUTRAL (N).
If your vehicle has the StabiliTrak®feature, cruise
control will turn off if road conditions cause
StabiliTrak
®to activate.
If the accelerator pedal is held for 60 seconds or
longer, cruise control will turn off.
Erasing Speed Memory
When you turn off the cruise control or the ignition,
your cruise control set speed memory is erased.
Headlamps
The control on the driver’s side of your instrument panel
operates the headlamps.
Turn the control clockwise to operate the lamps.
The headlamp control has four positions:
9(Off):Turning the control to this position turns off
the Daytime Running Lamps (DRL) and the automatic
headlamps.
AUTO (Automatic):Turning the control to this position
puts the system into automatic headlamp mode.
3-14
Page 172 of 540
When it begins to get dark, the automatic headlamp
system will switch from DRL to the headlamps.
When you turn the headlamp switch off, the headlamps
will go off, and your DRL lamps will illuminate,
provided it is not dark outside.
Shifting the transmission into PARK (P) will allow you
to idle the vehicle with the DRL off. The DRL will stay
off until you shift the transmission out of PARK (P).
This procedure applies only to vehicles �rst sold in the
United States.
Automatic Headlamp System
When it is dark enough outside, your automatic headlamp
system will turn on your headlamps at the normal
brightness along with other lamps such as the taillamps,
sidemarker, parking lamps, and the instrument panel
lights. The radio lights will also be dim.
To turn off the automatic headlamp system, turn the
exterior lamps switch to the off position and then release.
Turning off the automatic headlamp system with the
headlamp switch is not available for vehicles �rst sold in
Canada. For vehicles �rst sold in Canada, you can turn
off the automatic headlamp system when parked at
night by applying the parking brake before starting
your vehicle. The headlamps will remain off once
the vehicle is started for as long as you are parked.If you release the parking brake, the lights will turn
on. If the parking brake is not released before you
begin to drive, the exterior lamps will turn on above
2 mph (3.2 km/h).
Your vehicle has a light sensor located on the top of
the instrument panel in the defroster grille. Be sure it is
not covered, or the system will be on whenever the
ignition is on.
The system may also turn on your headlamps when
driving through a parking garage, heavy overcast
weather, or a tunnel. This is normal.
There is a delay in the transition between the daytime
and nighttime operation of the Daytime Running
Lamps (DRL) and the automatic headlamp systems so
that driving under bridges or bright overhead street
lights does not affect the system. The DRL and
automatic headlamp system will only be affected when
the light sensor sees a change in lighting lasting
longer than the delay.
If you start your vehicle in a dark garage, the automatic
headlamp system will come on immediately. Once
you leave the garage, it will take approximately
one minute for the automatic headlamp system to
change to DRL if it is bright enough outside. During that
delay, your instrument panel cluster may not be as
bright as usual. Make sure your instrument panel
brightness control is in the full bright position. See
Instrument Panel Brightness on page 3-18.
3-16
Page 197 of 540
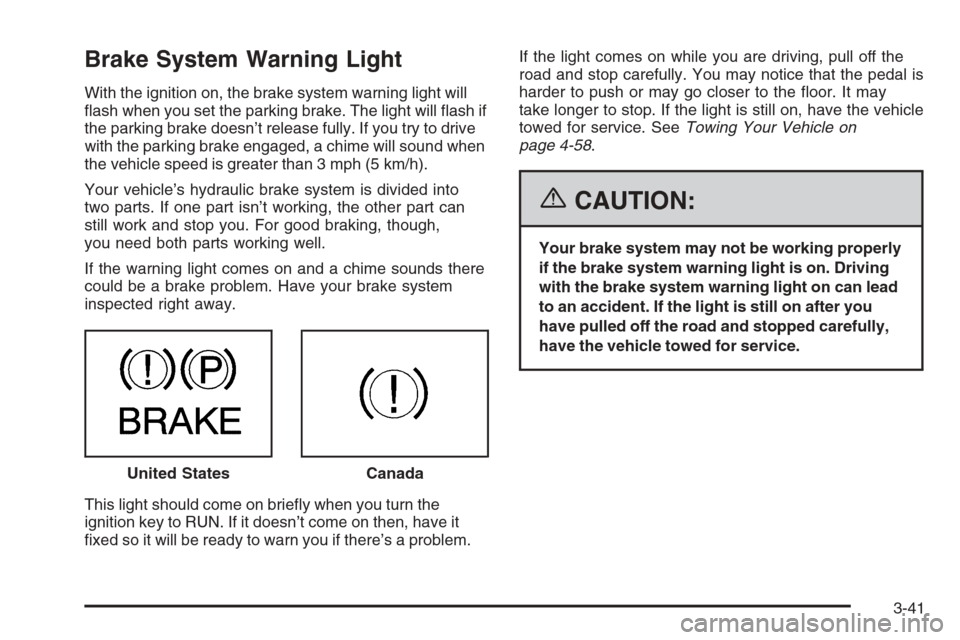
Brake System Warning Light
With the ignition on, the brake system warning light will
�ash when you set the parking brake. The light will �ash if
the parking brake doesn’t release fully. If you try to drive
with the parking brake engaged, a chime will sound when
the vehicle speed is greater than 3 mph (5 km/h).
Your vehicle’s hydraulic brake system is divided into
two parts. If one part isn’t working, the other part can
still work and stop you. For good braking, though,
you need both parts working well.
If the warning light comes on and a chime sounds there
could be a brake problem. Have your brake system
inspected right away.
This light should come on brie�y when you turn the
ignition key to RUN. If it doesn’t come on then, have it
�xed so it will be ready to warn you if there’s a problem.If the light comes on while you are driving, pull off the
road and stop carefully. You may notice that the pedal is
harder to push or may go closer to the �oor. It may
take longer to stop. If the light is still on, have the vehicle
towed for service. SeeTowing Your Vehicle on
page 4-58.
{CAUTION:
Your brake system may not be working properly
if the brake system warning light is on. Driving
with the brake system warning light on can lead
to an accident. If the light is still on after you
have pulled off the road and stopped carefully,
have the vehicle towed for service.
United States
Canada
3-41
Page 198 of 540

Anti-Lock Brake System
Warning Light
With the anti-lock brake
system, this light will come
on when you start your
engine and may stay on
for several seconds.
That’s normal. If the light does not come on then, have it
�xed so it will be ready to warn you if there is a problem.
If the light stays on, or comes on when you are driving,
your vehicle needs service. You will also hear a chime
sound when the light is on steady. If the regular brake
system warning light is not on, you still have brakes, but
you do not have anti-lock brakes. If the regular brake
system warning light is also on you do not have anti-lock
brakes and there is a problem with your regular brakes.
In addition to both lights, you will also hear a chime sound
on the �rst occurrence of a problem and each time the
vehicle is shut off and then restarted. SeeBrake System
Warning Light on page 3-41.
The anti-lock brake system warning light should come on
brie�y when you turn the ignition key to RUN. If the light
does not come on then, have it �xed so it will be ready to
warn you if there is a problem.
Engine Coolant Temperature Gage
This gage shows the engine coolant temperature.
It also provides an indicator of how hard your vehicle is
working. During a majority of the operation, the gage
will read 210°F (100°C) or less. If you are pulling a load
or going up hills, it is normal for the temperature to
�uctuate and approach the 250°F (122°C) mark. If the
gage reaches the 260°F (125°C) mark, it indicates
that the cooling system is working beyond its capacity.
SeeEngine Overheating on page 5-28.
United StatesCanada
3-42