2006 CHEVROLET SUBURBAN ECO mode
[x] Cancel search: ECO modePage 146 of 540
Universal Home Remote
System
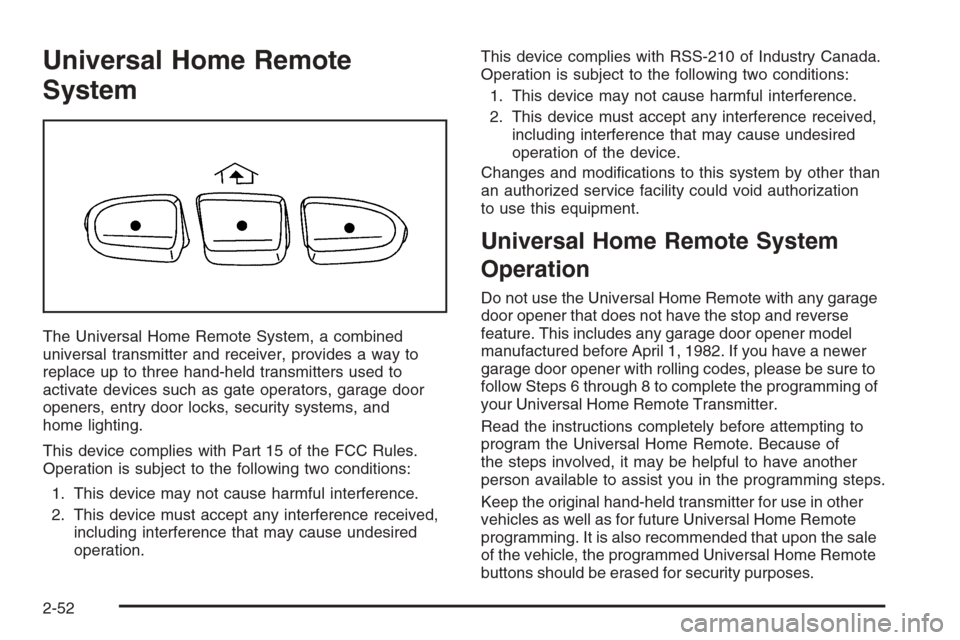
The Universal Home Remote System, a combined
universal transmitter and receiver, provides a way to
replace up to three hand-held transmitters used to
activate devices such as gate operators, garage door
openers, entry door locks, security systems, and
home lighting.
This device complies with Part 15 of the FCC Rules.
Operation is subject to the following two conditions:
1. This device may not cause harmful interference.
2. This device must accept any interference received,
including interference that may cause undesired
operation.This device complies with RSS-210 of Industry Canada.
Operation is subject to the following two conditions:
1. This device may not cause harmful interference.
2. This device must accept any interference received,
including interference that may cause undesired
operation of the device.
Changes and modications to this system by other than
an authorized service facility could void authorization
to use this equipment.
Universal Home Remote System
Operation
Do not use the Universal Home Remote with any garage
door opener that does not have the stop and reverse
feature. This includes any garage door opener model
manufactured before April 1, 1982. If you have a newer
garage door opener with rolling codes, please be sure to
follow Steps 6 through 8 to complete the programming of
your Universal Home Remote Transmitter.
Read the instructions completely before attempting to
program the Universal Home Remote. Because of
the steps involved, it may be helpful to have another
person available to assist you in the programming steps.
Keep the original hand-held transmitter for use in other
vehicles as well as for future Universal Home Remote
programming. It is also recommended that upon the sale
of the vehicle, the programmed Universal Home Remote
buttons should be erased for security purposes.
2-52
Page 149 of 540
Using Universal Home Remote
Press and hold the appropriate Universal Home Remote
button for at least half of a second. The indicator light
will come on while the signal is being transmitted.
Erasing Universal Home Remote
Buttons
To erase programming from the three Universal Home
Remote buttons do the following:
1. Press and hold down the two outside buttons until
the indicator light begins to ash, after 20 seconds.
Do not hold the two outside buttons for longer
than 30 seconds.
2. Release both buttons.
The Universal Home Remote is now in the training
(learning) mode and can be programmed at any time
beginning with Step 2 under “Programming Universal
Home Remote” shown earlier in this section.
Individual buttons cannot be erased, but they can be
reprogrammed. See “Reprogramming a Single Universal
Home Remote Button” following this section.
Reprogramming a Single Universal
Home Remote Button
To program a device to Universal Home Remote using
a Universal Home Remote button previously trained,
follow these steps:
1. Press and hold the desired Universal Home
Remote button. Do not release the button.
2. The indicator light will begin to ash after
20 seconds. While still holding the Universal Home
Remote button, proceed with Step 2 under
“Programming Universal Home Remote” shown
earlier in this section.
For additional information on Universal Home Remote,
seeCustomer Assistance Offices on page 7-4.
2-55
Page 170 of 540
Ending Cruise Control
There are four ways to turn off the cruise control:
Step lightly on the brake pedal,
move the cruise control switch to off, or
shift the transmission to NEUTRAL (N).
If your vehicle has the StabiliTrak®feature, cruise
control will turn off if road conditions cause
StabiliTrak
®to activate.
If the accelerator pedal is held for 60 seconds or
longer, cruise control will turn off.
Erasing Speed Memory
When you turn off the cruise control or the ignition,
your cruise control set speed memory is erased.
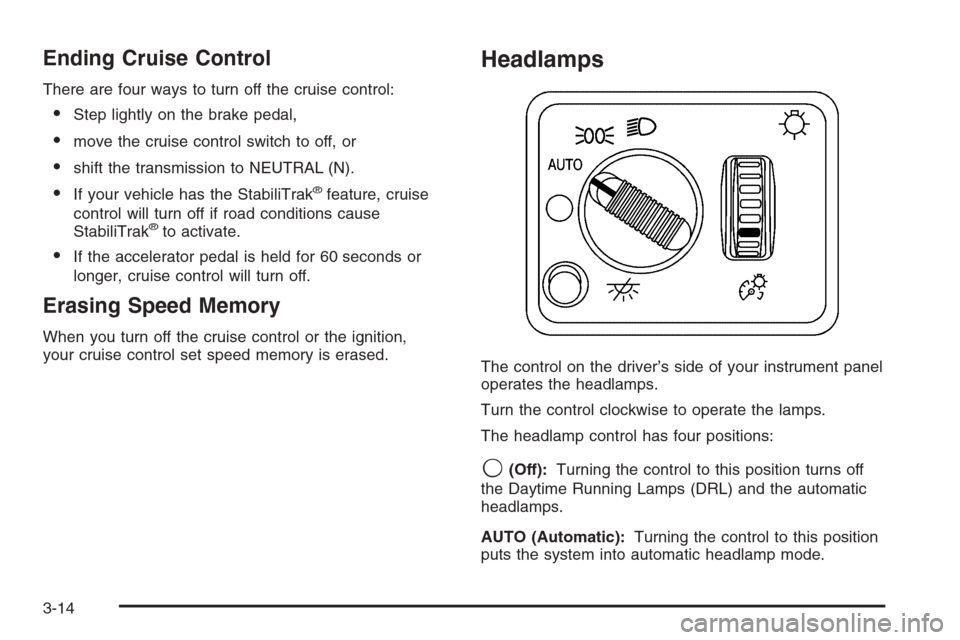
Headlamps
The control on the driver’s side of your instrument panel
operates the headlamps.
Turn the control clockwise to operate the lamps.
The headlamp control has four positions:
9(Off):Turning the control to this position turns off
the Daytime Running Lamps (DRL) and the automatic
headlamps.
AUTO (Automatic):Turning the control to this position
puts the system into automatic headlamp mode.
3-14
Page 182 of 540
The passenger’s temperature setting can be set to
match the driver’s temperature setting by pressing and
holding the AUTO button for four seconds. Both the
driver and passenger arrows will be displayed.
Automatic Operation
AUTO (Automatic):When automatic operation is
active the system will control the inside temperature,
the air delivery, and the fan speed.
Use the steps below to place the entire system in
automatic mode:
1. Press the AUTO button.
When AUTO is selected, the display will change to
show the current driver’s set temperature, delivery
mode and fan speed. Press the AUTO button again
within ve seconds to display the passenger’s set
temperature.
If the driver and passenger’s temperature settings
are not the same, the opposite side temperature
setting will be displayed for an additional ve
seconds. To make the passenger’s temperature the
same as the driver’s, press and hold the AUTO
button for about four seconds.When AUTO is selected, the air conditioning
operation and air inlet will be automatically
controlled. The air conditioning compressor will run
when the outside temperature is over about
40°F (4°C). The air inlet will normally be set to
outside air. If it’s hot outside, the air inlet may
automatically switch to recirculate inside air to help
quickly cool down your vehicle. The light on the
button will illuminate in recirculation.
2. Set the driver’s and passenger’s temperature.
To nd your comfort setting, start with a 74°F (23°C)
temperature setting and allow about 20 minutes
for the system to regulate. Turn the driver’s or
passenger’s side temperature knob to adjust the
temperature setting as necessary. If you choose the
temperature setting of 60°F (15°C) the system
will remain at the maximum cooling setting. If you
choose the temperature setting of 90°F (32°C)
the system will remain at the maximum heat setting.
Choosing either maximum setting will not cause
the vehicle to heat or cool any faster.
Be careful not to cover the sensor located on the top of
the instrument panel near the windshield. This sensor
regulates air temperature based on sun load, and
also turns on your headlamps.
3-26
Page 184 of 540
Pressing this button also cancels the auto recirculation
feature. To resume the auto recirculation function, press
the AUTO button. Each time the vehicle is started, the
system will revert to the auto recirculation function.
If you select recirculation while in defrost, defog or oor,
the light in the button will ash and then go out to let you
know that this is not allowed. This is normal and helps to
prevent fogging.
When the weather is cool or damp, operating the system
in recirculation for extended periods of time may cause
fogging of the vehicle’s windows. To clear the fog, select
either defog or front defrost.
You may also notice that the A/C compressor will run
while in recirculation mode. This is normal and helps to
prevent fogging.
9(Off):Press this button to turn off the entire climate
control system. Outside air will still enter the vehicle, and
will be directed to the oor. This direction can be changed
by pressing the mode button. The temperature can also
be adjusted using either temperature knob. Press the up
or down arrows on the fan switch, the defrost button, the
AUTO button, or the air conditioning button to turn the
system on when it is off.
Display
If you press the MODE button to select an air delivery
mode, the display will change to show you the selected
air delivery mode. After 10 seconds, the display will
change to show the driver’s temperature setting and the
selected mode.
If you press the up or down arrows on the fan switch,
the display will change to show the selected fan speed.
After 10 seconds, the display will change to show the
driver temperature setting and the selected mode.
Whenever you press AUTO, the display will change to
show the following:
The current driver’s set temperature and an arrow
for ve seconds
The current passenger’s set temperature setting
and an arrow for ve seconds
The automatic air delivery mode and fan speed
If the driver’s and passenger’s temperature settings are
the same when AUTO is pressed, the temperature setting
and both arrows will be displayed for ve seconds along
with the automatic air delivery mode and fan speed. After
the ve second update, the display will change to show
the temperature setting, both arrows and AUTO.
3-28
Page 208 of 540
DIC Operation and Displays
The Driver Information Center (DIC) comes on when the
ignition is on. After a short delay, the DIC will display
the information that was last displayed before the engine
was turned off.
The DIC has different modes which can be accessed by
pressing the four DIC buttons located on the steering
wheel. These buttons are trip information, fuel
information, customization, and select. The button
functions are detailed in the following pages.
Trip Information Button
3
(Trip Information):Press the trip information
button to scroll through the ODOMETER, TRIP A,
TRIP B, TIRE PRESSURES, TIMER, and ENGINE
HOURS.
Odometer:Press the trip information button until
ODOMETER appears on the display. This mode shows
the total distance the vehicle has been driven in
either miles or kilometers. Pressing the reset stem
located on the instrument cluster with the vehicle off
will also display the odometer.Trip A:Press the trip information button until TRIP A
appears on the display. This mode shows the current
distance traveled since the last reset for TRIP A in either
miles or kilometers.
Trip B:Press the trip information button until TRIP B
appears on the display. This mode shows the current
distance traveled since the last reset for TRIP B in either
miles or kilometers.
To reset TRIP A or TRIP B information, press and hold
the select button for one second while in one of the
trip modes. This will reset the information for TRIP A
or TRIP B.
You can also reset TRIP A or TRIP B while they are
displayed by pressing the reset stem on the cluster.
If you press and hold the reset stem or the select button
for four seconds, the display will show the distance
traveled since the last ignition cycle for TRIP A or
TRIP B.
SeeTrip Odometer on page 3-36for more information.
3-52
Page 209 of 540
Tire Pressures:The tire pressure mode is available
only on vehicles equipped with a tire pressure monitor.
Press the trip information button until TIRE
PRESSURES appears on the display. This mode shows
the tire pressure in pounds per square inch (psi) or
kilopascals (kPa). Press the select button to scroll
through the following information:
LF TIRE shows the tire pressure for the front
driver’s side tire.
RF TIRE shows the tire pressure for the front
passenger’s side tire.
LR TIRE shows the tire pressure for the rear
driver’s side tire.
RR TIRE shows the tire pressure for the rear
passenger’s side tire.
Timer:The DIC can be used as a timer. Press the
select button while TIMER is displayed to start the timer.
The display will show the amount of time that has
passed since the timer was last reset, not including time
the ignition is off. Time will continue to be counted as
long as the ignition is on, even if another display is being
shown on the DIC. The timer will record up to 99 hours,
59 minutes and 59 seconds (99:59:59) after which
the display will roll back to zero.To stop the counting of time, press the select button
briey while TIMER is displayed.
To reset the timer to zero, press and hold the select
button while TIMER is displayed.
Engine Hours:Press the trip information button until
ENGINE HOURS appears on the display. This mode
shows the total number of hours the engine has run.
Pressing and holding the reset stem located on the
instrument cluster for about four seconds will also display
the engine hour information after the odometer is
displayed when the vehicle is off.
Fuel Information Button
t
(Fuel Information):Press the fuel information
button to scroll through the range, fuel used, average
fuel economy, and the engine oil life system.
Fuel Range:Press the fuel information button until
RANGE appears on the display. This mode shows the
remaining distance you can drive without refueling.
It is based on fuel economy and the fuel remaining in
the fuel tank. The display will show LOW if the fuel
level is low.
The fuel economy data used to determine fuel range
is an average of recent driving conditions. As your
driving conditions change, this data is gradually updated.
Fuel range cannot be reset.
3-53
Page 210 of 540
Fuel Used:Press the fuel information button until
FUEL USED appears on the display. This mode shows
the number of gallons or liters of fuel used since the
last reset of this menu item. To reset the fuel used
information, press and hold the select button for one
second while FUEL USED is displayed.
Average Fuel Economy:Press the fuel information
button until AVG ECON appears on the display.
This mode shows how many miles per gallon (MPG) or
liters per 100 kilometers (L/100 km) your vehicle is
getting based on current and past driving conditions.
Press and hold the select button for one second while
AVG ECON is displayed to reset the average fuel
economy. Average fuel economy will then be calculated
starting from that point. If the average fuel economy is not
reset, it will be continually updated each time you drive.
Engine Oil Life System:Press the fuel information
button until ENGINE OIL LIFE appears on the display.
The engine oil life system shows an estimate of the
oil’s remaining useful life. It will show 100% when the
system is reset after an oil change. It will alert you
to change your oil on a schedule consistent with your
driving conditions.Always reset the engine oil life system after an oil
change. To reset the engine oil life system, seeEngine
Oil Life System on page 5-18.
In addition to the engine oil life system monitoring the
oil life, additional maintenance is recommended in
the Maintenance Schedule in this manual. SeeEngine
Oil on page 5-15andScheduled Maintenance on
page 6-4.
Customization Button
4
(Customization):Press the customization button to
access the VEHICLE SETTINGS menu and customize
the settings to your vehicle. SeeDIC Vehicle
Customization on page 3-66for more information.
Select Button
r
(Select):Press the select button to reset certain
DIC functions and set your customization settings.
For example, this button will reset the trip odometers
and enables you to scroll through and select the
language in which the DIC information will appear.
3-54