2006 CHEVROLET SILVERADO manual radio set
[x] Cancel search: manual radio setPage 178 of 594

Up-Shift Light (Manual Transmission)...............3-40
Brake System Warning Light..........................3-41
Anti-Lock Brake System Warning Light.............3-42
Traction Off Light..........................................3-42
Engine Coolant Temperature Gage..................3-43
Transmission Temperature Gage.....................3-43
Malfunction Indicator Lamp.............................3-45
Oil Pressure Gage........................................3-47
Security Light...............................................3-48
Cruise Control Light......................................3-48
Highbeam On Light.......................................3-49
Four-Wheel-Drive Light..................................3-49
Tow/Haul Mode Light....................................3-49
Cargo Lamp Light.........................................3-49
Fuel Gage...................................................3-50
Low Fuel Warning Light.................................3-50
Driver Information Center (DIC).......................3-51
DIC Operation and Displays...........................3-52
DIC Warnings and Messages.........................3-54
DIC Vehicle Customization.............................3-64Audio System(s).............................................3-70
Setting the Time for Radios without Radio
Data Systems (RDS)..................................3-71
Setting the Time for Radios with Radio Data
Systems (RDS).........................................3-71
AM-FM Radio...............................................3-72
Radio with CD..............................................3-74
Radio with Cassette and CD..........................3-85
Radio with Six-Disc CD.................................3-99
Rear Seat Entertainment System...................3-114
Rear Seat Audio (RSA)................................3-125
Theft-Deterrent Feature................................3-126
Audio Steering Wheel Controls......................3-127
Radio Reception.........................................3-128
Care of the Cassette Tape Player.................3-128
Care of Your CDs and DVDs........................3-129
Care of the CD and DVD Player...................3-130
Fixed Mast Antenna....................................3-130
XM™ Satellite Radio Antenna System............3-130
Chime Level Adjustment...............................3-130
Section 3 Instrument Panel
3-2
Page 190 of 594

Headlamps on Reminder
A reminder chime will sound when your headlamps or
parking lamps are manually turned on and your
ignition is off and a door is open. To disable the chime,
turn the light off then back on.
Daytime Running Lamps (DRL)
Daytime Running Lamps (DRL) can make it easier for
others to see the front of your vehicle during the
day. DRL can be helpful in many different driving
conditions, but they can be especially helpful in the short
periods after dawn and before sunset. Fully functional
DRL are required on all vehicles �rst sold in Canada.
The DRL system will come on when the following
conditions are met:
The ignition is on
The exterior lamps control is in AUTO
The light sensor determines it is daytime
When the DRL are on, only your DRL lamps will be on.
The taillamps, sidemarker and other lamps will not be on.
The instrument panel back lighting will not be on either.When it begins to get dark, the automatic headlamp
system will switch from DRL to the headlamps.
When you turn the headlamp switch off, the headlamps
will go off, and your DRL lamps will illuminate,
provided it is not dark outside.
Automatic Headlamp System
When it is dark enough outside, your automatic
headlamp system will turn on the headlamps at the
normal brightness, along with the taillamps, sidemarker,
parking lamps, and the instrument panel lights. The
radio back lighting will also be dimly lit.
To turn off the automatic headlamp system, turn the
exterior lamps switch to the off position. Turning off
the automatic headlamp system with the headlamp
switch is not available for vehicles �rst sold in Canada.
Your vehicle has a light sensor located on the top of
the instrument panel in the defroster grille that regulates
when the automatic headlamps turn on. Be sure it is
not covered, or the system will come on whenever the
ignition is on.
3-14
Page 246 of 594

Audio System(s)
Determine which radio your vehicle has and then read the
pages following to familiarize yourself with its features.
Driving without distraction is a necessity for a safer
driving experience. SeeDefensive Driving on page 4-2.
By taking a few moments to read this manual and
get familiar with your vehicle’s audio system, you can
use it with less effort, as well as take advantage of
its features. While your vehicle is parked, set up your
audio system by presetting your favorite radio stations,
setting the tone and adjusting the speakers. Then,
when driving conditions permit, you can tune to your
favorite stations using the presets and steering
wheel controls if the vehicle has them.
{CAUTION:
This system provides you with a far greater
access to audio stations and song listings.
Giving extended attention to entertainment
tasks while driving can cause a crash and you
or others can be injured or killed. Always keep
your eyes on the road and your mind on the
drive — avoid engaging in extended searching
while driving.Keeping your mind on the drive is important for safe
driving. For more information, seeDefensive Driving on
page 4-2.
Here are some ways in which you can help avoid
distraction while driving.
While your vehicle is parked:
Familiarize yourself with all of its controls.
Familiarize yourself with its operation.
Set up your audio system by presetting your
favorite radio stations, setting the tone, and
adjusting the speakers. Then, when driving
conditions permit, you can tune to your favorite
radio stations using the presets and steering wheel
controls if the vehicle has them.
Notice:Before adding any sound equipment to
your vehicle, such as an audio system, CD player,
CB radio, mobile telephone, or two-way radio, make
sure that it can be added by checking with your
dealer. Also, check federal rules covering mobile
radio and telephone units. If sound equipment can
be added, it is very important to do it properly.
Added sound equipment may interfere with
the operation of your vehicle’s engine, radio, or
other systems, and even damage them. Your
vehicle’s systems may interfere with the operation
of sound equipment that has been added.
3-70
Page 253 of 594
Setting Preset Stations
Up to 30 stations (six FM1, six FM2, and six AM,
six XM1 and six XM2 (if equipped)), can be programed
on the six numbered pushbuttons, by performing the
following steps:
1. Turn the radio on.
2. Press BAND to select FM1, FM2, AM, or XM1
or XM2.
3. Tune in the desired station.
4. Press and hold one of the six numbered
pushbuttons until you hear a beep. Whenever that
numbered pushbutton is pressed, the station
that was set will return for that pushbutton.
5. Repeat the steps for each pushbutton.
To store an equalization setting to a preset station
perform the following:
1. Tune to the preset station.
2. Press and release the AUTO EQ button to select
the equalization setting.
Once the equalization no longer appears on the
display, the equalization will be set for that preset
station.
Setting the Tone (Bass/Treble)
AUDIO:Push and release the AUDIO knob until BASS
or TREB appears on the display. Turn the knob to
increase or to decrease. The display will show the bass
or treble level. If a station is weak or noisy, decrease
the treble.
To adjust the bass or treble to the middle position, while
it is displayed, push and hold the AUDIO knob. The
radio will produce one beep and adjust the display level
to the middle position.
To adjust all tone and speaker controls to the middle
position, push and hold the AUDIO knob when no tone
or speaker control is displayed. ALL CENTERED will
appear on the display, you will hear a beep, and
the display level will be adjusted to the middle position.
AUTO EQ (Automatic Equalization):Press this
button to select customized equalization settings
designed for country/western, jazz, talk, pop, rock, and
classical. Selecting CUSTOM or changing bass or
treble, returns the EQ to the manual bass and treble
settings.
The radio will save separate AUTO EQ settings for each
preset and source.
If the radio is equipped with the Bose
®audio system,
the equalization settings are either CUSTOM or TALK.
3-77
Page 264 of 594
Setting Preset Stations
Up to 30 stations (six FM1, six FM2, and six AM,
six XM1 and six XM2 (if equipped)), can be programed
on the six numbered pushbuttons, by performing the
following steps:
1. Turn the radio on.
2. Press BAND to select FM1, FM2, AM, or XM1
or XM2.
3. Tune in the desired station.
4. Press and hold one of the six numbered
pushbuttons until you hear a beep. Whenever that
numbered pushbutton is pressed, the station
that was set will return for that pushbutton.
5. Repeat the steps for each pushbutton.
To store an equalization setting to a preset station
perform the following:
1. Tune to the preset station.
2. Press and release the AUTO EQ button to select
the equalization setting.
Once the equalization no longer appears on the
display, the equalization will be set for that preset
station.
Setting the Tone (Bass/Treble)
AUDIO:Push and release the AUDIO knob until BASS
or TREB appears on the display. Turn the knob to
increase or to decrease. The display will show the bass
or treble level. If a station is weak or noisy, decrease
the treble.
To adjust the bass or treble to the middle position while
it is displayed, push and hold the AUDIO knob. The
radio will produce one beep and adjust the display level
to the middle position.
To adjust all tone and speaker controls to the middle
position, push and hold the AUDIO knob when no tone
or speaker control is displayed. ALL CENTERED will
appear on the display, you will hear a beep, and
the display level will be adjusted to the middle position.
AUTO EQ (Automatic Equalization):Press this
button to select customized equalization settings
designed for country/western, jazz, talk, pop, rock, and
classical. Selecting CUSTOM or changing bass or
treble, returns the EQ to the manual bass and treble
settings.
The radio will save separate AUTO EQ settings for each
preset and source.
If the radio is equipped with the Bose
®audio system,
the equalization settings are either CUSTOM or TALK.
3-88
Page 303 of 594
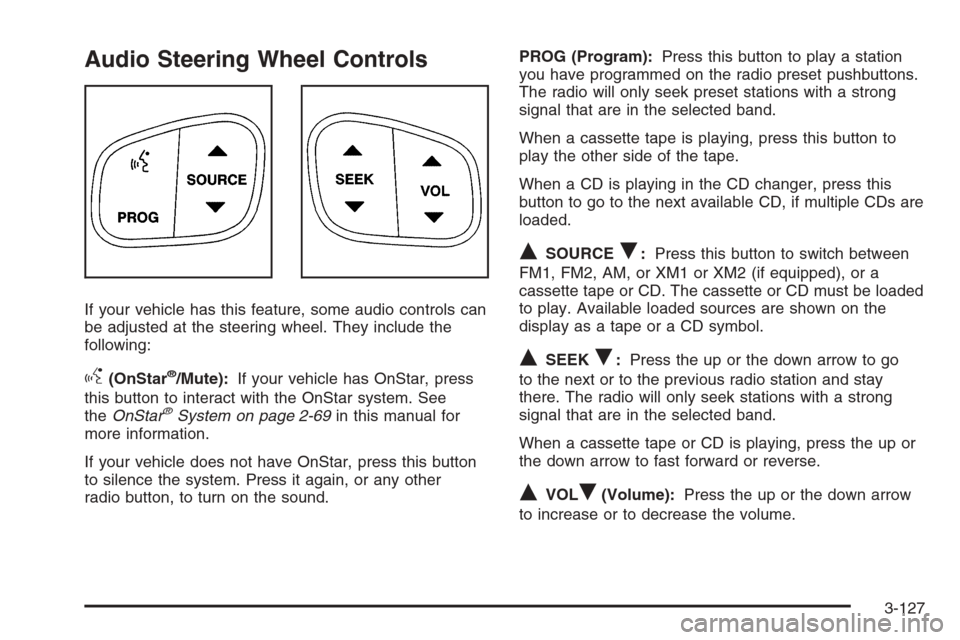
Audio Steering Wheel Controls
If your vehicle has this feature, some audio controls can
be adjusted at the steering wheel. They include the
following:
g(OnStar®/Mute):If your vehicle has OnStar, press
this button to interact with the OnStar system. See
theOnStar
®System on page 2-69in this manual for
more information.
If your vehicle does not have OnStar, press this button
to silence the system. Press it again, or any other
radio button, to turn on the sound.PROG (Program):Press this button to play a station
you have programmed on the radio preset pushbuttons.
The radio will only seek preset stations with a strong
signal that are in the selected band.
When a cassette tape is playing, press this button to
play the other side of the tape.
When a CD is playing in the CD changer, press this
button to go to the next available CD, if multiple CDs are
loaded.
QSOURCER:Press this button to switch between
FM1, FM2, AM, or XM1 or XM2 (if equipped), or a
cassette tape or CD. The cassette or CD must be loaded
to play. Available loaded sources are shown on the
display as a tape or a CD symbol.
QSEEKR:Press the up or the down arrow to go
to the next or to the previous radio station and stay
there. The radio will only seek stations with a strong
signal that are in the selected band.
When a cassette tape or CD is playing, press the up or
the down arrow to fast forward or reverse.
QVOLR(Volume):Press the up or the down arrow
to increase or to decrease the volume.
3-127
Page 317 of 594
Manual Selectable Ride
The main function of this system is to provide superior
ride comfort while trailering or fully loaded, as well
as for unloaded driving. This system also helps
to provide:
Improved trailering stability
Improved handling response when trailering or fully
loaded
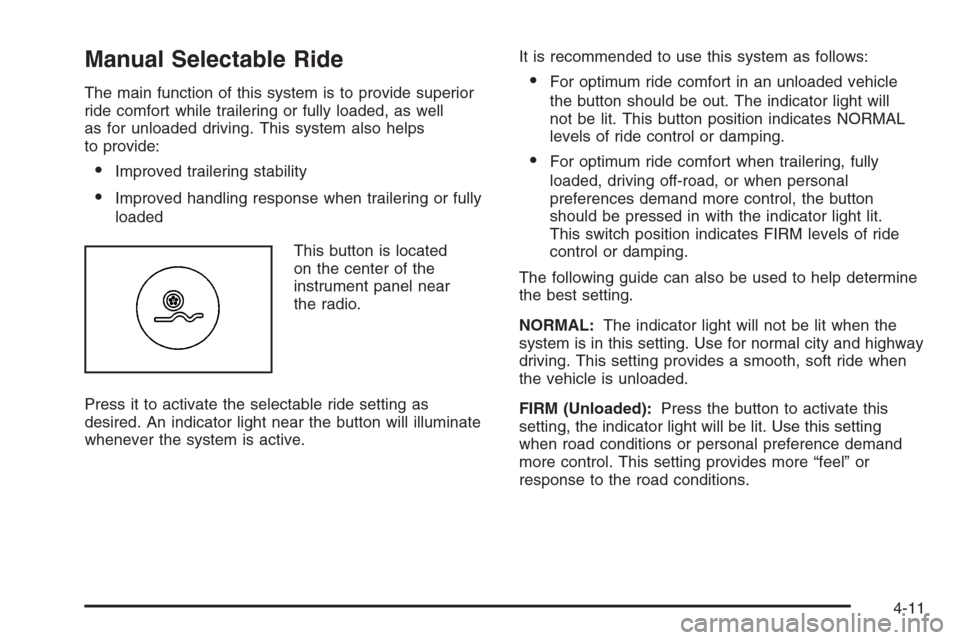
This button is located
on the center of the
instrument panel near
the radio.
Press it to activate the selectable ride setting as
desired. An indicator light near the button will illuminate
whenever the system is active.It is recommended to use this system as follows:
For optimum ride comfort in an unloaded vehicle
the button should be out. The indicator light will
not be lit. This button position indicates NORMAL
levels of ride control or damping.
For optimum ride comfort when trailering, fully
loaded, driving off-road, or when personal
preferences demand more control, the button
should be pressed in with the indicator light lit.
This switch position indicates FIRM levels of ride
control or damping.
The following guide can also be used to help determine
the best setting.
NORMAL:The indicator light will not be lit when the
system is in this setting. Use for normal city and highway
driving. This setting provides a smooth, soft ride when
the vehicle is unloaded.
FIRM (Unloaded):Press the button to activate this
setting, the indicator light will be lit. Use this setting
when road conditions or personal preference demand
more control. This setting provides more “feel” or
response to the road conditions.
4-11
Page 457 of 594
3. Get the vehicles close enough so the jumper cables
can reach, but be sure the vehicles are not touching
each other. If they are, it could cause a ground
connection you do not want. You would not be able
to start your vehicle, and the bad grounding
could damage the electrical systems.
To avoid the possibility of the vehicles rolling, set
the parking brake �rmly on both vehicles involved
in the jump start procedure. Put an automatic
transmission in PARK (P) or a manual transmission
in NEUTRAL before setting the parking brake. If
you have a four-wheel-drive vehicle, be sure
the transfer case is in a drive gear, not in
NEUTRAL.
Notice:If you leave your radio or other accessories
on during the jump starting procedure, they could
be damaged. The repairs would not be covered
by your warranty. Always turn off your radio and
other accessories when jump starting your vehicle.
4. Turn off the ignition on both vehicles. Unplug
unnecessary accessories plugged into the cigarette
lighter or accessory power outlets. Turn off the
radio and all lamps that are not needed. This will
avoid sparks and help save both batteries. And
it could save the radio!5. Open the hoods and locate the positive (+) and
negative (−) terminal locations of the other vehicle.
Your vehicle has a remote positive (+) jump
starting terminal and a remote negative (−) jump
starting terminal. You should always use these
remote terminals instead of the terminals on the
battery.
The remote positive (+) terminal is located behind a
red plastic cover, if equipped, near the engine
accessory drive bracket. To uncover the remote
positive (+) terminal, open the red plastic cover, if
equipped.
The remote negative (−) terminal is located on the
engine drive bracket on all V8 and diesel engines,
and on the thermostat housing on the 8.1L engine.
On V8 engines it is marked GND (Ground).
On V6 engines the remote negative (−) terminal is
located on a tab attached to the engine accessory
drive bracket where it is marked GND (Ground).
SeeEngine Compartment Overview on page 5-14
for more information on the location of the
remote positive (+) and remote negative (−)
terminals.
5-53