2006 CHEVROLET SILVERADO brake light
[x] Cancel search: brake lightPage 127 of 594
The selector button is located on the end of the shift
lever. Turn the Turn Tow/Haul on and off by pressing the
button. When the Tow/Haul is on, a light on the
instrument panel cluster will come on.
SeeTow/Haul Mode Light on page 3-49for more
information.
Also see “Tow Haul Mode” underTowing a Trailer on
page 4-67for more information.
Grade Braking and Cruise Grade
Braking (Allison Transmission®)
Grade Braking and Cruise Grade Braking assists when
driving on a downhill grade. It maintains the vehicle’s
speed by automatically implementing a shift schedule
that uses the engine and the transmission to slow
the vehicle. This reduces wear on the brakes system
and increases control of the vehicle. The system
constantly monitors the vehicle’s speed, acceleration,
engine torque, and brake pedal usage. It detects
when the truck is on a downhill grade and the driver’s
desire to slow down by pressing the brake.Cruise Grade Braking is available on the 6.6L
DURAMAX
®diesel engine. Cruise Grade Braking
monitors a vehicle’s cruise state, engine torque,
acceleration, vehicle speed, and the cruise set speed.
Using this information, it detects when the truck is
accelerating on a downhill grade and will automatically
downshift to slow the vehicle if it exceeds the cruise
set speed by a certain amount.
SeeCruise Control on page 3-10for more information.
The Tow/Haul mode and Grade Braking shift modes
can be activated by pressing the button on the front
of the shift control stalk. If your vehicle has the
DURAMAX
®Diesel Engine or the 8.1L VORTEC™
gasoline engine, Grade Braking is only available while
the Tow/Haul Mode is selected. While in the Range
Selection Mode, Grade Braking is deactivated allowing
the driver to select a desired gear.
SeeAutomatic Transmission Operation on page 2-24for
more information.
Also seeTowing a Trailer on page 4-67for more
information.
2-31
Page 130 of 594
Six-Speed (VORTEC™ 8.1L V8 and
DURAMAX®6.6L V8 Engines)
Here is how to operate
your transmission.
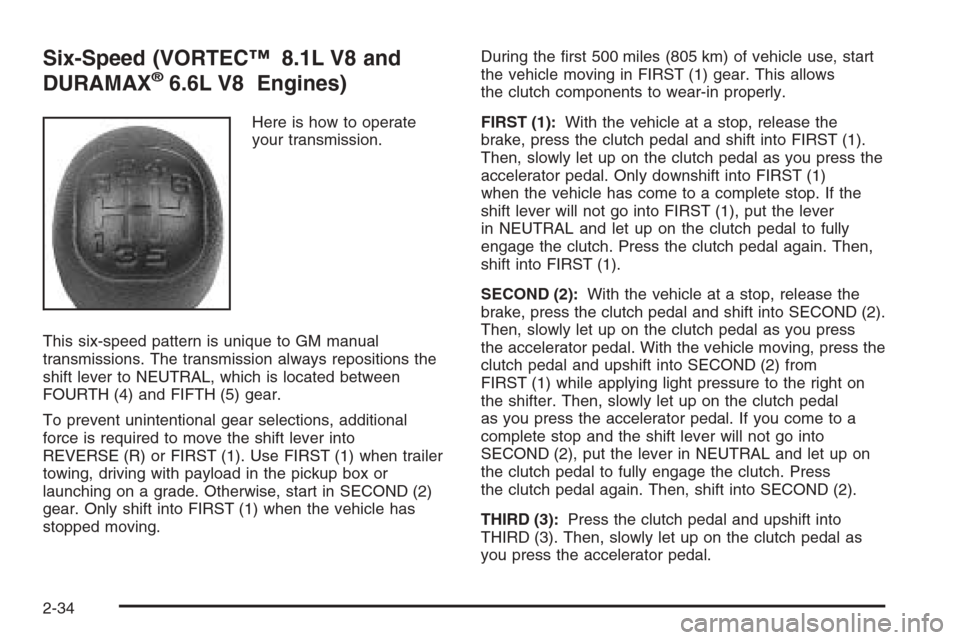
This six-speed pattern is unique to GM manual
transmissions. The transmission always repositions the
shift lever to NEUTRAL, which is located between
FOURTH (4) and FIFTH (5) gear.
To prevent unintentional gear selections, additional
force is required to move the shift lever into
REVERSE (R) or FIRST (1). Use FIRST (1) when trailer
towing, driving with payload in the pickup box or
launching on a grade. Otherwise, start in SECOND (2)
gear. Only shift into FIRST (1) when the vehicle has
stopped moving.During the �rst 500 miles (805 km) of vehicle use, start
the vehicle moving in FIRST (1) gear. This allows
the clutch components to wear-in properly.
FIRST (1):With the vehicle at a stop, release the
brake, press the clutch pedal and shift into FIRST (1).
Then, slowly let up on the clutch pedal as you press the
accelerator pedal. Only downshift into FIRST (1)
when the vehicle has come to a complete stop. If the
shift lever will not go into FIRST (1), put the lever
in NEUTRAL and let up on the clutch pedal to fully
engage the clutch. Press the clutch pedal again. Then,
shift into FIRST (1).
SECOND (2):With the vehicle at a stop, release the
brake, press the clutch pedal and shift into SECOND (2).
Then, slowly let up on the clutch pedal as you press
the accelerator pedal. With the vehicle moving, press the
clutch pedal and upshift into SECOND (2) from
FIRST (1) while applying light pressure to the right on
the shifter. Then, slowly let up on the clutch pedal
as you press the accelerator pedal. If you come to a
complete stop and the shift lever will not go into
SECOND (2), put the lever in NEUTRAL and let up on
the clutch pedal to fully engage the clutch. Press
the clutch pedal again. Then, shift into SECOND (2).
THIRD (3):Press the clutch pedal and upshift into
THIRD (3). Then, slowly let up on the clutch pedal as
you press the accelerator pedal.
2-34
Page 134 of 594
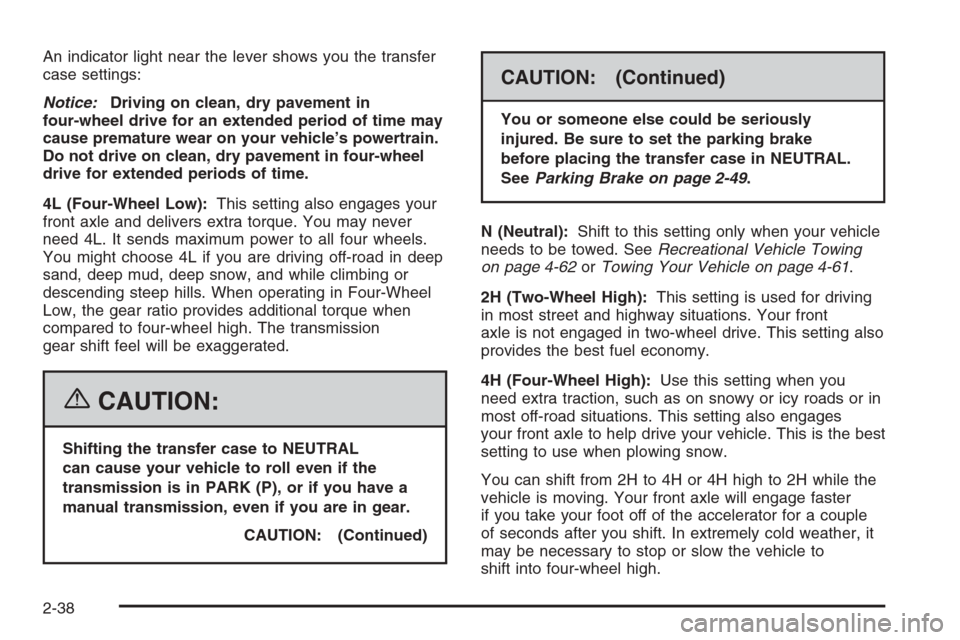
An indicator light near the lever shows you the transfer
case settings:
Notice:Driving on clean, dry pavement in
four-wheel drive for an extended period of time may
cause premature wear on your vehicle’s powertrain.
Do not drive on clean, dry pavement in four-wheel
drive for extended periods of time.
4L (Four-Wheel Low):This setting also engages your
front axle and delivers extra torque. You may never
need 4L. It sends maximum power to all four wheels.
You might choose 4L if you are driving off-road in deep
sand, deep mud, deep snow, and while climbing or
descending steep hills. When operating in Four-Wheel
Low, the gear ratio provides additional torque when
compared to four-wheel high. The transmission
gear shift feel will be exaggerated.
{CAUTION:
Shifting the transfer case to NEUTRAL
can cause your vehicle to roll even if the
transmission is in PARK (P), or if you have a
manual transmission, even if you are in gear.
CAUTION: (Continued)
CAUTION: (Continued)
You or someone else could be seriously
injured. Be sure to set the parking brake
before placing the transfer case in NEUTRAL.
SeeParking Brake on page 2-49.
N (Neutral):Shift to this setting only when your vehicle
needs to be towed. SeeRecreational Vehicle Towing
on page 4-62orTowing Your Vehicle on page 4-61.
2H (Two-Wheel High):This setting is used for driving
in most street and highway situations. Your front
axle is not engaged in two-wheel drive. This setting also
provides the best fuel economy.
4H (Four-Wheel High):Use this setting when you
need extra traction, such as on snowy or icy roads or in
most off-road situations. This setting also engages
your front axle to help drive your vehicle. This is the best
setting to use when plowing snow.
You can shift from 2H to 4H or 4H high to 2H while the
vehicle is moving. Your front axle will engage faster
if you take your foot off of the accelerator for a couple
of seconds after you shift. In extremely cold weather, it
may be necessary to stop or slow the vehicle to
shift into four-wheel high.
2-38
Page 137 of 594

When the vehicle detects a loss of traction, the system
will automatically engage four-wheel drive. Driving in
this mode results in slightly lower fuel economy
than Two-Wheel High.
2
m(Two-Wheel High):This setting is used for driving
in most street and highway situations. Your front axle
is not engaged in two-wheel drive. This setting also
provides the best fuel economy.
{CAUTION:
Shifting the transfer case to NEUTRAL
can cause your vehicle to roll even if the
transmission is in PARK (P). You or someone
else could be seriously injured. Be sure to set
the parking brake before placing the transfer
case in NEUTRAL. SeeParking Brake on
page 2-49.
N (NEUTRAL):Shift the vehicle’s transfer case to
N (NEUTRAL) only when towing your vehicle.
SeeRecreational Vehicle Towing on page 4-62or
Towing Your Vehicle on page 4-61for more information.4
m(Four-Wheel High):Use this setting when you
need extra traction, such a on snowy or icy roads or in
most off-road situations. This setting also engages
your front axle to help drive your vehicle. This is the best
setting to use when plowing snow.
4
n(Four-Wheel Low):This setting also engages
your front axle and delivers extra torque. You may never
need Four-Wheel Low. It sends maximum power to all
four wheels. You might choose Four-Wheel Low if
you are driving off-road in deep sand, deep mud, deep
snow, and while climbing or descending steep hills.
When operating in Four-Wheel Low, the gear ratio
provides additional torque when compared to
four-wheel high. The transmission gear shift feel will
be exaggerated.
Indicator lights in the switches show which setting your
transfer case is in. The indicator lights will come on
brie�y when you turn on the ignition and one will stay on.
If the lights do not come on, you should take your
vehicle to your dealer for service. An indicator light will
�ash while the transfer case is being shifted. It will
stay on when the shift is complete. If for some reason
the transfer case cannot make a requested shift, it
will return to the last chosen setting.
If the SERVICE 4WD message stays on, you should
take your vehicle to your dealer for service. See
DIC Warnings and Messages on page 3-54for further
information.
2-41
Page 139 of 594
Shifting Out of Four-Wheel Low
To shift from Four-Wheel Low to Four-Wheel High,
AUTO 4WD, or Two-Wheel High, your vehicle must
be stopped or moving less than 3 mph (5 km/h) with
the transmission in NEUTRAL (N) and the ignition
in RUN. The preferred method for shifting out of
Four-Wheel Low is to have your vehicle moving
1 to 2 mph (1.6 to 3.2 km/h). Press and release the
Four-Wheel High, AUTO 4WD, or Two-Wheel High
switch. You must wait for the Four-Wheel High,
AUTO 4WD, or Two-Wheel High indicator light to
stop �ashing and remain on before shifting your
transmission into gear.
Notice:Shifting the transmission into gear
before the Four-Wheel Low indicator light has
stopped �ashing could damage the transfer case.
To help avoid damaging your vehicle, always
wait for the Four-Wheel Low indicator light to
stop �ashing before shifting the transmission
into gear.
The transfer case may make noise and the vehicle
may jerk when the transfer case is shifted between
Four-Wheel Low and Four-Wheel High ranges or from
NEUTRAL with the engine running.If the four-wheel high, AUTO 4WD, or Two-Wheel
High switch is pressed when your vehicle is in gear
and/or moving, the Four-Wheel High, AUTO 4WD,
or Two-Wheel High indicator light will �ash for
30 seconds but will not complete the shift unless your
vehicle is moving less than 3 mph (5 km/h) and the
transmission is in NEUTRAL (N).
Shifting Into NEUTRAL
{CAUTION:
Shifting the transfer case to NEUTRAL
can cause your vehicle to roll even if the
transmission is in PARK (P). You or someone
else could be seriously injured. Be sure to set
the parking brake before placing the transfer
case in NEUTRAL. SeeParking Brake on
page 2-49.
To shift the transfer case to NEUTRAL do the following:
1. Make sure the vehicle is parked so that it will
not roll.
2. Set the parking brake.
3. Start the vehicle or turn the ignition to RUN.
2-43
Page 140 of 594
4. Put the transmission in NEUTRAL (N).
5. Shift the transfer case to Two-Wheel High.
6. Simultaneously press and hold the Two-Wheel High
and Four-Wheel Low buttons for 10 seconds. The
red NEUTRAL light will come on when the
transfer case shift to NEUTRAL is complete.
7. If the engine is running, shift the transmission to
REVERSE (R) for one second, then shift the
transmission to DRIVE (D) for one second, or
FIRST (1) for vehicles equipped with a manual
transmission.
8. Turn the engine off, by turning the key to
ACCESSORY.
9. Place the transmission shift lever in PARK (P).
10. Turn the ignition to LOCK.Shifting Out of NEUTRAL
To shift out of NEUTRAL:
1. Set the parking brake and apply the regular brake
pedal.
2. Turn the ignition to RUN with the engine off.
3. Shift the transmission to NEUTRAL (N).
4. Press the button for the desired transfer case shift
position (Two-Wheel High, Four-Wheel High, AUTO
4WD, or Four-Wheel Low).
5. After the transfer case has shifted out of NEUTRAL
the red light will go out.
6. Release the parking brake.
7. You may start the engine and shift the transmission
to the desired position.
Excessively shifting the transfer case into or out of the
different modes may cause the transfer case to enter the
shift protection mode. This will protect the transfer case
from possible damage and will only allow the transfer
case to respond to one shift per 10 seconds. The transfer
case may stay in this mode for up to three minutes.
2-44
Page 144 of 594
Shifting into NEUTRAL
{CAUTION:
Shifting the transfer case to NEUTRAL can
cause your vehicle to roll even if the
transmission is in PARK (P). You or someone
else could be seriously injured. Be sure to set
the parking brake before placing the transfer
case in NEUTRAL. SeeParking Brake on
page 2-49.
To shift the transfer case to NEUTRAL, �rst make sure
the vehicle is parked so that it will not roll:
1. Set the parking brake.
2. Start the vehicle or turn the ignition to RUN.
3. Press the foot brake pedal and put the transmission
in NEUTRAL (N).
4. Shift the transfer case to Two-Wheel High.
5. Simultaneously press and hold the Two-Wheel High
and Four-Wheel Low buttons for 10 seconds. The
red NEUTRAL light will come on when the
transfer case shift to NEUTRAL is complete.
6. Start the engine if it is not already running.7. Press and hold the foot brake pedal and Shift the
transmission to REVERSE (R) for one second,
then shift the transmission for one second to
DRIVE (D) for an automatic transmission, or
FIRST (1) for vehicles equipped with a manual
transmission and then let out the clutch. This is to
ensure the transfer case is in NEUTRAL. If not,
repeat this procedure starting at Step 3.
8. Turn the engine off, by turning the key to
ACCESSORY.
9. Place the transmission shift lever in PARK (P) for
an automatic transmission, or FIRST (1) for
vehicles equipped with a manual transmission.
10. Turn the ignition to LOCK.
Shifting Out of NEUTRAL
To shift out of NEUTRAL:
1. Set the parking brake and press and hold the
regular brake pedal.
2. Shift the transmission to NEUTRAL (N) for an
automatic transmission, or press the clutch pedal for
vehicles equipped with a manual transmission.
Then turn the ignition to RUN with the engine off.
3. Press the button for the desired transfer case shift
position (Two-Wheel High, Four-Wheel High, or
Four-Wheel Low).
2-48
Page 145 of 594
4. After the transfer case has shifted out of NEUTRAL
the red light will go out.
5. Release the parking brake.
6. You may start the engine and shift the transmission
to the desired position. Excessively shifting the
transfer case into or out of the different modes may
cause the transfer case to enter the shift protection
mode. This will protect the transfer case from
possible damage and will only allow the transfer
case to respond to one shift per 10 seconds.
The transfer case may stay in this mode for up to
three minutes.
7. After the transfer case has shifted out of NEUTRAL
the red light will go out.
Parking Brake
To set the parking brake, hold the regular brake pedal
down with your right foot. Push down the parking
brake pedal with your left foot.
A chime will activate and the warning light will �ash when
the parking brake is applied and the vehicle is moving at
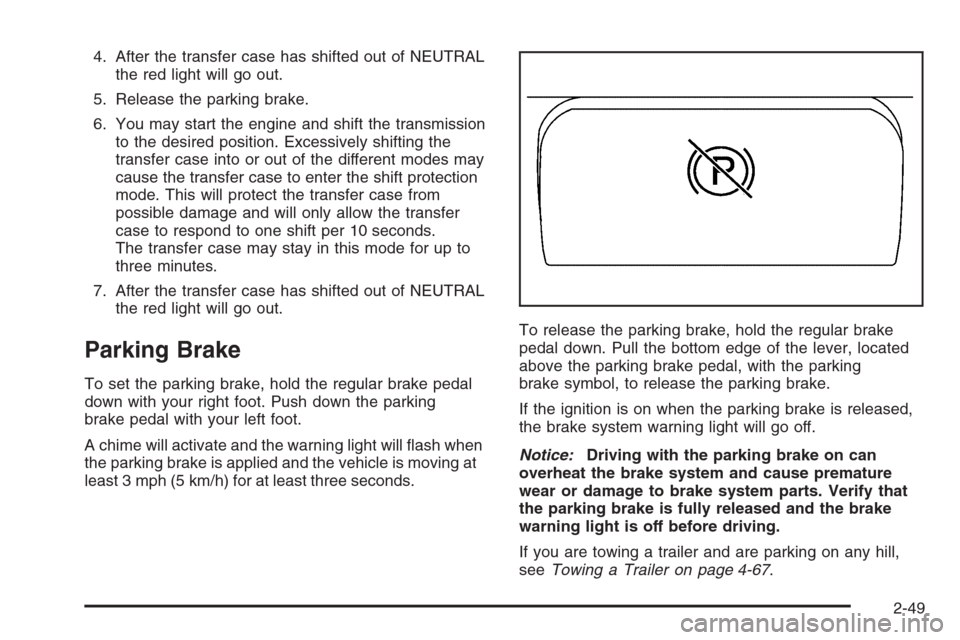
least 3 mph (5 km/h) for at least three seconds.To release the parking brake, hold the regular brake
pedal down. Pull the bottom edge of the lever, located
above the parking brake pedal, with the parking
brake symbol, to release the parking brake.
If the ignition is on when the parking brake is released,
the brake system warning light will go off.
Notice:Driving with the parking brake on can
overheat the brake system and cause premature
wear or damage to brake system parts. Verify that
the parking brake is fully released and the brake
warning light is off before driving.
If you are towing a trailer and are parking on any hill,
seeTowing a Trailer on page 4-67.
2-49