2006 CHEVROLET MALIBU clock
[x] Cancel search: clockPage 89 of 442
Doors and Locks
Door Locks
{CAUTION:
Unlocked doors can be dangerous.
Passengers, especially children, can easily
open the doors and fall out of a moving
vehicle. When a door is locked, the handle
will not open it. You increase the chance
of being thrown out of the vehicle in a
crash if the doors are not locked. So, wear
safety belts properly and lock the doors
whenever you drive.
Young children who get into unlocked
vehicles may be unable to get out. A child
can be overcome by extreme heat and can
suffer permanent injuries or even death
from heat stroke. Always lock your vehicle
whenever you leave it.
CAUTION: (Continued)
CAUTION: (Continued)
Outsiders can easily enter through an
unlocked door when you slow down or
stop your vehicle. Locking your doors
can help prevent this from happening.
There are several ways to lock and unlock your vehicle.
From the outside, use your key or remote keyless
entry transmitter, if equipped. Turn the key
counterclockwise to unlock the door.
From the inside, lock and unlock the door by moving
the manual lock knob down and up, or by using
the power door lock switches.
2-11
Page 96 of 442
Window Lockout
The driver’s power window controls also include a
lockout button.
o(Window Lockout):Press the lockout button to
stop the rear passengers from using their window
switches. The driver and front passenger can still
operate all the windows with the lock on. When the
red part of the switch is visible you have returned
to normal window operation.
Sun Visors
To block out glare, you can swing down the visors.
You can also remove them from the center mount and
swing them to the side, to block out glare from the
side. The visors also have extenders that can be
pulled out.
Your vehicle may have lighted visor vanity mirrors
located on the passenger and driver’s side visor.
When you lift the cover, the light will turn on.
Theft-Deterrent Systems
Vehicle theft is big business, especially in some cities.
Although your vehicle has a number of theft-deterrent
features, we know that nothing we put on it can make it
impossible to steal.
Content Theft-Deterrent
Your vehicle may have a
content theft-deterrent
alarm system.
Arming the System
With the ignition off, you can arm the system by doing
any one of the following:
Press the remote keyless entry transmitter lock
button.
Press the power door lock switch while the driver’s
door is open.
Turn the driver’s door key lock cylinder clockwise.
2-18
Page 97 of 442
The system will arm either:
Thirty seconds after all the doors and the
liftgate (MAXX) are closed or,
Sixty seconds with any door open
If you press the lock button on the remote keyless
entry transmitter a second time while all the doors and
liftgate are closed, the system will arm immediately.
The system will still arm in sixty seconds if a door
or liftgate is open. When the opened door or liftgate
is closed, it will also become armed.
The security light, located on the instrument panel
cluster, will turn on to indicate that arming has been
initiated. Once the system is armed, the security light
will �ash once every three seconds.
If the security light is �ashing twice per second, this
means that a door or the liftgate is open.
If you do not want to arm the system, you may lock
the car with the lock knob on the doors.
Disarming the System
You can disarm the system by doing any one of the
following:
Press the remote keyless entry transmitter unlock
button.
Turn the ignition on.
Turn the driver’s door key lock cylinder
counterclockwise.
Once the system is disarmed, the security light will
stop �ashing.
How the System Alarm is Activated
If the system is armed, it can be activated by either:
Opening the driver’s door or liftgate (MAXX model).
This will cause a ten second pre-alarm chirp followed
by a thirty second full alarm of horn and lights.
Opening any other door. This will immediately cause
a full alarm of horn and lights for thirty seconds.
When an alarm event has �nished, the system will
re-arm itself automatically.
2-19
Page 98 of 442
How to Turn Off the System Alarm
To turn off the system alarm, do one of the following:
Press the lock button on the remote keyless
entry transmitter. The system will then re-arm itself.
Press the unlock button on the remote keyless entry
transmitter. This will also disarm the system.
Insert the key in the driver’s door key lock cylinder
and turn it counterclockwise. This will also disarm
the system.
Insert the key in the ignition and turn it on. This will
also disarm the system.
How to Detect a Tamper Condition
If you hear three chirps when you press the unlock or
lock buttons on the remote keyless entry transmitter,
it means that the content theft security system
alarm was triggered previously.
PASS-Key®III+
The PASS-Key®III+ system operates on a radio
frequency subject to Federal Communications
Commission (FCC) Rules and with Industry Canada.
This device complies with Part 15 of the FCC Rules.
Operation is subject to the following two conditions:
1. This device may not cause harmful interference.
2. This device must accept any interference received,
including interference that may cause undesired
operation.
This device complies with RSS-210 of Industry Canada.
Operation is subject to the following two conditions:
1. This device may not cause interference.
2. This device must accept any interference received,
including interference that may cause undesired
operation of the device.
Changes or modi�cations to this system by other than
an authorized service facility could void authorization to
use this equipment.
PASS-Key
®III+ uses a radio frequency transponder
in the key that matches a decoder in your vehicle.
2-20
Page 116 of 442
Mirrors
Manual Rearview Mirror
This mirror can be adjusted two ways. First, to adjust
the angle of the mirror, move the mirror to a position
that allows you to see out of the back window. To adjust
the height of the mirror, adjust the arm that connects
the mirror to the windshield.
To reduce glare from lights behind you, move the lever
toward you to the night position.
Manual Rearview Mirror with
OnStar
®
If your vehicle has this feature, this mirror has a knob
located at the bottom of the mirror. It is used to change
the mirror from day to night position. To reduce glare
from headlamps behind you while driving at night,
rotate the knob clockwise. For daytime driving, turn
the knob counterclockwise.
There are also three OnStar
®buttons located at the
bottom of the mirror face. See your dealer for more
information on the system and how to subscribe
to OnStar
®. SeeOnStar®System on page 2-44for
more information about the services OnStar®provides.
Automatic Dimming Rearview Mirror
with OnStar
®
Your vehicle may have an automatic dimming rearview
mirror with OnStar®. This feature enables the mirror
to sense nighttime glare from vehicle headlamps from
behind and automatically dim to reduce the glare to
a safe level.
The automatic dimming feature turns on each time the
vehicle is started. Press the OFF button once and
the green indicator light located to the left of the button
will go out indicating the feature is off. To turn the
feature back on, press and release the AUTO button
and the green indicator light will come on.
There are also three OnStar
®buttons located at
the bottom of the mirror face. See your dealer for
information on the system and how to subscribe
to OnStar
®. SeeOnStar®System on page 2-44for
more information about the services OnStar®provides.
2-38
Page 151 of 442
Instrument Panel Brightness
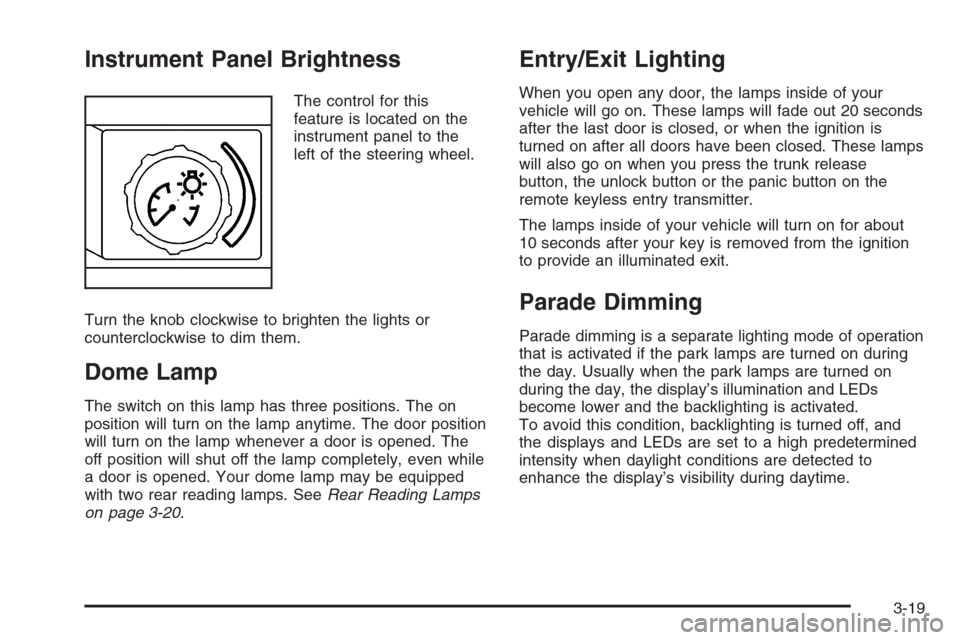
The control for this
feature is located on the
instrument panel to the
left of the steering wheel.
Turn the knob clockwise to brighten the lights or
counterclockwise to dim them.
Dome Lamp
The switch on this lamp has three positions. The on
position will turn on the lamp anytime. The door position
will turn on the lamp whenever a door is opened. The
off position will shut off the lamp completely, even while
a door is opened. Your dome lamp may be equipped
with two rear reading lamps. SeeRear Reading Lamps
on page 3-20.
Entry/Exit Lighting
When you open any door, the lamps inside of your
vehicle will go on. These lamps will fade out 20 seconds
after the last door is closed, or when the ignition is
turned on after all doors have been closed. These lamps
will also go on when you press the trunk release
button, the unlock button or the panic button on the
remote keyless entry transmitter.
The lamps inside of your vehicle will turn on for about
10 seconds after your key is removed from the ignition
to provide an illuminated exit.
Parade Dimming
Parade dimming is a separate lighting mode of operation
that is activated if the park lamps are turned on during
the day. Usually when the park lamps are turned on
during the day, the display’s illumination and LEDs
become lower and the backlighting is activated.
To avoid this condition, backlighting is turned off, and
the displays and LEDs are set to a high predetermined
intensity when daylight conditions are detected to
enhance the display’s visibility during daytime.
3-19
Page 154 of 442
Cigarette Lighter
Your vehicle may have a cigarette lighter. To use the
lighter, located on the instrument panel below the
climate controls, push it in all the way and let go.
When it is ready, it will pop back out by itself.
Notice:Holding a cigarette lighter in while it is
heating will not allow the lighter to back away from
the heating element when it is hot. Damage from
overheating may occur to the lighter or heating
element, or a fuse could be blown. Do not hold a
cigarette lighter in while it is heating.
Notice:If you put papers, pins, or other �ammable
items in the ashtray, hot cigarettes or other
smoking materials could ignite them and possibly
damage your vehicle. Never put �ammable items in
the ashtray.
Climate Controls
Climate Control System
With this system you can control the heating, cooling
and ventilation for your vehicle. If your vehicle has
the remote start feature, the climate control system
will function as part of the remote start feature.
SeeRemote Keyless Entry System Operation
on page 2-6.
Operation
9
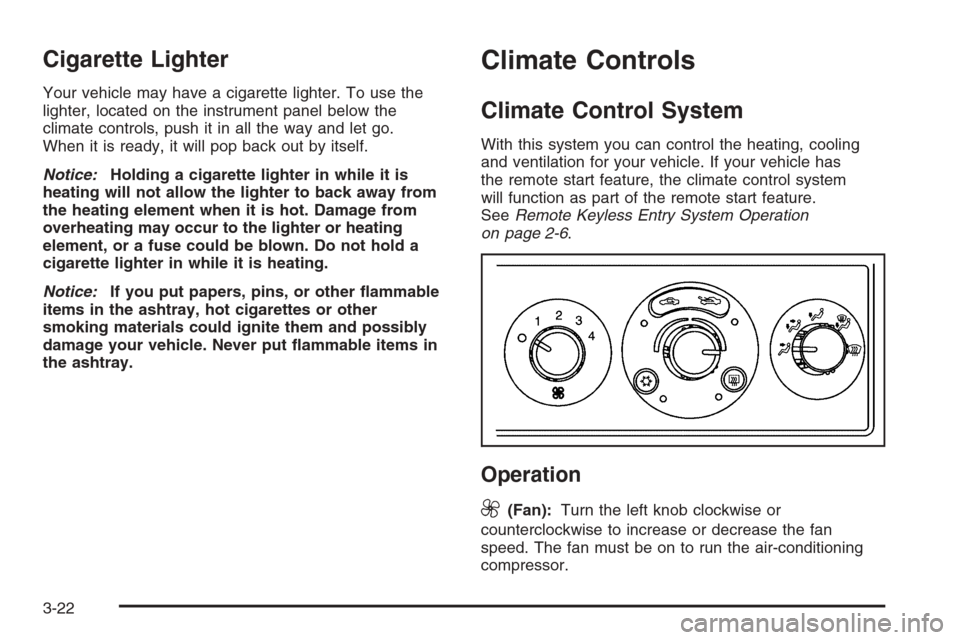
(Fan):Turn the left knob clockwise or
counterclockwise to increase or decrease the fan
speed. The fan must be on to run the air-conditioning
compressor.
3-22
Page 156 of 442
Temperature Control:Turn the center knob clockwise
or counterclockwise to increase or decrease the
temperature inside your vehicle.
When it’s cold outside 0°F (−18°C) or lower, use the
engine coolant heater, if equipped, to provide warmer air
faster to your vehicle. An engine coolant heater warms
the coolant that the engine uses to provide heat to
warm the inside of your vehicle. For more information,
seeEngine Coolant Heater on page 2-26.
#(Air Conditioning):Press this button to turn the air
conditioning system on or off. When the air conditioning
button is pressed, an indicator light will come on to
let you know that air conditioning is activated.
On hot days, open the windows to let hot inside air
escape; then close them. This helps to reduce the
time it takes for your vehicle to cool down. It also
helps the system to operate more efficiently.For quick cool down on hot days, do the following:
1. Select the vent mode.
2. Select the highest fan speed.
3. Select air conditioning.
4. Select the recirculation mode.
5. Select the coolest temperature.
Using these settings together for long periods of time
may cause the air inside of your vehicle to become too
dry. To prevent this from happening, after the air in
your vehicle has cooled, turn the recirculation mode off.
The air-conditioning system removes moisture from
the air, so you may sometimes notice a small amount
of water dripping underneath your vehicle while idling
or after turning off the engine. This is normal.
3-24