2006 CHEVROLET HHR buttons
[x] Cancel search: buttonsPage 10 of 394
Power Lumbar
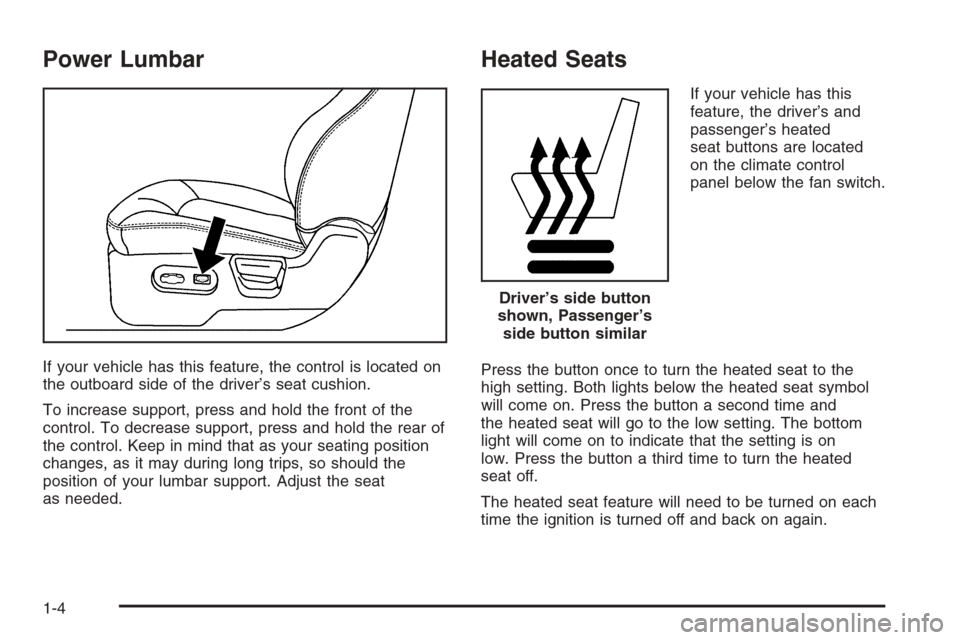
If your vehicle has this feature, the control is located on
the outboard side of the driver’s seat cushion.
To increase support, press and hold the front of the
control. To decrease support, press and hold the rear of
the control. Keep in mind that as your seating position
changes, as it may during long trips, so should the
position of your lumbar support. Adjust the seat
as needed.
Heated Seats
If your vehicle has this
feature, the driver’s and
passenger’s heated
seat buttons are located
on the climate control
panel below the fan switch.
Press the button once to turn the heated seat to the
high setting. Both lights below the heated seat symbol
will come on. Press the button a second time and
the heated seat will go to the low setting. The bottom
light will come on to indicate that the setting is on
low. Press the button a third time to turn the heated
seat off.
The heated seat feature will need to be turned on each
time the ignition is turned off and back on again.
Driver’s side button
shown, Passenger’s
side button similar
1-4
Page 101 of 394

How the System Alarm is Activated
If the system is armed, it can be activated by either:
Opening the driver’s door or tailgate. This will cause
a ten second pre-alarm chirp followed by a thirty
second full alarm of horn and lights.
Opening any other door. This will immediately
cause a full alarm of horn and lights for thirty
seconds.
When an alarm event has �nished, the system will
re-arm itself automatically.
How to Turn Off the System Alarm
To turn off the system alarm, do one of the following:
Press the lock button on the remote keyless
entry transmitter. The system will then re-arm itself.
Press the unlock button on the remote keyless entry
transmitter. This will also disarm the system.
Insert the key in the ignition and turn it on. This will
also disarm the system.
How to Detect a Tamper Condition
If you hear three chirps when you press the unlock or
lock buttons on the remote keyless transmitter, it means
that the content theft security system alarm was
previously activated.
PASS-Key®III+
The PASS-Key®III+ system operates on a radio
frequency subject to Federal Communications
Commission (FCC) Rules and with Industry Canada.
This device complies with Part 15 of the FCC Rules.
Operation is subject to the following two conditions:
1. This device may not cause harmful interference.
2. This device must accept any interference received,
including interference that may cause undesired
operation.
This device complies with RSS-210 of Industry Canada.
Operation is subject to the following two conditions:
1. This device may not cause interference.
2. This device must accept any interference received,
including interference that may cause undesired
operation of the device.
Changes or modi�cations to this system by other than
an authorized service facility could void authorization to
use this equipment.
PASS-Key
®III+ uses a radio frequency transponder in
the key that matches a decoder in your vehicle.
2-19
Page 120 of 394
Mirrors
Manual Rearview Mirror
To reduce glare from lamps behind you, move the lever
toward you to the night position. Your vehicle may
also have reading lamps. Press the buttons, located
under the mirror, up to turn the lamps on or off.
Automatic Dimming Rearview Mirror
with OnStar
®and Compass
Your vehicle may have an automatic dimming rearview
mirror with OnStar®, compass and reading lamps.
This feature enables the mirror to sense nighttime glare
from vehicle headlamps from behind and automatically
dim to reduce the glare to a safe level.
The automatic dimming feature turns on each time the
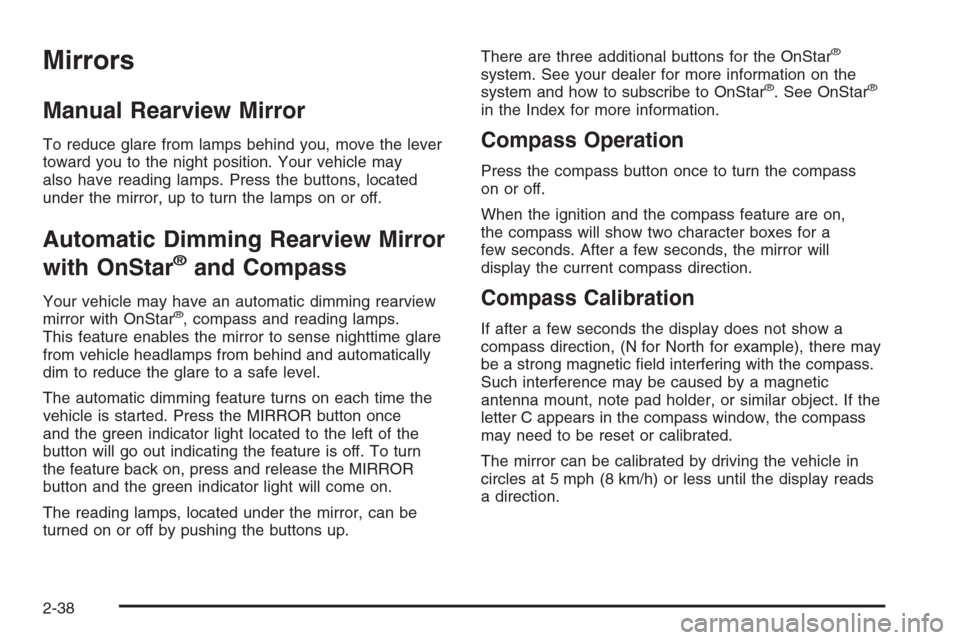
vehicle is started. Press the MIRROR button once
and the green indicator light located to the left of the
button will go out indicating the feature is off. To turn
the feature back on, press and release the MIRROR
button and the green indicator light will come on.
The reading lamps, located under the mirror, can be
turned on or off by pushing the buttons up.There are three additional buttons for the OnStar
®
system. See your dealer for more information on the
system and how to subscribe to OnStar®. See OnStar®
in the Index for more information.
Compass Operation
Press the compass button once to turn the compass
on or off.
When the ignition and the compass feature are on,
the compass will show two character boxes for a
few seconds. After a few seconds, the mirror will
display the current compass direction.
Compass Calibration
If after a few seconds the display does not show a
compass direction, (N for North for example), there may
be a strong magnetic �eld interfering with the compass.
Such interference may be caused by a magnetic
antenna mount, note pad holder, or similar object. If the
letter C appears in the compass window, the compass
may need to be reset or calibrated.
The mirror can be calibrated by driving the vehicle in
circles at 5 mph (8 km/h) or less until the display reads
a direction.
2-38
Page 122 of 394
Automatic Dimming Rearview
Mirror with OnStar
®, Compass
and Temperature Display
Your vehicle may have an automatic dimming rearview
mirror with OnStar®, compass and temperature
display. If the vehicle has this feature, the automatic
dimming mirror automatically dims to the proper level to
minimize glare at night from lights behind your vehicle.
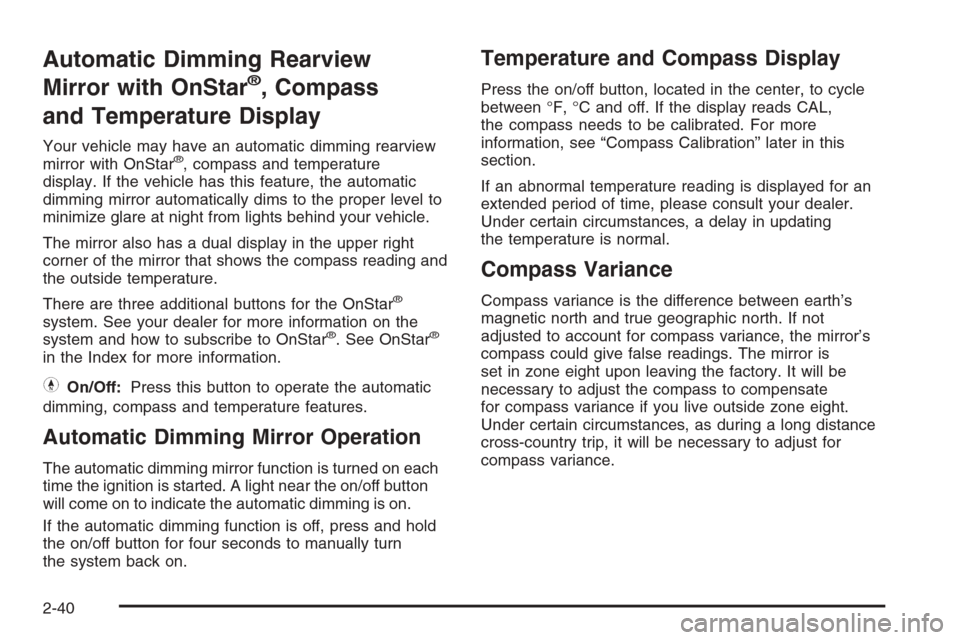
The mirror also has a dual display in the upper right
corner of the mirror that shows the compass reading and
the outside temperature.
There are three additional buttons for the OnStar
®
system. See your dealer for more information on the
system and how to subscribe to OnStar®. See OnStar®
in the Index for more information.
YOn/Off:Press this button to operate the automatic
dimming, compass and temperature features.
Automatic Dimming Mirror Operation
The automatic dimming mirror function is turned on each
time the ignition is started. A light near the on/off button
will come on to indicate the automatic dimming is on.
If the automatic dimming function is off, press and hold
the on/off button for four seconds to manually turn
the system back on.
Temperature and Compass Display
Press the on/off button, located in the center, to cycle
between °F, °C and off. If the display reads CAL,
the compass needs to be calibrated. For more
information, see “Compass Calibration” later in this
section.
If an abnormal temperature reading is displayed for an
extended period of time, please consult your dealer.
Under certain circumstances, a delay in updating
the temperature is normal.
Compass Variance
Compass variance is the difference between earth’s
magnetic north and true geographic north. If not
adjusted to account for compass variance, the mirror’s
compass could give false readings. The mirror is
set in zone eight upon leaving the factory. It will be
necessary to adjust the compass to compensate
for compass variance if you live outside zone eight.
Under certain circumstances, as during a long distance
cross-country trip, it will be necessary to adjust for
compass variance.
2-40
Page 137 of 394
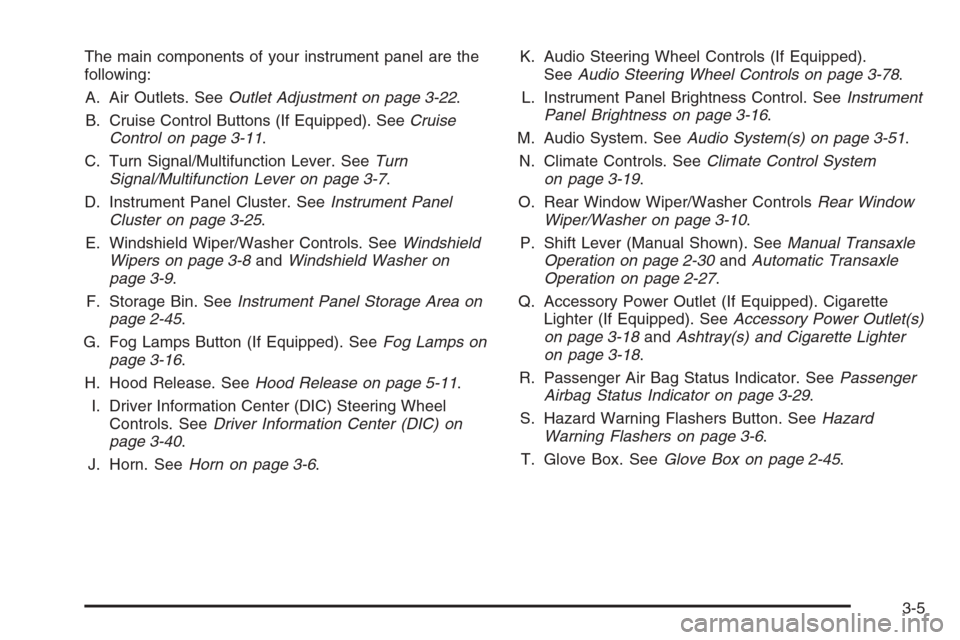
The main components of your instrument panel are the
following:
A. Air Outlets. SeeOutlet Adjustment on page 3-22.
B. Cruise Control Buttons (If Equipped). SeeCruise
Control on page 3-11.
C. Turn Signal/Multifunction Lever. SeeTurn
Signal/Multifunction Lever on page 3-7.
D. Instrument Panel Cluster. SeeInstrument Panel
Cluster on page 3-25.
E. Windshield Wiper/Washer Controls. SeeWindshield
Wipers on page 3-8andWindshield Washer on
page 3-9.
F. Storage Bin. SeeInstrument Panel Storage Area on
page 2-45.
G. Fog Lamps Button (If Equipped). SeeFog Lamps on
page 3-16.
H. Hood Release. SeeHood Release on page 5-11.
I. Driver Information Center (DIC) Steering Wheel
Controls. SeeDriver Information Center (DIC) on
page 3-40.
J. Horn. SeeHorn on page 3-6.K. Audio Steering Wheel Controls (If Equipped).
SeeAudio Steering Wheel Controls on page 3-78.
L. Instrument Panel Brightness Control. SeeInstrument
Panel Brightness on page 3-16.
M. Audio System. SeeAudio System(s) on page 3-51.
N. Climate Controls. SeeClimate Control System
on page 3-19.
O. Rear Window Wiper/Washer ControlsRear Window
Wiper/Washer on page 3-10.
P. Shift Lever (Manual Shown). SeeManual Transaxle
Operation on page 2-30andAutomatic Transaxle
Operation on page 2-27.
Q. Accessory Power Outlet (If Equipped). Cigarette
Lighter (If Equipped). SeeAccessory Power Outlet(s)
on page 3-18andAshtray(s) and Cigarette Lighter
on page 3-18.
R. Passenger Air Bag Status Indicator. SeePassenger
Airbag Status Indicator on page 3-29.
S. Hazard Warning Flashers Button. SeeHazard
Warning Flashers on page 3-6.
T. Glove Box. SeeGlove Box on page 2-45.
3-5
Page 143 of 394
Cruise Control
With cruise control, you can maintain a speed of about
25 mph (40 km/h) or more without keeping your foot
on the accelerator. This can really help on long
trips. Cruise control does not work at speeds below
25 mph (40 km/h).
{CAUTION:
Cruise control can be dangerous where you
cannot drive safely at a steady speed. So, do
not use your cruise control on winding roads
or in heavy traffic.
Cruise control can be dangerous on slippery
roads. On such roads, fast changes in tire
traction can cause excessive wheel slip, and
you could lose control. Do not use cruise
control on slippery roads.
Setting Cruise Control
{CAUTION:
If you leave your cruise control on when you
are not using cruise, you might hit a button
and go into cruise when you do not want to.
You could be startled and even lose control.
Keep the cruise control switch off until you
want to use cruise control.
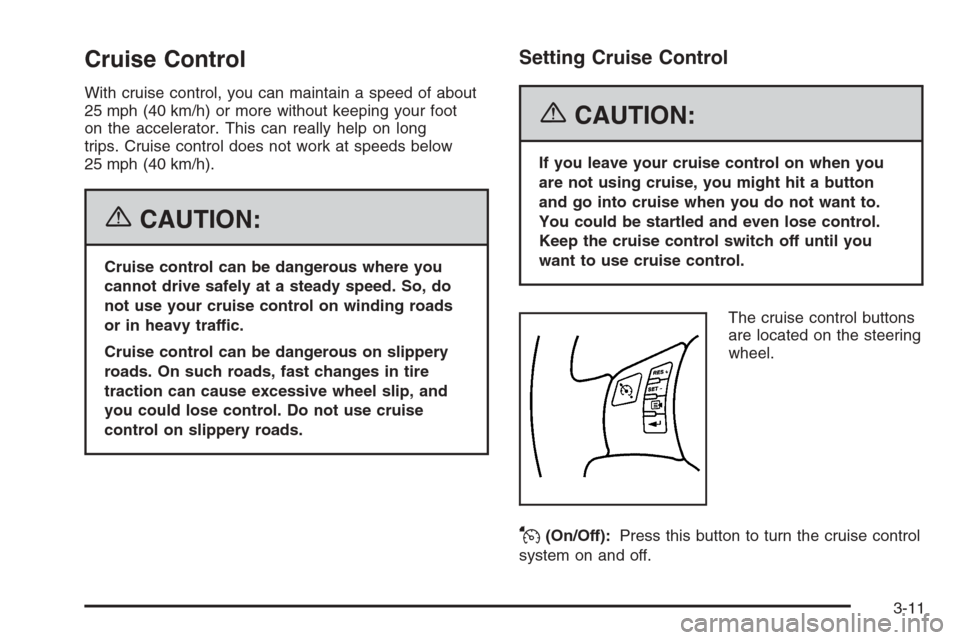
The cruise control buttons
are located on the steering
wheel.
J(On/Off):Press this button to turn the cruise control
system on and off.
3-11
Page 172 of 394
Fuel Gage
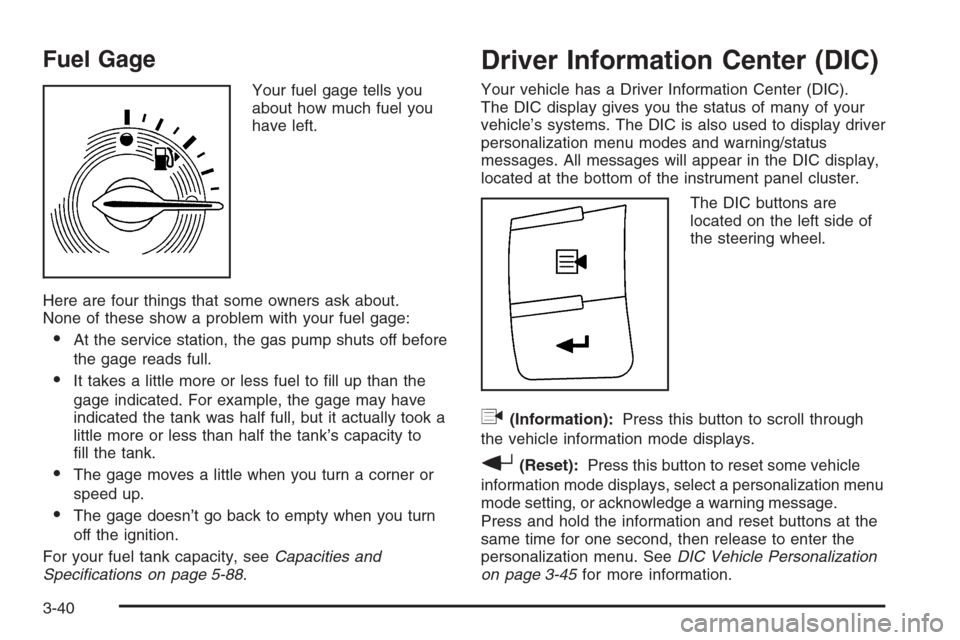
Your fuel gage tells you
about how much fuel you
have left.
Here are four things that some owners ask about.
None of these show a problem with your fuel gage:
At the service station, the gas pump shuts off before
the gage reads full.
It takes a little more or less fuel to �ll up than the
gage indicated. For example, the gage may have
indicated the tank was half full, but it actually took a
little more or less than half the tank’s capacity to
�ll the tank.
The gage moves a little when you turn a corner or
speed up.
The gage doesn’t go back to empty when you turn
off the ignition.
For your fuel tank capacity, seeCapacities and
Specifications on page 5-88.
Driver Information Center (DIC)
Your vehicle has a Driver Information Center (DIC).
The DIC display gives you the status of many of your
vehicle’s systems. The DIC is also used to display driver
personalization menu modes and warning/status
messages. All messages will appear in the DIC display,
located at the bottom of the instrument panel cluster.
The DIC buttons are
located on the left side of
the steering wheel.
q(Information):Press this button to scroll through
the vehicle information mode displays.
r(Reset):Press this button to reset some vehicle
information mode displays, select a personalization menu
mode setting, or acknowledge a warning message.
Press and hold the information and reset buttons at the
same time for one second, then release to enter the
personalization menu. SeeDIC Vehicle Personalization
on page 3-45for more information.
3-40
Page 173 of 394
DIC Operation and Displays
The DIC comes on when the ignition is on. The DIC has
different modes which can be accessed by pressing
the DIC buttons. The button functions are detailed in the
following.
Information Modes
q
(Information):Press this button to scroll through
the following vehicle information modes:
Outside Air Temperature and Odometer
Press the information button until the outside air
temperature and the odometer are displayed. This mode
shows the temperature outside of the vehicle in either
degrees Fahrenheit (°F) or degrees Celsius (°C) and the
total distance the vehicle has been driven in either
miles (mi) or kilometers (km). The outside air
temperature will appear on the left side of the DIC
display and the odometer will appear on the right side of
the display.
To change the DIC display to English or metric units,
see “UNITS” underDIC Vehicle Personalization on
page 3-45.
TRIP A or TRIP B
Press the information button until TRIP A or TRIP B is
displayed. These modes show the current distance
traveled since the last reset for each trip odometer in
either miles (mi) or kilometers (km). Both odometers can
be used at the same time.
Each trip odometer can be reset to zero separately by
pressing and holding the reset button for a few seconds
while the desired trip odometer is displayed.
FUEL RANGE
Press the information button until FUEL RANGE is
displayed. This mode shows the remaining distance you
can drive without refueling in either miles (mi) or
kilometers (km). It is based on fuel economy and the
fuel remaining in the tank.
The fuel economy data used to determine fuel range is
an average of recent driving conditions. As your
driving conditions change, this data is gradually updated.
The FUEL RANGE mode cannot be reset.
3-41